If your craft supplies have quietly taken over a closet, a dining table, and possibly one innocent chair, welcome. You are among friends. Glitter has a sneaky talent for multiplying overnight, ribbon tangles like it trained for the Olympics, and somehow there is always one lonely glue stick rolling around where it absolutely should not be.
The good news is that smart craft storage does not require a giant studio, a celebrity budget, or the patience of a saint. The best setups make supplies easy to see, easy to reach, and easy to put away. That means less digging, less duplicate buying, and way more time actually making things. Whether you have a full craft room, a shared office, or a tiny corner of the kitchen, these clever craft storage ideas can help you build a space that feels organized, inspiring, and ready for action.
Why good craft storage matters
The goal is not to turn your creative life into a museum where no one touches anything. The goal is to give every tool, paper pad, paint bottle, spool, and bead a home. When you can see what you have, sort it by project type, and grab what you need without launching an avalanche, crafting becomes more enjoyable. You stay inspired, protect your supplies better, and avoid buying your fifth pair of scissors because the other four disappeared into the void.
27 clever craft storage ideas
1. Use clear bins for your most-used supplies
Clear bins are the MVP of craft organization. You can see exactly what is inside without opening six lids and muttering dramatic things under your breath. They work especially well for beads, paper scraps, markers, mini tools, and embellishments.
2. Label everything like your future self is a stranger
A neat bin without a label is just a mystery box with better manners. Add simple labels to drawers, bins, baskets, and boxes so you can find items fast. Bonus points if you label by category and size, such as “Ribbon: Holiday” or “Cardstock: Neutrals.”
3. Turn a pegboard into a vertical command center
Pegboards are popular for a reason: they get tools off the table and onto the wall. Hang scissors, rulers, washi tape, brushes, and small baskets so your supplies stay visible and within arm’s reach. It is practical, flexible, and strangely satisfying.
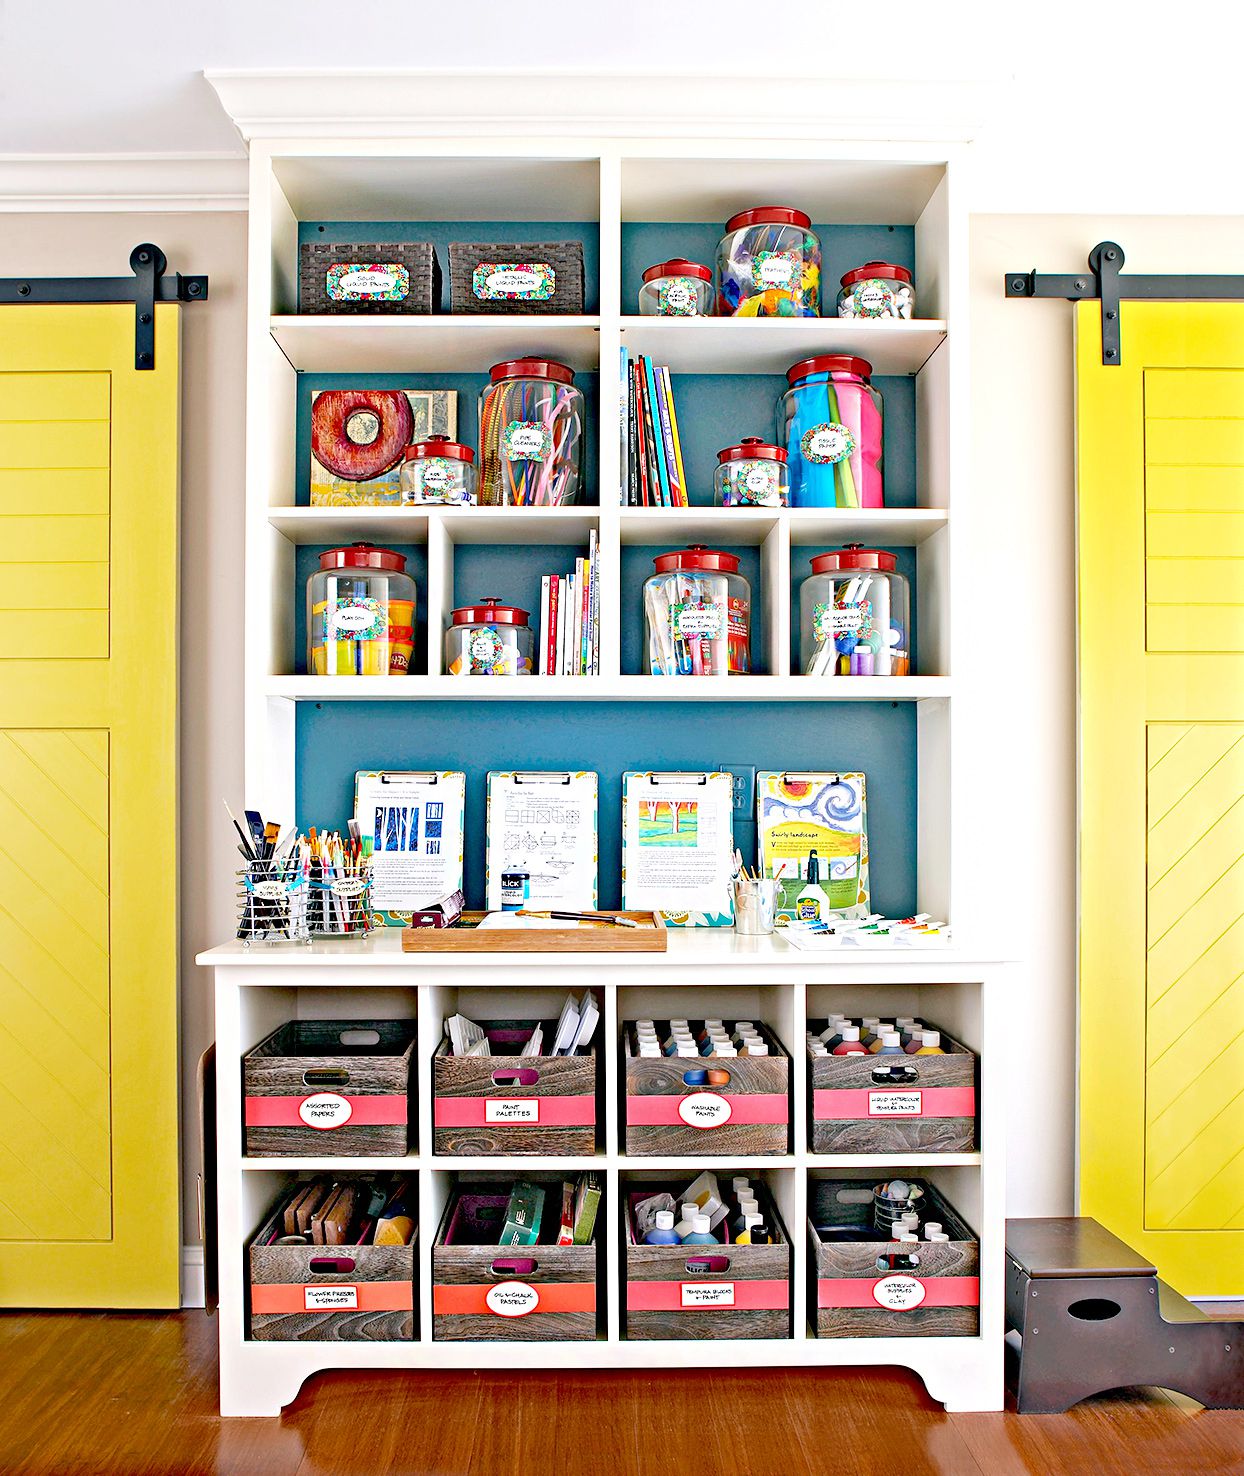
4. Store pretty supplies in the open
Not everything has to be hidden away. If you have colorful thread, patterned paper, or jars of buttons that look charming on display, let them work as decor. Open storage can keep beautiful supplies accessible while adding personality to your creative area.
5. Create zones for different hobbies
If you sew, scrapbook, paint, and occasionally pretend you are about to start candle-making, divide your storage by activity. Give each hobby its own drawer, shelf, or bin. This keeps projects from blending into one giant craft stew.
6. Add drawer dividers for tiny supplies
Loose buttons, clips, blades, and stamps love chaos. Drawer dividers help keep small items separated and easy to spot. The trick is to store pieces in a single layer whenever possible so nothing disappears beneath the pile.
7. Use a rolling cart for mobile crafting
A three-tier cart is perfect if you craft wherever space opens up. Load it with your current project, move it to the table when inspiration strikes, then wheel it away when real life returns. It is especially handy in apartments and multipurpose rooms.
8. Repurpose kitchen glasses and dishes
Cups, mugs, and small bowls make excellent homes for pens, scissors, paintbrushes, and crayons. Group them on a tray so they feel intentional instead of “I gave up and put office supplies in the cereal bowl.”
9. Give ribbon its own system
Ribbon can become a colorful snake pit if you let it. Store spools in labeled bins, on dowels, inside shoe boxes, or on a rack mounted behind a door. The less tangling, the more your blood pressure stays in the safe range.
10. Fold fabric and file it vertically
Fabric is easier to browse when it is folded neatly and stored upright on shelves or in cubbies. Think of it like a tiny fabric boutique in your house, minus the soothing jazz and price tags.
11. Convert a closet into a craft hub
A spare closet can become a wildly efficient storage zone. Add upper shelves for backstock, drawers for small tools, and a middle shelf for machines like a cutting tool or printer. Close the doors, and the mess disappears like magic.
12. Install low shelves for kids’ craft access
If children use the supplies, keep storage low enough for them to reach independently. A child-friendly setup makes cleanup easier and encourages them to put things back without needing a summit meeting first.
13. Hang an over-the-door organizer
The back of a door is valuable storage real estate. Use an over-the-door system for yarn, fabric rolls, paint bottles, rulers, ribbon, or packaged kits. It is one of the smartest ways to gain space without adding furniture.
14. Use mesh or see-through drawers
Drawers are great, but mystery drawers are not. Mesh or translucent drawers let you spot what you need while still keeping supplies tidy. They are ideal for stamps, scraps, adhesives, and small tools that tend to roam.
15. Try a tiered spice rack for tiny colorful items
Tiered organizers are not just for cinnamon and paprika. They also work beautifully for paint bottles, glitter jars, washi tape, mini inks, and markers. Everything becomes easier to see, which means fewer duplicate purchases and less rummaging.
16. Store paper vertically in magazine files
Cardstock, scrapbook paper, vinyl sheets, and unfinished printables all behave better when stored upright. Magazine files or slim bins keep stacks from turning into floppy paper pancakes.
17. Use shoe boxes for budget-friendly sorting
Never underestimate the humble shoe box. It is affordable, stackable, and surprisingly useful for thread, stickers, ribbon, and wrapping supplies. Cover it with pretty paper if you want it to look less “athletic footwear” and more “organized genius.”
18. Save jars for beads, buttons, and clips
Glass or plastic jars are excellent for tiny supplies. They keep categories separate, make inventory easy to check, and look charming on shelves. Few things say “creative person with their life together” like a row of labeled jars.
19. Turn old cans into pencil and tool holders
Empty cans wrapped in decorative paper can hold pens, brushes, knitting needles, and scissors. It is inexpensive, easy, and a nice excuse to feel smug about repurposing something instead of tossing it.
20. Build upward with floor-to-ceiling shelves
If you have the wall space, go vertical. Tall shelving gives you room for baskets, bins, paper, tools, and bulk supplies. Keep frequently used items at eye level and less-used items higher up so you are not climbing for the glue gun every afternoon.
21. Use ladders or narrow racks for paper and display pieces
Lean-style storage can organize paper, finished cards, fabric, or works in progress while taking up less floor space than a cabinet. It is functional and looks a little more creative than a plain stack of bins.
22. Add rails and clips for rotating artwork
Kitchen rails, curtain clips, or wire display systems can hold sketches, finished pieces, reference images, and in-progress work. This keeps inspiration visible and frees up desk space that would otherwise disappear under paper piles.
23. Choose furniture that multitasks
A cabinet hutch, old dresser, or bookcase can become a compact craft station with shelves, baskets, and boxes inside. Furniture with hidden storage is especially helpful when your craft area shares space with a guest room or office.
24. Keep in-progress projects in dedicated drawers
Not every project is finished in one glorious sitting. Use one or two drawers, trays, or document boxes for active projects so pieces stay protected between sessions. Your half-finished wreath should not have to mingle with watercolor paper and bias tape.
25. Store backups separately from daily supplies
Your everyday glue, scissors, pens, and favorite tools should stay close to your workspace. Bulk extras can live on higher shelves or in a closet. This simple separation prevents your main area from becoming cluttered with backup stock.
26. Use a paper roll holder for kraft paper or wrapping supplies
A mounted holder under a shelf or on a wall makes kraft paper, kids’ drawing paper, or wrapping paper much easier to access. It also keeps rolls from slumping in a corner like they are going through something.
27. Edit your stash on a regular basis
The smartest storage idea is not a bin. It is a habit. Every few months, sort through supplies, toss dried-out products, donate what you no longer use, and combine duplicates. Good storage works best when it is not trying to contain a decade of abandoned hobbies.
How to choose the right craft storage setup
The best system depends on how you craft. If you like to spread out and work for hours, invest in drawers, shelves, and a sturdy work surface. If you work in short bursts at the dining table, a rolling cart and portable bins make more sense. If kids are involved, visible, low, easy-to-return storage matters more than a picture-perfect setup. And if your craft space doubles as another room, hidden storage will probably save your sanity.
Try this simple formula: visible storage for pretty or frequently used items, closed storage for backups and visual clutter, and labeled containers for everything small enough to vanish. That combo tends to work in almost any room, whether you are organizing a full studio or one brave little corner.
Mistakes to avoid when organizing craft supplies
One common mistake is buying containers before sorting supplies. That is how you end up with beautiful bins that fit absolutely nothing you own. Another mistake is storing by size only instead of by use. A third is overstuffing containers until every search feels like an archaeological dig.
Also, do not ignore accessibility. The prettiest setup in the world is useless if the scissors are always behind the paint, the paint is behind the yarn, and the yarn is somehow balanced on top of a basket labeled “holiday tags.” Organization should make crafting easier, not turn every session into a scavenger hunt.
My experience with craft storage ideas that actually worked
I used to believe I was “creatively organized,” which is a beautiful phrase that really meant I had piles with excellent intentions. One pile was for scrapbook paper, one was for wrapping supplies, one was for sewing odds and ends, and one was a deeply confusing mountain of ribbon, labels, and mystery clips that had formed a small independent nation on a bookshelf.
The turning point came when I spent 20 minutes looking for a pair of scissors I already owned, gave up, bought another pair, and then found the original scissors in a bin labeled “seasonal decor.” That was a humbling moment. A very educational, slightly annoying, definitely-happened-to-me kind of moment.
So I stopped trying to organize by vague optimism and started organizing by real behavior. First, I pulled everything out. And yes, it looked alarming. I had duplicate adhesive runners, five half-used notebooks, enough gift tags to open a tiny shop, and ribbon in colors I do not even remember buying. But once it was all visible, patterns appeared fast. I could see what I used every week, what I only touched during holidays, and what had been sitting untouched since a burst of enthusiasm in another era.
The biggest improvement came from switching to clear bins and labels. Suddenly, I was not guessing. I knew where the stamps lived, where the paint pens lived, and where the good scissors were supposed to live. I also created one drawer for active projects, which saved me from covering the whole table with half-finished supplies for days at a time. That single change made my space feel calmer almost immediately.
I also learned that vertical storage is a lifesaver. Once I added wall hooks, a pegboard, and a simple shelf, my work surface finally had room to function as an actual workspace instead of a storage unit with emotional support glitter. Brushes, rulers, and tape became easy to grab, and because I could see them, I used them more often. Funny how creativity improves when your markers are not buried beneath three bags of pom-poms.
The rolling cart was another surprise success. I thought it might be trendy but unnecessary. Turns out, it is wildly helpful when a room has to do double duty. I can pull it out for a project, park it beside the table, and put it away when I am done. No drama. No giant reset. Just a smooth little system that makes me feel far more organized than I probably deserve.
The most useful lesson, though, was this: good craft storage should support how you actually create, not how you imagine a flawless internet person creates. If you love visible color, open shelves may inspire you. If clutter stresses you out, cabinets and closed bins might be better. If your kids craft with you, low-access storage matters more than a magazine-worthy display. Once I stopped trying to copy a fantasy craft room and started building one around real habits, the whole setup worked better.
Now when I sit down to make something, I start with ideas instead of a cleanup mission. That is the real win. Not perfection. Not matching baskets. Just a craft space that helps creativity show up faster and leaves a little less chaos behind.
Final thoughts
The best craft storage ideas are the ones that reduce friction. They help you see your supplies, protect your favorites, and make cleanup less painful. Start small if you need to: one drawer, one shelf, one rolling cart, one set of labels. You do not need a giant makeover to make a meaningful difference. Sometimes the smartest fix is simply giving your ribbon a real home and refusing to let the glitter run the household anymore.