Walls are the quiet overachievers of the home. They hold up shelves, frame your favorite photos, tolerate mystery fingerprints, and somehow collect dust while pretending nothing happened. If you have ever moved a picture frame and discovered a ghostly clean rectangle behind it, congratulations: your walls have been keeping secrets.
Learning how to dust walls is one of those simple cleaning skills that makes a room look brighter almost instantly. Dust, cobwebs, pet dander, pollen, cooking residue, and everyday airborne particles settle on walls, especially around corners, vents, baseboards, textured surfaces, and high-traffic areas. The good news? You do not need a dramatic cleaning arsenal. In most homes, a microfiber cloth, a soft duster, a flat mop, or a vacuum brush attachment can handle the job beautifully.
This guide covers four practical ways to dust walls safely: dry microfiber dusting, long-handle wall mopping, vacuum dusting, and lightly damp dusting for stubborn film. Each method works best in different situations, so you can choose the right approach for painted walls, wallpaper, textured walls, tall stairwells, kitchens, bathrooms, and those suspicious corners where cobwebs hold tiny committee meetings.
Before You Start: A Smart Wall-Dusting Setup
Before attacking your walls like a cleaning superhero with a telescoping pole, take five minutes to prepare. A little setup prevents streaks, paint damage, and dust avalanches onto your freshly vacuumed floor.
Gather the Right Supplies
For most wall dusting jobs, you may need a few microfiber cloths, a dry microfiber mop pad, a soft-bristle duster, a vacuum with a brush attachment, a bucket of warm water, mild dish soap, and a clean towel for drying. If your walls are high, use a telescoping duster or flat mop instead of balancing on furniture. Chairs are for sitting, not for auditioning as a ladder.
Work From Top to Bottom
Dust falls. It does not negotiate. Start near the ceiling, crown molding, vents, corners, and door frames, then work downward in overlapping sections. Finish with baseboards and floors. This top-to-bottom cleaning order keeps you from dusting the same area twice and silently questioning your life choices.
Know Your Wall Surface
Different wall finishes need different levels of gentleness. Flat and matte paint can show rubbing marks more easily, so use a light touch. Eggshell, satin, and semi-gloss finishes usually tolerate careful dusting and light damp wiping better. Wallpaper should be handled according to its material: washable vinyl can usually take a lightly damp cloth, while grasscloth, fabric, paper, or delicate wallpaper should stay mostly dry. Textured walls need soft tools that will not snag or crumble the surface.
Avoid Too Much Moisture
Drywall and paint do not enjoy being soaked. When damp dusting, your cloth or mop pad should be barely damp, not dripping. Keep moisture away from outlets, switches, unsealed plaster, peeling paint, and damaged areas. If you live in a home built before 1978 and suspect old lead-based paint, avoid sanding, scraping, or aggressively disturbing painted surfaces. Dust gently and consult a qualified professional for deteriorating paint.
Way 1: Dust Walls With a Dry Microfiber Cloth or Duster
The easiest way to dust walls is also the most useful for routine maintenance: dry microfiber dusting. Microfiber is popular because its tiny fibers help grab and hold dust instead of simply pushing it into the air. This method is ideal for bedrooms, living rooms, hallways, home offices, and lightly dusty painted walls.
Best For
Use this method for weekly or monthly cleaning, smooth painted walls, lightly dusty wallpaper, corners, trim, and areas behind furniture. It is also a good first step before washing walls because removing dry dust prevents muddy streaks later.
How to Do It
Start by removing lightweight wall decor or pulling furniture a few inches away from the wall. Wrap a clean microfiber cloth around your hand, or use a soft microfiber duster. Begin at the top corner of the wall and move across in gentle horizontal strokes. Then work downward in sections, slightly overlapping each pass so you do not leave dusty stripes.
For corners and cobwebs, use the tip of the duster or a microfiber cloth wrapped over a broom head. Do not press hard. You are removing dust, not trying to buff the wall into a sports car. When one side of the cloth becomes dirty, fold it to a clean side. If the cloth is overloaded, replace it with a fresh one.
Pro Tips for Better Results
Use white or light-colored cloths on light walls so you can see how much dust you are collecting. Wash microfiber cloths without fabric softener, which can reduce their dust-grabbing ability. If you are dusting a whole room, clean the ceiling fan, light fixtures, and shelves first, then move to the walls. Otherwise, your newly dusted wall may receive a fresh sprinkle from above, like the world’s least festive confetti.
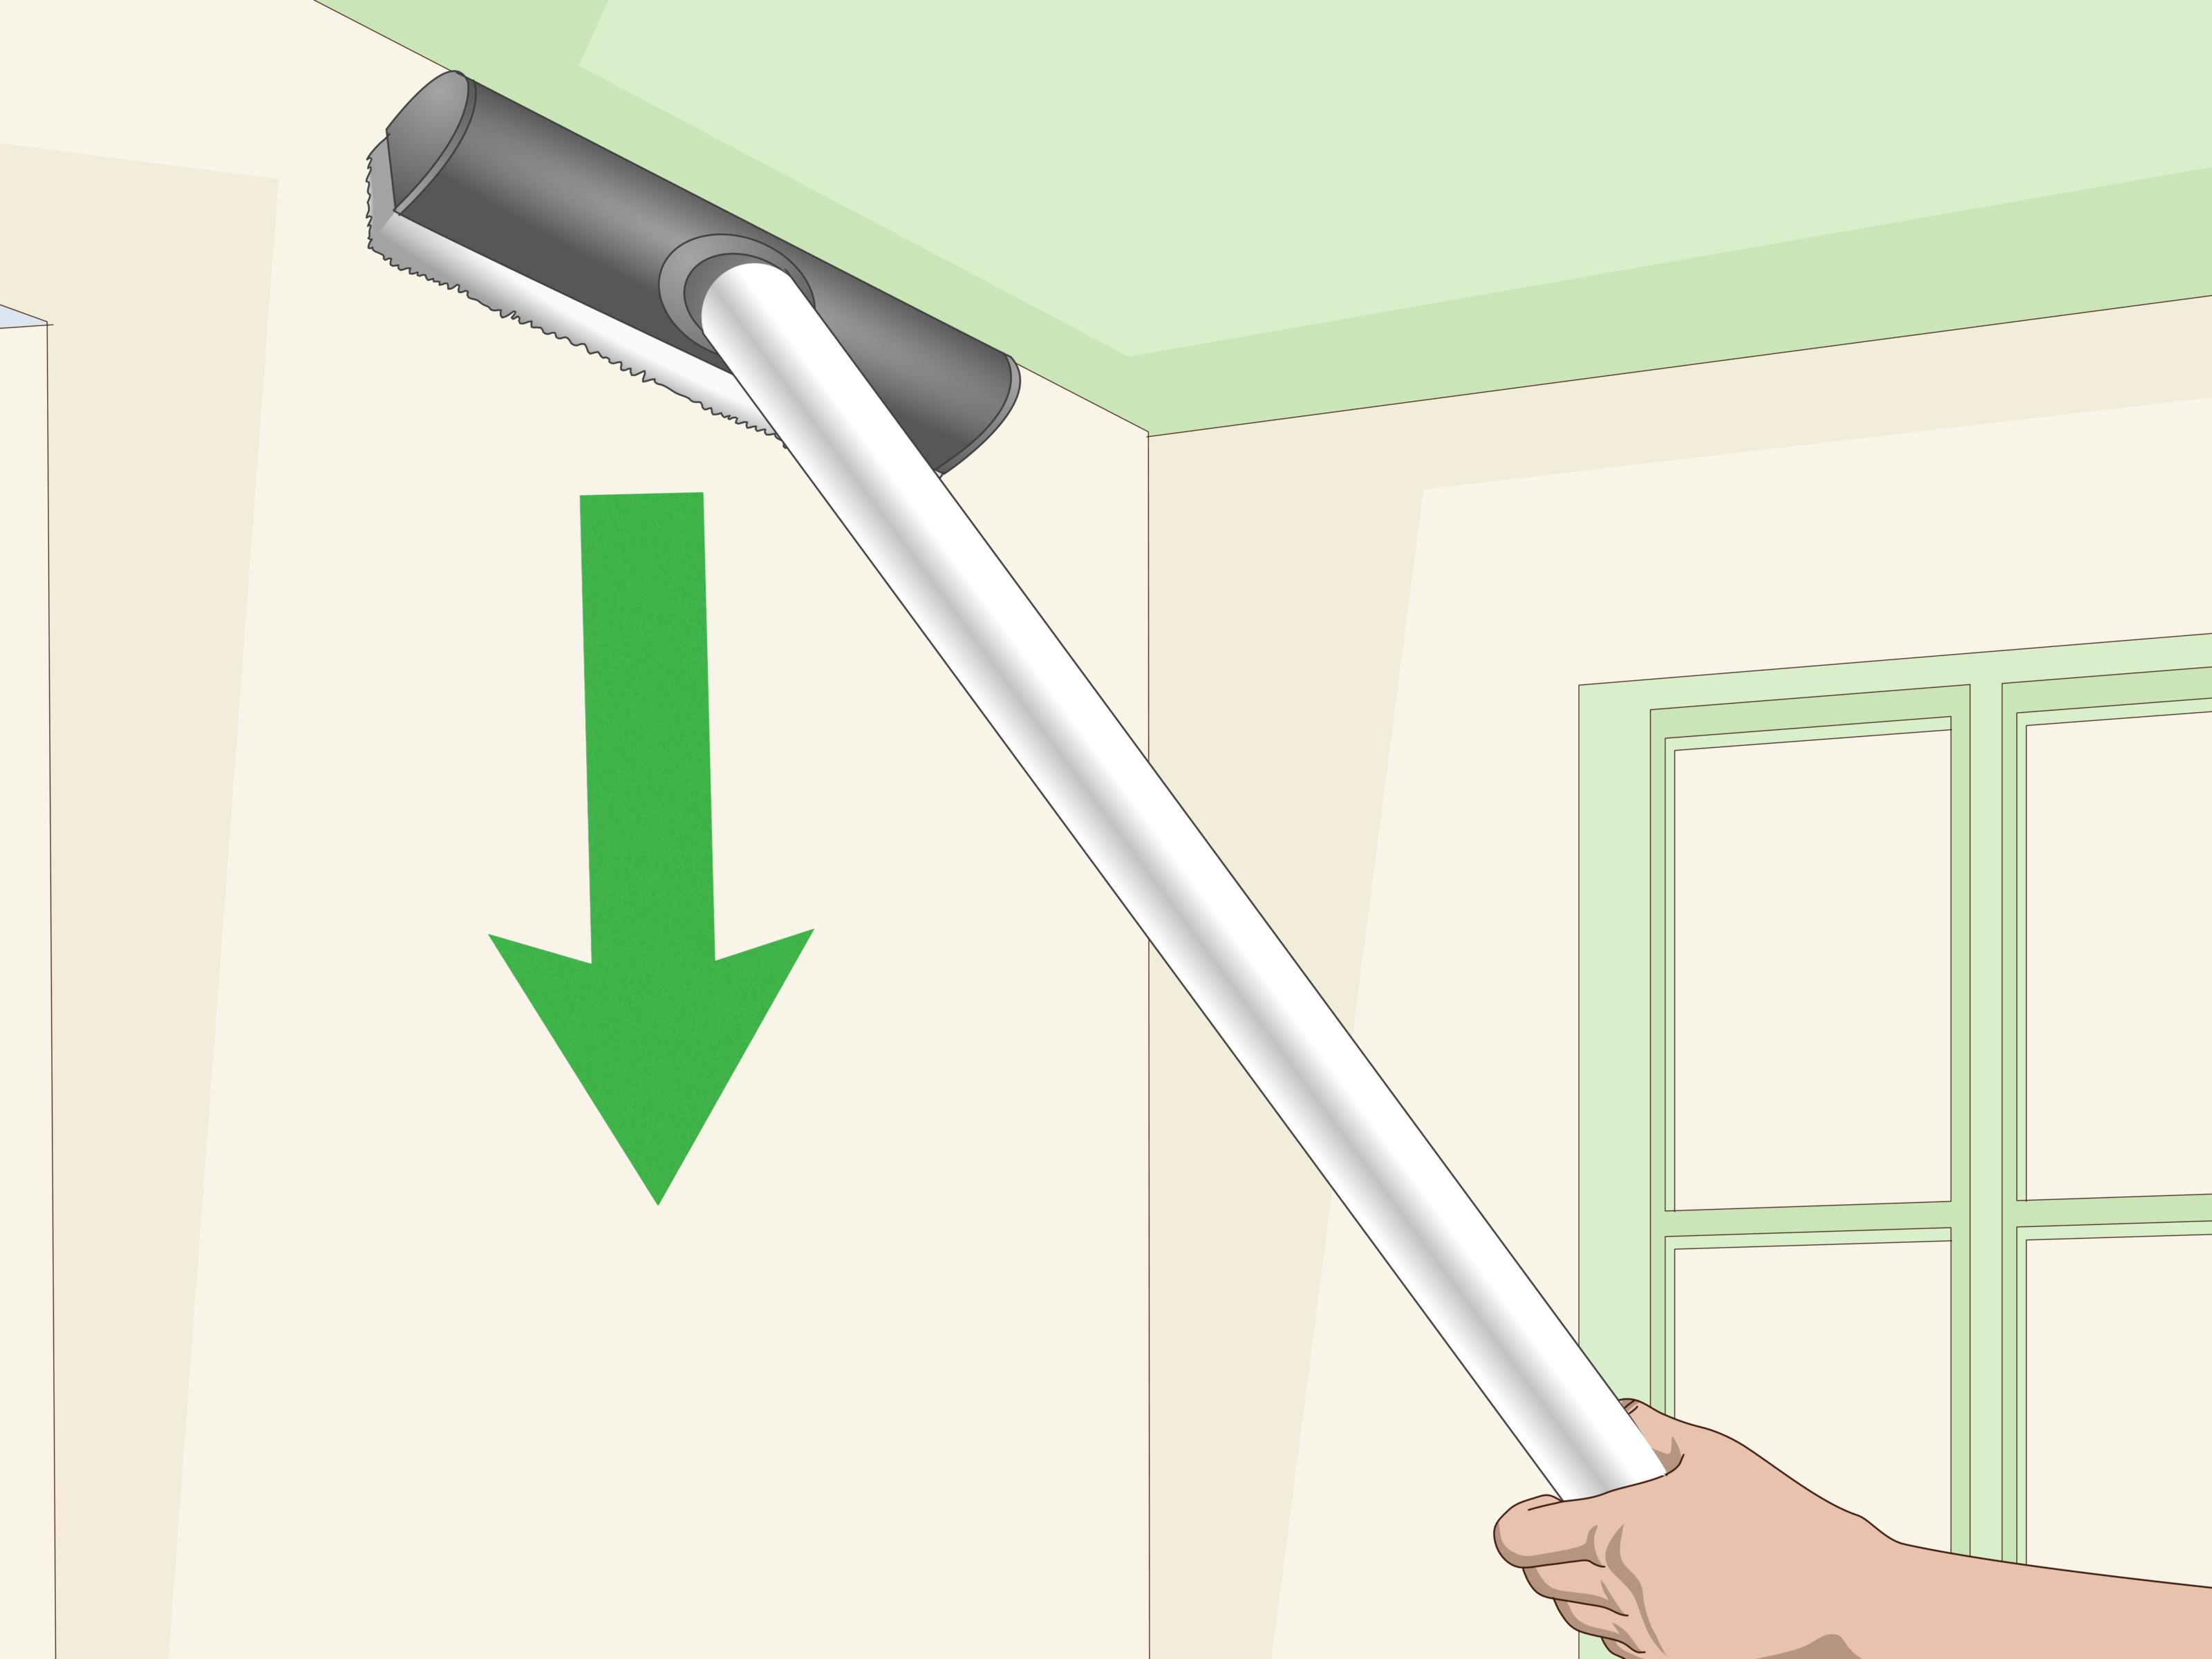
Way 2: Use a Long-Handled Microfiber Mop for Large Walls
If your home has tall walls, long hallways, stairwells, or rooms with big open surfaces, a flat microfiber mop is your best friend. This method is fast, ergonomic, and surprisingly satisfying. It lets you clean a lot of wall area without crouching, stretching, or dragging a ladder around the room like a medieval siege tool.
Best For
Use a long-handled microfiber mop for large painted walls, high areas, stairwells, vaulted rooms, dining rooms, open-plan living spaces, and regular seasonal dusting. It is especially helpful if you have pets, live near a busy road, keep windows open often, or notice dust around vents.
How to Do It
Attach a clean, dry microfiber pad to a flat mop. Make sure the pad is secure so it does not slide off halfway up the wall and create a tiny cleaning tragedy. Starting at the top, move the mop in smooth vertical strokes, similar to painting. Work from one side of the wall to the other, slightly overlapping your passes.
Use light pressure. The mop should glide across the surface instead of scrubbing. If your wall has trim, framed art, or shelves, remove what you can and dust around fixed items carefully. For corners, angle the mop head or switch to a hand duster. When the pad becomes visibly dusty, change it or shake it outdoors away from open doors and windows.
Why This Method Works So Well
A microfiber wall mop covers more surface area than a hand cloth, making it ideal for whole-room cleaning. It also keeps your hands away from textured paint and reduces the temptation to scrub one spot too aggressively. For busy households, this method turns wall dusting from a once-a-year marathon into a quick maintenance routine.
Smart Add-On: Dust Baseboards Last
After dusting the wall surface, run the mop or a microfiber cloth along baseboards. Baseboards collect dust, hair, crumbs, and the occasional tiny object no one remembers dropping. Cleaning them last makes the entire wall look sharper.
Way 3: Vacuum Walls With a Soft Brush Attachment
Vacuuming walls may sound odd until you try it. A vacuum with a soft brush attachment can remove dust, cobwebs, pet hair, and loose debris from surfaces where cloths may snag or smear. It is especially useful for textured walls, popcorn-style surfaces, brick accent walls, paneling grooves, and high corners.
Best For
This method works well for textured walls, rough surfaces, walls near HVAC vents, homes with pets, allergy-sensitive households, and areas with heavy cobwebs. It is also a good choice before repainting because it removes loose dust without adding moisture.
How to Do It
Attach a soft dusting brush to your vacuum hose or extension wand. Avoid stiff bristles, beater bars, rotating brushes, or anything that feels aggressive against the wall. Set the vacuum to low or medium suction if your model allows adjustment. Start at the top of the wall and gently guide the brush over the surface, letting the suction do the work.
For corners, use the brush attachment first, then switch to a crevice tool only if needed. Be careful around wallpaper seams, peeling paint, wall decals, loose plaster, and delicate textures. If the brush attachment is dirty from floors or upholstery, clean it before touching walls. A dusty brush is not a cleaning tool; it is a dust relocation service.
Use a HEPA Filter When Possible
If your vacuum has a HEPA filter or high-quality filtration, it may help capture fine particles instead of blowing them back into the room. This can be helpful in homes with pets, dust sensitivities, or seasonal pollen issues. After vacuuming the walls, vacuum the floor so any fallen debris is removed.
When Not to Vacuum Walls
Do not vacuum fragile wallpaper, flaking paint, crumbly plaster, or very delicate decorative finishes. If the surface looks unstable, use the gentlest dry microfiber method instead. When in doubt, test an inconspicuous area first.
Way 4: Lightly Damp Dust Walls for Sticky Dust and Grime
Dry dusting handles loose particles, but some walls collect a sticky film. Kitchens get cooking residue. Bathrooms get humidity. Entryways get fingerprints. Kids’ rooms get everything, including substances not yet identified by science. For these areas, lightly damp dusting can remove dust that clings to the surface.
Best For
Use lightly damp dusting for kitchens, bathrooms, laundry rooms, entryways, around light switches, near vents, and walls with mild grime. This method is best for washable painted walls in good condition, especially satin, semi-gloss, or gloss finishes.
How to Do It
First, dry dust the wall to remove loose particles. Then dampen a microfiber cloth with warm water and wring it out thoroughly. The cloth should feel barely damp. Wipe the wall gently from top to bottom using smooth strokes. For mild greasy dust, add a drop or two of gentle dish soap to a bucket of warm water. Dip the cloth, wring it well, and wipe lightly.
After using any soap solution, follow with a separate cloth dampened with plain water to remove residue. Then dry the wall with a clean towel. This final drying step helps prevent water marks, streaks, and moisture sitting on the paint.
Important Safety Rules
Do not spray water or cleaner directly onto walls, especially near outlets, switches, trim gaps, or damaged paint. Do not use abrasive pads, harsh chemicals, bleach-heavy mixtures, or strong degreasers unless the paint manufacturer specifically says the finish can handle it. Always test first in a hidden spot, such as behind a door or low corner.
What About Vinegar?
A diluted vinegar solution is often used for household cleaning, but it is not always necessary for dusting walls. Plain warm water or a tiny amount of mild dish soap is usually enough. If you use vinegar, keep it well diluted, avoid natural stone features nearby, test first, and rinse afterward. The goal is a clean wall, not a salad dressing situation.
How Often Should You Dust Walls?
Most homes benefit from wall dusting every one to three months. High-dust homes may need it more often. If you have pets, allergies, open windows, ceiling fans, fireplaces, or nearby construction, monthly dusting can make a visible difference. Kitchens and bathrooms may need light damp dusting more frequently because steam and grease help dust stick.
For low-traffic rooms, seasonal dusting may be enough. Guest rooms, formal dining rooms, and storage areas often collect dust slowly but steadily. A quick microfiber mop pass every few months keeps those rooms from developing the abandoned-mansion atmosphere.
Wall Dusting by Room
Living Room
Dust behind the television, around picture frames, above doorways, and near air vents. Electronics can attract dust, and that dust often settles on the surrounding wall. Use a dry microfiber cloth around cords and outlets.
Bedroom
Pay attention to the wall behind the headboard, corners near windows, and areas around ceiling fans. Fabric bedding, rugs, and curtains can release lint and fibers that settle on walls over time.
Kitchen
Kitchen walls often need the lightly damp method because airborne grease makes dust cling. Focus on areas near the stove, trash can, pantry door, and dining nook. Dry dust first, then use a barely damp cloth with mild soap if needed.
Bathroom
Humidity can turn dust into a clingy film. Use a dry duster first, then wipe washable painted walls with a barely damp cloth. Run the exhaust fan during and after showers to reduce moisture buildup.
Hallways and Entryways
These areas collect handprints, backpack scuffs, pet rub marks, and dust from outside. A long-handled microfiber mop works well for fast maintenance, while spot damp dusting can handle fingerprints around switches and doorknobs.
Common Wall-Dusting Mistakes to Avoid
Using a Dirty Tool
A dirty cloth or mop pad spreads dust instead of collecting it. Start with clean microfiber and change it as soon as it looks loaded.
Scrubbing Too Hard
Dust should not require muscle. Heavy pressure can dull paint, damage wallpaper, or leave shiny marks on matte finishes. Use gentle passes and repeat if necessary.
Skipping Dry Dusting Before Damp Wiping
If you wipe a dusty wall with a wet cloth too soon, dust can turn into streaky gray sludge. Dry dust first, then damp wipe only where needed.
Forgetting Corners and Baseboards
Corners, trim, and baseboards are dust magnets. Clean them as part of the same routine so the whole wall looks fresh.
Cleaning Floors First
Dust walls before vacuuming or mopping floors. Otherwise, falling dust lands on your clean floor and laughs quietly.
Final Thoughts: Clean Walls Make the Whole Room Feel Brighter
Dusting walls is not glamorous, but it is one of the fastest ways to make a room feel fresher without repainting, redecorating, or pretending not to notice that cobweb in the corner. Start with the gentlest method: dry microfiber. Use a long-handled mop for big walls, a vacuum brush for textured surfaces, and a lightly damp cloth for sticky dust in kitchens and bathrooms.
The best wall-cleaning routine is simple, safe, and realistic. You do not need to dust every wall every Saturday unless you truly enjoy living inside a cleaning calendar. Instead, build wall dusting into seasonal cleaning, focus on high-traffic spots monthly, and handle dusty corners as soon as you notice them. Your walls will look better, your paint may stay fresher longer, and your home will feel cleaner from floor to ceiling.
Real-Life Experience: What Dusting Walls Actually Teaches You
The first time I took wall dusting seriously, I expected a quick swipe around the room and a smug little feeling of accomplishment. Instead, I discovered that walls are basically vertical shelves for invisible grime. The living room looked clean from a distance, but once sunlight hit the wall near the window, a fine layer of dust appeared like a special effect in a detective movie.
I started with a dry microfiber cloth, which worked well on the lower areas but quickly made me realize two things. First, dust loves corners. Second, my arms are not as long as I think they are. A long-handled microfiber mop changed the entire job. Instead of stretching, climbing, and making dramatic sighing noises, I could glide the mop from top to bottom in smooth passes. The wall looked brighter almost immediately, not in a freshly painted way, but in a “why does this room suddenly feel less tired?” way.
The biggest surprise was the wall behind the sofa. Because nobody sees it, nobody thinks about it. That wall had collected dust, pet hair, and a few cobwebs that seemed to have signed a long-term lease. A vacuum brush attachment worked better there than a cloth because it pulled debris out of the tight space between the sofa and the baseboard. After vacuuming the wall and floor together, the room smelled cleaner even before any actual washing happened.
In the kitchen, dry dusting alone was not enough. The wall near the stove had that slightly sticky dust that comes from cooking oil, steam, and everyday life. A barely damp microfiber cloth with a tiny drop of dish soap made the difference. The key was wringing the cloth until it was almost dry and then following with a clean damp cloth and towel. When I skipped the drying step once, I got faint streaks. Lesson learned: walls appreciate manners.
Another practical lesson is that lighting matters. Dust walls during the day if possible, especially when natural light enters the room at an angle. Evening cleaning can hide dust until the next morning, when the sun shows every missed patch with unnecessary honesty. I also learned to dust before vacuuming floors, because wall dust does fall. Cleaning the floor first is like frosting a cake and then deciding to sift flour above it.
Most importantly, wall dusting feels less annoying when it is treated as maintenance instead of punishment. Doing one room at a time is far easier than declaring a whole-house wall-cleaning festival. A bedroom one weekend, the hallway the next, the kitchen when it starts looking dullthat rhythm keeps the job manageable. Clean walls do not shout for attention, but they quietly make everything else look better: paint color, artwork, trim, furniture, and even the light in the room. Not bad for a chore that requires a cloth and a little patience.