

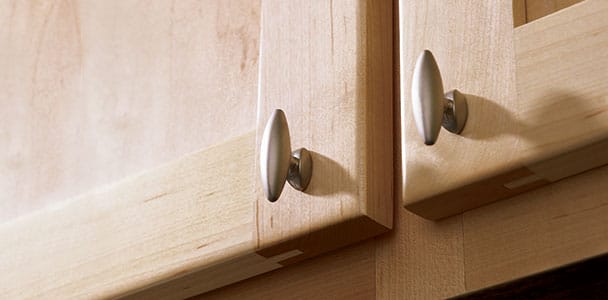
If your kitchen cabinets are sturdy but screaming “I peaked in 2009,” you don’t need a full tear-out to fix the vibe.
Cabinet refacing is the sweet spot between a quick paint job and a full replacement: you keep the cabinet boxes,
but swap the visible partsdoors, drawer fronts, and the cabinet “skin” on the face frames and exposed sides.
Translation: big visual glow-up, smaller budget meltdown.
Cabinet Refacing 101: What It Is (and What It Isn’t)
Refacing kitchen cabinets means keeping the existing cabinet boxes in place while updating the exterior.
Typically, you’ll replace cabinet doors and drawer fronts, then cover the face frames and any exposed cabinet ends with
wood veneer, laminate, or a rigid thermofoil-style surface that matches the new doors. You usually finish with new hinges,
pulls, knobs, and any trim that makes the whole kitchen look “intentional.”
What refacing isn’t:
- Refinishing: Sanding and repainting or restaining what you already have (doors stay the same, just prettier).
- Replacing: Removing the cabinet boxes and installing new ones (new layout potential, bigger cost, bigger mess).
Refacing is perfect when your cabinet boxes are solid and your layout worksbut you want a new look that doesn’t feel like a
weekend craft project that got out of hand.
Is Refacing Right for Your Kitchen? A Fast Reality Check
Refacing is a “yes” when:
- The cabinet boxes are structurally sound (no sagging shelves, loose joints, or crumbling particleboard).
- Your cabinet layout works (refacing won’t magically create a pantry where none exists).
- You want a major style change: shaker to slab, oak to white, traditional to modernwithout demo.
- You’d like less disruption (many refacing projects can be done in days, not weeks).
Refacing is a “no” (or at least a “fix first”) when:
- There’s water damage near the sink or dishwasher that’s swollen the boxes.
- Cabinets are badly out of square or the face frames are splitting.
- You need a new layout, more storage, or bigger drawersrefacing doesn’t change cabinet geometry.
- You’re hoping refacing will solve sticky drawers and crooked doors without any hardware upgrades (it won’t).
The big rule: veneer and laminate only stick as well as the surface beneath them. If the boxes are failing,
you’ll be paying for a “new look” on top of an old problemlike putting nice tires on a car with no engine.
Budget: What Cabinet Refacing Costs in the U.S.
Cabinet refacing costs vary wildly by kitchen size, door style, material choices, and labor rates. In many U.S. markets,
professional refacing commonly lands in the mid-thousands for an average kitchen. You’ll also see pricing expressed
as cost per linear foot, because kitchens love math when you least do.
Typical price ranges (real-world, not fantasy-land)
- Professional refacing: often ranges from $4,000–$10,000+ for many average kitchens, and can climb higher with premium doors, custom finishes, or lots of cabinets.
- Linear-foot estimates: commonly fall around $150–$450 per linear foot depending on materials and region.
- DIY refacing: can be dramatically cheaper if you’re using refacing kits or ordering doors and doing veneer yourselfbut you “pay” in tools, learning curve, and time.
A quick example: if your kitchen has about 20 linear feet of cabinetry, a pro refacing job could land somewhere in the
low-to-mid thousands on the lower end, up to five figures in higher-cost markets or with premium upgrades. The more doors,
drawers, and exposed end panels you have, the more the price rises.
Pro tip: refacing is usually less expensive than full replacement, but it’s more expensive than simply painting.
If your cabinet boxes are high-quality and the layout is good, refacing can be one of the best ROI-per-headache upgrades.
Design Decisions That Make (or Break) the Final Look
1) Door style: the “face” of your kitchen
The fastest way to change your kitchen’s personality is by changing door style:
shaker is the universal crowd-pleaser, slab reads modern, raised-panel leans traditional, and
glass inserts can add depth (and also reveal your snack stashchoose wisely).
2) Overlay and hinges: the sneaky detail that screams “professional”
If you’re switching to a more modern look, you might choose full overlay doors that cover more of the face frame.
That often means new hinges, careful measuring, and more precise alignment. Great resultsjust don’t eyeball it.
Eyeballing is how doors become “abstract art.”
3) Veneer vs laminate: the durability/style trade
Wood veneer looks classic and can feel higher-end, especially when paired with quality doors. Laminate
is tough, consistent, and often budget-friendly. Either can look great if the edges are clean, seams are tight, and the finish
matches the door color and sheen.
4) Hardware and trim: the jewelry and tailoring
New pulls and knobs are small but mighty. Pair them with crown molding, light rails, filler strips, and end panels when needed.
Those details are what make refacing look like a full remodel (without actually living in a construction zone).
Tools & Materials You’ll Actually Use
Your exact list depends on your method (peel-and-stick veneer vs contact cement, DIY kit vs pro-grade veneer),
but most refacing projects involve a similar lineup:
Materials
- New cabinet doors and drawer fronts (ordered or custom-built)
- Veneer/laminate for face frames and exposed cabinet sides
- Edge banding (iron-on or adhesive-backed)
- Wood filler (for dings and chips)
- Degreaser/cleaner (kitchen cabinets are basically magnets for invisible oil)
- New hinges (often soft-close) and cabinet hardware (pulls/knobs)
- Optional: molding, toe-kick skins, end panels, light rail trim
Tools
- Tape measure, straightedge, and a notepad (or a cabinet “map”)
- Drill/driver, bits, and a hinge/pull jig (for consistent holes)
- Utility knife and sharp blades
- Veneer roller / J-roller (to press veneer and remove bubbles)
- Laminate trimmer or router with flush-trim bit (for crisp edges)
- Clamps, painter’s tape, and a sanding block or orbital sander
- Iron (for iron-on edge bandingyes, the same one that’s “never used” in the laundry room)
Safety note: adhesives and solvents can be intense. Ventilate, follow labels, and don’t treat “strong fumes” as a personality trait.
How To Reface Kitchen Cabinets Step-by-Step
Below is a practical, field-tested sequence that works for most refacing jobs. Read it through once before you start,
so you don’t end up holding a drawer front in one hand and existential dread in the other.
Step 1: Evaluate the cabinet boxes (the part you’re keeping)
Check for water damage, loose joints, bowed sides, or face frames pulling away. Open and close everything. If drawers are sticky,
decide now whether you’ll replace slides or adjust boxes. Refacing is cosmetic, but it’s also the perfect time for functional upgrades.
Step 2: Photograph and map your kitchen
Take photos of every cabinet run and close-ups of hinge locations, fillers, and end panels. Then draw a simple diagram with labels
for each door and drawer (A1, A2, B1, etc.). This prevents the classic DIY moment: “Where did this door go?” (Answer: not here.)
Step 3: Measure for new doors and drawer fronts (accurately, please)
Measure each opening and decide your overlay. Door sizing depends on your cabinet style (face-frame vs frameless) and the overlay you choose.
If you’re not 100% confident, use a door supplier’s measuring guideor bring in a pro for measuring only. This is one of the easiest places
to make an expensive mistake.
Step 4: Empty cabinets and protect your kitchen
Remove dishes, pantry items, and anything that could be ruined by dust. Mask countertops and floors. Set up a “hardware station” with small bags
labeled by cabinet. You’re not being extra. You’re being future-you-friendly.
Step 5: Remove doors, drawers, and hardware
Take off doors and drawer fronts. Label them as you go, even if you’re replacing them. If you’re reusing hinges or pulls, keep each set together.
If you’re replacing hinges, note whether you need face-frame hinges, frameless hinges, or specialty sizes.
Step 6: Clean, degrease, and lightly sand the surfaces
Kitchen cabinets collect grease like it’s their job. Clean thoroughly, then scuff-sand to improve adhesion. The goal is not to remove all finish
it’s to create a clean, slightly abraded surface so veneer or laminate can bond reliably.
Step 7: Repair dings, chips, and face-frame damage
Fill gouges and chips with wood filler, let it cure, then sand flush. Tight seams and smooth surfaces matter because veneer will highlight bumps
and dents like a spotlight at karaoke.
Step 8: Apply veneer or laminate to face frames (rails first, then stiles)
For many refacing methods, you’ll cover face frames with strips of veneer or laminate. A common approach is:
- Cut slightly oversize pieces for each section (so you can trim for a perfect fit).
- Apply adhesive as directed (pressure-sensitive peel-and-stick or contact cement, depending on product).
- Start with rails (horizontal pieces), then do stiles (vertical pieces) for cleaner seam control.
- Press firmly with a roller to remove bubbles and ensure full contact.
- Trim edges with a laminate trimmer, router, or a sharp knifeslowly and carefully.
Work methodically. Adhesive-backed products can grab fast, and contact cement famously does not reward indecision.
Step 9: Reface exposed cabinet sides and ends
Any cabinet side you can see should match the new look. Measure each exposed end panel, cut veneer/laminate to fit, and apply it smoothly.
Use a roller, trim cleanly, and consider adding matching end panels for a more “factory-made” appearance.
Step 10: Apply edge banding for clean, durable edges
Edge banding covers raw edges and makes everything look finished. Iron-on edge banding is common for DIY projects:
align it carefully, apply heat, press, then trim the overhang with an edge trimmer or sharp blade.
Take your timeragged edges are the #1 thing that makes refacing look DIY in the wrong way.
Step 11: Install new doors and drawer fronts
Hang doors first, then align gaps and adjust hinges. Modern hinges are adjustableuse that gift. For drawer fronts, use clamps or temporary spacers
to align, then attach securely from inside the drawer box.
Step 12: Add hardware and finishing details
Install pulls/knobs with a jig for consistent placement. Add trim, crown molding, or light rail as desired. Touch up any seams, clean off adhesive residue,
and step back for the “wait…this is the same kitchen?” moment.
DIY vs Hiring a Pro: How to Decide Without Regret
DIY refacing can be rewardingif you enjoy precise measuring, neat trimming, and learning a few new skills. It’s also a project where
“close enough” can turn into “why is that seam waving at me?”
Consider hiring a pro if:
- You want perfect seams and fast turnaround.
- Your kitchen has lots of exposed ends, tall pantry units, or tricky corners.
- You’re upgrading to full overlay doors and need flawless alignment.
- Your time is limited and you’d prefer not to live in a cabinet puzzle for weeks.
If you do hire out, get multiple quotes and ask exactly what’s included: door quality, hinge type (soft-close?), drawer slide upgrades,
end panels, molding, disposal, and warranty. “Refacing” can mean a lot of thingssome are premium, some are basically “new doors and good luck.”
Mistakes to Avoid (Because Cabinets Hold Grudges)
- Skipping deep cleaning: Grease prevents adhesion. Veneer fails. You cry.
- Rushing trimming: One slip can gouge a face frame or tear veneer.
- Ignoring box problems: Water-damaged boxes won’t become strong through positive thinking.
- Inconsistent hardware holes: Eyeballing leads to crooked pulls. Crooked pulls lead to lifelong annoyance.
- Not planning for end panels: If you can see it, it needs to match.
Smart Upgrades to Add While You’re in There
Refacing is the perfect time to upgrade function, not just looks:
- Soft-close hinges (goodbye, accidental door slams).
- Full-extension drawer slides for easier access.
- Pull-out shelves, trash pull-outs, spice organizers, and tray dividers.
- Under-cabinet lighting (because cooking under a cave vibe is not ideal).
Maintenance: Keep Your Refaced Cabinets Looking New
Refaced cabinets are durable when installed properly, but treat them like the high-touch surfaces they are:
- Clean with mild soap and water; avoid harsh abrasives that dull finishes.
- Wipe spills quicklyespecially near sinks and dishwashers.
- Use gentle microfiber cloths; save steel wool for… literally anything else.
- Check hinge screws after a few weeks and retighten if needed (normal settling happens).
Conclusion: A Big Kitchen Upgrade Without a Big Kitchen Demolition
If your cabinet boxes are solid, refacing kitchen cabinets is one of the smartest ways to modernize a kitchen without the mess
and cost of full replacement. Done well, it can look like an entirely new kitchen: crisp doors, seamless faces, updated hardware,
and upgrades that make daily life smoother. Just remember the golden rulegreat prep and precise measuring beat heroic last-minute fixes every time.
Extra: Real-World Refacing Experiences and Lessons (The Stuff People Only Tell You After)
Homeowners often start refacing projects thinking, “This can’t be that hardit’s basically stickers and doors, right?”
Then they meet the kitchen’s secret superpower: nothing is square. A common experience is discovering that cabinet openings vary
by an eighth of an inch here and there, especially in older homes. That tiny variance doesn’t sound dramatic until you try to align new doors
so the reveals look even across an entire run. The lesson: measure every opening, label everything, and embrace adjustable hinges like the blessing they are.
Another theme you’ll hear is that cleaning is the make-or-break moment. People underestimate how much grease sits on cabinet faces
especially near the stove. One DIYer might say they “cleaned the cabinets,” then watch veneer edges lift weeks later. The better approach is a two-step:
degrease thoroughly, rinse, dry, then scuff-sand lightly. The surprising emotional arc is real: deep cleaning is boring, but failed adhesion is heartbreaking.
A lot of refacing success stories include a mid-project pivot: “We were going to keep the old hinges… and then we didn’t.”
That’s because new doors and drawer fronts often expose the truth about old hardwareworn springs, sloppy movement, and alignment limitations.
Many homeowners report that upgrading to soft-close hinges and modern drawer slides was the single most satisfying part of the project,
even more than the new look. It’s a reminder that refacing can be both cosmetic and functional if you plan it that way.
People also learn quickly that edges are where quality shows. Flat areas can look good even with beginner technique,
but edge banding exposes every shortcut. The best experiences come from slowing down: using an iron at the right heat, pressing firmly,
trimming carefully, and sanding lightly for a smooth transition. Many DIYers say the first few edges looked rough, but by the time they reached the last cabinet,
their technique improved dramatically. A practical tip: practice edge banding on a scrap board before touching your kitchen.
There’s also a very human “decision fatigue” moment in refacing: choosing door style, finish, sheen, hardware size, hardware finish, and panel details.
Homeowners who had the easiest time often followed a simple rule: pick one hero choice (like a shaker door or a bold hardware finish),
and keep everything else timeless. That approach avoids a kitchen that feels overly trendy by next year’s social media cycle.
In other words: your kitchen should outlast the internet’s attention span.
Finally, many refacing experiences share the same happy ending: the kitchen feels updated, cleaner, brighter, and more “you”without weeks of demolition.
The most satisfied homeowners typically did three things: they confirmed the cabinet boxes were worth saving, they invested in door quality and hardware,
and they treated measuring and prep as the main event (not a warm-up act). If you do those, refacing stops being a gamble and starts being a smart,
high-impact upgrade that looks like you spent way more than you did.