

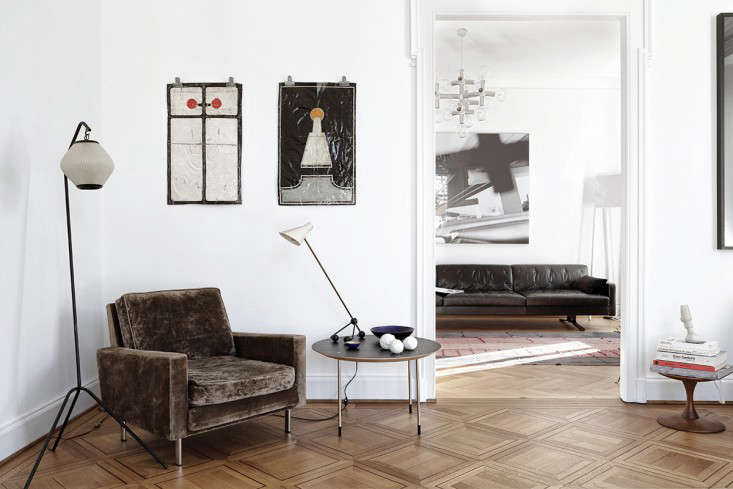
Frames are wonderful. They protect artwork, add polish, and make a humble print look as though it has a respectable retirement account. They can also be expensive, heavy, slow to order, and surprisingly permanent for anyone who enjoys rearranging a room every other Tuesday.
Metal clips offer a refreshingly uncomplicated alternative. A binder clip, bulldog clip, clipboard clamp, or small steel hanger can turn an unframed print into intentional wall decor in minutes. The result feels relaxed rather than unfinished, making this approach especially appealing for apartments, studios, home offices, children’s rooms, and creative spaces where the display changes frequently.
The secret is treating the clip as part of the design. Choose the right size, finish, spacing, and mounting method, and an ordinary piece of office hardware becomes a crisp architectural detail. Choose carelessly, and the wall may resemble a paperwork emergency. This guide explains how to achieve the first result.
Why Metal Clips Work So Well as Art Holders
A frame creates a visual boundary around artwork. A metal clip does almost the opposite: it leaves the edges exposed and allows the paper to feel immediate, tactile, and informal. Instead of separating the viewer from the image, the hardware makes the display feel like part of an active studio, design workshop, or collector’s evolving mood board.
Design publications have repeatedly highlighted binder clips and small clamps as practical tools for hanging posters, flea-market prints, photographs, and inexpensive artwork. A discreet nail or hook supports the clip while its jaws grip the upper edge of the paper. A second clip can be added at the bottom for stability or visual balance.
They Make Art Easy to Rotate
Traditional framing is best for art you intend to display for years. Metal art clips are ideal when the collection changes with the season, the project, or your attention span. Open the clip, remove one sheet, add another, and your wall has a new personality before the coffee cools.
They Keep the Display Visually Light
Frames can make a small wall feel crowded, particularly when several pieces are grouped together. Clips add very little visual weight. The exposed paper edges and narrow hardware preserve a sense of openness, even in a dense gallery arrangement.
They Turn Functional Hardware Into Decoration
A matte-black binder clip looks graphic and industrial. A brass bulldog clip feels warmer and more refined. Stainless steel suits contemporary interiors, while aged metal introduces vintage character. The mechanism holding the artwork becomes a tiny piece of sculpture in its own right.
Choosing the Right Type of Metal Clip
Binder Clips
Standard binder clips are inexpensive, widely available, and strong enough for most lightweight prints. Their wire handles create a ready-made hanging loop that can rest on a nail, hook, or screw. Black clips provide high contrast, but white, brass-toned, copper, silver, and painted versions are also available.
Use small clips for postcards and snapshots, medium clips for letter-size drawings, and larger clips for posters. Oversized binder clips can look wonderfully dramatic, but stronger is not always better. A clip with excessive spring pressure may leave a permanent dent in delicate paper.
Bulldog Clips
Bulldog clips have broad, flat jaws and a curved metal loop. They usually create a cleaner, more architectural silhouette than traditional binder clips. Because the gripping surface is wide, they distribute pressure more evenly, making them useful for medium-size prints and lightweight calendars.
Clipboard and Drawing-Board Clamps
Salvaged clipboard clamps work well when you want the hardware to command attention. Mount a clamp directly to a strip of wood, a painted board, or a simple panel to create a reusable art station. This method is particularly effective for children’s artwork, schedules, sketches, and inspiration boards.
Magnetic Metal Clips
Magnetic clips are excellent on steel cabinets, metal doors, magnetic boards, and certain appliance panels. They require no wall holes and can be repositioned instantly. Test the magnet before trusting it with anything important, since holding power varies significantly.
Curtain Rings and Skirt-Hanger Clips
Metal rings with attached clamps can slide along a rod, wire, or narrow rail. They are useful for creating a horizontal display above a desk or along a hallway. Wooden pants hangers with metal clamps offer another variation, holding wider prints while adding a warm material to the composition. HGTV has used clip rails, display boards, and clamp-style hangers as flexible systems for rotating children’s art and photographs.
Vintage Industrial Clips
Old office clips, drafting clamps, receipt holders, and numbered metal fasteners can be decorative finds. Inspect vintage pieces carefully. Surface patina may be charming, but active rust, sharp edges, or oily residue can stain or tear paper. “Character” is lovely until it leaves an orange mustache across your favorite photograph.
How to Hang Art With Metal Clips
Step 1: Select Suitable Artwork
Clip displays are best for replaceable or moderately priced pieces: posters, digital prints, photocopies, magazine pages, maps, children’s drawings, calendars, typography, fabric swatches, and casual photographs. Valuable originals, fragile antique papers, signed editions, and irreplaceable family documents deserve preservation-grade framing rather than direct contact with a spring-loaded metal clamp.
Step 2: Choose the Display Location
Look for a wall that supports the scale of the art without exposing it to intense sunlight, cooking grease, steam, or frequent splashes. A home office, hallway, studio, bedroom, or sheltered reading corner usually works better than a damp bathroom or the wall beside a stove.
Step 3: Test the Clip Pressure
Place the clip on a scrap sheet of paper similar in thickness to the artwork. Leave it there for several minutes, remove it, and inspect the mark. When the jaws create a deep crease, place a narrow strip of acid-free card between the clip and the artwork to distribute pressure.
Step 4: Plan the Arrangement Before Making Holes
Lay the artwork on the floor or tape paper templates to the wall. This allows you to test spacing, scale, and balance without creating a constellation of regrettable nail holes. For a neat grid, keep the gaps consistent. For a looser salon arrangement, begin with the largest piece and build outward.
Gallery-wall guidance commonly recommends planning with templates or painter’s tape and positioning the visual center of a display near average eye level. The familiar 57-inch guideline is a useful starting point, not a sacred commandment handed down by the decorating gods. Adjust it around sofas, desks, staircases, and seated viewing areas.
Step 5: Install Wall Hardware Appropriate to the Surface
For a single lightweight paper print, a small picture nail or hook is often sufficient. Heavier clip rails and wood-mounted clamp systems may require screws, anchors, or attachment to a wall stud. Drywall, plaster, brick, tile, and concrete all behave differently, so match the fastener to the surface and the total weight of the display.
When a stud is unavailable, use a properly rated wall anchor rather than assuming drywall will politely hold everything forever. Hardware manufacturers and home-improvement guidance consistently emphasize observing weight limits and using anchors where the wall material cannot securely hold an ordinary screw.
Step 6: Clip, Hang, and Level the Art
Center one clip along the upper edge of a small piece. Larger paper may need two clips positioned equal distances from the sides. Hang the clip loops on the selected hooks, then use a small level or a phone’s level function to make final adjustments.
When a lightweight sheet curls or moves in drafts, attach a second clip at the bottom as a visual weight. The lower clip does not necessarily need to connect to the wall; sometimes its mass is enough to help the paper hang more smoothly.
Creative Metal Clip Art Display Ideas
The Minimal Single-Print Display
Hang one generous print from a substantial brass or black clip. Leave plenty of empty wall around it. This presentation works beautifully with botanical studies, architectural drawings, abstract posters, and black-and-white photography. The simplicity makes every detail visible, so center the clip carefully.
The Orderly Grid
Arrange nine or twelve similarly sized pieces in evenly spaced rows. Use identical clips to connect the collection visually. This is one of the easiest ways to make postcards, family photographs, or children’s drawings look curated rather than randomly accumulated.
The Studio Salon Wall
Combine sketches, photographs, notes, and small prints in different dimensions. Keep one element consistentperhaps all-black clips, a limited color palette, or aligned top edgesto prevent visual chaos. A successful eclectic display needs a quiet organizing principle, even when it pretends not to.
The Clip Rail
Mount several clips to a narrow wood strip, ruler, peg rail, or painted board. This creates a dedicated horizontal zone for rotating material. In a home office, the rail can hold reference images and project notes. In a child’s room, it becomes a continuously changing exhibition. In a kitchen, it can display recipe cards and grocery lists, although original art should remain safely away from splatters.
The Wire Gallery
Stretch coated picture wire or stainless cable between two secure anchors and attach prints with small metal clamps. Allow a little slack for a casual look or pull the line taut for a more structured arrangement. Bob Vila and other home-design sources have demonstrated similar wire, mesh, and clip systems for displaying photographs, cards, and lightweight decorative items.
The Layered Desk Display
Not every clip must hang directly on a wall. Attach art to standing clipboards, shallow ledges, wire grids, or metal easels, then overlap pieces at slightly different heights. The result resembles an artist’s working surface and can be rearranged without tools.
Matching Metal Clips to Your Interior Style
Industrial
Choose blackened steel, galvanized metal, exposed nails, and large utilitarian clips. Pair them with blueprint reproductions, technical drawings, monochrome photography, and raw wood. Concrete, brick, and dark-painted walls strengthen the workshop character.
Minimalist and Scandinavian-Inspired
Use slim silver or matte-white clips with abundant negative space. Limit the display to one or three pieces and favor pale walls, restrained typography, soft landscapes, or simple line drawings. Alignment matters more in a minimal arrangement because there are fewer objects available to distract from a crooked clip.
Warm Modern
Brass, bronze, or copper-toned clips soften the office-supply appearance. Combine them with cream paper, warm wood, terracotta accessories, woven textiles, and muted abstract art.
Vintage and Eclectic
Mix old drafting clips, flea-market paper ephemera, postcards, maps, and found photographs. Repetition still matters. Similar clip finishes or a unified paper palette can prevent the wall from looking like the contents of an antique-store drawer after a minor earthquake.
Colorful and Playful
Paint inexpensive clips or buy powder-coated versions in coordinating colors. This is especially effective in craft rooms and children’s spaces. Choose two or three recurring colors rather than using every shade in the box unless “joyful stationery explosion” is the official design brief.
Protecting Art From Clip Damage
The attractive informality of exposed artwork comes with a trade-off: the paper receives less protection from light, dust, humidity, pollutants, and physical contact. The Library of Congress advises minimizing light exposure, avoiding direct or intense light, maintaining a stable environment, and keeping works on paper away from vents and radiators. It also discourages using paper clips and other fasteners on collection materials.
Use Reproductions for Precious Images
Make a high-quality scan or photograph of an irreplaceable item and display the reproduction. Store the original flat in an appropriate enclosure. This provides the relaxed clip-hung appearance without asking a century-old document to live beside sunlight, dust, and an enthusiastic spring mechanism.
Add a Protective Buffer
Place a folded strip of acid-free paper or thin preservation board between the clip and the back of the artwork. Make the strip slightly wider than the clip jaws so the metal never touches the original surface.
Inspect Clips for Corrosion
Metal fasteners can corrode and stain paper. National Park Service conservation guidance notes that rusty paper clips and other attachments may leave stains, emboss the surface, or contribute to tearing. Check display hardware periodically, especially in humid climates, and replace any clip showing rust or roughness.
Rotate Light-Sensitive Art
Watercolors, inkjet prints, photographs, and many colored papers can fade under prolonged light. Smithsonian conservation resources emphasize that works on paper may require limited display periods and rotation to reduce damage from light, temperature, and humidity.
Common Mistakes to Avoid
- Using clips that are too strong: Heavy spring pressure can emboss, buckle, or tear thin paper.
- Hanging art in direct sunlight: The easy display is not worth permanently fading the image.
- Ignoring wall construction: A clip may be light, but a long wood rail carrying, buckle, or tear thin paper.
- Hanging art in direct sunlight: The easy display is not worth permanently fading the image.
- <strong twelve clips is not.
- Using rusty vintage hardware: Decorative patina should not transfer onto the paper.
- Overcrowding the arrangement: Exposed paper needs breathing room, particularly when edges curl.
- Mixing too many clip styles: One deliberate mismatch can be interesting; seventeen unrelated clamps can look like the office-supply drawer has achieved consciousness.
- Clipping valuable originals: Use archival framing or professional mounting for significant artwork.
Where Metal Clip Displays Work Best
Home offices: Use clips for sketches, reference photographs, calendars, and project inspiration. A rail above the desk keeps ideas visible without covering the work surface.
Children’s rooms: Create a rotating gallery that gives new artwork an immediate place of honor. Mount clips above a child’s reach when the hardware has sharp edges or strong springs.
Hallways: A repeated row of clips can turn a narrow passage into a family photo timeline or travel gallery.
Studios: Display color studies, fabric samples, typography, contact sheets, and works in progress. Here, the unfinished quality feels completely natural.
Bedrooms: Use a small, calm arrangement above a dresser or desk rather than installing heavy frames over the bed.
Rental homes: Lightweight clip displays can reduce the amount and size of wall hardware required. Removable hooks may work on suitable smooth surfaces, but application instructions and weight ratings should be followed carefully.
Conclusion: A Small Clip With Considerable Style
Metal clips succeed as art holders because they are practical without pretending not to be practical. Their springs, loops, handles, and jaws remain visible, transforming ordinary hardware into part of the composition. They allow art to be changed quickly, displayed economically, and arranged with a spontaneity that formal framing rarely provides.
The best metal clip art displays still involve thoughtful decisions. Match the clip to the size and fragility of the paper. Plan the spacing before installing hardware. Use a wall fastener appropriate to the surface. Protect artwork from pressure, rust, humidity, and strong light. Most importantly, reserve the technique for art that can safely remain exposed.
Done well, a clipped print does not look like artwork waiting for a frame. It looks complete on its owncasual, clever, and just industrial enough to suggest that someone in the home owns both a sketchbook and a very organized pencil drawer.
Field Notes: Real-World Experiences With Metal Clip Art Displays
The most successful clip installations usually begin with a temporary experiment. A homeowner hangs three inexpensive prints above a desk, intending to replace them with frames later. Several months pass, the frames never arrive, and nobody misses them. The exposed edges make the arrangement feel less formal, while the visible black clips echo the desk lamp and cabinet handles. What began as a placeholder becomes the preferred design.
A common discovery is that one clip does not behave the same way with every kind of paper. Heavy art paper may hang beautifully from a centered bulldog clip, remaining reasonably flat throughout the day. Thin printer paper often curls inward at the bottom corners. Adding a second decorative clip along the lower edge helps, but a better solution is sometimes to mount the print temporarily on a slightly heavier backing sheet. The backing adds structure without introducing a conventional frame.
Clip pressure is another lesson that tends to arrive after the first installation rather than before it. Standard binder clips can leave noticeable impressions on coated prints and soft cotton paper. A small protective strip of acid-free card dramatically reduces the problem. The strip remains hidden behind the art, costs almost nothing, and makes changing the display less nerve-racking.
In family spaces, a fixed row of clips often works better than a loose gallery wall. Five or six clamps attached to a painted wood strip give children a clear place to display new drawings. Because the positions never change, the wall remains orderly even when the artwork features six purple suns, a floating dog, and an interpretation of the family car that appears to have nineteen wheels. Rotating the art also becomes an activity rather than a decorating project.
Home-office installations reveal the value of separating decorative art from active reference material. One row can hold finished prints that remain in place for several months, while a lower rail carries swatches, sketches, and notes that change weekly. Using two clip sizes or finishes helps distinguish the permanent-looking layer from the working layer.
Vintage clips create the strongest character but demand the most inspection. A beautiful old clamp may have uneven jaws that grip one side more tightly than the other. Some leave dust clamp may have uneven jaws that grip one side more tightly than the other. Some, rust, or an oily residue on a test sheet. Cleaning may improve the hardware, but questionable clips are better used to hold replaceable reproductions than original drawings. A decorative object should never win an argument against the artwork it is supposed to support.
Spacing also changes how the idea is perceived. A single print hung from a clip can feel spare and gallery-like. Twelve prints crowded together without consistent alignment can feel temporary in the wrong way. Laying the collection on the floor, photographing the proposed arrangement, and measuring the gaps usually produces a more confident result. Even an informal wall benefits from evidence that someone made a decision.
Finally, rotating the display is more than a stylistic benefit. It encourages neglected photographs, stored sketches, postcards, and small prints to reenter daily life. The clips remove the friction of framing, so the collection can respond to seasons, travel memories, current projects, or simple changes in taste. That flexibility is the real pleasure of the method: the wall stops being a finished statement and becomes an evolving part of the home.