

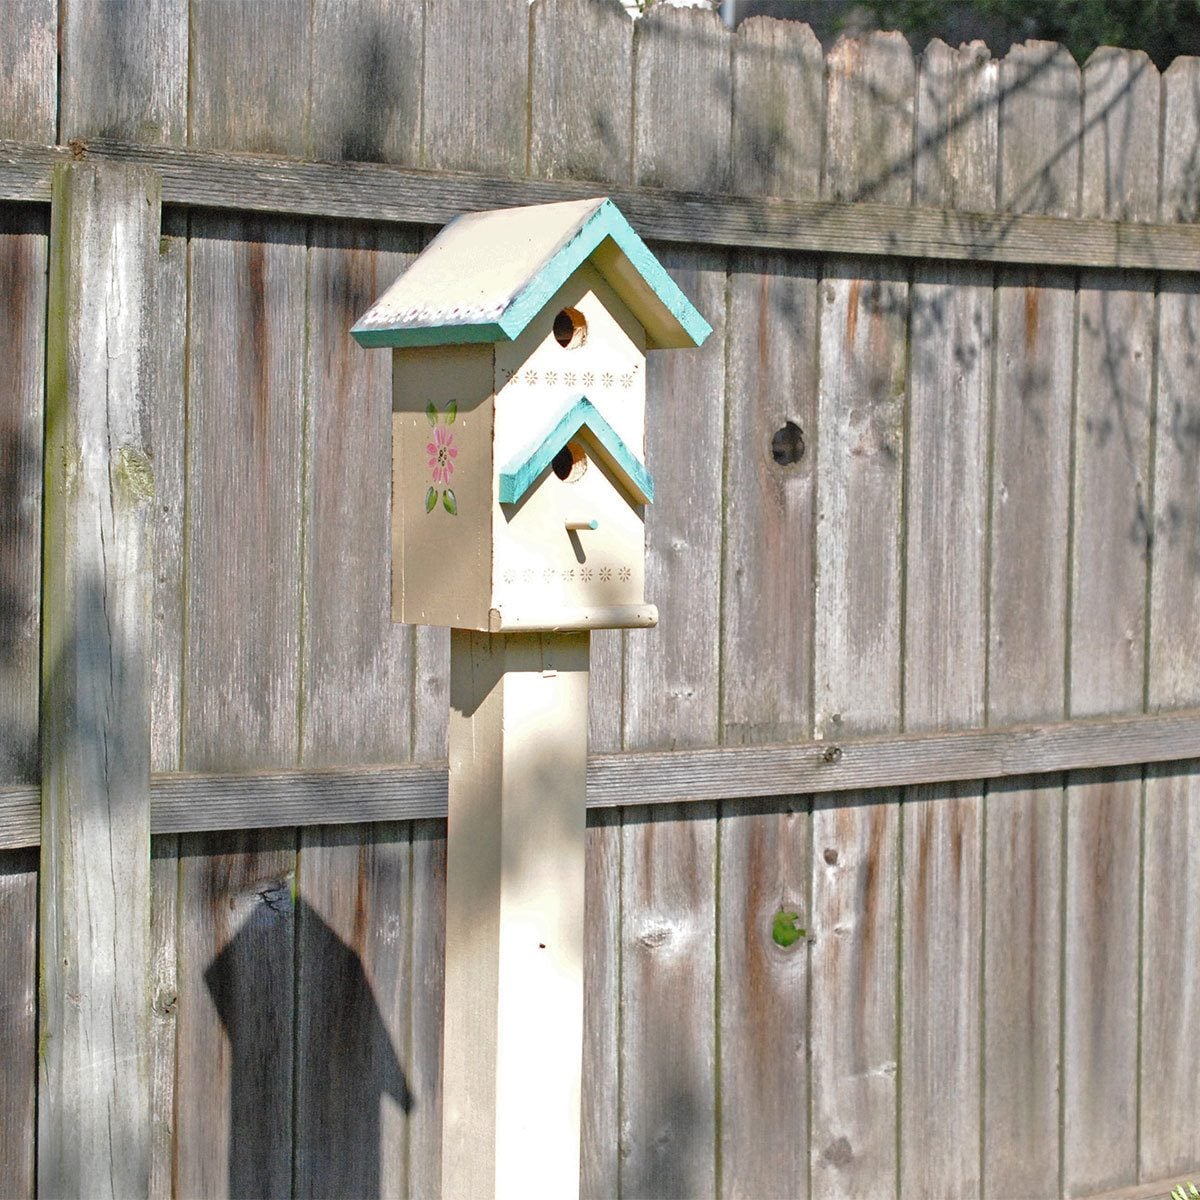
A birdhouse can be adorable, rustic, beautifully painted, and apparently approved by every aunt on Pinterest. But if it wobbles on a bad post, sits where predators can easily reach it, or faces a weekly blast of lawn-sprg how to install a birdhouse post is a straightforward DIY project, but a good installation requires more than digging a random hole and hoping gravity behaves itself. The post should be stable in wind, positioned for the bird species you want to attract, accessible for future maintenance, and designed with predator protection in mind.
This guide walks through the entire process, from selecting a location and choosing a post to digging, setting, leveling, mounting, and maintaining the birdhouse. We’ll also cover common mistakes and practical experiences that can save you from doing the project twicewhich is the traditional DIY way of learning, but not necessarily the most enjoyable one.
Why Install a Birdhouse on a Post?
Birdhouses can be attached to trees, buildings, fences, or freestanding supports. However, a birdhouse mounted on a post offers several important advantages.
Freestanding metal poles and suitable posts can make it easier to install predator guards or baffles. A carefully located pole can also place the nest box away from overhanging branches that may give snakes, squirrels, and other climbing animals another route to the box. NestWatch specifically recommends freestanding metal poles or PVC pipe systems as effective mounting options for many small nest boxes.
s you more freedom when selecting habitat. Instead of saying, “Well, that’s where the tree is, so I guess that’s where the birdhouse lives,” you can choose a site based on the needs of the target bird species.
Finally, a properly installed post can simplify monitoring and cleaning. Many small nest boxes are intentionally positioned at a manageable height so responsible homeowners can inspect and maintain them without performing circus acts on extension ladders.
Before You Install a Birdhouse Post
Choose the Bird Species You Want to Attract
Before selecting post height or location, think about the birds the house is designed for. Different cavity-nesting species have different preferences for entrance-hole dimensions, box height, habitat, and mounting location.
A bluebird box, for example, is generally placed in relatively open habitat. Boxes for some woodland species belong in more wooded surroundings. Larger birds, such as kestrels or screech-owls, require completely different boxes and mounting heights.
The National Wildlife Federation emphasizes matching the nest box design, entrance size, mounting height, and surrounding habitat to the target species. In other words, a decorative birdhouse is not automatically a functional nest box. Birds are not impressed by a tiny “Welcome Home” sign if the entrance hole is wrong.
dhouse
Before mounting anything, check that the birdhouse itself is suitable for nesting. A functional box should generally have ventilation, floor drainage, a weather-shedding roof, and a panel or door that opens for maintenance.
A perch below the entrance is usually unnecessary for common cavity-nesting songbirds. Wildlife organizations and extension specialists frequently discourage decorative perches because natural tree cavities do not need them and perches may make access easier for unwanted visitors.
Make sure screws are tight and the clean-out panel closes securely. It is much easier to repair a loose hinge while the birdhouse is sitting on your workbench than after it is mounted six feet in the air and occupied by an extremely judgmental wren.
Call 811 Before Digging
In the United States, contact 811 or your state 811 center before digging a post hole. The national 811 service coordinates the marking of approximate buried utility locations. This applies even to seemingly small residential digging projects.
Wait until utilities have responded to the locate request before breaking ground, then follow the instructions associated with the markings. Relocate the birdhouse post if necessary rather than discovering your gas line with a post-hole digger. That particular bird-watching story will not improve with repetition.
ials You’ll Need
The exact supplies depend on whether you’re installing a wood post or a metal pole. For a typical DIY wood-post installation, gather the following:
- Birdhouse or species-appropriate nest box
- Pressure-treated or naturally rot-resistant post, commonly a 4×4 for a decorative wood installation
- Post-hole digger or digging bar
- Shovel
- Tape measure
- 2-foot or longer level
- Exterior-rated screws or appropriate mounting hardware
- Drill and drill bits
- Crushed gravel
- Concrete mix, if required for your installation
- Mixing container or wheelbarrow
- Temporary wood braces and stakes
- Predator baffle or guard suitable for the post
- Work gloves and eye protection
For smaller nest boxes, a smooth metal pole or electrical conduit mounting system may be preferable to a bulky wooden post. The bird species, box design, local weather, soil, and predator concerns should guide your choice.
How To Install a Birdhouse Post Step by Step
Step 1: Select the Best Location
Start by studying your yard rather than immediately grabbing a shovel. The correct birdhouse location depends primarily on the species the nest box is intended to serve.
For a bluebird-style nest box, open lawns, fields, pastures, orchards, and similar habitats can be appropriate. Penn State Extension recommends mounting Eastern Bluebird boxes about four to six feet above the ground and facing them away from prevailing winds.
Avoid assuming there is one magical compass direction for every birdhouse in every climate. Habitat, weather exposure, shade, heat, and species requirements matter. In very hot locations, excessive solar heating can become a serious nest-box issue, so afternoon exposure deserves consideration.
If predator protection is a major goal, keep a pole-mounted birdhouse away from trees and overhanging branches that could create an alternate route to the box.
Step 2: Mark the Post Location
Once you’ve chosen the site and confirmed that digging is safe, mark the center of the post hole with landscape marking paint or a stake.
Stand back and look at the site from several directions. Check whether the post will interfere with mowing, irrigation, gates, walkways, vehicles, or future landscaping.
This 30-second inspection is surprisingly valuable. There is a special type of DIY sadness associated with perfectly setting a post in concrete and realizing your lawn mower no longer fits between it and the fence.
Step 3: Determine the Post-Hole Depth
Post depth depends on the post dimensions, soil, above-ground height, frost conditions, and local requirements. Major home-improvement installation guides commonly use a hole depth of roughly one-third of the above-ground post height, while also recommending installation below the local frost line when necessary.
For example, a six-foot above-ground post may require a hole around 30 inches deep in a typical installation. This is an example, not a universal measurement. Frost-line depth varies significantly across the United States.
For a species-specific metal pole installation, follow the mounting plan for that nest box. Penn State’s Eastern Bluebird guidance, for example, describes sinking the pole approximately two feet into the ground.
Post Hole
Use a post-hole digger to excavate the marked location. Keep the hole reasonably straight rather than allowing it to become a giant bowl at the surface.
For a conventional 4×4 post, DIY installation guidance commonly suggests a hole approximately three times the width of the post. Again, check local frost conditions and any applicable requirements before committing to a depth.
Remove loose soil from the bottom. If you encounter large rocks, a digging bar may help loosen them. Stop immediately if you find anything resembling a utility, conduit, cable, or unexplained pipe.
Do not participate in backyard archaeology with a shovel.
Step 5: Add Gravel for Drainage
Add several inches of gravel to the bottom of the post hole and tamp it. Lowe’s and Home Depot post-installation guidance commonly specifies roughly three to four inches of gravel in many wood-post applications.
The gravel helps provide drainage at the base. This is especially useful when installing a wood post, since prolonged moisture exposure encourages deterioration.
Measure the hole after adding gravel. You may need to remove additional soil to maintain the required post depth.
Step 6: Prepare the Post and Mounting Hardware
Before setting the post, consider installing any brackets that are easier to attach while the post is horizontal. Family Handyman’s birdhouse-post installation process similarly includes attaching brackets before placing and setting the post.
Predrill screw holes when necessary, particularly near wood edges. Use exterior-rated fasteners capable of handling outdoor moisture.
If your birdhouse has a back mounting board, determine whether it will screw directly to the post or to a separate bracket. The box needs to remain firmly attached during strong winds while still allowing access to its clean-out door.
Step 7: Set the Post in the Hole
Place the post on the gravel base. Hold a level against two adjacent sides and adjust the post until it is plumb in both directions.
Temporary braces make this much easier. Attach scrap boards to the post and secure the opposite ends with stakes. Recheck the level after installing the braces.
Do not trust your eyes. A post can look perfectly straight while leaning just enough to annoy you every time you see it from the kitchen window for the next nine years.
Step 8: Add Concrete if Needed
Whether concrete is necessary depends on the post system, soil, climate, and manufacturer’s instructions. A substantial decorative wood post carrying a large birdhouse may benefit from concrete support, while some specialized metal nest-box pole systems use different anchoring methods.
When using concrete, prepare the mix according to the concrete manufacturer’s instructions. Fill around the post while checking that the support remains plumb.
Work the concrete around the post to reduce large voids. At the top, shape the finished concrete so water does not collect against the wood. Some post-setting instructions recommend sloping the concrete surface away from the post.
Check the post with your level again. Then check it one more time. Wet concrete has a sneaky habit of moving posts approximately 12 seconds after you congratulate yourself.
Step 9: Let the Post Set
Allow the concrete to cure according to the product manufacturer’s instructions before attaching substantial weight or removing required bracing.
Do not rush this step just because the concrete looks hard on the surface. Cure time varies by product and conditions.
While waiting, inspect your birdhouse hardware, prepare the predator guard, and enjoy the brief DIY period when no one expects you to dig anything.
Step 10: Attach the Birdhouse
Position the birdhouse at the correct height for your target species. Use exterior screws or the mounting hardware specified for the nest box.
Ask a helper to hold the birdhouse while you level and fasten it, especially if the box is large. Avoid relying on one partially installed screw while the house swings around like a wooden helicopter.
Check that:
- The birdhouse is securely mounted.
- The roof can shed rain properly.
- The clean-out panel still opens.
- Drainage and ventilation holes are unobstructed.
- The entrance is not blocked by branches or decorations.
- No sharp screw points protrude into the nest cavity.
Some species-specific boxes are installed with a slight forward lean to help shed rain, but follow the design guidance for the actual nest box rather than applying this idea universally.
Step 11: Install a Predator Guard
A predator baffle may be the most important accessory on the entire birdhouse post.
NestWatch recommends a smooth pole combined with a predator guard or baffle as an effective strategy for discouraging climbing predators. Cone-shaped metal guards, stovepipe-style baffles, and species-specific guard systems are commonly used.
The correct guard design and position depend on the post and local predators. A guard installed too low or immediately beside a launching point may not accomplish much. Trees, fences, stacked firewood, patio furniture, and nearby structures can all create alternate access routes.
After installing the baffle, look at the setup from the perspective of an athletic raccoon with unlimited free time. It is a humbling design exercise.
Wood Post vs. Metal Pole: Which Is Better?
Wood Birdhouse Posts
A 4×4 wood post is sturdy and visually attractive. It works well in traditional gardens and can support decorative mounting brackets. Wood is also easy to drill and customize.
The disadvantages are moisture exposure and predator access. Wood is easier for some animals to climb than a smooth metal pole. A proper predator guard is especially important.
Metal Birdhouse Poles
Metal poles are popular for functional nest boxes because smooth surfaces can make climbing more difficult. Predator baffles are also relatively easy to incorporate into many pole systems.
Cornell’s NestWatch notes that freestanding metal poles and PVC mounting arrangements offer practical advantages for smaller boxes. Audubon bluebird guidance also describes metal conduit and rebar-based mounting systems.
For serious nest-box management, particularly for bluebirds, the less decorative metal pole may be the more functional choice. Birds, inconveniently, rarely coordinate their nesting decisions with your farmhouse aesthetic.
Common Birdhouse Post Installation Mistakes
Installing the Wrong House in the Wrong Habitat
A perfect post cannot compensate for a nest box that does not match the intended species. Research entrance-hole dimensions, habitat preferences, and mounting height before installation.
Mounting the Box Too Close to Predator Access
A baffle is not magical if squirrels or snakes can approach from a branch above the house. Study the entire area around the post.
Skipping the Level
A visibly leaning post looks unfinished and may place uneven stress on brackets. Level the post during setting and immediately after adding concrete.
Blocking the Clean-Out Door
Mounting screws and brackets should not prevent future maintenance. Test the access panel before finalizing the installation.
Using Indoor Fasteners
Outdoor moisture can quickly attack inappropriate hardware. Use exterior-rated screws or the hardware recommended for the birdhouse and post system.
Forgetting Future Yard Maintenance
Think about mowing, string trimming, irrigation, and landscaping. Leave enough working space around the post.
How To Maintain a Birdhouse and Post
Inspect the mounting system regularly, particularly after major storms. Check the post for movement, wood deterioration, corrosion, loose brackets, and damaged predator guards.
Clean nest boxes at an appropriate time between breeding seasons or according to species-specific guidance. Cornell and university extension resources recommend removing old nesting material and checking drainage, ventilation, screws, and hardware. Avoid repairing or cleaning a box while birds are actively nesting.
ng cleaning. Depending on conditions, additional personal protection may be appropriate. Remove old materials carefully, inspect the interior, and avoid casually spraying insecticides into a nesting box.
Also inspect the post at ground level. This area is particularly important on wood posts because moisture and soil contact can contribute to deterioration.
My Practical Experience Installing Birdhouse Posts: Lessons That Make the Job Easier
The biggest lesson from birdhouse-post projects is that the installation usually becomes difficult long before the birdhouse is attached. The glamorous part is putting the little wooden house on top. The real project is location planning, digging, drainage, leveling, and repeatedly walking backward while squinting at a post.
One of the most useful habits is to place the uninstalled post on the ground at the proposed site before digging. Then walk around the yard. Look from the patio, driveway, windows, garden beds, and mowing path. A location that seems perfect from three feet away may look ridiculous from the house or create a frustrating obstacle for lawn equipment.
I also treat the target bird species as the starting point, not the birdhouse design. Years ago, my natural DIY instinct would have been to buy the most attractive box, find a scenic corner, and install it. The better approach is the reverse: decide what cavity-nesting birds are realistic for the habitat, choose the correct box, then determine the placement.
The second practical lesson is to have every tool ready before mixing concrete. Concrete possesses a supernatural ability to create urgency. The moment the mix is ready, the level will be on the other side of the yard, the drill battery will die, and the temporary brace will suddenly reveal itself to be six inches too short.
I lay out the level, braces, screws, drill, tape measure, and stakes within reach before setting the post. I also test the braces in advance. This turns the leveling stage into a calm process instead of an improvised wrestling match with a 4×4.
Another lesson: check plumb from two directions. On one installation, a post looked beautifully straight from the front. From the side, it had the posture of a person checking a phone while walking. Two adjacent level checks would have caught the problem immediately.
Predator protection is another area where appearance can be misleading. A shiny metal baffle may look impressive, but the surrounding landscape matters just as much. One birdhouse location had a nearby fence rail that essentially provided an alternate route toward the box. Moving the post was simpler than trying to invent an anti-squirrel security system worthy of a spy movie.
Maintenance access deserves attention, too. I prefer installing small nest boxes at a species-appropriate height that also allows responsible monitoring without dangerous climbing. When attaching the house, I open the clean-out panel before tightening the final hardware. This simple test confirms that brackets, screws, and the post itself do not block the door.
Finally, resist the urge to decorate a functional nest box into uselessness. Tiny perches, elaborate trim, oversized signs, and thick layers of dark paint may look charming to humans but do not necessarily help birds. I have learned to separate “yard ornament” projects from “wildlife habitat” projects. Sometimes one object can be both, but bird needs should win every design argument.
A properly installed birdhouse post is satisfying because the finished project looks simple. That’s the quiet reward of good DIY work. The post stands straight, the box stays secure through bad weather, maintenance remains possible, and eventually a bird may move in without knowing you spent an entire afternoon debating whether the post leaned one-eighth of an inch to the west.
Conclusion
Learning how to install a birdhouse post is an approachable weekend DIY project, but thoughtful planning makes the difference between a decorative lawn feature and a useful nest-box installation.
Start with the bird species and choose an appropriate house. Contact 811 before digging. Select a stable post or pole, dig to a suitable depth for local conditions, provide drainage where appropriate, keep the support plumb, and use mounting hardware designed for outdoor exposure. Most importantly, consider predators and install an effective baffle or guard when needed.
Then maintain the box and post instead of treating installation day as the end of the project. A quick seasonal inspection can reveal loose screws, clogged drainage, damaged hardware, or a leaning post before minor problems become major repairs.
The birds probably won’t send a thank-you card. Still, watching a cavity-nesting bird inspect a house you installed is a pretty good rewardand significantly more exciting than watching concrete cure.
SEO Tags
Note: Birdhouse dimensions, entrance-hole size, mounting height, habitat, and placement should always be matched to the target bird species and local conditions. Check current species-specific nest-box recommendations before installation.