

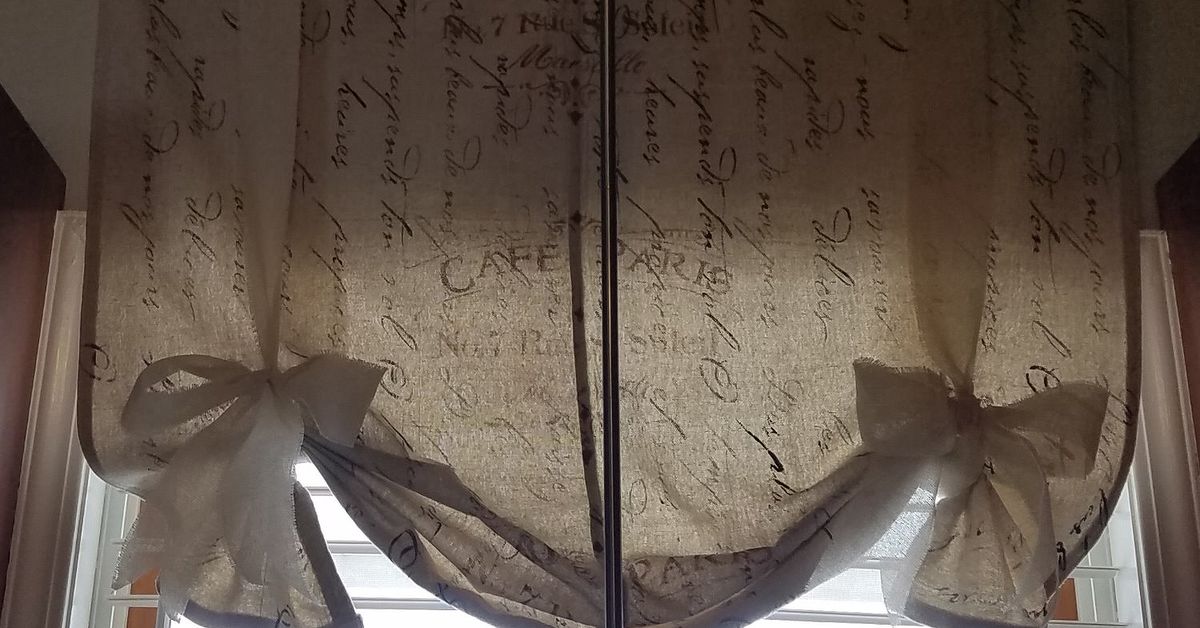
A canvas drop cloth usually enters a room with one humble assignment: lie down, keep quiet, and catch whatever the roller flings at it. It is the background actor of home improvementdependable, beige, and rarely invited into the “after” photos. Yet beneath that dusty worksite reputation is a large piece of sturdy fabric practically begging for a second career.
With washing, trimming, color, and a little nerve, an ordinary painter’s cloth can become relaxed curtains, a tailored-looking slipcover, graphic wall art, a bed canopy, a table skirt, or an outdoor privacy panel. The appeal is not merely that canvas drop cloths are affordable and widely available. Their neutral color, visible weave, useful weight, and generous dimensions give DIY decorators a forgiving foundation. The trick is to treat the cloth like real yardage rather than a disposable shield.
Why a Canvas Drop Cloth Makes Surprisingly Good Decor
Canvas drop cloths are designed to be durable, absorbent, washable, and reusable. Many are made with double-stitched hems, which can save time when a finished edge happens to land where a project needs one. Their weight also helps them hang more convincingly than thin craft fabric. Those practical qualities explain why decorators regularly repurpose them for curtains, cushions, slipcovers, and other hardworking home textiles.
The Beauty of the Imperfect Neutral
Drop cloth canvas is rarely a flawless, uniform cream. Slight color shifts, darker threads, and visible seams can add depth in farmhouse, coastal, cottage, industrial, or modern-organic rooms. Still, unfold the entire cloth before cutting and check for oily marks, holes, loose threads, odors, and inconvenient seam placement. A few slubs are character; a large dark blotch in the middle of a curtain is a conversation you do not want to keep having.
Not Every Drop Cloth Is the Same
For sewing, dyeing, or painting, look for a canvas or cotton-rich cloth without a plastic or polyethylene backing. A coated cloth is excellent at stopping leaks but poor at behaving like drapery. Fiber content matters because natural fibers and synthetics require different dyes and methods. Before buying several panels, read the label, compare color lots, and make sure the dimensions work after expected shrinkage and hemming. Rit’s dye guidance likewise begins with identifying fiber content and prewashing to remove finishes that can interfere with color absorption.
First, Give the Drop Cloth a Proper Spa Day
A dramatic makeover begins with an aggressively ordinary step: laundry. Prewashing removes dust and finishes while revealing how much the canvas will soften and shrink. Wash it separately with detergent, skip fabric softener, and dry according to the care label. Pull it from the dryer promptly and press it before cutting, taping, or stenciling.
Square It Before You Beautify It
Factory edges are not always perfectly square. Measure, mark a true rectangle, and trim only after deciding which original hems can be reused. For paired curtains, orient both panels the same way so the weave, seams, and color remain consistent.
Choose the Makeover Before Choosing the Paint
Decide how the cloth needs to move before decorating it. Curtains must fold, slipcovers must bend, and wall art can tolerate a heavier finish. Test paint or dye on an offcut, then wash, iron, and rub it against a white towel. This miniature rehearsal exposes bleeding, stiffness, weak adhesion, and unfortunate color choices before the full-size cloth becomes an extremely large regret.
Four Dramatic Makeovers That Actually Suit the Material
1. Relaxed Drop Cloth Curtains
Drop cloth curtains are the classic transformation because the material’s weight creates an easy, substantial drape. Ring clips provide the quickest no-sew installation. For a cleaner finish, sew a rod pocket, back tabs, or a header fitted with curtain tape. Hang the rod high and wide to visually enlarge the window, then choose a deliberate finished length: floating just above the floor, lightly breaking, or puddling. Curtains that stop awkwardly several inches above the floor tend to look accidental rather than tailored.
Lining can reduce light, hide visible seams, and improve drape; unlined panels create a softer filtered glow. A painted border, contrast stitching, or one oversized stripe adds a custom note without turning the window into a carnival tent.
2. A Striped or Stenciled Shower Curtain
A large canvas panel can become a long, dramatic shower curtain, especially when mounted near the ceiling. Use a separate waterproof liner because ordinary canvas is absorbent, not waterproof. Better Homes & Gardens has featured a custom striped shower curtain made from plastic-backed canvas, while This Old House recommends canvas drop cloth as a rustic, budget-friendly curtain material.
For stripes, press the cloth, measure from a fixed edge, and burnish painter’s tape firmly. Roll on several light coats of fabric paint, then remove the tape before the paint fully hardens. For stencils, place cardboard underneath and use an almost-dry brush or sponge; less paint gives sharper edges and softer fabric.
3. A Slipcover That Forgives Real Life
Canvas is particularly useful for casual chair and sofa covers because it is substantial, washable, and less precious than decorator fabric. A fitted slipcover requires patient pinning and sewing, but a loose cover can be shaped with tucks, ties, and strategically hidden safety pins. Bob Vila highlights the material’s affordability and weight for no-sew slipcovers, and This Old House has documented drop cloth used for a sewn window-seat cushion.
Preshrink the fabric, reinforce stress points, and keep bulky factory seams away from seat centers. Dark piping looks tailored; floor-skimming hems and arm ties feel relaxed. The goal is “European country house,” not “furniture hiding under a sheet during a thunderstorm.”
4. Oversized Wall Art or a Soft Headboard
A drop cloth can fill a large wall without the price tag of a giant framed print. Stretch it over a wood frame, staple it neatly at the back, and add a painted geometric design, broad color blocks, botanical stencils, or minimalist line art. Canvas naturally accepts graphic treatments, and large-scale paint projects become more interesting when texture remains visible through the color. BHG’s canvas-art and creative paint guidance supports experimenting with layered, dripped, striped, and dimensional effects.
For a headboard, wrap foam or batting with the cloth and secure it to a rigid panel. Tufting, nailhead trim, leather tabs, or a painted frame can refine the look. Anchor wall-mounted pieces securely so “dramatic makeover” does not become “dramatic midnight crash.”
Color Treatments: From Quietly Elevated to Full Theatrical Entrance
Dye for All-Over Color
Dye preserves flexibility better than a thick overall coat of paint. Match the dye to the fiber, use a container large enough for the cloth to move freely, and stir consistently. Natural-fiber methods commonly use hot water and salt for cotton or linen. Wet fabric looks darker than dry fabric, so judge patiently. For softer variation, try dip-dyeing, ombré, folding, or ice dyeing.
Paint for Pattern and Structure
Fabric paint is best for stripes, motifs, borders, and typography. Acrylic paint mixed with a textile medium can also work, but test the ratio and finished feel. Place a barrier under the cloth, secure it so it cannot shift, and build color gradually. Heat-set only according to the product instructions. A giant stencil may look simple on a mood board, but repeating it evenly across nine feet of fabric requires measuring, registration marks, and snacks.
Finishing Details That Make the Project Look Intentional
A makeover succeeds at the edges. Press hems before sewing, use a canvas-appropriate needle, and test tension on scraps. Fusible tape handles light-duty hems, although sewn seams usually tolerate washing and tension better.
Hardware contributes as much style as color. Matte black clips create an industrial contrast. Brass grommets add polish. Wood rings and leather tabs warm the neutral canvas. For outdoor privacy curtains, reinforced grommets and secure anchors are essential because a broad panel can behave like a sail. Bob Vila recommends grommets, hooks, or a rod with shower-curtain rings for hanging canvas privacy panels, while This Old House cautions that weather-resistant fabric is more durable than standard drop cloth for long-term outdoor exposure.
Common Drop Cloth Makeover Mistakes
- Skipping the prewash: The finished curtain shrinks, the hem rises, and suddenly the window appears to be wearing capri pants.
- Ignoring center seams: Factory seams can land in highly visible places. Plan the cut around them or feature them symmetrically.
- Using the wrong dye: Fiber content determines which dye and method will work.
- Applying too much paint: Heavy paint creates stiffness, cracking, and a plastic feel.
- Assuming canvas is waterproof: Standard drop cloth absorbs moisture and needs a liner or weather-resistant replacement in wet locations.
- Measuring only once: Large cloths stretch, shift, and shrink. Measure after washing, again before cutting, and once more before hemming.
- Trying to hide every irregularity: A little texture is the point. Perfect uniformity can make the project lose the relaxed character that made canvas appealing.
A Composite Makeover Experience: What the Project Teaches in Real Life
Consider a typical weekend project assembled from common DIY outcomes: two 6-by-9-foot canvas drop cloths are chosen for a pair of living-room curtains. At the store, both packages look identical. Once unfolded at home, one cloth is slightly warmer in color and has a center seam positioned three inches differently. Lesson one arrives before the washing machine starts: open every panel, compare them in daylight, and decide which sides will face the room.
After a warm wash and tumble dry, the fabric feels dramatically bettersofter, less dusty, and more like heavy linen from a distance. It also measures smaller. The original plan for a deep floor puddle quietly becomes a light break. That compromise improves the design, because the room is busy and the shorter finish looks cleaner. The experience confirms that preshrinking is not optional bookkeeping; it is part of designing with the actual material rather than the dimensions printed on the package.
The first paint test is less successful. A broad navy stripe looks crisp, but the roller carries too much paint, leaving a stiff patch. On the second swatch, excess paint is rolled off onto a tray, then applied in thin layers. The texture remains visible and the fabric still folds. The final design uses one 10-inch stripe near the lower third of each panel. It is bold enough to register across the room but simple enough to align without turning the floor into a geometry exam.
Ring clips make hanging fast, yet evenly spaced clips reveal another practical truth: tiny differences become obvious across a wide window. Marking clip positions with a measuring tape takes five extra minutes and improves the drape more than an expensive accessory would. Once mounted several inches above the window frame and extended beyond the trim, the panels make the opening look taller and wider. The plain beige cloth now reads as textured neutral fabric, while the navy stripe connects to a nearby rug.
The leftover canvas becomes the most satisfying part of the makeover. One offcut is sewn into a lumbar pillow, with the stripe running off-center. Another is stretched over a thrifted frame and painted with a loose abstract shape. A narrow strip becomes matching ties for a storage curtain under a console table. These smaller pieces make the room feel coordinated without looking like a matching furniture set escaped from a catalog.
The final result is not flawless. One original seam remains visible in strong afternoon light, and the painted borders are not microscopically identical. Neither issue matters once the curtains are hanging. What matters is proportion, repetition, and finish: washed fabric, intentional length, aligned pattern, pressed hems, and hardware that suits the room. The project’s biggest lesson is that humble material does not need to impersonate luxury fabric. It only needs a clear job, careful preparation, and one confident design move. The drop cloth keeps its rugged personality; it simply stops dressing like it is waiting for someone to repaint the ceiling.
Conclusion: Let the Drop Cloth Steal the Scene
A successful drop cloth makeover recognizes what canvas already does well: hang with weight, accept color, survive handling, cover large surfaces, and add relaxed texture. Choose uncoated fabric, wash before measuring, test every finish, and respect how the completed piece needs to move.
Whether the final act is a pair of striped curtains, a washable chair cover, oversized wall art, or a breezy privacy panel, restraint usually creates the strongest result. One bold stripe, one rich dye bath, one row of brass grommets, or one beautifully pressed hem can turn worksite beige into deliberate design. The once-drab drop cloth does not need sequins, a fog machine, or an emotional support chandelier. It just needs a plan.
Note: The project diary above is a composite scenario based on common drop cloth DIY methods and outcomes rather than a claim of one personally completed project. Always follow the care, dye, paint, tool, and installation instructions provided by the relevant manufacturers.