Camphor wood is not shy. It walks into a room with swirling grain, warm golden-brown color, dramatic figure, and a natural aroma that politely says, “Yes, I am the interesting one here.” If you want a coffee table that looks like it came from a boutique furniture studio but still has the soul of a weekend workshop project, a camphor coffee table is a brilliant choice.
This guide walks you through how to build an amazing camphor coffee table from planning to finishing. We will cover how to choose the right slab, flatten it, stabilize cracks, design a sturdy base, sand properly, apply a durable finish, and avoid the classic mistakes that turn a dream project into an expensive wooden pancake.
Whether you are working with a live edge camphor slab, a bookmatched top, or a smaller board-style layout, the goal is the same: build a coffee table that feels natural, polished, strong, and custom. The best part? Camphor already brings so much personality that you do not need to overdesign it. Your job is to help the wood look like the superstar it already thinks it is.
Why Camphor Wood Makes a Stunning Coffee Table
Camphor wood, often associated with camphor laurel, is valued in furniture making for its attractive grain, aromatic character, and workability. It is commonly used for furniture, cabinetry, chests, veneer, turned objects, and decorative pieces. For a coffee table, those qualities are especially helpful because the tabletop is both functional and highly visible.
A camphor coffee table can feel rustic, modern, coastal, Japanese-inspired, farmhouse, or luxury organic depending on the shape of the slab and the base you choose. A live edge slab with hairpin legs leans casual and contemporary. A thick slab with a black steel trapezoid base looks bold and architectural. A clean rectangular top with tapered wooden legs feels warm and mid-century. Camphor is flexible enough to play all those roles without complaining to the design manager.
Key Benefits of Camphor for Coffee Tables
- Beautiful figure: Camphor often has lively grain, color variation, and occasional burl-like movement.
- Natural aroma: The scent can add a distinctive sensory element, especially when the wood is freshly cut or sanded.
- Furniture-friendly use: Camphor is commonly used in cabinetry and furniture applications.
- Unique appearance: No two slabs look exactly alike, which makes the finished table feel custom.
- Works well with live edge designs: Natural edges highlight the organic personality of the wood.
Plan the Table Before You Buy the Slab
The fastest way to overspend on a slab is to fall in love before measuring your room. Yes, the eight-foot monster slab looks magnificent. No, it probably should not live in a small apartment unless your sofa plans to move out.
For most living rooms, a coffee table works well when it is about two-thirds the length of the sofa and roughly the same height as the sofa seat or slightly lower. A common finished height is between 16 and 18 inches, though modern low-profile designs may sit closer to 14 inches. Leave enough walking room around the table so people can pass without performing living-room parkour.
Recommended Coffee Table Dimensions
- Small room: 30–36 inches long, 18–22 inches wide
- Medium room: 40–48 inches long, 22–28 inches wide
- Large room: 50–60 inches long, 26–34 inches wide
- Typical height: 16–18 inches
- Top thickness: 1.5–2.5 inches after flattening is ideal for a bold slab look
Sketch the table before buying materials. Decide whether you want a live edge on one side, both sides, or a cleaner squared-off top. Also decide whether the base should disappear visually or become part of the design. Camphor is already expressive, so simple bases often work best.
Choose the Right Camphor Slab
The slab is the heart of the project. Choose carefully, because no amount of fancy finishing will fully rescue a slab that is twisted, wet, bug-damaged, or cracked in all the wrong places. Character cracks are charming. Structural cracks that threaten to split the table into two dramatic but useless pieces are less charming.
Look for a kiln-dried or properly air-dried camphor slab with a moisture content suitable for indoor furniture. For interior woodworking, many professionals aim for wood in the 6% to 8% moisture range, depending on local humidity and the final environment. If the slab is too wet, it can shrink, cup, twist, or crack after you build the table. Wood movement is not a rumor; it is wood’s favorite hobby.
What to Inspect Before Buying
- Moisture content: Use a moisture meter or ask the supplier for readings.
- Flatness: Sight down the slab to check for twist, bow, and cupping.
- Cracks: Small checks can be filled; deep splits may need bow ties or epoxy reinforcement.
- Soft spots: Avoid punky or crumbly areas unless you are comfortable stabilizing them.
- Thickness: Make sure there is enough thickness left after flattening.
- Grain direction: Choose a face with the most attractive figure for the top surface.
- Smell: Camphor’s aroma is part of the appeal, but make sure it is pleasant to you.
If you are new to slab furniture, buying a slab that has already been dried and surfaced by a reputable lumber supplier can save time and stress. Rough slabs are cheaper for a reason: they require more flattening, more sanding, and occasionally more emotional support.
Tools and Materials You Will Need
You do not need a museum-grade furniture shop to build a camphor coffee table, but you do need a realistic setup. A router sled is one of the most useful tools for flattening a slab that is too wide for a planer. If you do not own one, you can build a simple sled, rent shop time, or pay a local millwork shop to flatten the slab for you.
Tools
- Moisture meter
- Router and slab-flattening bit
- Router sled or flattening jig
- Random orbital sander
- Sandpaper from 80 to 320 grit
- Chisels or carving tools for cleaning bark and cracks
- Drill and bits
- Clamps
- Straightedge and measuring tape
- Level
- Brushes, rags, mixing cups, and spreaders
- Safety glasses, hearing protection, gloves, and a respirator suitable for dust and finishing work
Materials
- Camphor slab or boards
- Epoxy for filling cracks and voids
- Painter’s tape or sheathing tape
- Bow tie inlays if the slab has structural cracks
- Wood glue if building a laminated top
- Table legs or base hardware
- Threaded inserts or tabletop fasteners
- Finish: hardwax oil, polyurethane, oil-modified water-based finish, or wiping varnish
- Microfiber cloths or tack cloth
Step 1: Acclimate the Camphor Wood
Bring the slab into the room or workshop where it will be built and let it acclimate for at least several days, longer if the slab is thick or has recently moved between climates. Store it flat with stickers underneath so air can circulate on both sides. Do not lean it against a wall like a forgotten surfboard unless you enjoy surprise warping.
Check the moisture content in several places: near the ends, in the middle, near cracks, and on both faces if possible. A single reading does not tell the whole story. If the numbers are inconsistent, wait longer or ask a professional mill to evaluate the slab.
Step 2: Remove Bark and Clean the Live Edge
If your camphor slab has bark attached, decide whether to keep it. In most coffee table builds, bark is removed because it can loosen over time. A live edge does not mean “keep every crumb nature left behind.” It means preserve the natural outline while cleaning and stabilizing the edge.
Use a chisel, scraper, nylon brush, or small wire brush to remove loose bark and debris. Work carefully so you do not gouge the edge. Sand the live edge by hand to soften sharp spots while keeping its organic shape. The goal is a touchable edge, not a perfectly machined one.
Step 3: Flatten the Slab
Flattening is where the table starts becoming furniture instead of “large decorative lumber.” Wide slabs usually cannot go through a standard planer or jointer, so a router sled is a practical solution. The router rides across rails while a flattening bit removes high spots and creates a level surface.
Secure the slab firmly to your workbench. Shim it so it does not rock. Start with the top face and take shallow passes. Do not try to remove too much material at once. Router bits are powerful, but they are not magic wands, and they become deeply offended when forced to hog through hardwood like a lawn mower in a jungle.
After flattening one side, flip the slab and repeat the process on the underside. The final thickness should be consistent. Once both faces are flat, use a straightedge to check your work. Slight texture from the router can be sanded out later.
Step 4: Stabilize Cracks, Knots, and Voids
Cracks can add character, but they need to be managed. Small cracks and knots can be filled with epoxy. Larger cracks that continue through the slab may need bow tie inlays, also called butterfly keys, to help prevent the split from spreading.
Using Epoxy the Smart Way
Choose the right epoxy for the job. Tabletop epoxy is designed for thin coating layers, while deep-pour epoxy is formulated for thicker fills. For small voids, a clear or tinted low-viscosity epoxy works well. For larger cavities, follow the manufacturer’s maximum pour depth and cure-time instructions.
Before pouring epoxy, clean dust from the cracks and seal the underside with tape so resin does not leak onto the floor. Pour slowly, let bubbles rise, and avoid whipping air into the mixture while stirring. A thin seal coat can help reduce bubbles from porous wood. Work in a level, dust-controlled space and wear proper protective gear.
When to Add Bow Tie Inlays
Bow ties are both functional and decorative. They look great across a split, especially when made from contrasting wood such as walnut, maple, or ebonized hardwood. Route or chisel the recess, fit the bow tie snugly, glue it in place, then plane or sand it flush after the glue cures.
Do not scatter bow ties everywhere like confetti. One or two well-placed inlays can look intentional. Seven random bow ties can make the table look like it lost a fight with a craft store.
Step 5: Shape the Ends and Edges
Once the slab is flat and stabilized, decide how to treat the ends. You can cut them square for a clean modern look, angle them slightly for movement, or preserve an irregular natural end if the slab allows it. A track saw, circular saw with a straightedge, or handsaw can work depending on your tools and confidence.
Ease the edges with sandpaper, a block plane, or a small roundover bit. Coffee tables are touched constantly, so comfort matters. Sharp edges chip more easily and feel unfriendly. A tiny roundover can make the table feel finished without making it look soft or bulky.
Step 6: Sand Like You Mean It
Sanding is not glamorous, but it is where good projects become great ones. Start around 80 or 100 grit if router marks are visible. Move through 120, 150, 180, and 220 grit. For some finishes, stopping at 180 or 220 is ideal because going too fine can reduce finish absorption. Always follow the finish manufacturer’s recommendations.
Use pencil scribbles across the surface before each grit. Sand until the marks disappear, then move to the next grit. This simple trick prevents uneven sanding. Vacuum thoroughly between grits and inspect under raking light, which reveals scratches that normal overhead lighting hides like a sneaky little gremlin.
Sanding Tips for Camphor
- Do not skip grits; it usually creates more work later.
- Sand the live edge by hand to preserve its natural shape.
- Use dust collection and respiratory protection.
- Wipe with mineral spirits or water, depending on your finish system, to preview the grain.
- Let raised grain dry, then lightly sand again if using water-based products.
Step 7: Choose the Right Base
The base should support the slab physically and visually. Camphor can be visually busy, so many builders choose a simple base: black metal hairpin legs, steel trapezoid legs, a minimalist wooden frame, or a low sled base.
For a modern look, use matte black steel legs. For a warmer handmade look, build a wooden base from walnut, white oak, ash, or even camphor offcuts. For a floating effect, inset the base several inches from the edges. This makes the slab appear lighter, which is helpful if the top is thick.
Popular Base Options
- Hairpin legs: Affordable, easy, and casual.
- Trapezoid steel legs: Strong, modern, and great for heavy slabs.
- Wooden apron base: Classic, sturdy, and customizable.
- Sled base: Clean, stable, and excellent for contemporary interiors.
- Panel legs: Dramatic and sculptural, especially with waterfall-style designs.
Whatever base you choose, remember that solid wood moves with seasonal humidity. Avoid fastening the top in a way that traps the slab completely. Use slotted holes, Z-clips, figure-eight fasteners, elongated screw holes, or threaded inserts with room for movement. A solid slab needs freedom to expand and contract, not a permanent wrestling hold.
Step 8: Attach the Base Correctly
Turn the slab upside down on a padded surface. Position the base and check the overhang from every side. A common overhang is 3 to 6 inches, but it depends on the slab size and base style. Mark the mounting holes carefully.
For metal legs, threaded inserts are a clean and durable option. Drill straight pilot holes, install the inserts, and attach the legs with machine screws. For wood bases, use tabletop clips, wood buttons, or screws through elongated holes. Do not overtighten the hardware; snug is good, but crushing the wood fibers is not a personality trait we need in this project.
Before finishing, flip the table upright and test for wobble. If it rocks, adjust the legs, level the feet, or correct the base before applying the final finish. A wobbly coffee table will announce itself every time someone sets down a mug.
Step 9: Apply a Beautiful, Durable Finish
The finish should protect the camphor while showing off the grain. Coffee tables deal with cups, remotes, books, snacks, feet, and the occasional mysterious sticky spot no one in the house admits creating. Durability matters.
Good Finish Choices
- Hardwax oil: Natural look, easy repair, soft sheen.
- Oil-based polyurethane: Warm tone, strong protection, longer drying time.
- Water-based polyurethane: Clearer color, lower ambering, quick drying.
- Oil-modified water-based finish: A useful middle ground with warmth and faster drying.
- Wiping varnish: Easy application, controlled build, beginner-friendly.
If you love the natural color of camphor, test the finish on an offcut or underside first. Some finishes deepen the color dramatically. Others keep it lighter and more contemporary. Never test a finish for the first time on the top surface unless you enjoy suspense as a lifestyle.
Apply thin, even coats. Sand lightly between protective coats when recommended, usually with fine 220-grit or higher abrasive. Remove all dust before recoating. Let the finish cure fully before heavy use. Dry to the touch does not always mean cured. Treat the table gently at first, even if it looks ready for a magazine cover.
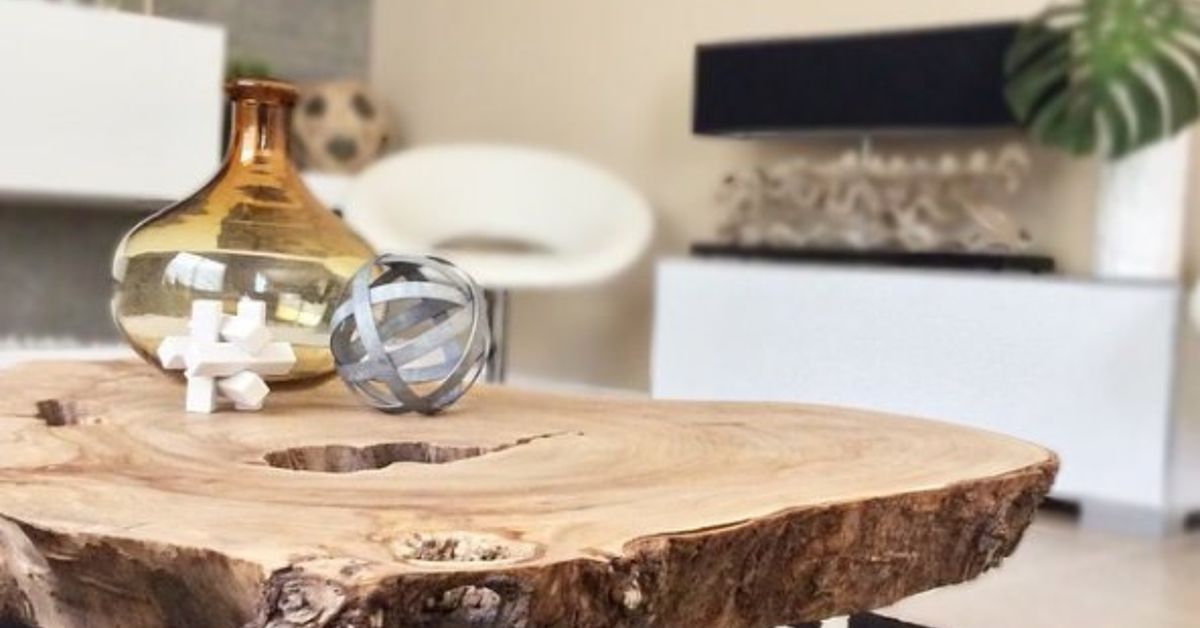
Step 10: Style and Maintain Your Camphor Coffee Table
Once the finish has cured, bring the table into your living room and let it do what camphor does best: steal attention politely. Keep styling simple. A tray, a small stack of books, a ceramic bowl, or a low plant is enough. Do not cover the entire surface; the wood grain is the main event.
For maintenance, wipe spills quickly, use coasters, and clean with a soft damp cloth. Avoid harsh cleaners unless your finish manufacturer specifically approves them. If the surface starts to look tired after years of use, many oil and hardwax finishes can be refreshed with light sanding and another coat. Film finishes like polyurethane may require more careful repair, but they also offer excellent everyday protection.
Common Mistakes to Avoid
Building With Wood That Is Too Wet
This is the big one. If the slab is not dry enough, the table may move after construction. That movement can cause cracks, cupping, finish failure, or gaps around inlays. Measure moisture before building.
Overfilling Every Natural Feature
Not every small line needs epoxy. Some natural checking adds charm. Fill defects that affect function, cleanliness, or structure. Leave subtle character alone when it makes the table more beautiful.
Using the Wrong Epoxy
Thin tabletop epoxy is not the same as deep-pour epoxy. Match the product to the depth and purpose of the fill. Follow mix ratios exactly. Epoxy is chemistry, not soup.
Skipping Test Boards
Always test stain, oil, polyurethane, or hardwax finish on scrap or the underside. Camphor’s color and grain can change dramatically when finished.
Ignoring Wood Movement
Screwing a slab tightly to a rigid base can cause problems later. Use fasteners that allow seasonal movement across the width of the top.
Design Ideas for an Amazing Camphor Coffee Table
If you want a showpiece, pair a thick live edge camphor slab with a black steel base and dark-tinted epoxy in the cracks. This creates a dramatic modern look without shouting. For a softer organic design, use clear epoxy, rounded edges, and a satin hardwax oil finish. For a mid-century style, cut the slab into a cleaner oval or rounded rectangle and add tapered wooden legs.
You can also build a two-board camphor top if a single slab is too expensive. Joint the boards carefully, glue them into a panel, and shape the outline after the glue cures. This approach gives you more control over dimensions while still showing off camphor’s grain.
For a high-end detail, chamfer the underside of the tabletop. This makes a thick slab look lighter from the side. It is a small design move with a big payoff, like putting on a good jacket before leaving the house.
Experience Notes: What Building a Camphor Coffee Table Teaches You
Building a camphor coffee table is one of those projects that teaches patience whether you invited patience or not. The first lesson is that the slab leads the design. You may begin with a perfect plan, but once you study the grain, cracks, live edge, knots, and color transitions, the wood usually suggests a better idea. A dramatic curve may become the front edge. A knot you planned to cut away may become the focal point. A crack may look like a flaw at first, then become the perfect place for a dark epoxy fill or a walnut bow tie.
The second lesson is that flattening takes longer than expected. A slab can look fairly flat until you put it under a straightedge. Then it reveals its tiny hills and valleys like a wooden topographic map. Router sled work is slow, dusty, and repetitive, but it is also satisfying. Each pass brings the surface closer to furniture. The trick is to avoid rushing. Shallow passes produce cleaner results and reduce stress on the router. Once the first face is flat, the whole project feels more possible.
The third lesson is that sanding is where your standards show. Most people notice the finish, but the finish only looks good because the sanding underneath is even. If you leave 80-grit scratches and cover them with oil, congratulations, you have made the scratches darker and more confident. Working through the grits carefully is not optional. It is the quiet discipline that makes the final table feel professional.
The fourth lesson is that epoxy rewards preparation. Tape every possible leak path. Level the slab. Mix slowly. Scrape the sides and bottom of the cup. Pour with patience. Tiny mistakes with epoxy can become permanent decorations, and not always the kind you brag about. Still, when the resin cures cleanly inside a camphor crack, it can look incrediblelike the table healed itself with a little design drama.
The fifth lesson is that the base changes everything. The same camphor slab can look rustic on chunky wooden legs, industrial on steel legs, or elegant on a recessed frame. Before drilling holes, test the base position with the slab upside down and then upright if possible. Small changes in overhang can make the table feel balanced or awkward. Trust your eye, but measure too. Your eye is artistic; your tape measure is sober.
The final lesson is that handmade furniture becomes personal fast. By the time the finish goes on, you know every curve and quirk in the slab. You remember the stubborn low spot, the crack that swallowed more epoxy than expected, and the edge you sanded by hand until it felt just right. That is the real appeal of building a camphor coffee table. You are not simply making a place to set coffee. You are building a functional centerpiece with a story, a scent, a grain pattern, and a little evidence that your hands were there.
Conclusion
Learning how to build an amazing camphor coffee table is really about respecting the wood. Camphor already brings beauty, aroma, color, and movement. Your job is to choose a stable slab, flatten it carefully, preserve the best natural features, reinforce weak areas, sand with patience, attach a base that allows wood movement, and finish it with protection that suits real life.
The best camphor coffee tables do not look overworked. They look intentional. They let the grain breathe, the live edge speak, and the craftsmanship quietly support the whole piece. Build it well, and your table will not just hold coffee. It will hold attention, start conversations, and possibly make your old store-bought furniture feel a little nervous.