A flower box is one of those rare DIY projects that gives you a lot of beauty for a very reasonable amount of effort. You do not need a professional workshop, a truck full of lumber, or the patience of a retired shipbuilder. With a few boards, basic tools, drainage holes, and the right planting mix, you can build a charming flower box that makes a porch, balcony, deck rail, patio, or window feel instantly more alive.
The best part? A handmade flower box is customizable. Store-bought planters can be lovely, but they do not always fit the exact space, style, or budget you have in mind. Building your own means you can choose the length, depth, finish, and overall look. Want a rustic cedar flower box for geraniums? Done. Prefer a crisp painted window box under the kitchen window? Also done. Want herbs close enough to snip while cooking? Congratulations, you have basically become the neighborhood garden genius.
This guide explains how to build a flower box in 5 simple steps, from measuring and cutting to drainage, finishing, and planting. The project is beginner-friendly, but the details matter. A flower box is not just a decorative wooden rectangle. It has to hold soil, handle water, support plant roots, survive weather, and avoid turning into a soggy little coffin for your petunias. Let’s build it properly.
Why Build a Flower Box Yourself?
Building a DIY flower box gives you control over size, materials, and design. If you have an odd window width, a narrow railing, or a small patio corner, custom sizing can make the difference between “that looks built-in” and “that planter is clearly trying its best.”
A homemade flower box can also be stronger than many lightweight plastic planters. When built with rot-resistant wood, exterior screws, and good drainage, it can last through multiple growing seasons. It also lets you choose safer, cleaner materials for edible herbs or flowers near your home. Cedar and redwood are popular choices because they naturally resist decay better than many softwoods. Pine is more affordable, but it needs a protective exterior finish if it will live outdoors.
Tools and Materials You Will Need
Before you start, gather your supplies. Nothing ruins a productive DIY mood faster than realizing you own three tape measures but zero exterior screws.
Basic Tools
- Tape measure
- Pencil
- Square or straightedge
- Circular saw, miter saw, or handsaw
- Power drill and drill bits
- Screwdriver bit
- Sandpaper or sanding block
- Clamps, if available
- Paintbrush or rag for finish
Recommended Materials
- One 1×8 board for the front and back
- One 1×6 or 1×8 board for the bottom
- One 1×8 board or scrap pieces for the side ends
- Exterior-grade screws
- Wood glue rated for exterior use, optional but helpful
- Landscape fabric or plastic liner with drainage holes
- Exterior paint, stain, or sealer
- Potting mix, not heavy garden soil
- Plants with similar sun and water needs
For a common window flower box, a length of 24 to 36 inches works well. A depth and height of about 7 to 8 inches gives many annual flowers and herbs enough room to grow without making the finished box too heavy. Remember: soil plus water gets heavy. A flower box may look innocent while empty, then turn into a small wooden gym weight after watering.
Step 1: Measure Your Space and Plan the Flower Box
The first step in building a flower box is measuring the area where it will sit or hang. If you are placing it on a deck, porch, or patio, decide how long and deep you want it to be. If you are making a window box, measure the window width and consider whether the flower box should match the exact width, extend slightly beyond the trim, or sit neatly inside the frame.
A balanced window box often looks best when it is close to the width of the window. For a freestanding patio flower box, you have more flexibility. Just keep the weight in mind. A very long planter may need extra bottom support or thicker lumber.
Suggested Beginner Size
A simple beginner-friendly flower box can be built with these dimensions:
- Length: 30 inches
- Height: 7 1/4 inches
- Depth: 7 1/4 inches
This size is roomy enough for several small flowering plants, compact herbs, or a mix of trailing and upright plants. It is also manageable for cutting, assembling, lifting, and mounting.
Plan for Drainage Before You Build
Drainage is not a bonus feature. It is the difference between healthy roots and a swamp-themed tragedy. Flower boxes need holes in the bottom so excess water can escape. Without drainage, water sits around the roots, air disappears from the soil, and plants can decline quickly.
Plan to drill several drainage holes in the bottom panel. A good rule is to place holes evenly across the base, with more holes for longer boxes. You can also raise the finished box slightly on small feet or spacers if it will sit on a flat surface. This helps water leave the box instead of collecting underneath.
Step 2: Cut the Wood Pieces
Once you have your measurements, mark the lumber carefully. Use a square to draw straight cut lines. Measure twice, cut once, and then measure again because wood has a mischievous personality.
For a 30-inch flower box, cut the following pieces:
- Front board: 30 inches long
- Back board: 30 inches long
- Bottom board: 30 inches long
- Two side boards: cut to match the width and height of the box
If you are using standard 1×8 boards, the actual width is usually about 7 1/4 inches. That makes the build simple because the board width can become the height of the flower box. If your bottom board sits between the front and back boards, account for the thickness of the lumber when cutting the side pieces. If the front, back, and sides wrap around the bottom, cut accordingly.
Sand the Edges
After cutting, sand all rough edges. This step makes the box nicer to handle and helps paint or stain adhere more evenly. Focus on the top edges, corners, and any splintery spots. You do not need furniture-grade perfection. This is a flower box, not a violin. Smooth and safe is the goal.
Step 3: Assemble the Box
Lay out the front, back, side, and bottom pieces on a flat surface. Dry-fit everything before adding screws. This quick test shows whether the boards line up correctly and gives you a chance to fix mistakes before they become “rustic charm.”
Start by attaching one side piece to the front board. Drill pilot holes first to reduce the chance of splitting the wood. Add exterior wood glue if you want extra strength, then drive screws through the front board into the side piece. Repeat with the other side. Next, attach the back board, forming a rectangular frame.
Place the bottom board into position and secure it with screws along the front, back, and sides. Make sure it sits firmly. The bottom carries the weight of potting mix, water, and plants, so do not treat it like an afterthought. If your box is longer than 36 inches, consider adding a center support cleat underneath.
Use Exterior Screws
Outdoor planters deal with moisture, temperature changes, and repeated watering. Interior screws can rust quickly and weaken. Exterior-grade screws are a small investment that helps the flower box last longer. Stainless steel or coated deck screws are good options for outdoor use.
Check for Square
Before all screws are fully tightened, check that the box is square. Measure diagonally from corner to corner. If both diagonal measurements are equal, the box is square. If not, gently nudge it into position. A slightly imperfect flower box will still hold flowers, but a square box looks cleaner and mounts more easily.
Step 4: Drill Drainage Holes and Add a Protective Finish
Turn the assembled flower box upside down and drill drainage holes in the bottom. For a 30-inch box, six to eight evenly spaced holes are usually a practical starting point. Use a drill bit around 3/8 inch to 1/2 inch wide. The goal is to let excess water escape while keeping the bottom strong.
Some people add rocks to the bottom of planters, but modern container gardening advice generally favors using a quality potting mix and proper drainage holes instead. Rocks can add unnecessary weight and may not improve drainage the way many gardeners expect. In a flower box, lighter is usually better, especially if it will hang below a window or sit on a railing.
Line the Inside
A liner can help protect the wood from constant contact with moist potting mix. Use landscape fabric, a plastic liner, or a heavy-duty planter insert. If using plastic, make sure it has holes that line up with the drainage holes in the box. Do not seal the inside so tightly that water cannot escape. That would be like giving your plants rain boots and then filling the boots with soup.
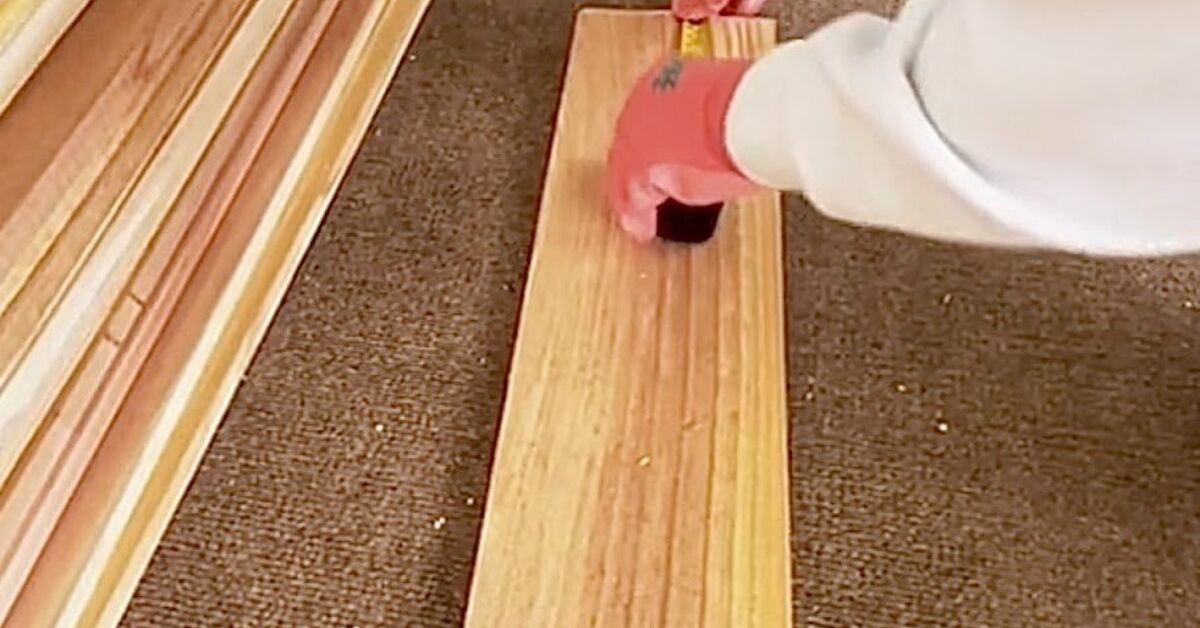
Finish the Outside
Apply exterior paint, stain, or sealer to the outside of the flower box. If you want a natural look, use an outdoor-rated clear sealer. If you prefer color, exterior paint can help match trim, shutters, railings, or patio furniture.
Let the finish dry according to the product instructions before planting. This is especially important if you are growing herbs or edible plants. Avoid using finishes not intended for outdoor planters, and keep strong coatings away from the planting surface unless the product is appropriate for that use.
Step 5: Fill, Plant, and Place Your Flower Box
Now comes the fun part: making the box look like it belongs in a gardening magazine instead of a lumber aisle. Start with a lightweight potting mix designed for containers. Do not use dense soil dug from the yard. Garden soil can compact in containers, drain poorly, and make it harder for roots to get oxygen.
Fill the box about two-thirds full with potting mix. Arrange your plants while they are still in their nursery pots so you can preview the design. Once you like the layout, remove each plant gently, loosen tight roots if needed, and plant at the same depth it was growing in its original container. Fill gaps with more potting mix and press lightly.
Use the Thriller, Filler, and Spiller Method
A classic container design trick is the “thriller, filler, and spiller” method. The thriller is the tall or dramatic plant, such as salvia, ornamental grass, or a bold geranium. Fillers are medium-height plants that add fullness, such as petunias, begonias, marigolds, or coleus. Spillers trail over the edge, such as sweet potato vine, ivy, creeping Jenny, or trailing lobelia.
This formula works because it creates height, volume, and movement. It also prevents the dreaded “three lonely flowers in a wooden shoebox” look.
Choose Plants for the Right Light
Match plants to the amount of sunlight your flower box receives. For full sun, consider petunias, geraniums, calibrachoa, marigolds, lantana, verbena, lavender, thyme, or rosemary. For part shade, try begonias, impatiens, coleus, fuchsia, parsley, mint, or shade-tolerant trailing plants.
Do not mix plants with completely different needs in the same box. A cactus and an impatiens may both be charming, but one wants dry conditions and the other wants steady moisture. That relationship is not built to last.
How to Mount a Window Flower Box Safely
If your flower box will sit on a patio or porch, placement is simple. If it will hang under a window, take mounting seriously. A planted flower box is heavy, especially after watering. Use sturdy brackets rated for the expected weight, and choose fasteners that match the wall material.
For wood siding or framing, exterior screws must reach solid structure, not just thin trim. For brick or masonry, use appropriate masonry anchors. For vinyl siding, avoid crushing or trapping moisture behind the siding. When in doubt, ask a hardware specialist or experienced builder for guidance. A falling flower box is not curb appeal; it is a gravity announcement.
Flower Box Care Tips After Building
Water Deeply and Let Excess Drain
Container plants dry out faster than garden beds because they have limited soil volume. Water until moisture reaches the bottom and drains out. In hot weather, a flower box may need water daily. In cooler weather, it may need much less. Check by touching the potting mix about an inch below the surface. If it feels dry, water.
Feed During the Growing Season
Frequent watering can wash nutrients out of container mix over time. A slow-release fertilizer mixed into the potting mix at planting can help. Many flowering annuals also benefit from regular feeding with an all-purpose fertilizer during the growing season. Always follow label directions. More fertilizer is not more love; sometimes it is just plant chaos in granular form.
Deadhead and Trim
Remove faded flowers to encourage more blooms. Trim trailing plants when they get too long or start looking tired. If one plant begins bullying the rest of the box, cut it back. Gardening is peaceful, but occasionally you must be the referee.
Common Mistakes to Avoid
Skipping Drainage Holes
This is the biggest mistake. A flower box without drainage is a decorative bathtub. Roots need both water and air. Give extra water a way out.
Using Heavy Garden Soil
Garden soil may work beautifully in the ground, but containers need a mix that drains well, holds some moisture, and stays loose enough for roots. Use potting mix labeled for containers.
Building Too Large Without Support
A long flower box looks impressive, but wet soil is heavy. Add support brackets, bottom cleats, or dividers for longer boxes.
Mixing Sun and Shade Plants
Plants sharing one box should enjoy similar light and water conditions. Otherwise, one group thrives while the other quietly files a complaint.
Ignoring Maintenance
A flower box is low-maintenance, not no-maintenance. Water, feed, trim, and refresh plants as the season changes.
Best Flowers and Herbs for a DIY Flower Box
For sunny spots, choose colorful annuals such as petunias, geraniums, zinnias, verbena, marigolds, and calibrachoa. These plants provide long-lasting color and can handle bright conditions when watered properly.
For shady or partly shaded boxes, try begonias, impatiens, coleus, fuchsia, torenia, and caladium. These plants bring color through foliage and flowers without needing full afternoon sun.
For an edible flower box, plant herbs such as basil, parsley, thyme, chives, oregano, mint, and rosemary. Keep aggressive herbs like mint in a separate pot or give them room, because mint behaves like it owns the property.
Real-Life Experience: What Building a Flower Box Teaches You
The first thing you learn when building a flower box is that “simple” does not mean “careless.” The project is absolutely beginner-friendly, but every small decision affects the final result. A straight cut makes assembly easier. A pilot hole prevents splitting. A drainage hole saves roots. A decent potting mix keeps plants from sulking two weeks after planting. The flower box may be small, but it is a complete little ecosystem with walls.
One practical experience many DIYers have is realizing that the box looks much bigger indoors than it does outside. A 30-inch wooden flower box on a workbench can seem enormous, like you accidentally built a tiny canoe. But once it sits below a window or along a porch rail, it usually looks just right. Outdoor scale is different. Houses, railings, and patios can visually swallow small decor, so do not be afraid of a box with some presence.
Another lesson is that sanding matters more than expected. Rough edges catch hands, snag liners, and make paint look messy. Five extra minutes with sandpaper can make the finished flower box feel intentional instead of rushed. The same goes for paint or stain. A plain wooden box can be beautiful, but a finish helps connect it to the home. White paint can look classic under a window. Dark stain can feel rustic and grounded. A bright color can turn a basic planter into the happiest object on the porch.
Planting also teaches restraint. At the garden center, every flower looks like it deserves a starring role. Then you get home and discover that fifteen plants do not fit into one modest flower box unless you are training them for public transportation. Start with fewer plants than you think you need. Give them space to grow. Within a few weeks, healthy annuals often fill in beautifully.
Watering is the habit that separates a thriving flower box from a crispy memory. Boxes in full sun dry quickly, especially on windy balconies or hot decks. The best routine is simple: check the soil with your finger, water deeply when dry, and let the extra drain away. Shallow sprinkling does not help much because roots need moisture throughout the mix, not just a polite mist on top.
Over time, a flower box becomes more than a project. It becomes part of the daily rhythm of the home. You notice new buds while carrying groceries. You pinch off faded blooms while talking on the phone. You snip basil for dinner and feel unusually proud of yourself. A DIY flower box rewards attention without demanding your entire weekend. It is small-scale gardening with big emotional returns.
The best experience of all is seeing something you built become more beautiful as plants grow into it. Many DIY projects look their best the moment they are finished. A flower box is different. It improves with time. The wood settles into the space, the plants spill over the edges, and the whole thing starts to look like it has always belonged there. That is the quiet magic of building one yourself.
Conclusion
Learning how to build a flower box in 5 simple steps is a practical, satisfying way to upgrade your outdoor space. Measure carefully, cut cleanly, assemble with exterior screws, drill proper drainage holes, protect the wood, and use a quality potting mix. From there, the plants take over and do what plants do best: make everything look more alive.
Whether you mount your flower box below a window, place it on a porch, or use it to grow herbs near the kitchen, the project offers a perfect blend of woodworking and gardening. It is affordable, customizable, and forgiving enough for beginners. Build it well, plant it wisely, and maintain it with regular watering and trimming. Your reward is a cheerful, blooming box that adds curb appeal, color, and a little daily joy.