A DIY yellow Swedish clock is the kind of project that politely says, “I have taste,” while also loudly whispering, “Yes, I made this, please ask me about it.” Inspired by Swedish Mora clocks, Gustavian furniture, Scandinavian simplicity, and the cheerful charm of a warm yellow finish, this handmade clock can turn an ordinary wall into a small design moment.
The best part? You do not need to be a master clockmaker from 18th-century Sweden. You need a clock movement kit, a wooden base, a good eye for proportion, patient paint prep, and the emotional strength to wait for paint to dry without poking it every four minutes. This guide walks you through the design ideas, materials, building process, color choices, styling tips, and real-world lessons behind creating a beautiful DIY yellow Swedish clock for your home.
What Is a Yellow Swedish Clock?
A yellow Swedish clock is not one single official object. It is more of a design idea: a clock inspired by Swedish craftsmanship, soft Scandinavian interiors, Gustavian painted furniture, and the graceful curves of traditional Mora clocks. Mora clocks originated in the town of Mora in Sweden’s Dalarna region and became known for their tall bodies, rounded forms, painted finishes, and elegant country-house personality.
For a DIY version, you can borrow the spirit without building a full floor-standing clock. A wall clock, tabletop clock, or slim decorative clock panel can still capture the Swedish look. The yellow finish gives it a sunny, modern twist. Instead of heavy ornamentation, the design focuses on gentle curves, useful function, warm color, and handmade character.
Why Yellow Works So Well in Swedish-Inspired Decor
Scandinavian design is often associated with white walls, pale wood, cozy textiles, and calm rooms that look like they drink herbal tea and never lose their keys. But Swedish interiors also have a long history of painted furniture. Soft yellows, creams, grays, blues, and muted greens can brighten a space without overwhelming it.
Yellow is especially effective because it adds warmth. A pale butter yellow feels vintage and gentle. A golden yellow feels cheerful and traditional. A mustard yellow feels earthy and modern. For a Swedish-style clock, the sweet spot is usually somewhere between soft ochre and buttery cream. You want the color to feel aged, collected, and charmingnot like a highlighter escaped from a backpack.
Design Inspiration: Mora Clocks, Gustavian Style, and Scandinavian Simplicity
The Mora Clock Influence
Traditional Mora clocks are famous for their curvy longcase silhouettes. Many have a rounded belly, a narrow waist, and a domed or arched top. Their shape is friendly and sculptural, almost like furniture with a personality. When creating a DIY yellow Swedish clock, you can reference that shape in a simplified way.
For example, instead of making a full standing clock, cut a tall wooden panel with an arched top. Add a round clock face near the upper third. Paint the body yellow, then lightly distress the edges for a timeworn look. Suddenly, your project has Swedish country charm without requiring a dedicated corner, advanced joinery, or an apology letter to your weekend.
The Gustavian Furniture Look
Gustavian style developed in Sweden in the late 18th century and is known for restrained elegance, pale painted wood, simple carved details, and a lighter interpretation of European neoclassical design. For a DIY clock, that means you can add subtle decorative features: thin molding, beaded trim, a small carved appliqué, or hand-painted accents.
The trick is restraint. Gustavian-inspired decor looks refined because it knows when to stop. A small gold line around the clock face? Lovely. A few delicate leaf motifs? Beautiful. Twelve different stencils, fake jewels, and a rooster wearing a crown? That clock has joined the circus.
Materials You Will Need
Before starting, gather your supplies. A well-planned project is much more relaxing than discovering halfway through that your clock hands are too long, your paint brush sheds like a nervous golden retriever, or your screw is missing because it has entered another dimension.
Basic Supplies
- Wooden clock base, plywood panel, pine board, or unfinished wooden plaque
- Quartz clock movement kit with hands
- Drill and drill bit sized for the clock movement shaft
- Sandpaper in medium and fine grits
- Wood filler, if needed
- Primer suitable for wood
- Yellow paint in matte, satin, or eggshell finish
- Small paint brush or foam roller
- Clear protective topcoat
- Painter’s tape
- Ruler, pencil, compass, or round template
- Optional trim, molding, stencils, wax, glaze, or gold paint
Choosing the Right Clock Movement
The clock movement is the small mechanism that sits behind the clock face and turns the hands. Most DIY clock kits use battery-powered quartz movements, which are affordable, easy to install, and reliable for decorative projects.
Pay close attention to shaft length. The threaded shaft must be long enough to pass through your clock face and still allow the washer, nut, and hands to attach securely. If your wooden base is thick, choose a movement with a longer shaft. If the shaft is too short, the hands will not attach correctly. If it is wildly too long, the clock may look awkward from the side, like it is hiding a tiny backpack.
Step-by-Step: How to Make a DIY Yellow Swedish Clock
Step 1: Pick the Clock Shape
Start with the overall silhouette. A simple round wall clock is easiest, but a Swedish-inspired design benefits from a little shape. Consider an arched rectangle, an oval panel, a shield-like form, or a tall narrow board with a curved top. These shapes echo antique Swedish clocks without copying them exactly.
If you are a beginner, buy an unfinished wooden plaque from a craft store. If you are comfortable cutting wood, draw your design on plywood or pine and cut it carefully. Sand the edges smooth so the clock feels finished rather than “I fought a board and the board won.”
Step 2: Mark the Center for the Clock Face
Decide where the hands should sit. On a round clock, this is easy: mark the center. On a tall Swedish-style panel, place the clock face near the upper third. This creates a more traditional longcase-inspired proportion.
Use a ruler to measure from side to side and top to bottom. Mark lightly with pencil. Hold the clock hands over the surface before drilling to make sure they fit comfortably within the face area. The minute hand should have enough room to rotate without hitting trim, raised numbers, or decorative details.
Step 3: Drill the Hole
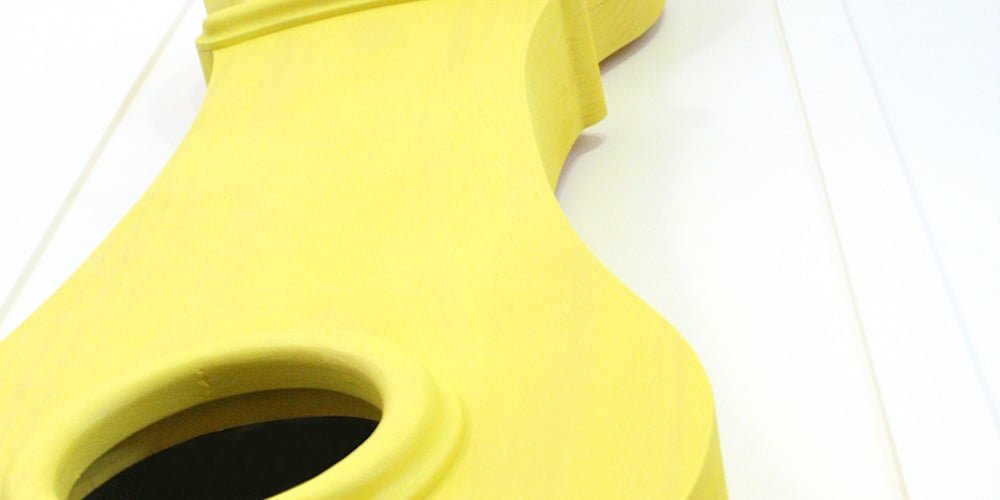
Drill a clean hole where the clock movement shaft will pass through. Use a bit that matches the kit instructions. Drill slowly and support the wood from behind to reduce splintering. Sand around the hole afterward.
This is also a good moment to test-fit the movement. Slide the shaft through the hole and confirm that the hardware can tighten properly. Do not wait until the clock is painted and sealed to discover the hole is too small. That is how DIY projects learn new curse words.
Step 4: Sand and Prep the Wood
Good paint begins with good preparation. Sand the surface so it feels smooth, but not polished like glass. Paint needs a little texture to grip. Fill cracks, dents, or unwanted gaps with wood filler, let it dry, and sand again.
Wipe away dust with a tack cloth or slightly damp cloth. Dust left on the surface can create bumps in the paint. Those bumps will annoy you forever because you made the clock, so you will know exactly where they are.
Step 5: Prime the Surface
Primer helps paint adhere evenly and keeps the yellow color from looking blotchy. This is especially useful on raw wood, which can absorb paint unevenly. Apply a thin coat of primer and let it dry according to the product directions.
After the primer dries, lightly sand with fine-grit sandpaper. This gives you a smoother final finish. Wipe away dust before painting.
Step 6: Paint It Swedish Yellow
Now comes the fun part. Choose a yellow that supports the Swedish-inspired mood. Pale butter yellow works beautifully for cottage style. Warm ochre adds antique character. Soft golden yellow pairs well with white walls, natural wood, blue accents, and linen textures.
Apply two thin coats instead of one thick coat. Thick paint can drip, pool around trim, or dry unevenly. Thin coats look more professional and reduce brush marks. Let each coat dry fully before adding the next. Yes, waiting is boring. Unfortunately, paint has never cared about our feelings.
Step 7: Add Swedish-Inspired Details
Once the yellow base is dry, add details. You can paint a soft white or cream circle for the dial area. Roman numerals create an antique look, while simple black Arabic numbers feel cleaner and easier to read. For a rustic Swedish look, keep the numbers slightly imperfect, as if the clock was painted by hand in a cozy workshop with excellent coffee.
Optional decorative ideas include:
- A thin gold ring around the clock face
- Small floral or leaf motifs near the top
- Light distressing on edges
- A soft brown glaze to create aged depth
- White dry brushing for a faded Gustavian look
- Simple wood trim painted the same yellow
Step 8: Seal the Finish
A clear topcoat protects your paint from scratches and handling. Choose matte or satin if you want an antique look. Gloss can work for a modern clock, but it may feel less Swedish country and more “freshly dipped in candy shell.”
Apply the topcoat lightly and evenly. Avoid heavy buildup around the hole where the movement shaft will sit. Let everything cure completely before final assembly.
Step 9: Install the Clock Movement
Insert the clock movement from the back. Add the washer and nut on the front, then tighten gently. Do not overtighten, especially if your surface is painted or thin. Attach the hour hand first, then the minute hand, and finally the second hand if your kit includes one.
Make sure the hands are parallel and do not touch each other. If they rub, the clock may stop or keep poor time. Add the battery, set the time, and watch your DIY Swedish clock officially become useful instead of just pretty.
Best Yellow Paint Shades for a Swedish Clock Look
The exact paint brand is less important than the mood of the color. Still, it helps to think in color families. For a soft Swedish cottage feel, look for buttercream, straw, wheat, vanilla, or pale ochre tones. For a bolder folk-inspired look, try warm golden yellow. For a more modern Scandinavian clock, choose a muted yellow with a hint of gray or green.
Avoid neon yellow unless your design goal is “traffic sign but make it Nordic.” Bright yellow can be fun, but Swedish-inspired pieces usually look best when the color feels aged, earthy, or sun-washed.
Where to Display Your DIY Yellow Swedish Clock
A yellow Swedish clock can work in many rooms because it brings both function and charm. In a kitchen, it adds warmth near open shelves, ceramic pitchers, or butcher-block counters. In a hallway, it creates a welcoming focal point. In a living room, it pairs nicely with linen curtains, woven baskets, pale wood furniture, and vintage books.
If your walls are white, cream, soft gray, or pale blue, yellow will stand out beautifully. If your room already has strong colors, use a muted yellow so the clock does not start a shouting match with the sofa.
Common Mistakes to Avoid
Using the Wrong Shaft Length
This is the most practical mistake. Always measure the thickness of your clock face before buying the movement. The shaft must fit through the wood and leave enough room for the hardware and hands.
Skipping Primer
Yellow paint can be surprisingly unforgiving. Without primer, it may look patchy or dull. A smooth primed base gives the color more life and helps the final result look intentional.
Overdecorating the Clock
Swedish-inspired design is elegant because it balances beauty and simplicity. Choose one or two decorative ideas, not all of them. Your clock should look charming, not like it lost a craft-store argument.
Choosing Hands That Are Too Small
Clock hands should match the size of the face. Tiny hands on a large clock look odd and are hard to read. Oversized hands may hit the edge or each other. Test the proportions before final assembly.
DIY Yellow Swedish Clock Styling Ideas
For a farmhouse look, pair the clock with white shiplap, baskets, and aged wood. For a Scandinavian look, keep the surrounding area simple with clean lines, pale textiles, and natural materials. For a vintage European look, style it near brass candlesticks, botanical prints, and a small vase of dried flowers.
You can also create a mini gallery wall around the clock. Use small framed prints, antique plates, or simple sketches. Keep the palette calm so the yellow clock remains the star. Think “collected over time,” not “everything from aisle seven jumped onto the wall.”
Budget-Friendly Tips
A DIY yellow Swedish clock can be very affordable. Reuse scrap wood, repurpose an old cabinet door, or refresh a thrift-store clock. If the old clock has a working movement, you may only need paint and creativity. If the movement is broken, replace it with a quartz kit.
Craft-store wooden plaques often go on sale and are beginner-friendly. Leftover wall paint can also work if it is suitable for wood and properly sealed. For decorative numbers, use paint pens, stencils, adhesive numerals, or hand lettering.
of Real-World Experience: What Making a DIY Yellow Swedish Clock Teaches You
Making a DIY yellow Swedish clock teaches you very quickly that simple projects are not always simple in the way you expect. The basic idea sounds easy: paint wood yellow, add numbers, install clock movement, become a design genius. But the beauty of this project is in the small decisions. The curve of the top matters. The shade of yellow matters. The size of the hands matters. Even the spacing of the numbers can make the clock feel either charmingly handmade or suspiciously confused.
One useful experience is learning how yellow changes in different light. A color that looks soft and buttery under store lighting may look much brighter near a sunny window. Before painting the whole clock, test the color on a scrap piece of wood or the back of the clock base. Let it dry and look at it in morning, afternoon, and evening light. This tiny step can save you from creating a clock that glows like a cartoon lemon at 2 p.m.
Another lesson is that sanding is not punishment, even though it sometimes feels like it. Sanding makes the difference between a craft project and a finished decor piece. Rounded edges feel better. Smooth primer looks cleaner. Light sanding between coats can make the final paint job look much more polished. The clock is small enough that the extra prep does not take forever, but it still rewards patience.
Installing the clock movement also teaches practical design thinking. A clock is decorative, but it still has a job. If the hands are hard to read, the project loses function. If the numbers are too decorative, the clock may look pretty but become useless when someone asks what time it is. The best DIY clocks balance personality with readability.
The Swedish-inspired part of the project is also a great reminder that restraint can be powerful. You may be tempted to distress every edge, stencil every corner, add gold everywhere, and finish with three kinds of glaze. Usually, the clock looks better when you stop earlier. A soft yellow body, a cream dial, simple black numbers, and one delicate accent may be all it needs.
Finally, this project gives you the pleasure of making something that feels personal but still fits easily into a home. It does not demand a full room makeover. It does not require rare tools. It can be completed on a modest budget. Yet when it is finished and ticking quietly on the wall, it brings a sense of handmade warmth that store-bought decor often lacks. A DIY yellow Swedish clock is not just a timekeeper. It is a small sunny reminder that your hands can make useful beautyand that paint drying is still one of humanity’s greatest tests of patience.
Conclusion
A DIY yellow Swedish clock combines the graceful heritage of Swedish clock design with the practical joy of modern DIY. By borrowing inspiration from Mora clocks, Gustavian painted furniture, and Scandinavian simplicity, you can create a piece that feels warm, elegant, and personal. The key is choosing the right shape, preparing the wood properly, selecting a soft yellow paint, installing the clock movement carefully, and resisting the urge to overdecorate.
Whether you hang it in a kitchen, hallway, living room, or cozy reading corner, this clock can add charm without clutter. It is functional decor with a handmade soul. And unlike many home projects, it does not require tearing down walls, calling a contractor, or pretending you understand complicated wiring. Just wood, paint, patience, and a little Swedish-inspired imagination.
Note: This article is written as body-only HTML for web publishing. Add your website header, footer, internal links, images, and schema markup inside your CMS as needed.