

A front yard tree is basically nature volunteering to become a giant Christmas decoration. It already has branches, height, character, andmost importantlyno assembly instructions written in microscopic print. With a few inexpensive supplies and a sensible plan, you can turn an ordinary tree into a festive focal point without draining your gift budget or constructing a display visible from low Earth orbit.
The best cheap outdoor Christmas decorations rely on three things: bold shapes, weather-resistant materials, and smart placement. Simple ornaments often look better from the street than complicated crafts because tiny details disappear after dark. This guide covers affordable DIY ornaments, light-wrapping techniques, decorating themes, safety precautions, and practical lessons learned from putting homemade decorations outdoors.
Plan Your Front Yard Tree Before Buying Decorations
Before marching into a craft store and returning with twelve kinds of glitter, stand at the curb and study your tree. Consider its height, branch structure, distance from an outdoor electrical outlet, and visibility from the street.
A small ornamental tree near the walkway can handle detailed decorations. A tall oak or maple needs larger ornaments, stronger lighting, and fewer delicate pieces. Decorations that look enormous in your kitchen may appear approximately the size of breakfast cereal once hung twenty feet from the sidewalk.
Choose One Simple Color Scheme
Limiting the display to two or three colors makes inexpensive materials look coordinated. Reliable combinations include:
- Red, white, and green for a traditional Christmas yard
- Gold and warm white for a polished, elegant look
- Blue, silver, and cool white for a winter theme
- Red and white for a cheerful candy-cane display
- Multicolored lights with oversized playful ornaments for a nostalgic style
Consistency matters more than price. Twenty matching homemade ornaments usually create a stronger visual effect than an assortment of unrelated decorations collected from the mysterious corners of the garage.
Set a Realistic Budget
A convincing display does not require a sleigh full of money. Depending on what you already own, a basic project may cost $20 to $50. A fuller display with new outdoor LED lights, weatherproof ribbon, and oversized ornaments may land between $60 and $100.
Prioritize lights, outdoor-rated cords, and secure fasteners. Decorative items can often be made from recycled containers, plastic plates, inexpensive ribbon, pool noodles, scrap wood, and dollar-store supplies.
Affordable Supplies for DIY Outdoor Tree Decorations
Gather your materials before climbing a ladder. Repeatedly walking between the tree and the garage is technically exercise, but it is not the festive kind.
- Outdoor-rated LED string lights
- Outdoor extension cords and a weather-resistant timer
- Plastic zip ties in several lengths
- Floral wire or coated garden wire
- Weather-resistant ribbon or plastic tablecloth material
- Plastic bowls, plates, cups, and lightweight containers
- Pool noodles, foam sheets, and plastic ornaments
- Exterior craft paint or outdoor spray paint
- Clear outdoor sealant
- Scissors, wire cutters, and a hole punch
- Fishing line or UV-resistant cord
- Ground stakes and sandbags when needed
Use plastic, foam, coated metal, sealed wood, and synthetic ribbon whenever possible. Paper and untreated cardboard may survive a covered porch, but on an exposed tree they can quickly become festive compost.
Easy Cheap Christmas Decorations for a Front Yard Tree
1. Oversized Plastic Ball Ornaments
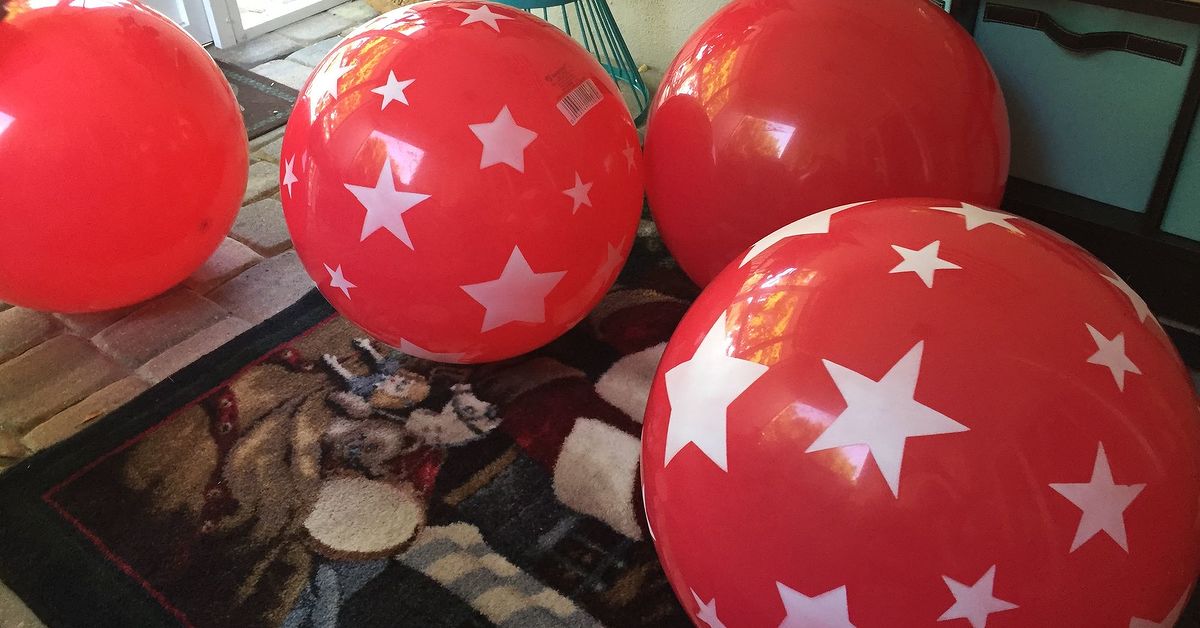
Large ornaments are ideal for outdoor trees because they remain visible from the street. You can make them from inexpensive plastic bowls, clear food containers, or lightweight toy balls.
- Clean and dry two matching plastic bowls.
- Paint the inside or outside with exterior-compatible paint.
- Glue or fasten the rims together to create a sphere.
- Attach a small plastic cup or section of painted foam at the top as the ornament cap.
- Punch or drill a hole through the cap and add coated wire.
- Seal painted surfaces with clear outdoor sealant.
Solid red, gold, or silver balls are the easiest to make. Add broad stripes or large polka dots rather than tiny designs. From forty feet away, subtle detail tends to become “a blob wearing ambition.”
2. Pool Noodle Candy Canes
Pool noodles are lightweight, inexpensive, and wonderfully difficult to break. Bend a red or white noodle into a candy-cane shape and secure the curve with fishing line or wire. Wrap contrasting weather-resistant ribbon around it in a spiral.
Hang several candy canes at different heights or arrange them around the base of the tree. For windier yards, insert flexible tubing or heavy wire inside the noodle before bending it. Avoid using thin paper tape because rain and snow may loosen it.
3. Giant Gift Boxes Beneath the Tree
Empty boxes covered in plastic tablecloth material can create the appearance of oversized presents. However, exposed cardboard eventually absorbs moisture. For a longer-lasting version, use plastic storage containers, foam shipping boxes, old coolers, or lightweight wooden crates.
Wrap each container in vinyl, plastic fabric, or an inexpensive outdoor tablecloth. Add wide ribbon and a simple bow. Place bricks or sandbags inside before closing the container so the neighborhood wind does not receive surprise gifts.
4. Weatherproof Ribbon Bows
Large bows fill empty branches and add daytime color when the lights are off. Use outdoor velvet ribbon, polypropylene ribbon, deco mesh, or strips cut from a plastic tablecloth.
Make each bow with loops at least eight to twelve inches wide. Secure the center with floral wire and attach the bow to a sturdy branch without pulling the branch downward. Position bows on the outer half of the canopy so they remain visible.
Ribbon can also be tucked in and out of branches to create flowing sections rather than being wrapped tightly around the trunk. This approach adds depth and makes a sparse tree appear fuller.
5. Plastic Plate Peppermint Ornaments
White plastic plates can become oversized peppermint candies for very little money.
- Paint broad red swirls on the front and back of each plate.
- Allow the paint to cure completely.
- Place two plates back-to-back and fasten the rims.
- Wrap the ornament in clear cellophane if desired.
- Tie the ends with ribbon to resemble wrapped candy.
- Punch a hanging hole and attach wire or strong cord.
These decorations work especially well with red-and-white lights, pool noodle candy canes, and giant gift boxes. Your tree may begin to resemble a candy shop, which is excellent unless local squirrels start expecting customer service.
6. Scrap-Wood Stars
Thin wood strips, paint stirrers, yardsticks, or leftover trim can be assembled into large five-point stars. Fasten the joints with exterior screws, small bolts, or strong construction adhesive rated for outdoor use.
Paint the stars white, gold, red, or green. Wrap battery-operated outdoor lights around them or outline them with reflective tape. Seal all surfaces and exposed ends because wood absorbs moisture fastest through cut edges.
Hang smaller stars from branches and stake larger ones near the trunk. Do not suspend heavy wooden decorations over sidewalks, driveways, or areas where people gather.
7. Recycled Container Bells
Plastic flowerpots, yogurt tubs, and small buckets can be turned upside down to make Christmas bells. Paint them, attach a plastic ornament underneath as the clapper, and tie a large bow around the top.
Create clusters of two or three bells for greater impact. Use lightweight plastic rather than ceramic or glass. Outdoor decorating is not the ideal moment to test whether gravity has taken the holidays off.
8. Birdseed Ornaments for a Natural Theme
For a woodland-inspired display, hang bird-friendly seed ornaments from low branches. Use recipes created specifically for wild birds and avoid ingredients that may be harmful to local wildlife. Place ornaments where fallen seeds will not create a slippery walkway.
Because edible decorations can attract squirrels, raccoons, deer, and other enthusiastic holiday guests, keep them separate from electrical cords and fragile decorations. Check local wildlife guidance before using food outdoors.
9. Tomato Cage Mini Trees
If the natural tree has a wide empty area near its base, add several mini trees made from tomato cages. Turn each cage upside down, pull the loose stakes together, and secure them with zip ties. Wrap the frame with artificial garland and outdoor lights, then stake it securely into the ground.
This affordable project is commonly recommended as an easy way to create small decorative outdoor trees. It works well beside a walkway, around the trunk, or as part of a miniature Christmas forest.
How to Put Christmas Lights on a Front Yard Tree
Lights usually provide the biggest transformation, particularly after sunset. Outdoor design guides commonly recommend mini lights for a dense, magical effect and larger C7- or C9-style bulbs for stronger visibility from a distance. Combining bulb sizes can create both depth and definition.
Choose Outdoor-Rated LED Lights
Use lights and cords specifically labeled for outdoor use. LED strands generally consume much less electricity than traditional incandescent holiday lights, produce less heat, and tend to last longer. The U.S. Department of Energy has reported that LED holiday strands can use about 70 percent less energy than conventional incandescent versions.
Test Every Strand First
Plug in the lights while they are still on the ground. Inspect cords, sockets, plugs, and bulbs for damage. Replace strands with cracked insulation, exposed wires, loose connections, or scorched areas. Testing first prevents the traditional holiday ritual of finishing an entire tree only to discover that the middle section has chosen darkness.
Wrap the Trunk and Main Branches
Begin near the power source and wrap upward around the trunk. Keep spacing reasonably consistent. Continue along major branches rather than attempting to cover every twig.
For a quick display, concentrate on the trunk and lower canopy. For a more dramatic result, extend lights along four to eight prominent branches. Bare deciduous trees often look especially striking because their branch structure remains visible.
Use a Light Net for Dense Shrubs
If the “tree” is actually a dense evergreen or large shrub, outdoor net lights may be faster than wrapping individual branches. Overlap sections slightly to prevent obvious dark gaps, and secure the net with plastic clips or loose ties.
Add an Outdoor Timer
A weather-resistant timer can automatically turn lights on after sunset and off later in the evening. Safety guidance recommends switching holiday lighting off when the household is asleep or away.
Keep Outdoor Christmas Tree Decorations Secure
Wind is the unofficial quality-control inspector of yard decorations. Anything weakly attached will be reviewed immediately and, possibly, delivered to another zip code.
Use Two Attachment Points
Large ornaments should be connected at two points when possible. A second piece of wire prevents spinning and reduces stress on the main hanger. Keep ties slightly loose around living branches to avoid damaging bark.
Choose Shatterproof Decorations
Outdoor decorating experts recommend shatter-resistant plastic ornaments and products labeled for indoor-outdoor use. Traditional glass ornaments, delicate paint, glitter coatings, and brittle materials may crack or deteriorate in cold, moisture, and wind.
Keep Heavy Items Low
Position wooden ornaments, large containers, and heavy decorations near the ground. Use lightweight foam or plastic higher in the canopy. Never hang a heavy object above a public sidewalk, parked vehicle, play area, or frequently used path.
Check the Display After Storms
Inspect cords, ties, ornaments, stakes, and branches after strong wind, heavy rain, ice, or snow. Tighten loose fasteners and remove anything that has become damaged or waterlogged.
Outdoor Holiday Lighting Safety
Christmas cheer should be memorable. An overloaded electrical circuit should not be.
- Use outdoor-rated lights, extension cords, plugs, timers, and power connections.
- Connect the display to a ground-fault circuit interrupter, commonly called a GFCI.
- Follow the light manufacturer’s limit for connected strands.
- Keep plugs and connections elevated and protected from standing water.
- Do not pierce cords with nails, screws, or metal staples.
- Use insulated clips, plastic hooks, or loose zip ties.
- Keep cords away from driveways, sidewalks, and snow-removal equipment.
- Do not connect multiple extension cords together simply to gain distance.
- Use a stable ladder on level ground and have another adult assist.
- Turn lights off before sleeping or leaving home.
The U.S. Consumer Product Safety Commission advises inspecting holiday lights, securely fastening outdoor strands against wind, and following manufacturer limits on connected sets. Current home-safety guidance also emphasizes outdoor-rated cords, GFCI-protected outlets, non-damaging clips, and avoiding overloaded circuits.
Three Cheap Decorating Plans
The $25 Simple Tree
- One or two reused LED light strands
- Six plastic plate peppermint ornaments
- Four large waterproof bows
- One bag of zip ties
Wrap the lower trunk, place peppermint ornaments evenly around the canopy, and use the bows to fill obvious gaps.
The $50 Candy-Cane Tree
- Outdoor red-and-white LED lights
- Six pool noodle candy canes
- Eight plastic peppermint ornaments
- Three weatherproof gift boxes
Keep the tree itself mostly red and white, then arrange the gift boxes and candy canes around the base. The limited palette helps inexpensive materials look intentional.
The $100 Neighborhood Showpiece
- Multiple outdoor LED strands
- Ten to fifteen oversized plastic ornaments
- Several large bows
- Three tomato cage mini trees
- A weather-resistant timer and outdoor extension cord
Wrap the trunk and main branches, distribute ornaments in triangular groupings, and use the mini trees to create a layered scene at ground level.
Real-World Experience: What Actually Works Outdoors
The most important lesson from decorating a front yard tree is that indoor craft logic does not always survive outdoor reality. In the living room, a delicate bow sits quietly where you place it. Outdoors, that same bow spends the night wrestling a cold front.
Large, simple ornaments consistently perform better than small, detailed ones. During daylight, an intricate six-inch ornament may look adorable from the ladder. From the curb, it practically disappears. Increasing the size to twelve or eighteen inches makes the decoration readable from both the sidewalk and the street.
Spacing also matters. During an early decorating attempt, it is easy to hang every ornament on the most convenient lower branches. The result looks crowded at eye level and empty above. A better method is to divide the visible canopy into sections before hanging anything. Place one large decoration in each section, step back, and then fill the remaining gaps.
Another useful lesson is to decorate for daytime as well as nighttime. Lights may carry the display after sunset, but a tree wrapped only in dark green wire looks unfinished during the day. Bright bows, peppermint ornaments, painted stars, and gift boxes keep the yard festive from breakfast through evening.
Attaching decorations with thin curling ribbon is rarely successful. It stretches, tears, and tangles in wind. Coated wire, strong cord, and reusable zip ties are less glamorous during installation but considerably more reliable. The attachment is usually hidden once the decoration is in place, so function deserves priority.
Plastic decorations should still be checked for drainage. Any container-shaped ornament can collect rainwater. A few small holes at the lowest point allow water to escape and reduce weight. This minor step can prevent ornaments from sagging, freezing, or pulling branches downward.
When installing lights, wrapping every small branch is beautiful but time-consuming. A practical compromise is to wrap the trunk and several major branches. The tree still gains a clear illuminated structure, while setup and removal remain manageable. Home Depot’s outdoor lighting guidance similarly notes that wrapping bare branches creates a jewel-like appearance, although it requires additional time.
Wind testing is worth doing before declaring the display finished. Gently push each large ornament from several directions. If it twists wildly, add a second tie. If a gift box slides, increase the ballast. If a tomato cage tree leans, add stakes before the weather does the testing for you.
Storage should be considered while building each decoration. Giant ornaments that cannot be opened, flattened, or stacked may become permanent garage residents. Bows can be stored in shallow containers, flat stars can hang on a wall, and two-piece plastic ornaments can be separated and nested. Labeling storage bins also prevents next December’s treasure hunt through boxes marked “miscellaneous.”
Finally, stop decorating before the tree becomes visually exhausted. A clear focal point, repeated colors, and evenly distributed pieces often look more polished than covering every available branch. The goal is cheerful abundance, not proving that your tree can carry the entire seasonal aisle.
Conclusion
Creating easy cheap Christmas decorations for a front yard tree is less about expensive products and more about scale, repetition, and durability. Oversized plastic ornaments, pool noodle candy canes, weatherproof bows, peppermint plates, scrap-wood stars, mini tomato cage trees, and illuminated branches can transform an ordinary yard without creating an extraordinary credit card bill.
Choose a simple color scheme, use outdoor-safe materials, secure every decoration carefully, and let LED lights provide the evening sparkle. When the display can survive wind, rain, curious wildlife, and at least one neighbor asking where you bought everything, the project has done its job.