

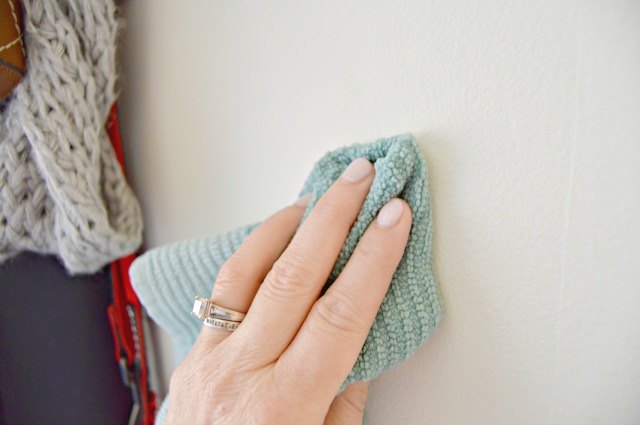
Walls collect more dirt than they politely admit. Dust settles near ceilings, fingerprints gather around light switches, kitchen grease drifts farther than seems scientifically reasonable, and mysterious scuffs appear without a single household member accepting responsibility.
Fortunately, most painted walls do not need an expensive specialty cleaner. A simple homemade cleaning solution made with warm water and mild dish soap can handle everyday grime while being gentle enough for many washable paint finishes. The important part is not creating the strongest possible mixture. It is choosing the mildest solution that works and using it without soaking, scratching, or polishing the paint into a shiny patch.
This guide explains how to make a homemade wall cleaner, adjust it for different stains, match it to the paint finish, and clean walls without leaving streaks or damage.
The Best Homemade Cleaning Solution for Walls
For routine cleaning, start with this low-risk recipe:
Basic Homemade Wall Cleaner
- 1 gallon warm water
- 1 tablespoon clear, mild dish soap
- Two clean microfiber cloths or soft, nonabrasive sponges
- Two buckets, if available
Mix the water and dish soap gently so the solution does not become a bubble bath. Excess suds are difficult to rinse and may leave a film that attracts more dust.
Use one bucket for the cleaning solution and another for clean rinse water. This prevents the increasingly gray wash water from being redistributed across the wall. If only one bucket is available, replace the solution whenever it becomes visibly dirty.
This mild formula works well for household dust, fingerprints, food splatters, and light grime on many properly cured, washable painted surfaces. Plain warm water should still be your first attempt on delicate finishes.
Why This Simple Wall Cleaner Works
Dish soap contains surfactants, ingredients that help water surround and lift oily dirt. That matters because many wall marks contain skin oils, cooking residue, smoke particles, or sticky grime that water alone cannot remove.
Using more soap does not necessarily improve the result. An overly concentrated mixture can leave streaks and a tacky residue. It also requires more rinsing, which exposes the paint and drywall beneath it to additional moisture. When cleaning painted walls, restraint is a feature, not laziness.
Check the Paint Finish Before Cleaning
Paint sheen affects how much cleaning a wall can tolerate. If you do not know the finish, test the cleaning solution in a hidden place, such as behind a sofa or near the baseboard inside a closet.
| Paint finish | Washability | Recommended approach |
|---|---|---|
| Flat or matte | Low | Begin with water and minimal pressure. Add only a tiny amount of mild soap if necessary. |
| Eggshell | Moderate | Use diluted dish soap, a well-wrung cloth, and gentle strokes. |
| Satin | Good | Suitable for routine washing and careful spot treatment. |
| Semi-gloss or gloss | High | Usually tolerates washing best, although aggressive abrasives can still scratch it. |
Flat and matte finishes contain less reflective binder at the surface and can burnish when rubbed. Burnishing creates a shiny spot that may be more noticeable than the original mark. Dark colors can also show rubbed or faded areas more readily than white paint.
New paint requires extra patience. Paint may feel dry within hours while still needing days or weeks to cure fully. Follow the paint manufacturer’s instructions and generally avoid washing a newly painted wall for at least two weeks.
How to Clean Walls Without Damaging the Paint
1. Prepare the Room
Move furniture away from the wall and place old towels or a drop cloth along the baseboard. Turn off electricity to the room before removing outlet or switch covers, and never allow liquid to enter electrical openings.
2. Dust Before Adding Water
Remove cobwebs and loose dust with a dry microfiber mop, clean cloth, or vacuum fitted with a soft brush attachment. Work from the ceiling downward.
Skipping this step turns dry dust into wet gray paste. That is less “freshly cleaned room” and more “preschool art project.” Pay particular attention to corners, trim, vents, and the tops of door frames.
3. Perform a Spot Test
Dip a white cloth into the cleaning solution, wring it until damp, and wipe a hidden area. Check the cloth for paint transfer. Allow the test spot to dry completely before deciding whether the solution is safe.
Stop if the color lifts, the finish becomes shiny, or the wall develops a pale water mark. Switch to plain water or limit cleaning to light dusting.
4. Work in Small Sections
Dip the microfiber cloth into the solution and wring it thoroughly. It should be damp, not dripping. Wash a manageable section using light, overlapping motions.
When washing a wall, working from the bottom upward can reduce long drip marks on the unwashed surface. Clean and rinse one section at a time rather than applying solution to the entire wall at once.
5. Rinse and Dry
Wipe the section with a second cloth dampened with clean water. Rinsing removes soap residue that could leave dull streaks or attract new dirt. Blot excess moisture with a soft towel and allow the wall to air-dry with good ventilation.
Homemade Wall-Cleaning Recipes for Specific Problems
For Kitchen Grease
- 1 quart warm water
- 1 teaspoon grease-cutting dish soap
Apply the solution with a well-wrung cloth and let it contact the greasy area briefly before wiping. Do not flood the wall. Several gentle passes are safer than one heroic scrubbing session.
Rinse carefully because leftover soap can create a film that captures airborne cooking grease. If the entire wall has accumulated residue, clean the complete surface so the treated area does not appear brighter than everything around it.
For Fingerprints and General Grime
Use the basic dish-soap solution, concentrating on doorways, light switches, hallways, staircases, and the wall behind frequently used furniture. A white microfiber cloth makes it easier to see whether dirt or paint is coming off.
For Scuff Marks
Begin with plain water, followed by diluted dish soap. If the scuff remains and the paint is washable, make a small paste with three parts baking soda and one part water.
Apply a tiny amount with a soft cloth, rub very lightly, and rinse immediately. Baking soda is mildly abrasive, so it can dull dark, flat, or delicate paint. Always test it first.
Melamine foam erasers can remove stubborn marks, but they also work through micro-abrasion. Use minimal pressure on durable satin or semi-gloss paint and avoid them on flat finishes unless the spot test shows no change.
For Washable Walls With Heavier Buildup
- 1 quart warm water
- 1 teaspoon mild dish soap
- Up to 1/4 cup distilled white vinegar
This stronger option may help cut mineral film and stubborn grime on durable, washable paint. However, vinegar is acidic and is not the safest default for every coating. Skip it on flat paint, limewash, chalk paint, unsealed surfaces, natural stone, or any finish whose manufacturer advises against acidic cleaners.
Never mix vinegar with chlorine bleach. In fact, homemade cleaners should never be combined with bleach or other disinfectants unless a product label specifically says the combination is safe.
What About Mold or Mildew on Walls?
Mold is a moisture problem, not merely a decorative inconvenience. First identify and correct the source, which could be a plumbing leak, roof damage, condensation, poor ventilation, or excessive indoor humidity. Cleaning without correcting the moisture source gives mold an engraved invitation to return.
For a small area on a cleanable, hard painted surface, detergent and water may be used to remove visible growth, followed by thorough drying. Porous drywall, insulation, ceiling tiles, or badly damaged wallboard may need to be removed rather than washed.
Routine use of bleach is not necessary for ordinary wall cleaning. If a specific situation calls for a registered mold or disinfecting product, follow its label exactly, ventilate the room, wear the recommended protective equipment, and keep children and pets away until the surface is dry.
Never mix bleach with vinegar, ammonia, alcohol, or another cleaner. Dangerous gases can form. Large areas of mold, recurring growth, contaminated HVAC systems, flood damage, or mold inside a wall should be assessed by a qualified remediation professional.
Surfaces That Need a Different Cleaning Method
Wallpaper
Confirm that the wallpaper is washable before using water. Vinyl wallpaper may tolerate a lightly dampened cloth and diluted dish soap, while grasscloth, fabric, hand-painted paper, and other delicate coverings often require dry cleaning methods. Moisture can loosen seams, fade ink, or create permanent water marks.
Unpainted Drywall
Bare drywall and joint compound absorb water readily. Remove dust with a soft brush or HEPA-filter vacuum and use only a barely damp cloth when necessary. Saturation can soften the paper facing and damage the gypsum core.
Textured Walls
Use a vacuum brush attachment or soft duster first. A microfiber cloth can snag on rough texture, so test it before wiping a large area. Avoid heavy pressure that could flatten, chip, or polish raised texture.
Historic, Decorative, or Specialty Finishes
Limewash, distemper, milk paint, murals, metallic finishes, and unsealed decorative coatings require specialized care. Contact the manufacturer, painter, or conservator rather than experimenting with pantry chemistry.
Common Wall-Cleaning Mistakes
- Using too much water: Dripping liquid can enter seams, soften drywall, and leave streaks.
- Skipping the spot test: A cleaner may alter color or sheen only after the surface dries.
- Scrubbing aggressively: Pressure can burnish matte paint or remove the finish entirely.
- Applying cleaner directly to the wall: Spray can run downward and create concentrated marks. Apply it to the cloth instead.
- Leaving soap behind: Residue makes walls look dull and attracts dust.
- Using strongly colored soap: Dye may transfer to pale or porous paint.
- Adding essential oils: Oils can spot paint, leave residue, and may not be suitable around every pet or household member.
- Mixing cleaning chemicals: Improvised combinations may damage surfaces or release dangerous fumes.
How Often Should Walls Be Cleaned?
A full wall washing once or twice a year is sufficient for many homes. Kitchens, entryways, children’s rooms, and stairwells may need more frequent attention. Monthly dusting and prompt spot cleaning can prevent grime from developing into a major weekend project.
Replace HVAC filters on schedule, use an exhaust fan while cooking, control indoor humidity, and keep candles away from walls. These habits reduce dust, grease, moisture, and soot before they settle on the paint.
Real-World Experience: Lessons From Cleaning an Entire Home
A whole-house wall-cleaning project quickly teaches a useful lesson: every room creates a different kind of dirt. Treating all walls with one powerful mixture sounds efficient, but it often creates unnecessary risk. A better strategy is to begin with dry dusting and plain water, then increase cleaning strength only where the results justify it.
Consider a typical living room with eggshell paint. At first glance, the walls may look reasonably clean. Once a microfiber mop passes over them, however, the paint often becomes noticeably brighter. Much of the dull appearance comes from airborne dust rather than stains. In this situation, washing every square inch with vinegar or baking soda would add work without providing much benefit. A mild dish-soap solution is usually enough for fingerprints near switches and marks behind the sofa.
A kitchen presents a different challenge. Grease tends to accumulate gradually, especially near the stove and above frequently used countertops. During one practical cleaning test, plain warm water made the wall look better while it was wet, but the greasy haze returned after drying. Adding a teaspoon of grease-cutting dish soap to a quart of warm water produced a more durable improvement. The wall then needed a clean-water rinse; without that step, the surface dried with faint streaks visible in afternoon sunlight.
Flat-painted hallways demonstrate why pressure matters. A dark shoe scuff may encourage enthusiastic rubbing, but aggressive treatment can replace one dark line with a larger shiny patch. The better sequence is water, diluted soap, and then a pinhead-sized amount of baking soda paste if the mark survives. Short, gentle passes with inspection between them provide far more control than scrubbing continuously.
Another common experience involves cleaning only the most obvious mark. Removing a fingerprint cluster from the center of a dusty wall can leave an unusually clean island. It is technically a victory, but visually it resembles a reverse stain. When the surrounding paint is washable, lightly cleaning the entire section from corner to corner produces a more even result.
Tools matter as much as ingredients. Old cellulose sponges may hold grit that scratches glossy paint, while rough towels can shed lint or create uneven friction. Clean microfiber cloths consistently provide better control. Keeping several cloths available also prevents grease from the first section from traveling around the room like an unwanted sightseeing tour.
The most valuable habit is allowing every test spot to dry before judging it. Wet paint temporarily appears darker and shinier, which can hide streaks, faded color, or burnishing. Waiting ten or fifteen minutes may feel slow, but repainting an entire wall is slower.
Finally, not every discoloration is removable dirt. Water stains can indicate an active leak, recurring dark spots may signal a moisture problem, and yellowing near heat sources may be embedded in the coating. When gentle cleaning does not improve the area, further scrubbing may damage the paint. Repairing the cause, applying an appropriate stain-blocking primer, and repainting can be the more sensible solution.
Conclusion
The best homemade cleaning solution for cleaning walls is intentionally uncomplicated: warm water and a small amount of mild dish soap. Start by dusting, identify the paint finish, test a hidden area, and use as little moisture and pressure as possible. Baking soda or diluted vinegar can help in selected situations, but neither ingredient is universally safe for every wall.
With the correct technique, ordinary household ingredients can remove dust, fingerprints, grease, and many scuffs without turning wall cleaning into an accidental painting project. Clean gently, rinse thoroughly, and give the wall time to dry before deciding whether another treatment is necessary.