Learning how to apply Bondo can feel a little intimidating the first time you open the can. There is the thick filler, the tiny tube of cream hardener, the unmistakable smell, and the quiet fear that you are about to permanently glue your spreader to your project. Good news: applying Bondo is not wizardry. It is a practical, repeatable process that rewards patience, surface preparation, and not pretending a giant rust hole is “basically fine.”
Bondo is a two-part polyester filler commonly used for auto body repairs, wood repairs, home projects, and small surface restoration jobs. When mixed with hardener, it cures into a sandable material that can fill dents, gouges, chips, and other imperfections. Used correctly, it creates a smooth surface ready for primer and paint. Used carelessly, it creates lumps, cracks, pinholes, and language your neighbors may not appreciate.
This guide walks you through how to apply Bondo in 8 steps, with practical tips for beginners, common mistakes to avoid, and real-world experience from the “measure twice, sand once, then sand five more times” school of DIY wisdom.
What Is Bondo?
Bondo is a brand name often used to describe body filler, although 3M’s Bondo line includes several products for automotive, wood, marine, metal, and household repairs. Traditional Bondo body filler is a two-component material: filler paste plus cream hardener. Once mixed, the chemical reaction begins quickly, giving you only a few minutes of working time before the filler starts to firm up.
For cars, Bondo is typically used to repair small dents, shallow dings, scratches, and low spots after metal work has been completed. For home projects, Bondo wood filler or all-purpose putty can repair damaged trim, doors, furniture, window sills, and other paint-grade surfaces. The key phrase here is “paint-grade.” Bondo is not designed to look like natural wood grain after staining. It wants primer and paint the way coffee wants Monday morning.
Before You Start: Safety and Supplies
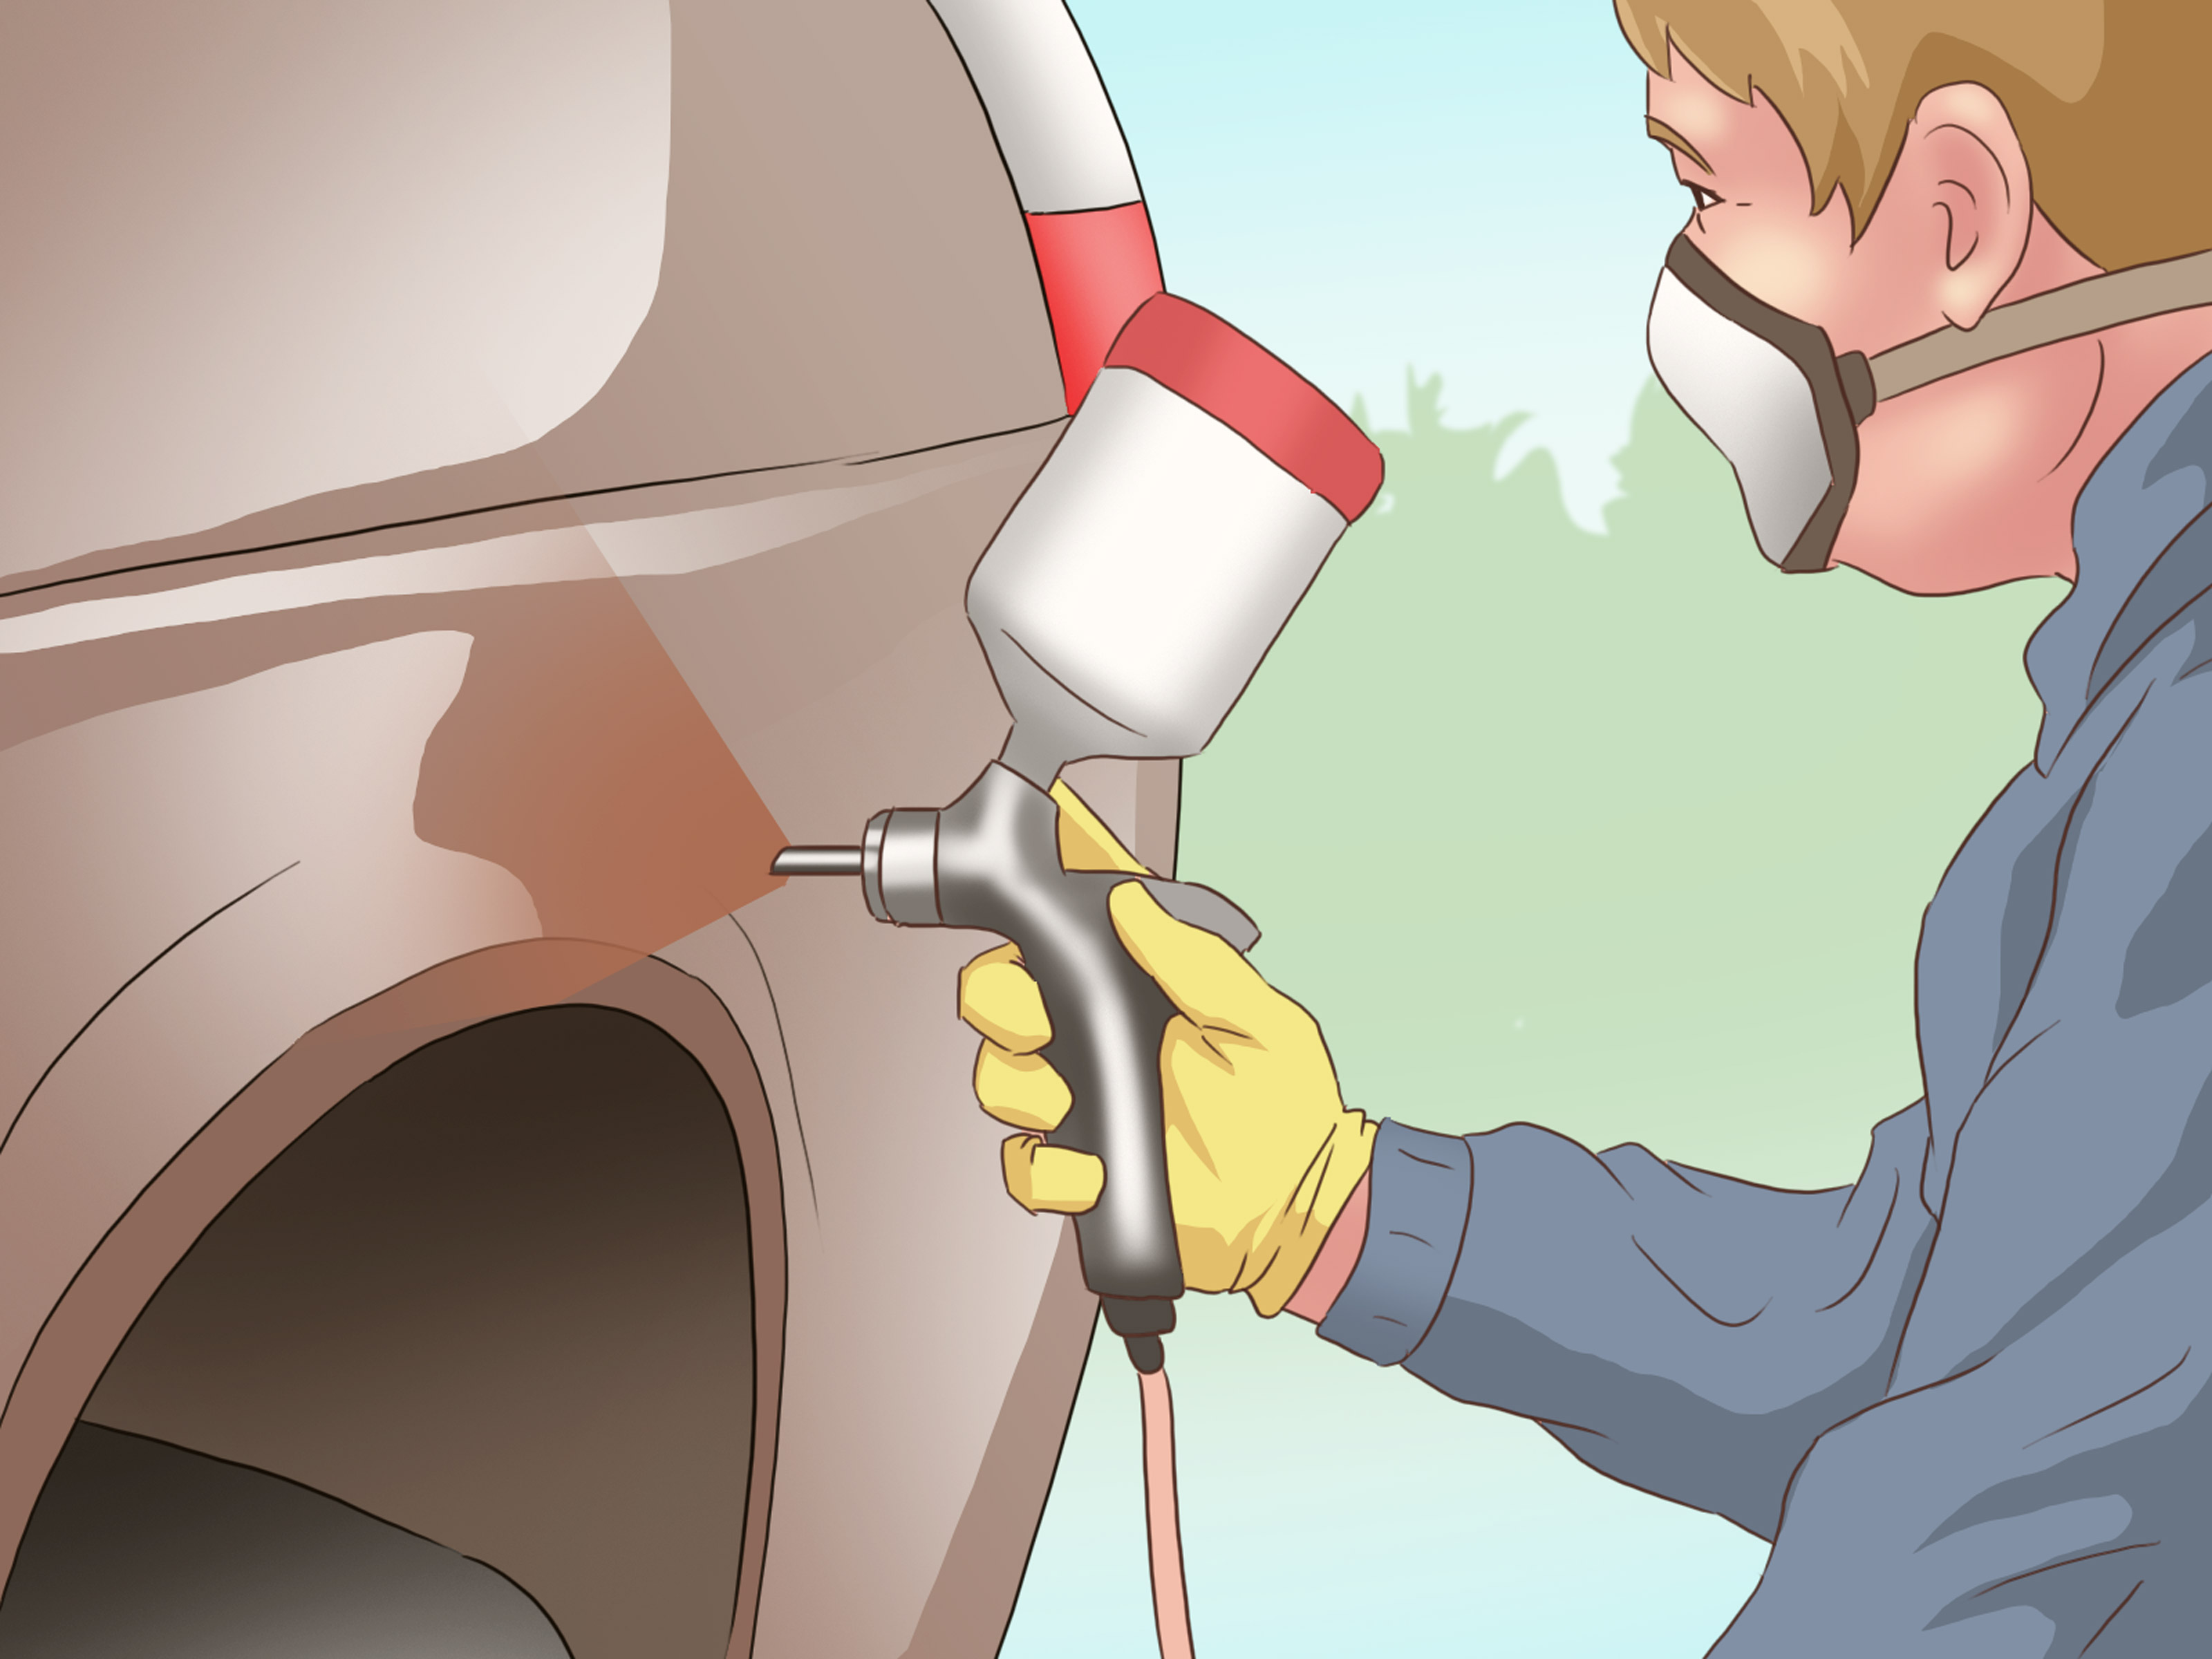
Bondo products can produce dust and vapors, so work in a well-ventilated area. Wear safety glasses, gloves, and a suitable mask or respirator when sanding. Keep the product away from open flames, sparks, and heat sources. If you are working in a garage, open doors and windows and use airflow wisely. Your lungs are not a workshop filter.
Tools and Materials You Will Need
- Bondo body filler, wood filler, or the correct filler for your project
- Cream hardener
- Plastic spreader or putty knife
- Disposable mixing board or clean nonporous surface
- 80-grit sandpaper for surface preparation
- 120-, 180-, and 220-grit sandpaper for shaping and smoothing
- 320-grit sandpaper for final finishing before primer
- Wax and grease remover, surface cleaner, or warm soapy water
- Clean cloths or shop towels
- Primer and paint
- Gloves, eye protection, and dust protection
How to Apply Bondo: 8 Steps
Step 1: Choose the Right Bondo Product
Start by matching the filler to the job. For car dents, use automotive body filler. For damaged trim, doors, or painted furniture, use Bondo wood filler or all-purpose putty. For stronger repairs over fiberglass or larger damaged areas, a fiberglass-reinforced filler may be better. The right product saves you from doing the same repair twice, which is fun only if you enjoy sanding as a personality trait.
Also consider the depth of the repair. Bondo works best in thin layers. If a dent is very deep, do metal work first to bring the panel closer to its original shape. Body filler should refine the surface, not replace half a fender. As a practical rule, avoid building filler thicker than about one-quarter inch. Thick filler is more likely to shrink, crack, or pop loose over time.
Step 2: Clean the Repair Area
Before sanding or mixing anything, clean the area thoroughly. Dirt, wax, grease, oil, silicone, road grime, and household residue can all interfere with adhesion. On automotive panels, use a wax and grease remover or an appropriate surface cleaner. On wood or home surfaces, warm soapy water or a surface cleaner may be enough, as long as the area dries completely before repair.
Never apply Bondo over damp, oily, dusty, or loose material. Filler needs a stable surface to grip. If the surface is dirty, the repair may look fine for a while, then fail later like a cheap folding chair at a family barbecue.
Step 3: Sand Down to a Solid Surface
For automotive work, sand the damaged area with coarse sandpaper, often around 80 grit, to remove paint, primer, rust, and loose material. Extend the sanding one to two inches beyond the damaged area so the filler can feather smoothly into the surrounding surface. On wood repairs, remove loose paint, soft rotted wood, splinters, and damaged fibers until you reach solid material.
This step is where many Bondo repairs are won or lost. Filler does not magically stop rust. If rust remains underneath, it can keep spreading and eventually ruin the repair. If wood rot remains, the damaged material can continue to break down. Bondo is tough, but it is not a time machine.
After sanding, remove all dust with a clean cloth or vacuum. Then wipe the area again if needed and let it dry. The surface should feel rough enough for grip but clean enough for bonding.
Step 4: Mix the Filler and Hardener Correctly
Scoop a small amount of filler onto a clean mixing board. Add the recommended amount of cream hardener. A common guideline for traditional body filler is roughly a golf ball-size amount of filler with a short ribbon of hardener, but always follow the directions on your specific product. Temperature matters too. Hot conditions can shorten working time, while cooler conditions can slow curing.
Use a spreader to fold the hardener into the filler until the color is uniform. Do not whip the mixture like cake batter. Stirring aggressively can trap air, which may create pinholes later. Fold, press, scrape, and blend until there are no streaks. Once mixed, the clock starts ticking. Mix only what you can apply in a few minutes.
Step 5: Apply the First Thin Layer
Press the mixed Bondo firmly into the repair area. The first pass should push filler into scratches, low spots, and texture so it makes full contact with the surface. Then spread additional filler over the repair, keeping the layer thin and slightly higher than the final surface. This gives you material to sand down later.
Use long, smooth strokes with the spreader. Try to follow the shape of the panel, trim, or surface. Do not worry if it is not perfect. Bondo is meant to be sanded. That said, the smoother you apply it now, the less sanding you will do later. Future you will appreciate this.
Step 6: Let the Bondo Cure
Allow the filler to cure according to the product directions. Many body fillers become sandable in roughly 15 to 30 minutes, depending on product type, hardener ratio, temperature, humidity, and thickness. Do not rush this step. If you sand too soon, the filler may gum up the paper, smear, or pull away from the surface.
A useful beginner test is to touch the edge of the filler with a gloved finger or fingernail. If it feels rubbery, wait longer. If it feels firm and sands into powder instead of sticky crumbs, it is ready. Patience here prevents frustration, and frustration is already included free with most DIY projects.
Step 7: Sand, Shape, and Feather the Edges
Start shaping with a sanding block and coarse paper, such as 80 grit. A sanding block helps keep the surface even and prevents finger grooves. Sand the high spots first, then work outward to feather the edges into the surrounding surface. Move through finer grits such as 120, 180, 220, and 320 as the repair gets smoother.
Do not rely only on your eyes. Run your hand lightly over the repair. Your fingers can often detect waves and ridges that your eyes miss. If you find a low spot, clean the area and apply another thin layer of filler. Most good repairs are built in layers, not one heroic mountain of Bondo.
Step 8: Prime, Inspect, and Paint
Once the repair is smooth and feathered, clean off all sanding dust. Apply primer suitable for your surface and topcoat system. Primer seals the repair, reveals imperfections, and helps paint adhere evenly. After priming, inspect the area under good lighting. Small pinholes or scratches may need glazing putty or another light skim before final sanding and paint.
When the surface looks smooth after primer, finish according to the paint manufacturer’s recommendations. For cars, this may include primer surfacer, block sanding, base coat, and clear coat. For home projects, it may simply mean primer and a durable paint. Either way, the final finish is only as good as the prep underneath.
Common Mistakes to Avoid When Applying Bondo
Applying Bondo Over Rust
Rust must be removed before applying filler. Covering rust with Bondo is like putting a rug over a trapdoor. It may look fine briefly, but the problem is still there.
Using Too Much Hardener
More hardener does not mean better. Too much can make the filler cure too fast, become brittle, or create finishing problems. Too little hardener may leave soft spots that never cure properly.
Mixing Too Large a Batch
Bondo hardens quickly. Beginners should mix small batches until they understand the working time. A giant batch may turn into a smoking pancake of regret before you finish spreading it.
Skipping the Sanding Block
Hand-sanding without a block can create waves, dips, and uneven surfaces. Use a block whenever possible, especially on automotive panels and flat trim.
Painting Without Primer
Paint applied directly over filler may absorb unevenly and highlight the repair. Primer helps seal the surface and creates a more consistent finish.
Best Uses for Bondo Around the Home and Garage
Bondo is useful for more than car dents. It can repair chipped painted furniture, damaged door trim, gouged baseboards, window sills, exterior wood details, garage projects, and small surface defects. It is especially handy when you need a hard, paintable repair that sands smooth.
However, it is not the right choice for every job. Do not use regular body filler where flexibility is needed, where the material remains wet, or where structural strength is required. For structural repairs, replace damaged material or use a product specifically designed for that purpose.
Extra Experience: Real-World Tips for Applying Bondo Like You’ve Done It Before
After using Bondo on dents, trim, furniture corners, and the occasional “how did that even break?” household repair, one lesson rises above all others: preparation beats talent. A beginner who cleans, sands, mixes carefully, and applies thin layers can get a better result than a confident person who slaps filler onto a dirty surface and hopes paint will hide everything. Paint is good, but it is not a magician with a spray can.
One helpful habit is to lay out everything before mixing. Put your spreader, sandpaper, gloves, rags, mixing board, and filler within reach. Once the hardener touches the filler, this is no longer a relaxed craft session. It is a tiny race against chemistry. If you have to search for your spreader after mixing, you may return to find your Bondo already turning into a plastic omelet.
Another experience-based tip is to use less filler than you think you need. Beginners often pile on too much because they want to cover the entire flaw in one pass. That usually creates more sanding, more dust, and a repair that is harder to shape. Thin coats are easier to control. If the repair needs more, add another layer after the first one cures and is sanded. Professional-looking repairs often come from several modest applications rather than one dramatic blob.
Temperature matters more than many people expect. On a hot day, Bondo can set up fast enough to make you question your life choices. In cooler weather, it may take longer to cure. If you are new to the process, start with small batches in moderate conditions. Do not work in direct summer sun unless you enjoy speed-sanding and panic.
For auto body repairs, shaping the metal first makes a huge difference. Bondo should smooth the final surface, not fill a canyon. If a dent is deep, use proper dent repair techniques before applying filler. The closer the metal is to the correct contour, the thinner and stronger the filler repair can be.
For wood repairs, remove soft or rotten material thoroughly. If the remaining wood is questionable, a wood hardener may help stabilize it before filler. But if the wood is badly damaged, replacement may be smarter. Bondo can rebuild edges and corners beautifully, but it should not be asked to hold up a porch post, support a stair tread, or substitute for actual carpentry.
Sanding is where the repair becomes believable. Start coarse, but do not stay coarse too long. Once the shape is close, move to finer grits to remove scratches. Use your hand as a guide. Close your eyes and feel the transition from the repair to the surrounding surface. If you can feel an edge, paint will probably show it. Feathering the edges is the secret handshake of good filler work.
Finally, primer is your truth-teller. A repair that looks perfect in raw filler may reveal pinholes, scratches, or waves after primer. Do not be discouraged. This is normal. Sand, skim, reprime, and inspect again. Bondo rewards people who are willing to refine the surface. The first coat fills the damage. The next steps create the finish.
Conclusion
Learning how to apply Bondo is mostly about respecting the process. Clean the surface, remove rust or rot, sand for grip, mix the filler correctly, apply thin layers, let it cure, sand it smooth, and finish with primer and paint. Whether you are repairing a car dent, fixing painted wood trim, or restoring a battered piece of furniture, Bondo can deliver a strong, smooth, paint-ready repair when used with care.
The biggest beginner secret is simple: do not rush. Bondo moves fast after mixing, but the overall repair rewards patience. Prepare well, work in small batches, and sand with intention. Do that, and your finished project can look less like “DIY emergency” and more like “I totally knew what I was doing the whole time.”