Makeup brushes are the unsung heroes of a good beauty routine. They blend, buff, sweep, soften, and occasionally make us feel like professional makeup artists in a bathroom with questionable lighting. But here is the not-so-glamorous truth: if you do not clean your brushes regularly, you are not just blending foundation. You may also be blending old makeup, skin oil, dead skin cells, dust, and yesterday’s bad decisions right back onto your face.
That sounds dramatic, but the point is simple. Clean makeup brushes help protect your skin, improve your makeup application, and make your tools last longer. Dirty brushes can turn a beautiful routine into a messy cycle of streaky foundation, muddy blush, irritated skin, and avoidable breakouts. In other words, the brush is not always innocent.
If you have ever wondered how to clean makeup brushes properly, how often to do it, and whether a lazy “I’ll do it next Sunday” approach counts as maintenance, this guide has you covered. Let’s get into the sudsy details.
Why Cleaning Makeup Brushes Actually Matters
Plenty of people think brush washing is just another beauty chore created to ruin weekends. It is not. There are real reasons to keep your brushes clean, and they go beyond being neat.
1. Dirty brushes can irritate your skin
Brushes pick up oil, dead skin, product residue, and environmental grime over time. When all of that buildup lands back on your skin day after day, it can contribute to clogged pores, skin congestion, and irritation. If your complexion has been acting a little dramatic lately, your foundation brush may deserve a side-eye.
2. Bacteria loves a dirty beauty tool
Makeup brushes, especially the ones used with liquid or cream formulas, can become a comfortable little hangout for bacteria and other microbes. That does not automatically mean disaster, but it does mean your brush is not something you want to treat like a forever-clean object. This matters even more if you have acne-prone, sensitive, or compromised skin.
3. Eye-area brushes need extra respect
Anything that goes near your eyes deserves stricter hygiene. Eyeshadow brushes, eyeliner brushes, and concealer brushes used close to the lash line should be cleaned more often than the average powder brush. The eye area is sensitive, and nobody wants to risk irritation or contamination for the sake of skipping five minutes at the sink.
4. Your makeup will look better
Yes, cleaner brushes are healthier, but they are also better at their actual job. A brush packed with old product cannot blend new product properly. Instead of a smooth finish, you get patchiness, dragging, and color payoff that looks confused. Clean brushes help makeup apply more evenly, look fresher, and behave the way the product was designed to behave.
5. Brushes last longer when you care for them
Good brushes are not cheap, and even budget-friendly ones should not be treated like disposable napkins. Regular cleaning removes residue that can stiffen bristles, affect shape, and shorten the useful life of the brush. A little maintenance now can save money later.
How Often Should You Clean Makeup Brushes?
This is where people want one simple answer, but reality is a little more nuanced. Different brushes need different schedules depending on what they touch.
Brushes used with liquid or cream makeup
Foundation brushes, concealer brushes, cream blush brushes, and any brush that works with wet product should usually be washed about once a week. These formulas cling to bristles, trap oil more easily, and create buildup fast.
Brushes used around the eyes
Eye brushes deserve frequent cleaning too. A good rule is every one to two weeks, and sooner if you use them daily, have sensitive eyes, or are dealing with any irritation.
Brushes used with dry powders
Powder brushes, blush brushes, bronzer brushes, and highlighter brushes can often go a little longer, but they still should not be ignored until they become archaeological artifacts. Many people do well with cleaning them every two to four weeks, depending on use.
Makeup sponges
Sponges are even needier than brushes. Since they stay damp and absorb product, they should be cleaned after every use or as close to that ideal as your real life allows. If your sponge has started looking suspicious, smelling weird, or bouncing with less enthusiasm, it may be time to replace it.
The easiest way to stay consistent is to build cleaning into your routine. For example, wash foundation and concealer brushes every Sunday, eye brushes every other Sunday, and powder brushes at the end of the month. Put it on a calendar if you must. Your brushes will not judge you for needing a reminder.
What You Need to Clean Makeup Brushes
You do not need a laboratory, a special sink, or a tiny robe for your brushes. Most of the time, you just need a few simple tools:
- A gentle liquid soap, mild shampoo, facial cleanser, or brush cleanser
- Lukewarm water
- A clean towel or microfiber cloth
- A shallow bowl or your palm
- An optional textured cleaning mat or glove for dense brushes
A gentle cleanser is usually best because harsh soaps can dry out bristles, weaken the brush over time, or leave residue. If you invested in good tools, treat them like good tools.
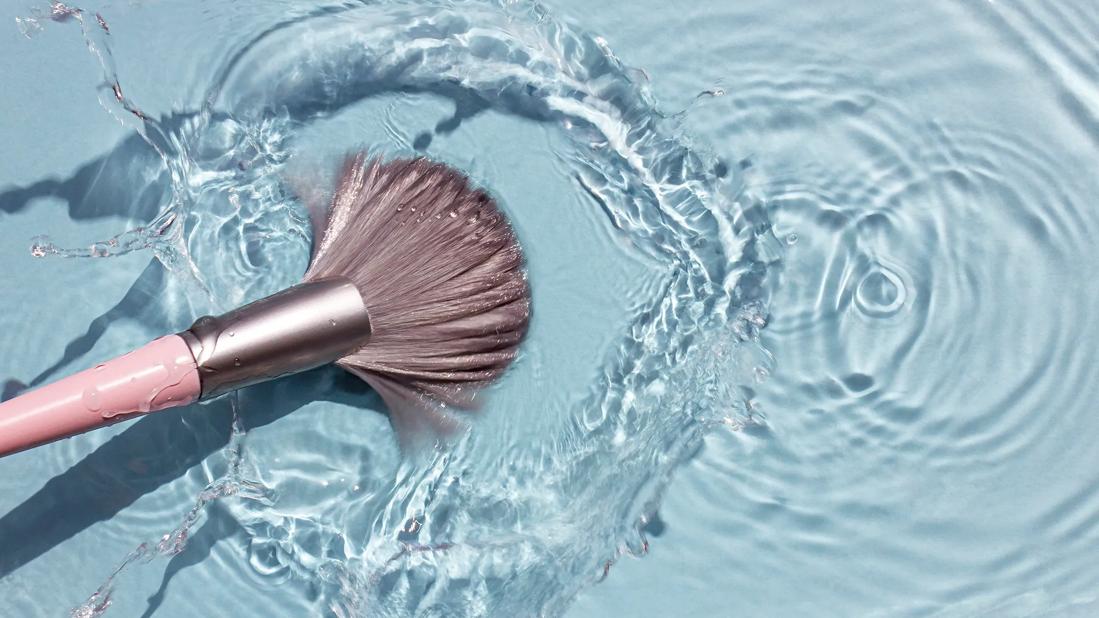
How To Clean Makeup Brushes Step by Step
Here is the straightforward method that works for most makeup brushes.
Step 1: Wet only the bristles
Hold the brush with the bristles pointing downward and rinse the tips under lukewarm water. Try not to soak the ferrule, which is the metal part that connects the bristles to the handle. Too much water there can loosen the glue over time and lead to shedding, wobbling, or a brush that gives up on life early.
Step 2: Add cleanser
Place a small amount of gentle cleanser in your palm, on a cleansing mat, or in a shallow dish. Swirl the damp bristles into the cleanser until you get a light lather. Dense brushes may need a little extra patience because foundation likes to move in and refuse to pay rent.
Step 3: Massage and loosen buildup
Use your fingers or the textured surface of a mat to work the cleanser through the bristles. Be gentle. This is a cleaning session, not an interrogation. You want to remove product without bending or roughing up the fibers.
Step 4: Rinse until the water runs clear
Rinse thoroughly under lukewarm water while keeping the brush angled downward. If the water still looks beige, pink, orange, or vaguely like your contour shade, keep going.
Step 5: Squeeze out excess water
Gently press the bristles with your fingers or a clean towel to remove extra moisture. Do not twist, yank, or wring the brush like it owes you money.
Step 6: Reshape the brush head
Use your fingers to guide the bristles back into their original shape. This helps the brush dry properly and keeps it performing the way it should.
Step 7: Dry it the right way
Lay the brush flat on a clean towel, ideally with the bristles hanging slightly off the edge of a counter so air can circulate. Some people dry brushes angled downward. What you want to avoid is drying them upright while wet, because water can travel into the ferrule and cause damage over time.
Let brushes air-dry completely before using them again. This usually takes several hours or overnight, depending on the brush size and density.
How To Quick-Clean Brushes Between Deep Washes
Sometimes you do not have time for a full wash, especially if you are switching colors quickly or need your favorite brush again tomorrow morning. That is where a quick-clean method helps.
You can use a fast-drying daily brush cleaner or spray cleanser. Lightly spray the bristles, wipe them on a clean cloth or paper towel, and repeat until the residue is gone. This is useful for between-use refreshes, especially for powder products and travel.
However, a quick-clean is not a substitute for a real wash. Think of it like perfume after the gym. Helpful? Sure. A full shower? Absolutely not.
Common Mistakes to Avoid
Using water that is too hot
Hot water can be rough on bristles and may weaken the glue holding the brush together. Lukewarm water is the sweet spot.
Soaking the whole brush
Submerging the entire brush may feel efficient, but it is one of the fastest ways to damage the handle and ferrule area. Keep the focus on the bristles.
Drying brushes upright while wet
This can send water downward into the base of the brush where it does not belong. Flat drying is the safer move.
Using harsh cleansers too often
Heavy-duty cleaners, strong alcohol products, or aggressive dish soaps may break down stubborn residue, but frequent use can be rough on delicate bristles. Save intense methods for occasional rescue jobs, not weekly maintenance.
Sharing brushes
Sharing may sound harmless, but it is not a great habit. Brushes and makeup tools can transfer bacteria and other contaminants, especially around the eyes and lips. Your best brush is your own brush.
When To Replace Makeup Brushes
Cleaning extends a brush’s life, but it does not make it immortal. Eventually, even a well-loved brush reaches retirement age.
It is time to replace a makeup brush if:
- The bristles are fraying, splitting, or shedding constantly
- The brush no longer holds its shape after washing
- It smells off even after a thorough clean
- The handle is loose or the ferrule is separating
- The brush starts applying makeup unevenly no matter what you do
Also remember that tools are only one part of the hygiene equation. Old or contaminated makeup can create problems too, especially products used around the eyes. If you have had an eye infection, toss the affected eye makeup and clean or replace any tools that came in contact with that area.
Storage Tips That Keep Brushes Cleaner Longer
Cleaning matters, but storage matters too. Tossing freshly washed brushes into a messy makeup bag full of powder dust and mystery crumbs defeats the point.
- Store clean, dry brushes in a clean cup, drawer organizer, or covered case
- Keep them away from damp bathroom conditions when possible
- Do not pack them while still damp
- Use separate spaces for clean brushes and used tools if you wear makeup often
- Wash the brush holder or makeup bag regularly too
If your brush container has not been cleaned in months, congratulations, you have discovered the side quest. Finish it.
Real-Life Experiences With Dirty and Clean Makeup Brushes
One reason this topic matters so much is that people often do not notice the problem right away. Dirty brushes rarely announce themselves with a tiny sign that says, “Hello, I am the reason your cheek acne is thriving.” Instead, the signs show up slowly.
A very common experience is the person who upgrades their skincare routine but forgets their tools. They buy a gentle cleanser, a calming serum, a fragrance-free moisturizer, maybe even a fancy spot treatment, and still wonder why their skin feels congested. Then one day they wash their makeup brushes properly and realize their makeup suddenly goes on smoother, their skin feels less irritated, and those random tiny bumps along the jawline start calming down. It is not magic. It is hygiene finally entering the group chat.
Another frequent experience happens with foundation brushes. Liquid foundation builds up fast, especially in dense buffing brushes. A brush that looked “fine enough” on Monday can feel stiff and heavy by Friday. The person using it may notice that their foundation starts looking streaky, or that it clings strangely around the nose and chin. They blame the primer, then the foundation, then the weather, then Mercury in retrograde. But the brush was the problem all along.
Eye brushes tell a similar story. Many makeup wearers have had that moment where their eyes suddenly feel itchy after applying shadow or liner. Sometimes the issue is the product, but sometimes it is the tool. A brush that has not been cleaned in ages can collect pigment, skin oils, and particles that do not belong near the eye area anymore. Once those brushes get a proper wash, application feels softer and cleaner, and the whole eye look performs better.
There is also the travel experience. People toss a few brushes into a makeup bag, use them for a week, and never think twice. Then they get home, open the bag, and discover a tiny ecosystem of powder fallout, bronzer dust, leaked concealer, and one brush that somehow absorbed all of it. Travel is not the enemy, but travel grime is very real. A quick clean during the trip and a deep wash after returning makes a major difference.
Makeup artists and frequent makeup users often learn brush care the practical way: by necessity. When you use multiple brushes every day, you cannot ignore buildup for long. Clean brushes save time because they work better. They blend faster. They pick up color more evenly. They do not surprise you by dropping yesterday’s smoky eye into today’s soft glam.
Then there is the “I did not realize how bad it was until I washed them” crowd. This is perhaps the largest group of all. People get used to gradual decline. A brush becomes a little rougher, a little less fluffy, a little less effective, and they adjust without noticing. Then they finally clean it, the bristles fluff back up, and the brush behaves like its former self. It feels like finding money in an old jacket pocket, except wetter.
The bigger lesson from these experiences is simple: cleaning makeup brushes is one of those small habits that quietly improves everything. Your skin can be happier. Your makeup can look better. Your tools can last longer. And your morning routine becomes less of a battle with patchy powder and mystery buildup. Not bad for something that mostly requires soap, water, and a little consistency.
Conclusion
If you wear makeup regularly, cleaning your brushes is not optional maintenance for perfectionists. It is basic tool care that supports healthier skin, better makeup performance, and longer-lasting brushes. The good news is that it is not hard. A gentle cleanser, lukewarm water, proper drying, and a realistic schedule will do most of the heavy lifting.
So the next time your blush looks muddy, your foundation goes streaky, or your skin seems crankier than usual, do not just blame the product. Check the brush. It may be asking, very politely, for a bath.