Nothing ruins the cozy promise of blackout shades faster than one heroic little beam of sunlight slicing across your pillow at 6:08 a.m. You bought the shade. You measured the window. You imagined hotel-level darkness. Then morning arrived, and your window decided to cosplay as a laser show.
The good news: light gaps on window shades are common, fixable, and usually not a sign that your shades are defective. Most gaps happen because shades need clearance to move up and down smoothly, especially inside-mount roller shades, cellular shades, solar shades, and pleated shades. The fabric or shade body is often slightly narrower than the full window opening, leaving small spaces at the sides where light can sneak in. The goal is not always to “seal” the window like a submarine hatch. The real goal is to block, redirect, or cover the light without damaging the shade, trapping moisture, or making the window treatment impossible to operate.
In this guide, you will learn how to cover light gap on window shades using practical solutions such as side channels, light-blocking strips, outside-mount shades, blackout curtains, cornices, valances, magnetic strips, and careful measuring. Whether you are fixing a nursery, bedroom, media room, home office, or shift-worker sleep cave, these methods can help you turn annoying glare into peaceful darkness.
What Is a Light Gap on Window Shades?
A light gap is the space between the edge of a window shade and the window frame, wall, trim, sill, or headrail. It may appear on the left side, right side, top, bottom, or corners of the shade. On sunny mornings, even a tiny gap can feel dramatic because direct light travels in a straight line. One quarter-inch opening can look like a spotlight when it lands on your face, laptop screen, television, or baby’s crib.
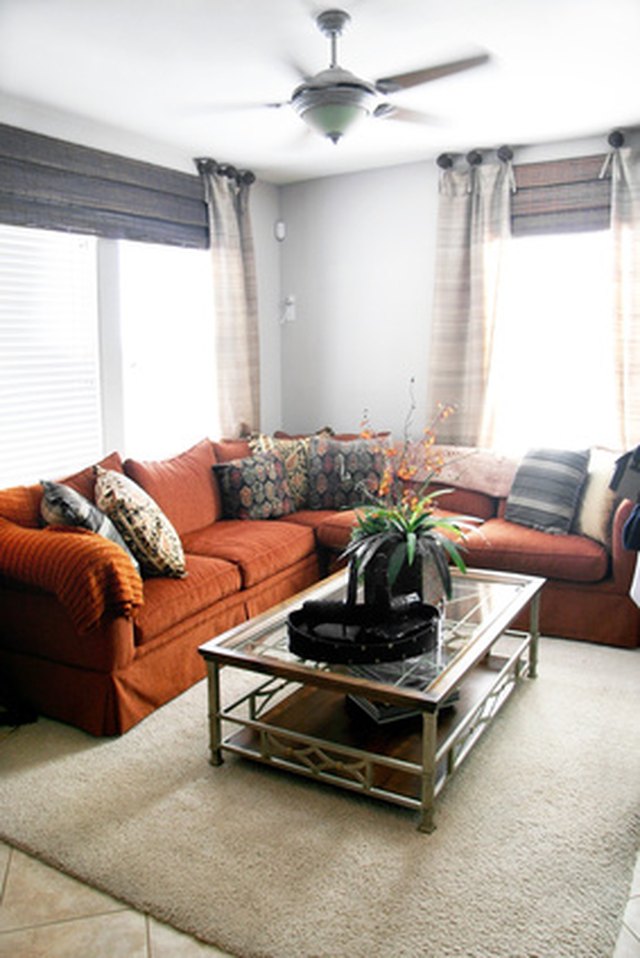
Light gaps are most noticeable with blackout window shades because the fabric blocks nearly all light through the material itself. Once the center of the window goes dark, the bright edges become obvious. It is a little like cleaning one part of the kitchen counter and suddenly noticing the toaster crumbs. The shade did its job; now the edges are demanding attention.
Why Window Shades Have Light Gaps
Before you fix the problem, it helps to know why it happens. Window shades need a small amount of operating clearance. If the shade fits too tightly inside the frame, it may rub, scrape, wrinkle, jam, or refuse to raise and lower properly. Manufacturers often make small deductions from inside-mount shades so the product can function smoothly. Roller shades also need room for brackets, clutch mechanisms, end caps, and the roll itself, which means the fabric is usually narrower than the full headrail width.
Other causes include windows that are not perfectly square, uneven trim, deep sills, shallow frames, bowed walls, bulky handles, crank hardware, and old houses that seem to have been measured with optimism and a sandwich. Even a custom shade can show light gaps if the window opening is irregular or if the wrong mount style was chosen.
Start With the Best Fix: Side Channels or Light Blockers
Side channels, also called light blockers, light guards, or side tracks, are among the most effective ways to cover light gaps on window shades. These narrow strips or tracks install along the left and right sides of the window opening. Depending on the design, they either guide the shade as it moves or simply overlap the shade edge to stop light from passing through.
Side channels are especially useful for inside-mount blackout shades, cellular shades, pleated shades, roller shades, and media-room window treatments. They work because they attack the exact weak point: the vertical edge. Instead of replacing the entire shade, you add a blocking system where light is escaping.
When Side Channels Work Best
Side channels are ideal when the shade fits well overall but leaks light along the sides. They are a strong choice for bedrooms, nurseries, home theaters, guest rooms, and any space where sleep or screen visibility matters. They also help increase privacy at night because they reduce the visible edge gap that might otherwise reveal movement or silhouettes.
For a polished look, choose channels that match the window trim, shade color, or wall color. White or off-white channels often disappear against painted trim, while darker channels can blend with black or charcoal blackout shades. If your window frame is shallow, check the product depth before purchasing, because some side-channel systems require more mounting space than others.
Use Light-Blocking Strips for a Budget-Friendly Upgrade
If you want a simpler fix, adhesive light-blocking strips can help. These are usually L-shaped or flat PVC pieces that attach to the window frame or wall beside the shade. They do not necessarily guide the shade; they create an overlap that hides the side opening.
This is a popular DIY solution because it is affordable, easy to cut, and usually removable with careful handling. For renters, adhesive strips can be a better option than drilling permanent tracks into the frame. Still, use caution: test adhesives in a hidden area first, especially on painted trim, stained wood, or delicate surfaces. Nothing says “weekend project” like accidentally removing a strip of paint shaped like regret.
How to Install Light-Blocking Strips
Lower the shade fully and mark where the light enters. Clean the mounting surface with a gentle cleaner and let it dry. Measure the height of the window opening and cut the strips to length. Hold each strip in place before removing the adhesive backing to confirm that the shade can still move freely. Then attach the strip so it slightly overlaps the edge of the shade without pressing into the fabric.
The key word is “slightly.” If the strip pushes hard against the shade, the fabric may fray, the hem bar may catch, or the shade may raise unevenly. Good light control should not require wrestling with your window every morning.
Switch to an Outside Mount Shade
If you are ordering new window shades, an outside mount is one of the smartest ways to reduce light gaps from the beginning. Instead of fitting inside the window opening, an outside-mount shade is installed on the wall or trim above and around the window. Because the shade overlaps the window on all sides, it covers more of the opening and blocks more edge light.
Outside mounting is particularly helpful for shallow windows, uneven frames, windows with crank handles, or openings that are not square. It can also make a small window look larger because the shade can be mounted higher and wider than the actual glass. This creates a clean, designer-friendly effect while improving room darkening.
How Much Overlap Do You Need?
For better light control, many homeowners choose at least two to three inches of overlap on each side when space allows. For serious blackout performance, wider overlap is even better. Add extra height above the window so the roll, headrail, or cassette blocks light at the top. Extend the shade below the sill if the bottom edge leaks light.
Before choosing an outside mount, check for obstacles. Doors, shelves, cabinets, wall art, alarm sensors, and window handles can interfere with operation. Measure twice, imagine the shade moving, then measure again like a person who has met a crooked wall before.
Layer Blackout Curtains Over the Shades
Layering is the classic fix, and for good reason. Blackout curtains or drapery panels can cover the light that escapes from the sides, top, and bottom of shades. This method works especially well when you already own shades and do not want to replace them.
For the best result, hang the curtain rod wider than the window and several inches above the frame. The fabric should extend beyond the shade edges and reach the sill, apron, or floor. Curtains with blackout lining provide the strongest light control. A wraparound curtain rod can help the fabric return toward the wall, reducing side glow even more.
Layering also gives you design benefits. A simple roller shade can handle privacy and daily function, while curtains add softness, color, pattern, texture, and acoustic comfort. In a bedroom, this combination feels cozy. In a media room, it feels intentional. In a rental apartment, it feels like you finally negotiated peace with the sunrise.
Add a Valance, Cornice, or Cassette to Block Top Light
Side gaps get most of the blame, but top gaps can be just as annoying. Light can enter between the headrail and the window frame, especially when the shade is mounted inside a deep opening or when the roll sits forward from the glass.
A valance, cornice, fascia, or cassette can cover the top of the shade and reduce overhead glow. A fabric valance offers a softer look, while a wood cornice or modern cassette gives a cleaner architectural finish. This solution is useful for roller shades, Roman shades, woven shades, and layered window treatments.
DIY Top Gap Fix
For a simple DIY approach, install a small painted wood strip, return valance, or fabric-covered board above the shade. Make sure it does not interfere with the shade roll or lift mechanism. The best top treatment should hide light, not become a tiny roof your shade bumps into every day.
Fix Bottom Light With a Better Drop or Sill Treatment
Bottom light gaps happen when the shade stops above the sill, curves away from the glass, or hangs unevenly. The fix depends on the window style. If the shade is too short, replacement may be the cleanest answer. If the shade is long enough but light leaks around the sill, a small overlap, sill-mounted strip, or heavier bottom rail can help.
Some blackout shades include a hem bar that helps the fabric hang straight. If your shade has side channels, make sure the bottom rail seats properly when fully lowered. If you use curtains, let the panels extend below the sill or to the floor so they cover the lower glow.
Choose the Right Shade Type for Better Light Control
Not all shades handle light gaps the same way. Roller shades are clean and modern, but they often have more noticeable side gaps because the fabric must be narrower than the operating hardware. Cellular shades can provide excellent insulation and room darkening, and some systems pair well with side tracks. Roman shades add softness and coverage, but depending on their construction, they may still leak light around the sides. Solar shades reduce glare and UV exposure but are not designed for full blackout darkness.
If you need maximum darkness, look for blackout cellular shades with side tracks, blackout roller shades with light blockers, or an outside-mount blackout shade layered with drapery. For a media room or night-shift bedroom, do not rely on fabric opacity alone. The fabric can be excellent, but the installation system determines whether light sneaks around the edges.
Measure Carefully Before Ordering New Shades
Accurate measuring is the quiet hero of light control. For inside-mount shades, measure the width at the top, middle, and bottom of the window opening. Measure the height at the left, center, and right. Use the manufacturer’s instructions for which measurement to submit because each product type may have different deduction rules.
For outside-mount shades, measure the window opening and then add your desired overlap. Confirm there is enough flat surface for brackets. If your goal is blackout performance, plan the shade like you are blocking a stage light: cover the glass, cover the trim edges, and give the fabric room to extend beyond the problem areas.
Common Measuring Mistakes
One common mistake is assuming all windows in a room are identical. They may look like siblings, but one may be slightly wider, taller, or more crooked than the rest. Measure each window separately. Another mistake is ordering inside mount because it looks tidy, even when the frame is too shallow or uneven. A clean look is nice, but sleeping through sunrise is also an interior design goal.
Try Magnetic or Velcro Edge Solutions Carefully
Some homeowners use magnetic strips, hook-and-loop tape, or removable fasteners to pull shade edges closer to the frame. These can work in certain situations, especially with lightweight blackout fabric or temporary setups. However, they require caution. Too much tension can distort the shade, damage the fabric, or make operation frustrating.
If you try this method, use small sections instead of one long strip. Place them where light leaks most, not necessarily along the entire shade. Avoid adhesives that leave residue on fabric. For expensive custom shades, test any DIY fix in a hidden spot or ask the manufacturer before attaching anything directly to the material.
Use Temporary Blackout Solutions for Renters and Travel
If you rent, travel, or need a short-term fix, temporary blackout panels can help. Options include removable blackout fabric, tension rods with curtains, static-cling blackout film, portable travel blackout blinds, and removable side strips. These are not always as elegant as custom side channels, but they can be extremely effective.
For renters, tension rods and wraparound curtains are often the least risky. They do not require drilling, and they can be removed when you move. Static-cling film can darken glass but will not solve side gaps by itself, so it works best when paired with shades or curtains. Avoid taping heavy materials directly to painted walls for long periods, especially in humid rooms.
Do Not Forget Safety and Ventilation
When covering light gaps, do not permanently seal windows shut or block emergency access. Bedrooms often require accessible windows for safety, and some windows need to open for ventilation. Also, be careful with cords. In homes with babies, toddlers, or young children, cordless window coverings or products with inaccessible cords are the safer choice. Keep cribs, beds, furniture, and toys away from window coverings and cords.
Moisture matters too. In bathrooms, kitchens, and humid climates, avoid creating a tight, unventilated pocket where condensation can collect behind fabric or plastic. If you see moisture on the glass, allow the area to dry and consider materials that tolerate humidity better, such as vinyl, faux wood, aluminum, or moisture-resistant shade options.
Best Solutions by Room
Bedroom
For bedrooms, combine blackout shades with side channels or layered blackout curtains. If you are ordering new shades, choose an outside mount with generous overlap. If you already have inside-mount shades, add light-blocking strips along the sides and a valance at the top.
Nursery
For a nursery, prioritize cordless operation, blackout fabric, and side gap control. Side channels can help create a dark nap environment, while curtains add another layer of light blocking. Keep all window treatment cords out of reach, and avoid placing the crib near the window.
Home Office
For a home office, the goal may be glare control rather than total darkness. Solar shades, light-filtering shades, or room-darkening shades with side coverage can reduce screen glare without making the room feel like a movie theater at noon.
Media Room
For a media room, treat light like an uninvited guest. Use blackout shades, side channels, top treatments, and floor-length blackout drapery. The more layers you add, the fewer bright slivers will show up on the television screen during the best part of the movie.
Step-by-Step Plan to Cover Light Gaps
First, lower the shade during the brightest part of the day and identify where the light enters. Side gaps need side channels or light-blocking strips. Top gaps need a valance, cassette, cornice, or higher outside mount. Bottom gaps need better shade length, sill overlap, a bottom seal, or curtains. Corner gaps often need a combination of side and top treatments.
Second, decide whether you want a temporary, DIY, or permanent solution. Temporary fixes include tension curtains and removable blackout panels. DIY upgrades include adhesive light blockers, painted trim strips, and wraparound curtain rods. Permanent improvements include new outside-mount shades, custom side channels, blackout cellular systems, or professionally installed layered treatments.
Third, test the shade operation after every change. Raise and lower it several times. Watch for rubbing, catching, buckling, or uneven movement. A perfect blackout fix is not perfect if it turns your shade into a daily arm workout.
Real-World Experiences: What Actually Works When the Sun Is Too Ambitious
In real homes, the best solution usually depends on how serious the light problem is. A person who only wants to reduce a soft morning glow may be happy with blackout curtains hung wider than the window. A night-shift worker trying to sleep at 1 p.m. may need blackout shades, side channels, top coverage, and curtains together. The difference is not just style; it is tolerance. Some people can sleep through a sunrise, a garbage truck, and a neighbor’s leaf blower. Others wake up when one photon enters the room wearing tap shoes.
One common experience is disappointment after installing inside-mount blackout roller shades. The fabric looks beautiful, the center of the window is dark, but the sides glow like a tiny sunrise border. This does not mean the shade is poor quality. Roller shade fabric must leave room for the brackets and controls. The practical fix is to add side light blockers or layer drapery over the shade. Many homeowners find that simple side strips reduce the sharpest beams immediately, while curtains soften the remaining glow.
Another frequent lesson: outside mount shades often solve more problems than expected. People choose inside mount because it looks neat and built-in, but older windows are not always square. When an outside-mount shade overlaps the frame, it hides crooked trim, covers more glass, and blocks side light more effectively. It can also make the window appear taller when mounted above the frame. The tradeoff is that the shade projects into the room more visibly, so it needs to be measured and styled intentionally.
For nurseries, parents often report that layered solutions are worth the effort. A blackout cellular shade may make the room darker, but adding side channels or blackout curtains can help with daytime naps. The goal is not to create a cave forever; it is to control light when sleep matters. Cordless products are especially important in children’s spaces, and furniture should stay away from windows. A dark nursery is useful. A safe nursery is non-negotiable.
In apartments and rentals, the winning strategy is usually reversible layering. Tension rods, removable blackout curtains, adhesive light strips, and portable blackout panels can dramatically improve a room without drilling into trim. The trick is to avoid aggressive tape on painted surfaces. Removable does not always mean damage-free, especially after summer heat, humidity, or months of direct sun.
Home theater owners learn quickly that “blackout fabric” and “blackout room” are not the same thing. The fabric may block light through the shade, but gaps around the shade still matter. For movie rooms, the best results usually come from combining an opaque shade with side tracks and dark drapery. Dark wall colors near the window can also reduce reflected light. A white window frame around a blackout shade can bounce sunlight into the room, while darker trim or fabric absorbs more of it.
The most practical experience of all is this: fix the biggest light leak first. Do not buy five products before you know where the light enters. Stand in the room when the sun hits the window. Take a photo if needed. Cover one gap temporarily with cardboard or fabric and see how much difference it makes. If the room improves immediately, you know where to invest. If not, check the top, bottom, and corners. Light is sneaky, but it is not magic. Find the path, block the path, enjoy the darkness.
Conclusion
Learning how to cover light gap on window shades is mostly about choosing the right layer for the right leak. Side channels and light-blocking strips are excellent for vertical edge gaps. Outside-mount shades reduce light by overlapping the window frame. Blackout curtains add flexible, stylish coverage. Valances and cornices help with top glow, while better measuring prevents many problems before the shade is even installed.
For the darkest result, combine solutions: blackout shade, side coverage, top treatment, and curtain layering. For a simple improvement, start with adhesive light blockers or wider drapery. For a long-term upgrade, consider custom shades with side channels or an outside mount designed specifically for room darkening. The perfect setup should block unwanted light, preserve smooth shade operation, match your room, and let you sleep past sunrise without negotiating with a glowing window edge.