

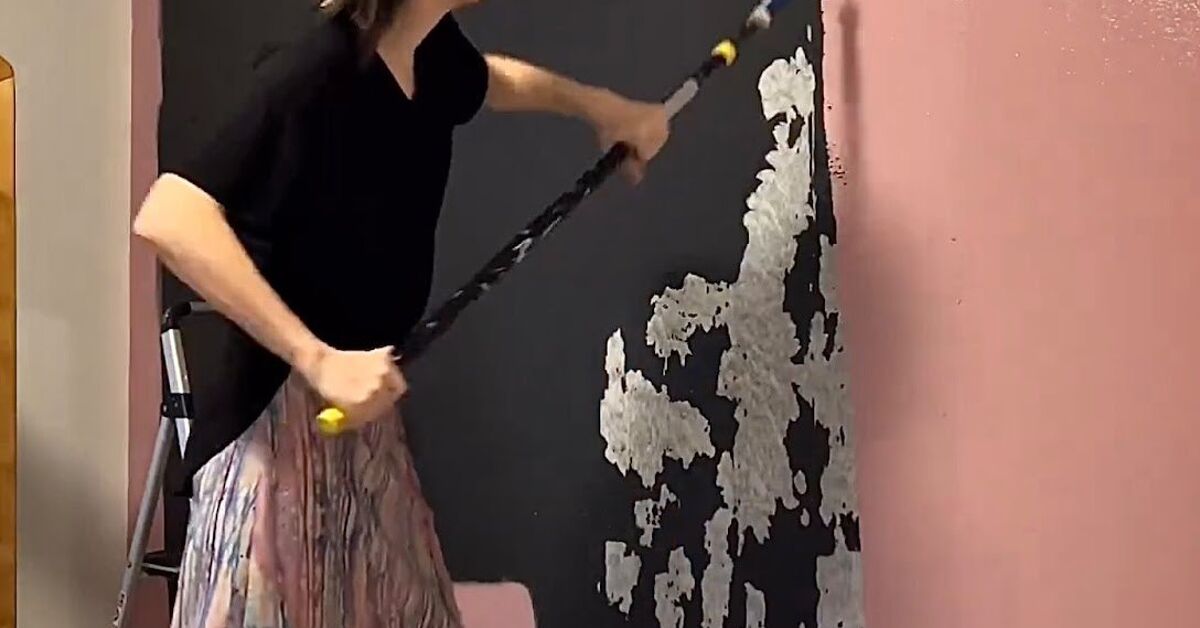
A plain wall is perfectly functional, but so is a cardboard box. If your bedroom, living room, dining area, or entryway needs more architectural character, a DIY shiplap accent wall can transform the space without requiring a contractor-sized budget.
Real solid-wood shiplap can quickly push a project beyond $150. The budget-friendly solution is faux shiplap made from thin plywood ripped into consistent planks. Once installed, spaced, trimmed, and painted, the finished wall delivers the clean horizontal lines of traditional shiplap at a fraction of the cost.
This guide uses an 8-foot-high by 10-foot-wide wall as the working example. The estimated budget assumes you already own, borrow, or rent the major tools. Material prices vary by region, so treat the numbers as a practical target rather than a legally binding promise from the lumber aisle.
Why Use Plywood for a Budget Shiplap Wall?
Traditional shiplap consists of boards with overlapping rabbeted edges. Those joints help the boards align while creating the narrow shadow lines associated with the style. Faux shiplap does not have interlocking edges. Instead, thin plywood strips are mounted directly to the wall with small, consistent gaps between them.
The plywood method works especially well for decorative interior walls because it is lightweight, paintable, relatively inexpensive, and easier to cut than thick solid-wood planks. Home improvement guides commonly recommend locating studs, establishing a level first row, and working systematically across the wall.
Using plywood also reduces the amount of thickness added around baseboards, window trim, and electrical outlets. It is still a permanent-looking wall treatment, but it does not make every outlet appear to be hiding at the bottom of a tiny wooden canyon.
Is Faux Shiplap Still Stylish?
Shiplap is no longer limited to bright-white farmhouse interiors. Current designs use narrow planks, vertical layouts, natural finishes, deep greens, charcoal, warm beige, muted blue, and colors that match the surrounding walls. Horizontal boards can visually widen a room, while vertical planks can emphasize ceiling height.
The safest design strategy is to treat shiplap as an architectural texture rather than a theme. Pair it with simple furniture, modern lighting, classic artwork, or natural materials instead of filling the room with signs announcing that everyone should “Gather.” Your guests were probably already planning to do that.
Estimated DIY Shiplap Wall Budget
For an 80-square-foot wall, three 4-by-8-foot sheets provide 96 square feet of raw material. That leaves room for saw kerf, damaged edges, outlet cuts, and a few pieces that somehow become mysteriously shorter between the saw and the wall.
| Material | Estimated Cost |
|---|---|
| Three 1/4-inch plywood or underlayment sheets | $60–$78 |
| Construction adhesive | $8–$12 |
| 18-gauge brad nails | $8–$12 |
| Wood filler and paintable caulk | $8–$12 |
| Primer and interior paint | $25–$35 |
| Optional edge trim | $10–$18 |
| Total | Approximately $119–$167 |
To remain below $150, shop carefully, use leftover paint when possible, compare plywood grades, and skip unnecessary decorative trim. Home improvement retailers sell 1/4-inch sanded plywood and plywood underlayment in 4-by-8-foot sheets, although availability and pricing depend heavily on location. A box of basic 18-gauge brads generally falls within the lower portion of the budget.
Ways to Reduce the Cost
- Ask the store whether it offers complimentary or low-cost rip cuts.
- Check the discounted lumber rack for paintable sheets with minor cosmetic damage.
- Use paint and primer left over from another room.
- Borrow a brad nailer, level, saw, or stud finder.
- Choose simple square-edge trim instead of decorative molding.
- Install planks only above an existing baseboard if removing it would add expense.
Materials and Tools You Will Need
Materials
- Three sheets of 1/4-inch sanded plywood or smooth plywood underlayment
- 1- to 1-1/4-inch 18-gauge brad nails
- Construction adhesive rated for wood and drywall
- Paintable acrylic-latex caulk
- Wood filler or lightweight spackling compound
- Bonding or wood primer
- Interior paint in your preferred color and sheen
- Nickels, tile spacers, or 1/8-inch reusable spacers
- Optional 1-by-2 trim or thin lattice for exposed edges
Tools
- Tape measure
- Pencil and notepad
- Four-foot level or laser level
- Stud finder
- Table saw, circular saw with a guide, or store cutting service
- Miter saw or circular saw for crosscuts
- 18-gauge brad nailer or hammer and finish nails
- Jigsaw or oscillating multi-tool
- Caulk gun
- Sanding block or random-orbit sander
- Paintbrush and small roller
- Safety glasses, hearing protection, and dust mask
Step 1: Measure the Wall and Plan the Layout
Measure the wall width and height in several places. Older homes are particularly skilled at creating walls that are almostbut never quitesquare. Use the largest measurements when calculating material requirements.
Multiply the width by the height to determine the square footage. Add approximately 10 to 15 percent for waste. Next, decide whether the boards will run horizontally or vertically. Horizontal planks create the most familiar shiplap appearance and are usually easier for first-time installers.
Plan the location of every visible seam before cutting. On a 10-foot-wide wall, 8-foot plywood strips will not span the entire distance, so each row needs an additional 2-foot piece. Stagger those joints from one row to the next rather than creating one obvious vertical seam.
Choose the Plank Width
Planks between approximately 5 and 8 inches wide work well in most rooms. Narrower strips create more lines and a slightly more contemporary appearance. Wider boards feel relaxed and traditional but can make a small wall look visually heavy.
For efficient use of a 48-inch-wide plywood sheet, ask for strips measuring approximately 5-7/8 inches wide. This allows room for the saw blade’s kerf while producing eight nearly equal planks from each sheet. Confirm the cutting plan with the person operating the saw before the first cut is made.
Step 2: Inspect and Prepare the Wall
Remove artwork, hooks, switch plates, outlet covers, and loose trim. If you plan to reinstall the baseboard over the new planks, remove it carefully and label the pieces. Removing fixtures before installation helps the new surface sit cleanly against the wall.
Repair water damage, mold, loose drywall, large holes, or structural problems before covering the wall. Shiplap can hide cosmetic imperfections, but it should never become a wooden curtain placed over an active leak.
Clean away dust and grease. Lightly sand major bumps because thin plywood tends to follow the shape of the surface beneath it.
Paint the Wall Behind the Gaps
Apply one coat of paint to the existing wall in the same color planned for the shiplap. The narrow spaces between the boards expose the original wall, and painting it first prevents random flashes of the old color from appearing through the gaps.
Dark shiplap makes this step particularly important. A white line peeking through a charcoal wall is less “custom millwork” and more “someone forgot a step.”
Step 3: Cut, Sand, and Prime the Plywood Strips
Rip the plywood into uniformly sized planks using a table saw or a circular saw with a straightedge guide. If the store performs the cuts, inspect several strips before leaving. Consistent width matters because small variations become more noticeable as rows accumulate.
Sand the face, cut edges, and corners of every strip with 120- to 180-grit sandpaper. Thin plywood can produce splinters, fuzzy edges, and small veneer chips. Sanding now is much easier than attempting to tame a splinter after it has been nailed seven feet above the floor.
Prime the fronts and exposed edges before installation. Painting the edges helps maintain crisp-looking shadow lines without forcing a loaded brush into every gap later. Primer also improves paint adhesion and can reduce uneven absorption. Paint manufacturers generally recommend clean, dry surfaces and suitable primer for bare wood or paneling.
Step 4: Find and Mark the Studs
Use a stud finder to locate the framing behind the drywall. Confirm each stud by scanning from both directions, then mark the center of the stud with a pencil. Extend the marks vertically with a level or transfer them to painter’s tape placed on the ceiling and floor.
Stud markings allow you to fasten the boards securely while reducing random nailing into areas that may contain plumbing or electrical wiring. Before driving a nail, remain aware of outlets, switches, water fixtures, and utility lines on the opposite side of the wall.
Step 5: Install the First Row Perfectly Level
The first row controls every row above it, so this is not the moment to trust the floor, ceiling, or your unusually optimistic eyeballing skills. Use a long level or laser line.
You can begin at the floor and work upward or start near the ceiling and work downward. Starting at the top places any narrow final plank near the baseboard, where furniture and trim may make it less noticeable. Starting at the bottom is often easier when the baseboard provides a reliable reference.
Apply a thin, wavy bead of construction adhesive to the back of the first plank. Do not use so much that it squeezes through the edges. Press the board into position, verify that it is level, and drive brads into the marked studs.
If future removal matters, skip or minimize adhesive and rely on nails placed into studs. Adhesive creates a stronger installation, but removing the boards later may damage the drywall paper.
Step 6: Add the Remaining Shiplap Rows
Place nickels or 1/8-inch spacers along the top of the installed plank. Rest the next board against the spacers, check it for level, and fasten it. Remove the spacers and reuse them for the next row.
Check the wall every two or three rows instead of assuming that identical spacers guarantee a level installation. A slightly bowed plank, uneven floor, or tiny measurement error can gradually send the project climbing uphill.
Stagger end joints so they do not form one vertical line. A simple alternating pattern works well: begin one row with an 8-foot strip and the next with a shorter section. Keep factory or cleanly cut edges at visible joints whenever possible.
Traditional shiplap boards use overlapping joints, while this plywood method depends on manually spaced gaps. Both techniques require a straight starting course and consistent fastening.
Step 7: Cut Around Outlets and Switches
Turn off power to the affected circuit before removing covers or working around electrical boxes. Confirm that the power is off using an appropriate tester.
Measure the location of each box carefully and transfer the dimensions to the plywood. Drill a starter hole and use a jigsaw or oscillating tool to make the opening. Leave enough clearance for the electrical box and device, but keep the cut small enough to remain hidden beneath the cover plate.
Because the new plywood changes the finished wall thickness, the electrical box or device may require a listed box extender or other approved adjustment. Electrical requirements vary with the installation. When the correct solution is unclear, stop and consult a licensed electrician rather than improvising with longer screws and positive thinking.
Step 8: Install the Final Plank and Edge Trim
The final row often requires a rip cut. Measure the remaining space at several points because the ceiling or floor may not be perfectly parallel. Cut the last plank to follow the actual dimensions rather than forcing the room to obey the drawing.
At exposed side edges, install thin lattice, square-edge molding, or 1-by-2 trim. A framed perimeter creates a crisp transition between the shiplap and adjacent drywall. If the planks terminate inside a corner, a neat bead of paintable caulk may be sufficient.
Avoid filling the horizontal gaps. Those lines are the entire reason you have spent the weekend manufacturing wooden stripes.
Step 9: Fill, Caulk, and Sand
Fill visible nail holes with wood filler or lightweight spackle. Allow the filler to dry, then sand it flush. Caulk the perimeter where the shiplap meets the ceiling, adjacent walls, or trim.
Use caulk sparingly. Heavy caulk lines make the installation look soft and uneven. A small controlled bead, smoothed immediately with a damp finger or finishing tool, usually creates the cleanest result.
Vacuum the entire wall and wipe it with a tack cloth or lightly damp microfiber cloth. Paint and sanding dust have a long-standing agreement to meet in the most visible location possible.
Step 10: Paint the Finished Shiplap Wall
Use a brush to paint the perimeter, trim, board ends, and any exposed gaps. Apply paint to the flat surfaces with a small microfiber or foam roller. Two thin coats generally create a cleaner finish than one heavy coat that floods the grooves.
Do not overload the roller. Thick paint can bridge the gaps and create stretchy paint membranes between boards. Shiplap painting guidance commonly favors lighter coats so the characteristic lines remain visible.
Choosing a Paint Sheen
Matte paint hides minor surface flaws but can be harder to clean. Eggshell offers a soft appearance with slightly better washability. Satin provides more durability and emphasizes the wall’s texture because it reflects additional light.
For bedrooms and low-traffic living rooms, eggshell is usually a balanced choice. Consider satin for entryways, mudrooms, children’s rooms, or other areas where the wall may require regular cleaning.
Common DIY Shiplap Mistakes to Avoid
Buying Too Little Plywood
Calculate the total square footage and add waste. Outlet openings, damaged veneer, saw kerf, staggered seams, and incorrect cuts consume more material than a perfect spreadsheet predicts.
Trusting the Floor or Ceiling
Use a level. A sloped floor can make every board appear crooked even when it sits evenly against the baseboard.
Skipping the Wall Paint
The original wall color will remain visible between faux shiplap boards. Paint the background before installation unless surprise stripes are part of the design.
Using Inconsistent Spacers
Choose one spacing dimension and use the same objects throughout the installation. Mixing coins, cardboard, and optimistic guesses produces uneven lines.
Filling Every Seam
Fill nail holes and unwanted end joints, but preserve the horizontal gaps. Caulking those spaces removes the depth that makes the wall look like individual boards.
Ignoring Moisture Problems
Standard plywood and MDF are poor choices for walls with recurring condensation, leaks, or direct water exposure. Fix the moisture source first and choose materials rated for the room’s conditions.
How to Keep a Shiplap Wall Looking Clean
Horizontal gaps can collect dust. Use a microfiber duster, soft paintbrush, or vacuum brush attachment every few weeks. Clean marks with a lightly damp cloth and a mild cleaner approved for the paint finish.
Avoid soaking the plywood or allowing water to remain inside the grooves. Keep a small labeled container of leftover paint for future nail-hole repairs and touch-ups.
If dust is a major concern, vertical shiplap has fewer horizontal ledges while still providing architectural texture. Shiplap maintenance guidance frequently notes that the grooves require more attention than a smooth painted wall.
Conclusion: A High-Impact Wall Without a High-End Bill
A DIY shiplap accent wall does not require premium lumber or professional installation. Thin plywood, careful planning, consistent spacing, and patient finishing can create a polished feature wall for approximately $150 or less.
The most important steps are also the least glamorous: calculate the layout, inspect the plywood, establish a perfectly level first row, mark the studs, and apply thin paint coats. Get those details right, and the wall will look intentionally designed rather than hurriedly assembled during a sudden burst of home-improvement confidence.
Use white or warm cream for a bright traditional finish, deep green for a cozy modern room, charcoal for drama, or a wall-matching neutral for subtle texture. The materials may be inexpensive, but the result can look convincingly custom.
Real-World Experiences and Lessons From Budget Shiplap Projects
The most common surprise in a plywood shiplap project is not the cutting, nailing, or painting. It is discovering how many objects in an ordinary room are not level. Floors slope. Ceilings dip. Corners lean. Baseboards may be thicker on one side than the other. The wall itself occasionally behaves as though it was installed during an earthquake.
This is why experienced DIYers stop checking the project against the room and start checking it against a level line. The first plank may need a slight gap beneath one end to remain level. That gap can later be hidden with baseboard or caulk. Following a crooked floor, by comparison, makes every row crooked.
Another practical lesson concerns store cutting services. Having plywood ripped at the store can save time and eliminate the challenge of moving full sheets through a table saw. However, the accuracy of those cuts varies. Before leaving, stack the strips and compare their widths. If several boards differ noticeably, reserve them for the narrow final row or recut them at home.
Plywood selection matters just as much as cutting accuracy. The cheapest sheet is not always the least expensive choice after accounting for damaged veneer, deep knots, delamination, or severe bowing. Inspect both faces and sight down the length of each sheet. A slightly more expensive smooth panel may require less filler, sanding, and paint.
Painting before installation can initially feel like unnecessary work, but it prevents several finishing headaches. Pre-painted edges create cleaner gaps, and primed faces need fewer coats after the boards are attached. The final coat can then unify the wall and cover nail-hole repairs without saturating every groove.
The spacer method also creates a small but memorable challenge. Nickels work well, but they have a remarkable ability to drop behind furniture, roll under tools, or disappear precisely when both hands are holding an eight-foot board. Reusable plastic spacers with tabs are easier to grip. Keeping several spacers available across the length of each plank prevents the board from tilting or pinching the gap.
Working with a second person is helpful, especially on long walls. One person can hold and level the plank while the other nails it in place. A solo installer can still complete the project by temporarily supporting long boards with small blocks, partially driven nails, or a ledger strip.
End seams deserve more attention than many first-time builders expect. Even a small mismatch becomes visible after painting because light catches the joint. Stagger seams, cut square ends, and place less attractive joints behind furniture whenever possible. If the wall is highly visible, frame the perimeter and plan a deliberate repeating seam pattern.
Budget projects also benefit from knowing where not to economize. Dull saw blades tear thin veneer. Cheap caulk may crack or shrink. Skipping primer can cause blotchy paint coverage. Saving five dollars on preparation can create several hours of repairs, which is a poor exchange rate even in the enthusiastic world of weekend DIY.
Finally, allow enough time. Installing the planks may take only a few hours, but preparation, sanding, filling, drying, caulking, and painting stretch the project across a weekend. Rushing the final coat is tempting because the wall already looks nearly finished. Resist. The finish work is what separates a clever plywood project from a wall that obviously began life as three sheets from the lumber department.