

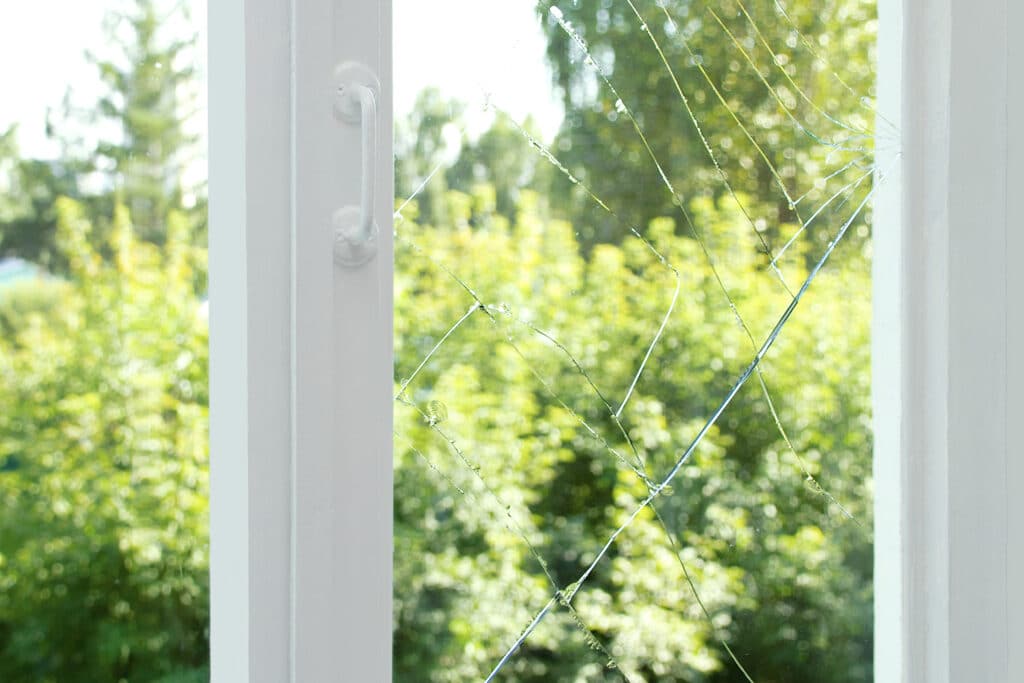
A cracked window has a special talent for turning an ordinary Tuesday into a home-repair mystery. One minute, the glass is quietly doing its job; the next, a thin line is creeping across the pane like it has somewhere important to be.
The good news is that not every crack requires replacing the entire window. A small crack in ordinary single-pane glass may be stabilized temporarily with clear epoxy. Traditional single-pane glass in a wood sash can often be replaced by a careful DIYer. However, cracked double-pane, tempered, laminated, oversized, or unusually located glass usually belongs in professional hands.
This guide explains how to assess the damage, secure the area, make a temporary repair, replace a basic single pane, and recognize when a cracked window is warning you to put down the putty knife and call a glazier.
First, Determine What Kind of Window You Have
Before choosing a repair method, identify the glass and window construction. The correct fix for an old single-pane wood window can be completely wrong for a modern insulated unit.
Single-Pane Glass
A single-pane window contains one sheet of glass. It is common in older homes, workshops, sheds, garages, and some storm windows. If the frame is sound, the broken pane can often be removed and replaced without replacing the entire sash or window.
Double- or Triple-Pane Glass
Modern insulated windows contain two or three panes separated by spacers. The space between the panes is sealed and may contain insulating gas. Together, the glass, spacer, sealant, and enclosed space form an insulated glass unit, commonly called an IGU.
When one pane cracks, the sealed system is usually compromised. Patching the visible crack does not restore the lost seal, insulating gas, moisture control, or original energy performance. The normal long-term repair is to replace the complete IGU or the manufacturer’s replacement sash.
Tempered or Laminated Safety Glass
Safety glazing may be required in doors, bathrooms, areas near floors, stairways, and other locations where impact injuries are a concern. Tempered glass usually breaks into many small pieces instead of remaining as one cracked sheet. Laminated glass may crack while staying attached to an internal plastic layer.
Do not replace safety glass with ordinary annealed glass. The new pane must meet the requirements for its location and local building code. A qualified glass company can identify and order the correct product.
Why Did the Window Crack?
Finding the cause matters because a new pane may crack again if the original problem remains. Common causes include:
- Direct impact: A ball, stone, tool, branch, or enthusiastic bird strikes the glass.
- Thermal stress: One area of the pane heats or cools faster than another, creating uneven expansion.
- Edge damage: A chip along the glass edge develops into a longer crack.
- Frame movement: A warped sash, settling structure, or fastener pressing against the glass places stress on the pane.
- Improper installation: Glass that fits too tightly may not have enough room for normal expansion and contraction.
- Pressure or altitude changes: Sealed insulated units can be affected by pressure differences, particularly when transported or installed at a significantly different elevation.
An impact crack often has an obvious point of contact. A thermal crack frequently begins near an edge and travels inward without a visible impact mark. Repeated cracking, difficult window operation, bowed frames, or cracks appearing in several windows may indicate a larger installation or structural issue.
Secure the Cracked Window Before Repairing It
Glass can shift without warning, so treat even a hairline crack cautiously. Keep children and pets out of the room, close the door if possible, and move furniture away from the window.
Wear safety glasses, cut-resistant work gloves, long sleeves, long pants, and closed-toe shoes. Place a drop cloth, cardboard, or heavy plastic beneath the window to catch fragments. Do not lean against the glass or test its strength by pushing on it. The window has already submitted its resignation letter.
If the pane is cracked but still stable, carefully place strips of clear packing tape or painter’s tape across the damaged area without pressing hard. Taping both accessible sides can help contain fragments. This is temporary stabilization, not a structural repair.
If glass has fallen out, cover the opening from the frame rather than attaching material to loose shards. Use plywood, polycarbonate, or heavy plastic secured to solid framing. Exterior openings exposed to weather or security risks should be boarded promptly.
Can a Cracked Window Be Repaired With Epoxy?
A clear two-part epoxy may make a small crack less noticeable and slow its spread. This method is most appropriate for a short, clean crack in ordinary single-pane glass that remains firmly supported.
Epoxy is not suitable for shattered glass, large or branching cracks, loose panes, safety glazing, fire-rated glass, insulated units, or windows exposed to substantial loads. It also does not restore the original strength of the glass. Think of it as a temporary patch wearing a respectable outfit.
Supplies for a Small Epoxy Repair
- Safety glasses and cut-resistant gloves
- Mild dish soap and water
- Lint-free cloths
- Clear two-part epoxy labeled for glass
- Disposable mixing surface and applicator
- Plastic putty knife or razor scraper
- Painter’s tape
Step 1: Clean and Dry the Glass
Clean around the crack with mild dish soap and water to remove dust, grease, and fingerprints. Avoid flooding the crack. Wipe away soap residue and allow the glass to dry completely. Moisture and adhesive are not famous for their teamwork.
Step 2: Protect the Surrounding Frame
Apply painter’s tape near the damaged area to keep epoxy off painted wood, vinyl, seals, and finished surfaces. Solvents and scraping tools can damage window coatings, so protect the frame before opening the adhesive.
Step 3: Mix the Epoxy
Combine the resin and hardener according to the manufacturer’s directions. Mix only the amount you can use during the stated working time. Some products begin thickening within minutes.
Step 4: Work Epoxy Into the Crack
Use a small applicator or plastic putty knife to spread epoxy over the crack. Gently work the material across the damaged line without flexing the glass. The goal is to fill the opening, not conduct an archaeological excavation.
Step 5: Remove Excess Material
Follow the product instructions for the correct trimming time. Depending on the epoxy, excess may be easier to remove after partial curing. Hold a sharp scraper at a shallow angle and work carefully so it does not catch the crack or scratch the surrounding pane.
Step 6: Allow a Full Cure
Do not open, wash, or place pressure on the window until the epoxy has fully cured. Cure time varies with the product, temperature, and humidity. Inspect the repair regularly. If the crack grows, branches, or reaches the frame, arrange replacement.
How To Replace Cracked Single-Pane Window Glass
Replacing a pane is a realistic DIY project when the window has a traditional wood sash, the opening is accessible, and the pane is relatively small. Stop if the sash is rotted, the frame is badly warped, the glass is unusually large, or you cannot remove the sash safely.
Tools and Materials
- Safety glasses and cut-resistant gloves
- Drop cloth and heavy cardboard
- Painter’s tape or packing tape
- Putty knife or glazing tool
- Pliers
- Replacement glass of the correct type and thickness
- Glazing points
- Glazing compound
- Primer and exterior-grade paint when required
- Brush and vacuum with an appropriate debris attachment
Step 1: Remove the Sash When Possible
A removable sash is safer and easier to work on when placed flat on a padded surface. Follow the window manufacturer’s instructions. Do not force unfamiliar tilt mechanisms, spring balances, or sash hardware.
Step 2: Stabilize and Remove the Broken Glass
Apply tape in a loose grid across the pane to help reduce fragmentation. Remove old glazing compound gradually with a putty knife. Take out the metal glazing points holding the glass.
Lift intact pieces away carefully. Remove stubborn fragments individually with pliers while wearing gloves. Never strike the glass with a hammer. Place shards directly into a rigid container rather than a thin trash bag.
Step 3: Clean and Inspect the Glazing Rabbet
Remove remaining putty, debris, and loose paint from the channel where the glass sits. Check for exposed fasteners, splinters, rot, or hard lumps that could place pressure on the replacement pane.
Repair minor wood deterioration and prime bare wood as appropriate for the glazing system. If the sash is severely rotten or no longer square, repairing the sash may be necessary before installing glass.
Step 4: Measure for Replacement Glass
Measure the opening at several points because old sashes are not always perfectly square. The replacement pane normally needs a small clearance so it does not bind against the frame during seasonal movement. Many traditional installations use glass approximately one-eighth inch smaller than the opening in both width and height, but confirm the allowance for your frame and glazing product.
Match the original thickness and required glass type. A local glass shop can cut a pane accurately and help determine whether safety glazing is required.
Step 5: Apply a Bedding Layer
Roll a thin rope of glazing compound and press it into the cleaned rabbet. Set the replacement pane gently into the bedding material. Apply light, even pressure around the edges, never in the middle of the glass.
Step 6: Install Glazing Points
Insert glazing points around the perimeter to hold the pane. Push them into the wood with a glazing tool or putty knife while keeping the tool flat against the glass. Space them according to the pane size and glazing-system instructions.
Step 7: Finish With Glazing Compound
Apply fresh compound around the exterior edge and shape it into a smooth bevel that sheds water. From inside the room, the finished putty line should remain hidden behind the wood profile rather than wandering into view like an uneven frosting job.
Step 8: Let the Glazing Cure
Traditional oil-based glazing compounds may need time to form a paintable skin. Follow the product instructions before priming or painting. When painting, slightly overlap the paint onto the glass to help seal the junction between the putty and pane.
What About Vinyl and Aluminum Windows?
Vinyl and aluminum windows commonly use removable stops, glazing beads, rubber gaskets, setting blocks, or manufacturer-specific sealants instead of traditional glazing putty. Some sashes are designed for glass-unit replacement; others are replaced as complete assemblies.
Do not pry aggressively against vinyl because it can crack or deform. Do not substitute ordinary household caulk for a specified glazing sealant. Search for the window label, model number, or etched glass information and consult the manufacturer’s service instructions.
For a double-pane window, order an insulated glass unit matching the exact width, height, thickness, spacer dimensions, coatings, tint, grid pattern, and safety rating. Because measuring and sealing errors can ruin an expensive unit, professional installation is often the sensible choice.
When To Call a Professional
Contact a licensed glass contractor or qualified window technician when:
- The window contains double- or triple-pane insulated glass.
- The pane is tempered, laminated, tinted, coated, patterned, or fire-rated.
- The window is located in a door, bathroom, stairway, or another safety-glazing area.
- The glass is large, high above the ground, difficult to reach, or overhead.
- The pane is loose, badly shattered, or falling from the frame.
- The sash is warped, rotten, or no longer square.
- The crack appeared without impact or keeps returning after replacement.
- The window may still be covered by a manufacturer or glass-seal warranty.
Professional replacement is also wise when the window is part of a historic assembly, exterior wall system, storefront, hurricane-rated installation, or custom architectural design.
Important Lead-Paint Precautions
Windows in homes built before 1978 may have lead-based paint. Scraping, sanding, cutting, and removing old painted sashes can release hazardous lead dust. Children and pregnant people are especially vulnerable to lead exposure.
Before disturbing an older painted window, use appropriate lead-safe practices or hire an EPA-certified lead-safe renovation contractor. Avoid dry sanding, uncontrolled scraping, and ordinary household cleanup methods that spread fine dust through the home.
How To Prevent Another Window Crack
- Do not place space heaters, hot-air vents, or intense heat sources directly beside cold glass.
- Avoid pouring hot or boiling water on frozen windows.
- Keep blinds, heavy curtains, and furniture from creating extreme heat pockets against sunlit glass.
- Repair sticking, twisted, or out-of-square sashes before replacing the pane.
- Use setting blocks, glazing materials, and clearances specified for the window.
- Trim branches and secure outdoor objects that could strike the glass.
- Inspect glazing compound, seals, and exterior caulk before water reaches the sash.
- Check the warranty before altering a newer window.
Practical Experiences and Lessons From Cracked-Window Repairs
Experience 1: The “Tiny” Crack That Did Not Stay Tiny
A common homeowner experience begins with a crack barely longer than a paper clip. Because the window is still transparent and no air seems to be entering, the repair gets postponed. After a cold night followed by direct morning sunlight, the short line travels across half the pane.
The lesson is simple: photograph and mark the end of a small crack as soon as it appears. Check it daily while arranging a repair. Temporary epoxy may slow a suitable single-pane crack, but temperature changes can continue stressing the glass. Early action usually creates more options than waiting for the crack to become an ambitious cross-country traveler.
Experience 2: Replacing Only the Visible Pane of an Insulated Window
Another frequent mistake is treating a double-pane sash as two unrelated pieces of glass. A homeowner sees that only the interior pane is cracked and assumes the exterior pane can remain in service. Unfortunately, the two panes are parts of one sealed insulating system.
Even when a patch looks acceptable, moisture can enter the spacer area, insulating gas can escape, and condensation may appear between the panes. The practical lesson is to obtain a quote for the complete insulated glass unit or replacement sash. That solution may initially sound more involved, but it restores the system the window was designed to provide.
Experience 3: Measuring the Opening Only Once
Old wood sashes often appear square until a tape measure becomes involved. A replacement pane ordered from one width and one height measurement may fit at the top but bind at the bottom. Forcing it into place creates edge pressure, which can cause another crack later.
Experienced repairers measure the width and height in several locations, use the smallest opening dimensions, and allow the required installation clearance. They also match the glass thickness. The few minutes spent measuring repeatedly are considerably more enjoyable than carrying a freshly cut pane back to the glass shop while pretending the first trip never happened.
Experience 4: Removing Old Putty Too Aggressively
Old glazing compound can be remarkably stubborn. Beginners sometimes angle a putty knife toward the glass or pry against a fragile wood profile. The result may be a second break, a damaged sash, or both.
The better approach is gradual removal with controlled, shallow movements. Work parallel to the glass, protect decorative muntins, and stop when the sash begins splintering. Professionals may use carefully controlled heat or specialized tools, but excessive heat can damage paint, glass edges, seals, and nearby materials. Patience is not the most exciting tool in the box, yet it is surprisingly good at preventing expensive noises.
Experience 5: Ignoring the Reason the First Pane Cracked
Sometimes a replacement pane cracks again even though nobody hit it. Investigation reveals that the sash is twisted, a glazing point is pressing against the glass edge, or the pane was cut with almost no clearance. In other cases, dark film, uneven shade, or a nearby heat source created a severe temperature difference across the glass.
The useful experience here is to inspect the complete opening before installing anything new. Look for bowed rails, protruding fasteners, hard debris, deteriorated setting blocks, and signs of structural movement. Replacing glass without correcting the stress point is like changing a flat tire while leaving the nail in the road directly ahead.
Experience 6: Discovering a Warranty After Paying for Repairs
Newer windows often carry separate coverage for the frame, hardware, installation, glass, or insulated-glass seal. Homeowners sometimes order a replacement before checking labels and paperwork, only to learn later that the sash might have qualified for manufacturer assistance.
Before modifying a modern window, photograph the damage, locate identifying labels, record etched markings, and review the warranty. Avoid applying adhesives or removing glazing beads until the manufacturer confirms that the work will not affect coverage. One telephone call or online warranty check can occasionally save the cost of an entire replacement unit.
Conclusion
The best way to fix a cracked window depends on what is cracked, where it is installed, and how the window was built. A short crack in ordinary single-pane glass may accept a temporary clear-epoxy repair. A traditional wood sash may be reglazed with a correctly sized replacement pane. Modern insulated, safety-rated, oversized, or hard-to-access glass generally requires a replacement unit installed by a professional.
Whatever method you choose, begin with safety, stabilize the area, identify the glass, and investigate why it cracked. A careful diagnosis protects more than the viewit protects the frame, the window’s energy performance, and everyone standing nearby.
Note: This guide covers common residential window configurations. Product instructions, manufacturer requirements, warranties, safety-glazing rules, and local building codes take priority over general DIY guidance.