A sticking door is basically your house’s way of saying, “Hello, I have seasons.” One day the door swings like it’s on a game show,
the next day it grabs the frame like it’s trying to start a long-term relationship. The good news: most sticky doors can be fixed
with simple adjustments, a few basic tools, and the patience to do a tiny bit of detective work before you start shaving wood like a
beaver with a deadline.
This guide walks you through the real causes (humidity, loose hinges, paint buildup, frame movement, sagging hardware) and the best fixes,
starting with the easiest, least destructive options first. Because sanding the door immediately is like treating a paper cut with a chainsaw:
technically effective, emotionally unnecessary.
What You’ll Need (and What You Probably Already Have)
- Phillips and flathead screwdrivers
- Rag + mild soap (or degreaser) for cleaning
- Pencil (for marking rub spots)
- Sandpaper (medium + fine grit) or a sanding block
- Optional but helpful: hand plane, utility knife, wood glue, toothpicks/wood splinters, 3-inch wood screws, shims
- For safety: eye protection; dust mask if sanding/planing painted doors
Step 1: Diagnose Like a Pro (Before You “Fix” the Wrong Thing)
Your first job is to figure out exactly where the door is sticking. If you skip this, you’ll end up sanding a perfectly innocent edge
while the real problem laughs quietly from the top hinge.
Quick ways to find the sticking spot
- Slow-close test: Open the door halfway and close it slowly. Feel where it catches: top, side, bottom, or near the latch.
- Paper test: Slide a thin strip of paper between the door and the frame. Where it pinches or tears is a hot zone.
-
Transfer-mark trick: Tape carbon paper (or another transfer paper) on the edge that’s rubbing, then open/close the door.
The mark shows you the exact contact points. - Look for evidence: Shiny worn paint, fresh scrape lines, or a dent in the jamb = the door’s “crime scene.”
What the rub location usually means
- Rubs at the top (near the latch side): Door is sagging. Hinges/screws are usually the culprit.
- Rubs along the latch side: Frame shift, strike plate issues, or swelling from humidity.
- Rubs on the hinge side: Hinge alignment, hinge mortise depth, or hinge damage.
- Drags on the floor/threshold: Sagging hinges, loose hinge pins, swelling, or a high threshold.
Step 2: Start With the Easiest Fixes (5–10 Minutes, Minimal Drama)
Fix #1: Clean the edges and frame
Dirt and grime can build up on the door edge and inside the jambespecially on frequently used doorsuntil the clearance disappears.
Wipe the door edge and the inside of the frame with warm, soapy water. If it’s greasy (kitchen door, garage entry), a mild degreaser helps.
Dry everything thoroughly.
Fix #2: Lubricate the hinges (the right way)
If the door sticks because it’s not swinging smoothly, lubrication can help. Use a silicone-based lubricant or a light household oil.
Open and close the door several times to work it in.
Tip: A little goes a long way. You’re greasing a hinge, not buttering corn. Also, avoid turning this into a dust-magnet situation by overdoing it.
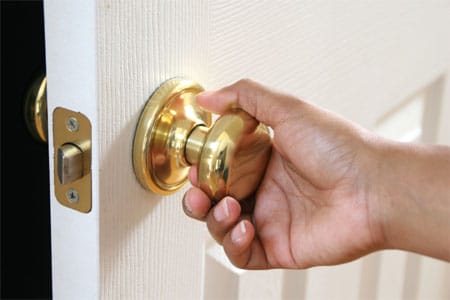
Fix #3: Tighten hinge and strike plate screws
Loose hinge screws let the door sag. Loose strike plate screws can stick out and scrape the door or latch area.
Use a screwdriver (not maximum-torque power drilling) and snug everything down.
Step 3: If the Door Is Sagging, Make the Hinges Do Their Job Again
Most sticking doors are really sagging doors wearing a “sticky” disguise. The fix is often: pull the door back into alignment by improving hinge bite
into solid framing.
Fix #4: Replace one hinge screw with a longer screw (the magic move)
On the top hinge, replace one screw on the jamb side with a 3-inch wood screw. This reaches deeper into the stud behind
the jamb and pulls the hinge (and door) back into alignment. In many cases, that’s enough to stop the rub immediately.
- Pre-drill a pilot hole if the wood is hard or if you’re near the edge (prevents splitting).
- Tighten gradually and test the door after a couple turns.
- If the door improves but still rubs, you can replace additional jamb-side hinge screws with longer ones.
Fix #5: Repair stripped screw holes (so screws actually tighten)
If a hinge screw spins forever like it’s trying to drill to Australia, the hole is stripped. You need to give the screw fresh wood to bite into.
- Remove the loose screw (or the hinge leaf if needed).
- Dip toothpicks or a small wood splinter in wood glue and pack them into the hole.
- Break them flush, let the glue set, then reinstall the screw.
For a stronger repair (especially for heavy exterior doors), drill the hole slightly larger and glue in a wood dowel, then re-drill a pilot hole.
Fix #6: Shim a hinge (micro-adjustments, big results)
If the door rubs at a corner, you can often correct the angle by adding a thin shim behind a hinge leaf.
A small piece of cardboard, thin veneer, or a purpose-made hinge shim can move the door just enough to clear the frame.
- If the door rubs at the top latch corner, shimming the bottom hinge can help lift/shift the latch side.
- If the door rubs at the bottom latch corner, shimming the top hinge can help.
Go slow: one thin shim can change the swing more than you think.
Step 4: Check the Strike Plate and Latch Area
Sometimes the door isn’t sticking on wood at allit’s rubbing metal hardware. The strike plate can shift or protrude, especially after years of use
or repeated “just pull harder” closures.
Fix #7: Tighten and realign the strike plate
- Close the door slowly and watch where the latch hits the strike plate opening.
- If it’s misaligned, loosen the strike plate screws slightly.
- Shift the plate up/down/in/out just enough for smooth latching.
- Retighten and test.
If the opening needs to be slightly bigger, you can carefully file the strike plate opening or deepen the mortise. Keep changes small and test often.
Step 5: If the Door Is Swollen or the Frame Is Tight, Sand or Plane (Last Resort, Best Results)
If you’ve tightened hinges, fixed stripped holes, and corrected hardwareand it still sticksthen yes, it may be time to remove material.
The key is to remove the minimum needed and keep the door looking intentional (not like it lost a fight with sandpaper).
Fix #8: Mark the rub area precisely
Use a pencil to mark exactly where the door rubs. You can also use the transfer-mark trick (carbon paper) to highlight contact points.
The goal: sand/plane only where needed, not wherever your mood takes you.
Fix #9: Remove the door (safely, without sacrificing toes)
- Close the door and place a wedge under it to support the weight.
- Tap hinge pins upward (a nail and hammer works) and pull them out.
- Lift the door off and place it on a stable surface.
Fix #10: Sand for small fixes; plane for bigger ones
Sanding is best for minor sticking, paint buildup, or small high spots.
Use medium grit first, then finish with fine grit for a clean edge.
Planing is better when the door needs noticeable trimming.
Take light passes and check your progress often. It’s easy to remove wood; it’s much harder to put it back.
Fix #11: Seal the fresh edge (don’t skip this)
If you sand or plane down to bare wood, seal it with primer and paint (or finish) to reduce future swelling.
Unsealed wood drinks humidity like it’s free lemonade, and your sticking door will be back for an encore.
Step 6: Humidity Fixes (When the Door Only Sticks “Seasonally”)
If your door sticks mainly in summer or rainy seasons, humidity is a prime suspect. Before you remove wood, try controlling moisture:
- Run the A/C or a dehumidifier for a few days and see if the door improves.
- Make sure bathroom and kitchen exhaust fans vent properly.
- Check weatherstrippingtight or bunched stripping can mimic “sticking.”
- Seal/paint all door edges (top and bottom edges included) to slow moisture absorption.
When to Call a Pro (Because Sometimes It’s Not the Door)
DIY is greatuntil the door frame is actually out of square because of foundation movement, significant settling, or rot.
Consider professional help if:
- The door suddenly started sticking after a noticeable shift/crack in nearby walls
- The frame is visibly warped or rotted (especially exterior doors)
- You’ve adjusted hinges and hardware but the problem keeps returning fast
- The door is a heavy exterior unit with security multipoint locks (more complicated adjustments)
Quick Recap: The Best Order of Operations
- Find where it sticks (mark it)
- Clean door edges + frame
- Lubricate hinges properly
- Tighten hinge + strike plate screws
- Replace a top-hinge jamb screw with a 3-inch screw
- Fix stripped holes (toothpicks/splinter + glue, or dowel)
- Shim hinges if needed
- Adjust strike plate alignment
- Sand/plane only after everything above
- Seal any freshly exposed wood
Conclusion
Fixing a door that sticks is mostly about being gentle and methodical. Start with cleaning and tightening, then move to longer screws and stripped-hole
repairs, then (and only then) consider sanding or planing. Do it in that order and you’ll usually solve the problem fastwithout turning your doorway
into a woodworking “learning experience.”
Real-World Experiences Fixing Sticking Doors (The Stuff You Only Learn After You’ve Done It)
The first sticking door I ever dealt with looked like a simple “sand the edge” situation. It scraped right at the top corner, and the paint had a clean
little skid mark that screamed, “I am clearly the problem.” So I grabbed sandpaper, sanded… and the door still stuck. Not as much, sure, but enough to
keep annoying me every single time I tried to close it quietly. That’s when I learned the golden rule: if the rub is at the top latch corner, the door is
often saggingnot swollen. The real fix was tightening the hinges, and in that case, swapping in one longer screw at the top hinge. Instantly better.
No sawdust in my eyebrows required.
Another time, the door only stuck in summer. In winter it behaved like a polite member of society. I almost planed it in July (because July-me is
impatient), but I tried a humidity test first: ran the A/C more consistently and used a dehumidifier for a couple of days. The door calmed down. That
was the moment it clicked: sometimes the “fix” isn’t wood removalit’s moisture control and sealing. When I finally did a proper paint touch-up on the
top and bottom edges (yes, the edges you never see but humidity absolutely does), the seasonal sticking got dramatically less dramatic. The door stopped
treating summer like an excuse to expand its personal space into the jamb.
The most stubborn case was a door with stripped hinge holes that fooled me for weeks. I’d tighten the screws, the door would work… and three days later,
it would sag again like a tired toddler. The screws weren’t tightthey were just spinning in chewed-up wood. The simple toothpick-and-glue method worked
surprisingly well as a quick repair, but on a heavier door, a dowel plug repair was the real long-term solution. After the dowel fix, the screws bit hard,
and the door finally held its alignment. It was one of those satisfying repairs where you close the door gently and it latches like it’s floating on air,
and you suddenly understand why people become obsessed with “proper reveals.”
I’ve also learned that strike plates are sneaky. A door can swing freely, and you’ll still swear it’s “sticking” because it takes extra force to latch.
That’s often a misalignment issue: the latch tongue is hitting the strike plate instead of sliding into the opening. The fix can be as basic as tightening
loose screws, or as slightly-fiddly as shifting the plate a hair. “A hair” is the correct unit of measurement heremove it too far and now you’ve created
a brand-new problem that didn’t exist five minutes ago.
Finally, sanding and planing: it works, but it’s the most irreversible step. The smartest approach I’ve found is to remove less than you think you need,
test-fit, then remove a tiny bit more. Doors love to humble people who get confident. And if you do expose bare wood, sealing it isn’t optional. Skipping
primer/paint on a freshly planed edge is basically inviting humidity to move in, unpack, and redecorate your door until it sticks again. The best door fix
is the one you only have to do once.