A torn lawn mower bag is one of those small backyard problems that suddenly becomes a big, leafy comedy show. One minute you are mowing like a responsible homeowner; the next, grass clippings are puffing out behind you like your mower has learned how to smoke. The good news? Many small tears in a lawn mower bag can be repaired at home with basic supplies, a little patience, and the emotional strength to admit that duct tape is not always the hero.
This guide explains how to fix a tear in a lawn mower bag safely and effectively. You will learn when a repair makes sense, when replacement is the smarter choice, which materials work best, and how to patch fabric, mesh, and seam tears so your mower can go back to collecting clippings instead of launching them into your socks.
Why a Torn Lawn Mower Bag Matters
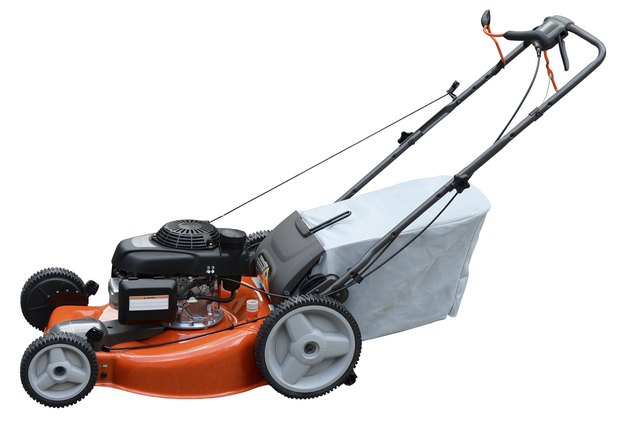
A lawn mower grass bag does more than hold clippings. It helps control airflow, keeps debris contained, and allows your mower to bag grass efficiently. When the bag has a hole, several things can happen. Grass may leak out, dust may blow toward your face, airflow may weaken, and small sticks or grit can escape through the damaged area.
That last point matters most. A mower blade spins fast enough to turn tiny yard debris into unpleasant little missiles. A worn or ripped mower bag is not just messy; it can become unsafe. If the fabric is badly deteriorated, sun-baked, brittle, or full of multiple holes, do not treat it like a craft project. Replace it. A patch is great for a clean tear. It is not magic armor for fabric that has already retired.
Repair or Replace? Make This Decision First
Before reaching for adhesive, inspect the entire bag. Spread it out in good light and look at the tear, seams, bottom corners, mounting edge, and the area where the bag rubs against the mower frame.
You can usually repair the bag if:
- The tear is small to medium, roughly 1 to 4 inches long.
- The surrounding fabric still feels strong.
- The rip is clean, not shredded into a fuzzy disaster zone.
- The damage is away from the mounting clips or rigid frame pocket.
- The bag has only one or two damaged spots.
You should replace the bag if:
- The fabric is thin, brittle, or crumbles when rubbed.
- There are several holes or long tears.
- The seam has separated across a large section.
- The bag no longer fits tightly on the frame.
- The frame is bent and causing the bag to sit crooked.
- Debris can pass through the material even away from the tear.
Here is the plain homeowner rule: if the tear looks like an accident, repair it. If the whole bag looks like it survived three presidents and a raccoon attack, replace it.
Tools and Materials You May Need
The best repair method depends on the type and location of the tear. Most lawn mower bags are made from tough fabric, canvas-like material, synthetic mesh, polyester, nylon, or a combination of fabric and vented panels. Gather supplies based on your chosen method.
Basic supplies:
- Work gloves
- Safety glasses
- Soft brush or rag
- Mild soap and water
- Rubbing alcohol or isopropyl alcohol
- Scissors or utility knife
- Clamps, clothespins, or heavy books
- Cardboard or wax paper to prevent adhesive bleed-through
Repair supplies:
- Outdoor fabric repair tape
- Urethane-based outdoor fabric adhesive or seam sealer
- Heavy-duty fabric patch such as canvas, denim, nylon, or polyester
- Upholstery thread, waxed thread, or heavy polyester thread
- Curved upholstery needle or heavy sewing needle
- Two-part epoxy for rugged patch repairs
- Optional: vinyl repair patch kit for certain slick or coated fabrics
Avoid ordinary office tape, cheap masking tape, hot glue, and thin household thread. A mower bag lives in a world of vibration, dust, wet grass, and rough handling. Use materials designed for outdoor fabric or heavy-duty repair.
Safety First: Do Not Patch the Bag on a Running Mower
This sounds obvious, but lawn equipment has a special way of making people think, “I’ll just do this quickly.” Do not. Turn off the mower, wait for all moving parts to stop, and let the engine cool. For a gas mower, disconnect the spark plug wire before working near the deck, chute, or bag mount. For a battery mower, remove the battery. For a corded electric mower, unplug it.
Remove the bag from the mower completely. Never try to repair, adjust, clean, or inspect the bag while the mower is running. Even if the blade is disengaged, treat the mower as dangerous until it is fully shut down and disabled.
Step-by-Step: How to Fix a Tear in a Lawn Mower Bag
Step 1: Remove and Empty the Bag
Lift the rear flap or release the bag according to your mower’s design. Most walk-behind mower bags lift off the rear brackets or slide away from the frame. Empty all clippings. Shake the bag gently, but do not beat it against concrete like it owes you money. That can make weak fabric worse.
Step 2: Clean the Damaged Area
Brush away dry grass, dust, and grit. Wash the area around the tear with mild soap and water, then rinse and let it dry completely. For adhesive patches, wipe the repair zone with rubbing alcohol after the fabric is dry. This removes residue that can weaken the bond.
Do not skip drying time. Adhesive does not like damp fabric. Wet grass bags also clog more easily, so starting with a clean, dry bag helps both the repair and future mowing performance.
Step 3: Trim Frayed Threads
Use scissors to trim loose fibers around the tear. Do not enlarge the hole. The goal is to remove fuzzy strands that keep tape or adhesive from sitting flat. If the tear is on mesh, trim carefully so the mesh does not unravel farther.
Step 4: Flatten the Bag
Place the bag on a flat surface with the tear facing up. Slide cardboard or wax paper inside the bag under the damaged area. This keeps adhesive from sticking the two sides of the bag together. A mower bag glued shut is technically repaired, but it is also now a very sad pillow.
Step 5: Choose the Best Repair Method
Use the following methods based on the damage.
Method 1: Fabric Repair Tape for Small Tears
Outdoor fabric repair tape is the fastest solution for small rips and punctures. It works best on flat areas where the fabric is still strong.
How to do it:
- Cut a patch that overlaps the tear by at least half an inch on all sides.
- Round the corners of the patch. Sharp corners peel faster.
- Press the torn edges together as neatly as possible.
- Apply the patch over the tear and smooth from the center outward.
- Press firmly to remove bubbles and wrinkles.
- For larger holes, patch the inside and outside of the bag.
- Let the adhesive cure for 24 hours before mowing.
This method is clean, simple, and beginner-friendly. It is ideal for a small tear caused by a twig, fence edge, or storage hook. The downside is that tape alone may not last long on high-stress seams or corners.
Method 2: Adhesive and Tape for a Stronger Patch
For a tear that needs more strength, combine outdoor fabric adhesive with repair tape. Urethane-based outdoor fabric adhesive or seam sealer works well because it stays flexible after curing. Flexibility matters because mower bags move, shake, and expand as air flows through them.
How to do it:
- Clean, dry, and flatten the damaged area.
- Pull the torn edges together.
- Apply outdoor fabric adhesive over the tear, extending slightly beyond the damaged area.
- Place fabric repair tape over the adhesive while it is still workable.
- Smooth the tape carefully to remove air pockets.
- Turn the bag inside out and repeat on the other side for extra strength.
- Let the repair cure at least 24 hours, or longer if the adhesive label recommends it.
This is one of the best all-around methods for a torn lawn mower bag. The adhesive seals the fibers while the tape acts like a bridge across the rip. If your mower bag is black or dark gray, choose black repair tape for a cleaner look. If not, remember: function beats fashion. The grass will not judge your patch.
Method 3: Sew-On Patch for Seam Tears and Larger Rips
If the tear is long, located near a seam, or under tension, sewing may be better than tape alone. A sewn patch spreads stress across a larger area and can survive repeated emptying better.
How to do it:
- Cut a patch from heavy fabric at least 1 inch larger than the tear on all sides.
- Round the corners to reduce snagging.
- Place the patch on the inside of the bag if appearance matters.
- Pin or clamp it in place.
- Use upholstery thread or heavy polyester thread.
- Sew around the patch with a whip stitch, backstitch, or box stitch.
- Add a second row of stitching for large repairs.
- Optional: apply fabric adhesive over the stitch line to seal fibers and reduce fraying.
A curved upholstery needle makes this job easier, especially if the bag is stiff. If you have a heavy-duty sewing machine, you can use it, but many mower bags are awkwardly shaped. Hand stitching may be slower, but it gives better control.
Method 4: Two-Part Epoxy Patch for Tough, Ugly Repairs
Two-part epoxy can create a rugged repair when appearance is not your top priority. It is useful for fabric or mesh areas where you want the patch to lock in place firmly. Use gloves and work in a well-ventilated area.
How to do it:
- Cut a fabric patch larger than the damaged area.
- Mix the epoxy according to the product directions.
- Brush a thin, even layer around the tear.
- Press the patch into place.
- Add another light coat over the patch edges.
- Lay the bag flat while the epoxy cures.
- Wait at least 24 hours before reinstalling the bag.
Epoxy can stiffen fabric, so do not use too much. A stiff patch on a flexible bag can create new stress points around the repair. Think “firm bond,” not “frosting a birthday cake.”
How to Fix a Tear Along the Bag Seam
Seam tears are common because seams carry tension when the bag fills with clippings. If the stitching has opened but the fabric is healthy, resew the seam with heavy thread. Use the original stitch holes if possible, then add a patch over the seam on the inside.
If the seam is frayed or the fabric edge has pulled apart, fold the weak edge under slightly and sew through stronger material. Add adhesive-backed fabric tape over the repair to protect the stitches from dust and abrasion.
How to Repair Mesh Panels
Mesh repairs are trickier because adhesive has less surface area to grip. For small holes, use repair tape on both sides, pressing the adhesive through the mesh so both patches bond to each other. For larger holes, sew a piece of mesh, nylon, or lightweight canvas over the damaged section.
Do not completely cover large vented areas with non-breathable material. A mower bag needs airflow to move clippings efficiently. Blocking too much mesh can reduce bagging performance and cause clumping.
Reinstalling the Lawn Mower Bag
After the repair has fully cured, reinstall the bag on its frame or mower brackets. Make sure the bag sits securely and the rear deflector rests correctly. Check that the patch does not interfere with the chute opening, frame rods, clips, or handle.
Start with a short test mow in dry grass. Watch for leaking clippings, peeling edges, or unusual vibration. If the patch holds for the first 10 to 15 minutes, it will usually survive normal mowing, especially if you allow the adhesive a full cure before putting it back to work.
Common Mistakes to Avoid
Using duct tape as a permanent repair
Duct tape may get you through one emergency mow, but heat, dust, and grass moisture usually defeat it. Use outdoor fabric repair tape instead.
Patching dirty fabric
Grass dust, pollen, and old clippings stop adhesives from bonding. Clean first, patch second. This is not negotiable unless you enjoy redoing projects.
Ignoring the rest of the bag
A single tear may be obvious, but the bottom corners and frame contact points often wear out too. Inspect the full bag before deciding it is worth repairing.
Mowing before the adhesive cures
Most fabric tapes and adhesives need time to reach full strength. Give the repair 24 hours whenever possible. Your lawn can wait. It has literally been standing outside all day.
Repairing a bag that should be replaced
If the material is severely worn, patching one spot may simply move the failure to another spot. Replacement is safer and often cheaper than repeatedly buying repair supplies.
How to Make the Repair Last Longer
Empty the bag before it is packed solid. Overfilled bags strain seams, reduce airflow, and make the bag harder to remove. Avoid mowing wet grass when possible because wet clippings are heavy and sticky. Store the bag indoors or in a dry shed rather than leaving it in direct sun or rain.
After each mow, shake out clippings and let the bag dry before storage. If the mower bag smells like a swamp had a baby with a compost pile, it needs airflow. Moisture weakens fabric, encourages mildew, and makes future repairs harder.
Real-World Experience: What Usually Works Best
In real backyard life, the best lawn mower bag repair is rarely the prettiest one. The most successful repairs usually have three things in common: the bag was cleaned well, the patch overlapped generously, and the owner waited long enough before mowing again. Most failed repairs happen because someone slapped tape over dusty fabric five minutes before cutting damp grass. That repair never had a fair chance. It was basically sent into battle wearing flip-flops.
For a small puncture, outdoor fabric repair tape is often enough. A neat patch on the outside can stop grass from leaking and keep the hole from spreading. For a longer tear, especially one near the bottom of the bag, a two-sided repair works better. Patch the inside first, then patch the outside. The inside patch takes the beating from clippings, while the outside patch keeps the tear from opening as the bag flexes.
For seam damage, stitching is usually the winner. Adhesive alone can struggle when the seam is under pulling force. Heavy thread acts like a new skeleton for the seam. A sewn repair topped with flexible adhesive or fabric tape gives the best balance of strength and sealing. It may not look factory-made, but it can hold up surprisingly well through a mowing season.
One useful trick is to use fabric that is similar in flexibility to the original bag. A thick denim patch on a thin mesh panel may hold, but it can also create a stiff spot that pulls at the surrounding material. A nylon or polyester patch often blends better with synthetic mower bags. For canvas-style bags, canvas or heavy outdoor fabric is a solid choice.
Another practical lesson: check the frame. Sometimes the bag tears because a bent frame, sharp bracket, or rough metal edge keeps rubbing the same area. If you patch the fabric but ignore the sharp edge, the mower will chew through the repair like a determined goat. Sand rough spots, straighten the frame if appropriate, or replace damaged hardware before reinstalling the bag.
Finally, keep expectations realistic. A repair is a smart way to extend the life of a mower bag with isolated damage. It is not a permanent cure for fabric that is thin everywhere. If sunlight, age, and abrasion have weakened the whole bag, replacement is the safer long-term move. The goal is not to prove you can patch anything. The goal is to mow safely, collect clippings cleanly, and avoid turning your yard work into a confetti cannon.
Conclusion
Learning how to fix a tear in a lawn mower bag can save money, reduce waste, and keep your mower working the way it should. For small tears, use outdoor fabric repair tape. For stronger repairs, combine flexible fabric adhesive with tape or a sewn patch. For seam damage, heavy-duty stitching is often the most reliable fix. But if the bag is badly worn, brittle, punctured in multiple places, or no longer fits securely, replace it.
A mower bag has a tough job. It catches clippings, handles airflow, takes abuse from twigs and dust, and gets dragged through a world that is basically green sandpaper. Treat it well, repair small damage early, and store it dry. Your lawn will look cleaner, your mower will bag better, and your socks will no longer be filled with surprise grass salad.