There are two kinds of people on a cold night: the ones sleeping soundly under a blanket, and the ones doing the 2:13 a.m. “why is the stove acting dramatic again?” shuffle in wool socks. If you own a wood stove, you already know the dream: load it before bed, wake up to a warm house, and still have enough live coals left in the morning to restart the fire without performing a full pioneer reenactment.
The good news is that an overnight burn is absolutely possible with many stoves. The less-fun-but-very-important news is that it has to be done correctly. A good overnight burn is not a smoky, suffocated fire that leaves your chimney coated in creosote and your living room smelling like a campfire’s bad decisions. It is a controlled, efficient, long-lasting burn built on dry wood, proper timing, smart loading, and safe air control.
In this guide, you’ll learn how to keep a wood stove burning all night in a way that is practical, cleaner, and safer. These 11 steps are based on real-world wood heat best practices, not folklore passed down by a cousin who thinks every problem can be fixed with “just throw another log on it.”
What “Burning All Night” Really Means
Before we get into the steps, let’s clear up one common misunderstanding. An overnight burn usually does not mean bright flames dancing away for eight straight hours like a fireplace in a holiday movie. In most cases, it means the stove produces steady heat through the night and leaves enough hot coals by morning for an easy reload.
That is the realistic goal. If you wake up to a few glowing coals and a house that is still comfortable, congratulations: your wood stove did its night shift.
Step 1: Start with Fully Seasoned Firewood
If your wood is wet, the rest of this article becomes a motivational poster rather than a working strategy. The single biggest factor in an overnight burn is dry, seasoned firewood. Wet or green wood wastes heat by boiling off moisture, produces more smoke, and encourages creosote buildup in the flue.
For the best results, use wood that has been split, stacked, and dried long enough to reach a low moisture content. Dense hardwoods such as oak, hickory, ash, maple, and beech are especially useful for overnight burns because they are heavier, burn more slowly, and deliver longer-lasting heat.
In plain English: if your firewood hisses, steams, or makes your stove glass look like it lost a mud-wrestling match, it is probably too wet.
Step 2: Pick the Right Size Logs for the Overnight Load
Small splits are great for starting a fire or giving the stove a quick heat boost. They are not the heroes of the overnight burn. For bedtime loading, you want larger, thicker pieces of wood. Big splits burn more slowly because they have less exposed surface area compared with a pile of little pieces.
A good overnight load usually uses a mix: medium pieces to help the load catch, plus larger logs that hold heat for hours. If you use only skinny kindling-sized wood, your stove may look busy for a while, but it will burn down fast and leave you greeting dawn with disappointment.
Step 3: Make Sure the Stove and Chimney Are Ready
An overnight burn should never begin with a dirty stove, a neglected chimney, or a questionable venting setup. Before you rely on your stove through the night, make sure the system has been inspected and cleaned as needed for the season. Creosote buildup, blocked flues, and damaged stove parts are not details to “deal with later.”
Also check your door gasket, air controls, baffle, catalyst if your stove has one, and ash pan area. If the door is not sealing properly, your carefully planned burn can turn into either a too-fast runaway fire or a frustratingly inconsistent one.
And yes, this is your friendly reminder to test smoke alarms and carbon monoxide alarms. A wood stove is cozy. Carbon monoxide is not.
Step 4: Build a Hot Evening Fire First
Do not try to create an overnight burn by stuffing the stove while the fire is still weak and lazy. That approach tends to smolder, smoke, and make everyone unhappy, including your chimney. Instead, build a hot, established fire in the evening and let it create a strong bed of coals.
This matters because hot coals help the larger overnight logs ignite properly. A stove that is already up to operating temperature is far more likely to settle into a long, steady burn than a cold stove that got ambushed by three giant oak rounds at 10:47 p.m.
Step 5: Let a Deep Coal Bed Form
This is where patience pays off. Once your evening fire is going well, give it enough time to produce a healthy coal bed. Those glowing coals are the engine that powers the overnight reload. Without them, the fresh load may struggle to ignite, especially if you are using large hardwood splits.
Many experienced stove owners find that the sweet spot is reloading when the active flames have eased off, but there is still a solid layer of hot coals across the firebox. Too soon, and the load may burn too aggressively. Too late, and you may lose the heat needed to light the reload efficiently.
Step 6: Manage Ashes Without Emptying the Stove Bare
A wood stove is not a minimalist art gallery. It does not need to be empty to function well. In fact, many stoves perform better with a modest ash bed because it helps insulate the coal base and supports steadier combustion. If ash is piled so high that it chokes airflow or crowds the firebox, remove some of it. But do not scrub the stove down to bare metal every single time.
When you do remove ashes, use a metal container with a tight-fitting lid and store it in a safe place away from combustible materials. Ashes can hold hidden heat for a surprisingly long time. They have a sneaky streak.
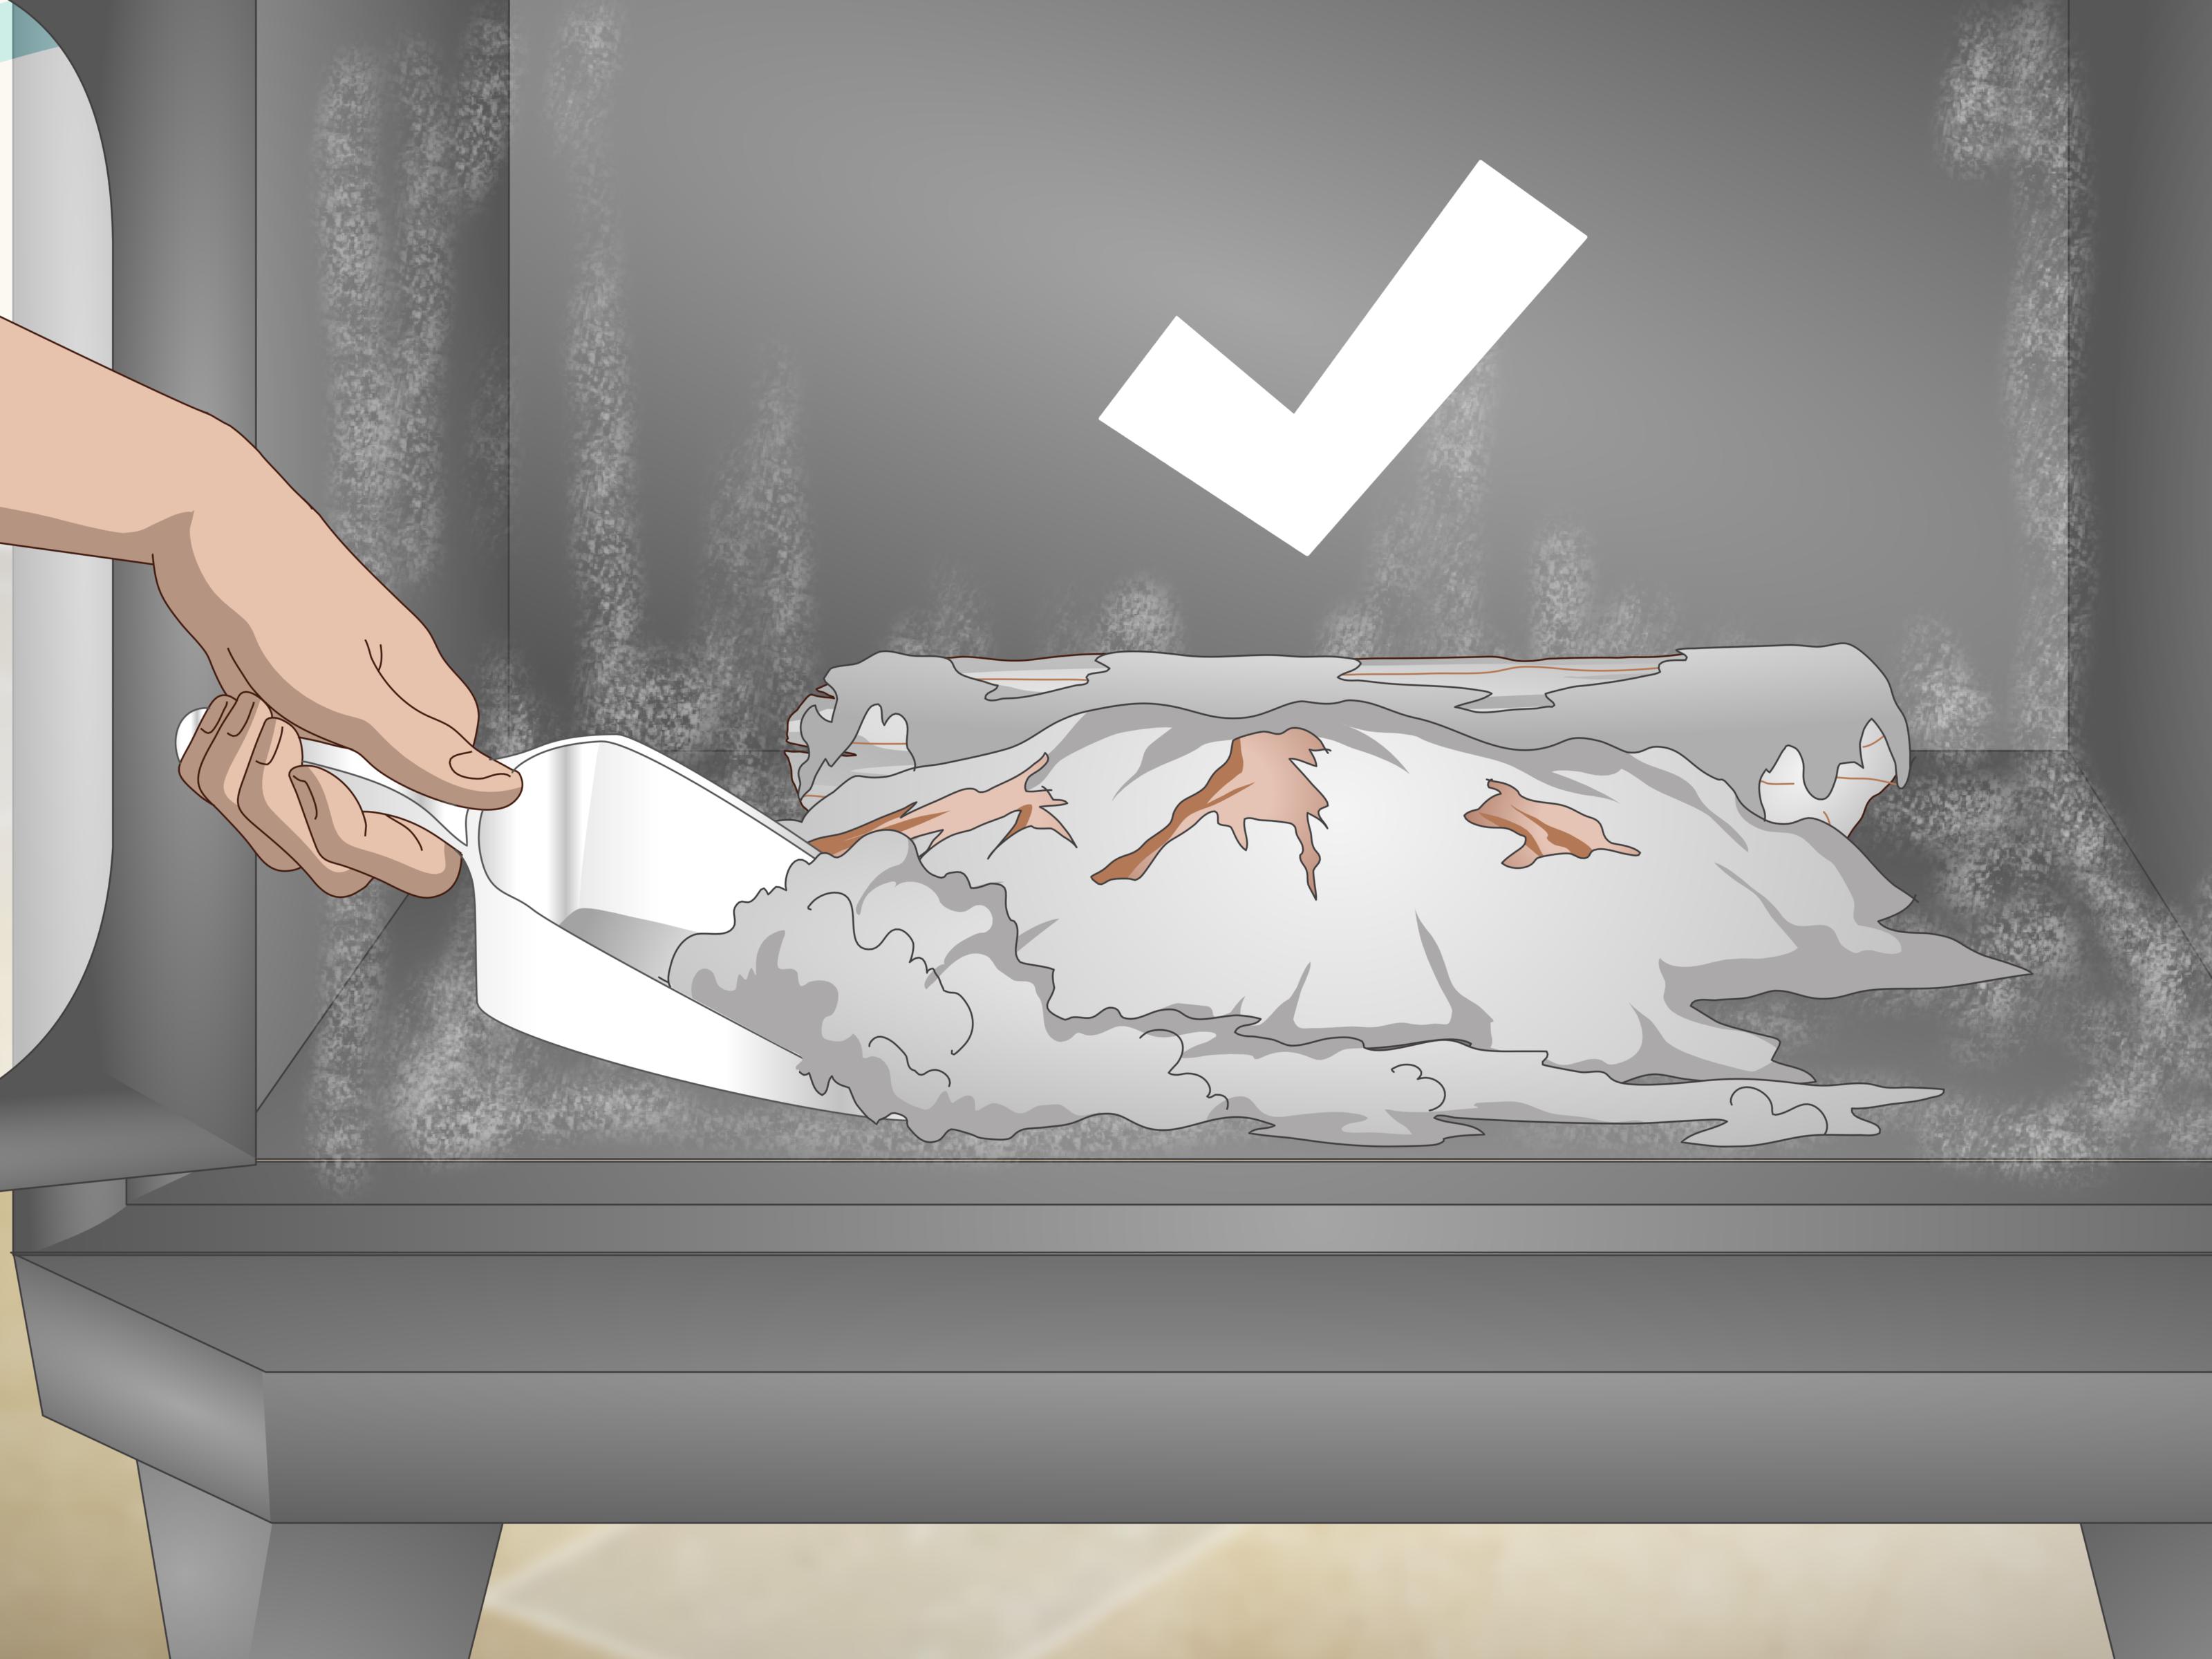
Step 7: Rake the Coals for a Better Reload
Right before your overnight reload, use a stove tool to rake the hot coals into the position recommended for your stove. In many non-catalytic stoves, pulling the coals slightly toward the front or center helps the new load ignite more efficiently because the incoming combustion air reaches the hottest part of the fuel bed first.
This is a small move that makes a big difference. Good coal placement can improve ignition, reduce smoke when reloading, and help the fresh wood catch without you standing there staring at it like a camp counselor.
Step 8: Load the Firebox Tightly with Large, Dense Wood
Now it is time for the main event. Place the largest, densest logs into the firebox for the overnight load. Pack them close enough to slow the burn, but not so tightly that you kill all airflow between the pieces. The exact layout depends on your stove design, firebox shape, and the manufacturer’s instructions.
If your stove allows different log orientations, the arrangement can influence burn behavior. A compact load generally lasts longer than a loose one. The point is to create a solid overnight charge that burns steadily rather than flaring up, collapsing, and leaving the house chilly by dawn.
This is not the time for random woodpile improvisation. Think of it as building a slow-release heat battery out of hardwood.
Step 9: Open the Air Control to Ignite the Reload
Once the stove is loaded, open the air control enough to let the fresh wood ignite vigorously. This stage is important because large logs need a burst of airflow to char, flame, and begin burning cleanly. If you reduce the air too soon, the new load may smolder instead of catching properly.
Let the logs flame actively for several minutes, or as directed by your stove’s manual. Catalytic stoves may require a specific sequence involving the bypass damper. Non-catalytic stoves also have their own preferred routine. Your manufacturer’s instructions always outrank internet swagger.
Step 10: Reduce the Air Gradually, Not All at Once
This is where many overnight burns go wrong. People get impatient, crank the air down too far, too fast, and accidentally put the stove on a smoky starvation diet. That may slow the fire, but it also lowers combustion quality, increases smoke, dirties the glass, and can boost creosote formation.
Instead, reduce the air in stages. Give the stove time to respond between adjustments. Watch the flames. You are aiming for a controlled, steady burn, not a dramatic blaze and not a dull, suffocated smolder. If the flames disappear completely right after you cut the air, you probably went too far.
A good overnight burn is calm, not comatose.
Step 11: Do a Final Safety Check Before Bed
Before you head off to sleep, take one last lap around your setup. Make sure the stove door is latched securely, the air control is set correctly, and the flue or bypass is in the proper operating position for your model. Confirm that no kindling, rugs, baskets, gloves, or mystery clutter are sitting too close to the stove.
Look at the chimney outside if possible. Excessive smoke can be a sign that the fire is not burning cleanly. A little visible exhaust at times may happen, especially during startup or reload, but a constant plume suggests the stove may need more air, drier wood, or a better loading method.
If everything looks good, you can go to bed knowing you gave the stove the best chance to do its job well and safely.
Why Some Wood Stoves Still Will Not Burn Until Morning
Here is an honest answer that saves a lot of frustration: not every wood stove is built for true overnight performance. Small stoves, older uncertified models, damaged stoves, or units installed in homes with low overnight heat demand may simply not hold a useful coal bed until morning. That does not mean you are failing. It may mean your setup has limits.
In some cases, the issue is the stove size. In other cases, it is the fuel. And sometimes the real problem is that the stove is being run too cool because the room overheats if it burns properly. Ironically, that leads people to shut the air down too far, which creates dirtier burns and worse results.
If you regularly struggle to keep coals overnight despite using dry hardwood and a good loading method, it may be worth checking the manual, replacing worn gaskets, reviewing chimney draft, or considering whether your stove is the right size and type for your home.
Common Mistakes That Ruin Overnight Burns
- Burning wood that is not fully seasoned
- Reloading onto a weak or shallow coal bed
- Using only small splits before bedtime
- Turning the air down too quickly
- Trying to make the stove smolder instead of burn cleanly
- Ignoring chimney maintenance and creosote risk
- Overfilling the stove without following the manufacturer’s guidance
If your current routine includes two or three of those, do not worry. Wood heat has a learning curve. The stove is not judging you. It is just very literal.
Conclusion
Learning how to keep a wood stove burning all night is really about learning how to burn wood well. The overnight part is just the reward. Dry wood, a good coal bed, larger logs, proper loading, gradual air control, and consistent safety checks are what make the difference between waking up to comfort and waking up to a cold room plus a bad attitude.
Once you dial in your stove, the process starts to feel less like guesswork and more like rhythm. You will know which wood burns longest, how long your coal bed needs, and when the stove is ready for its final load of the night. And on a bitter winter morning, when you crack the door and find hot coals still glowing, it feels weirdly victorious. Not Olympic-medal victorious, but definitely “I have defeated the thermostat with tree science” victorious.
Wood Stove Experience: What People Learn After a Few Winters
One of the most interesting things about wood heat is how fast it teaches humility. On paper, the process sounds simple: put wood in stove, light fire, enjoy warmth. In real life, every little detail matters. The species of wood matters. The moisture content matters. The outdoor temperature matters. Even the way the logs are stacked in the firebox can change the entire night. That is why experienced stove owners tend to sound a little obsessive. They are not trying to be difficult. They have simply learned that a fire that behaves beautifully at 7 p.m. can become stubborn, smoky, or short-lived by midnight if one piece of the routine is off.
Many people discover that their biggest early mistake was assuming any wood that “felt dry enough” was good to go. Then they switch to properly seasoned hardwood and suddenly the stove burns hotter, cleaner, and longer with less drama. Another common lesson is that overnight success usually starts earlier in the evening than expected. The best results often come from building a strong fire well before bedtime, letting a generous coal bed develop, and reloading at the right moment instead of waiting until the fire is almost dead.
Experienced burners also learn not to chase perfection. Some nights you wake up to a warm stove and a perfect bed of coals. Other nights the weather shifts, the draft changes, or the load burns a little faster than usual. That does not mean the system failed. It means wood heat is a live process, not a push-button appliance. The goal is consistency, not magic.
There is also a comfort factor that rarely gets mentioned in technical guides. A good overnight stove routine changes how a house feels. The warmth is steady, the air feels lived-in, and the morning reload becomes part of a rhythm that is oddly satisfying. You stop thinking of the stove as just equipment and start thinking of it as part heater, part craft project, and part stubborn roommate who behaves much better when treated properly.
Over time, people get better at reading the signs. They can tell by the look of the flames whether the air is too low. They can tell by the weight and sound of a log whether it is truly dry. They can open the stove door in the morning and know within seconds whether the previous night’s load was right, too loose, too small, or cut down too aggressively on air. That kind of experience is valuable because it turns a long list of tips into instinct.
And maybe that is the real secret behind keeping a wood stove burning all night. Yes, there are proven steps. Yes, there are safety rules you should never ignore. But there is also a hands-on familiarity that only comes from repeating the routine through an actual winter. After a while, you stop fighting the stove and start working with it. That is when overnight burns become less of a gamble and more of a dependable habit.