

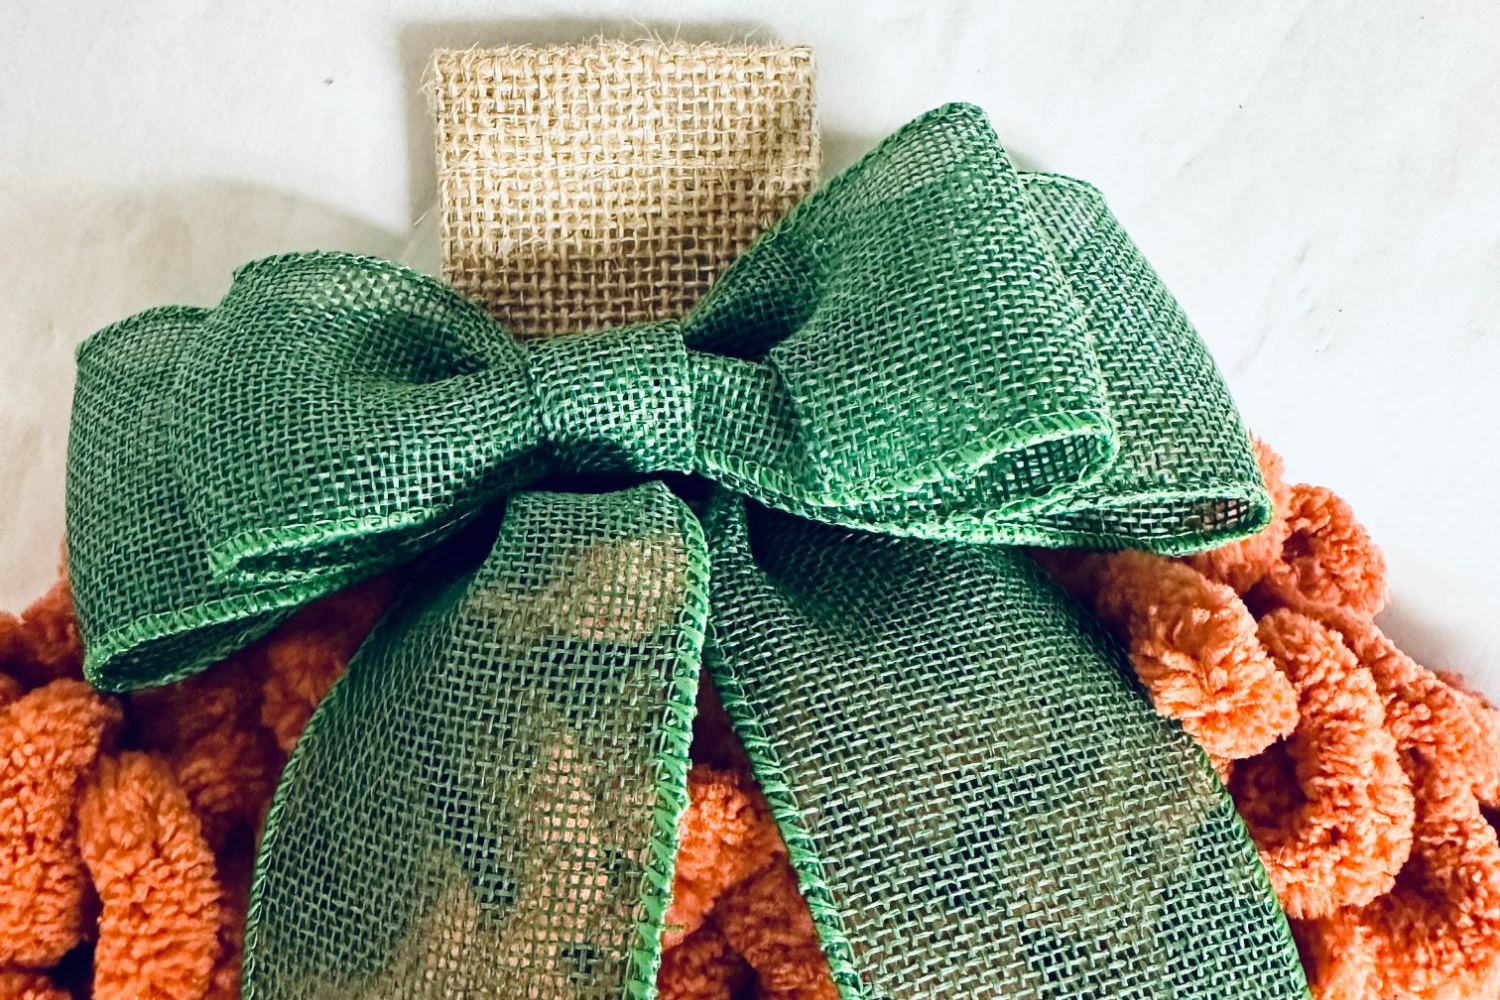
If fall had a front-door uniform, it would probably be a pumpkin wreath. It is cheerful, cozy, inexpensive, and just fancy enough to make neighbors think you planned your seasonal decorating calendar in July. The best part? You do not need a craft room that looks like a television studio or a heroic amount of patience. With chunky yarn, a wreath form, a little hot glue, and a few simple accents, you can make an easy pumpkin yarn wreath in about 30 minutes.
This DIY pumpkin yarn wreath is perfect for beginners because the basic technique is wonderfully forgiving. Wrap, fluff, glue, decorate, hang. That is the whole magic trick. The yarn hides small gaps, the pumpkin shape feels festive even when it is slightly imperfect, and the finished wreath looks much more expensive than it is. Think of it as the pumpkin spice latte of fall crafts: warm, comforting, and very hard to resist.
Below, you will find a complete step-by-step tutorial, supply tips, design variations, troubleshooting advice, and practical experience notes to help your wreath look polished instead of “I made this during a commercial break.” Although, honestly, that is part of the charm.
Why a Pumpkin Yarn Wreath Is the Perfect Quick Fall Craft
A pumpkin yarn wreath checks all the best DIY boxes. It is affordable, fast, beginner-friendly, reusable, and easy to customize for your porch, mantel, entryway, classroom, office, or Thanksgiving display. Unlike fresh greenery or real pumpkins, yarn will not wilt, rot, attract squirrels, or silently collapse into porch mush when the weather turns moody.
Chunky loop yarn or chenille-style yarn gives the wreath a soft, plush texture that feels cozy from across the room. A pumpkin wire wreath form creates the rounded fall shape instantly, but a round foam wreath form can also work if you style it with a burlap stem and leaf. Orange yarn is the classic choice, but cream, rust, mustard, sage green, burgundy, and blush pink all create beautiful autumn looks. In other words, this pumpkin wreath can go farmhouse, modern, neutral, colorful, cute, elegant, or full “fall exploded in the best way.”
Supplies You Need
Before you begin, gather everything on a clean table. A 30-minute craft becomes a 90-minute adventure when the scissors vanish under a ribbon pile.
Basic Materials
- 1 pumpkin-shaped wire wreath form, about 12 to 14 inches
- 1 skein chunky loop yarn or thick chenille yarn in orange, rust, cream, or another fall color
- Hot glue gun and glue sticks
- Scissors
- Burlap ribbon, felt, faux leather, cork, or brown fabric for the pumpkin stem
- Green felt, faux leaves, or wired ribbon for leaves
- Twine, floral wire, pipe cleaners, or ribbon for securing accents
- Wreath hanger, ribbon loop, or command hook for hanging
Optional Decorations
- Plaid bow or gingham ribbon
- Mini faux pumpkins or gourds
- Faux eucalyptus, wheat, berries, or fall leaves
- Wooden “welcome,” “thankful,” or monogram sign
- Raffia for a rustic harvest look
- Battery-operated fairy lights for indoor display
How Much Yarn Do You Need?
For a 12- to 14-inch pumpkin wire wreath form, one skein of chunky loop yarn is usually enough if you wrap snugly and keep the rows close together. If you want an extra-fluffy pumpkin wreath, buy two skeins. If you use thinner yarn, you will need more because it takes additional layers to hide the frame.
Loop yarn is especially helpful for beginners because it creates volume quickly. Chenille blanket yarn also works beautifully, but it may need tighter wrapping to prevent gaps. Traditional worsted-weight yarn can be used, but expect a longer project because you will wrap many more times. For a true 30-minute pumpkin yarn wreath, chunky yarn is your best friend. It is basically craft caffeine.
Step-by-Step: How to Make an Easy Pumpkin Yarn Wreath in 30 Minutes
Step 1: Set Up Your Work Area
Plug in your hot glue gun and place it on a heat-safe surface. Keep scissors, yarn, wreath form, and decorations within reach. If you are crafting with kids, let them help wrap yarn, choose colors, or fluff the wreath, but keep the hot glue work for an adult. Hot glue is wonderful, but it has the personality of a tiny lava monster.
Step 2: Secure the Yarn to the Wreath Form
Find the end of your yarn and tie it to the back or lower side of the pumpkin wreath form. A double knot works well. For extra hold, add a small dab of hot glue to the knot and press it down carefully. Start at the bottom or side of the frame so the beginning point is less noticeable.
If you are using a wire pumpkin form, tie the yarn around the outer wire. If you are using a foam wreath form, glue the yarn end to the back of the foam and let it set for a few seconds before wrapping.
Step 3: Wrap the Yarn Around the Frame
Begin wrapping the yarn around the wreath form, passing the skein through the center and around the outside. Keep the yarn rows close together so the wire or foam base does not show. Do not pull so tightly that the yarn loses its fluffy texture. Aim for snug, not strangled.
As you wrap, slide the yarn gently into place with your fingers. If you see a gap, push the neighboring yarn rows together. Add a small dot of hot glue every few inches on the back side if the yarn wants to shift. This is especially helpful on wire frames because the yarn can move around while you are working.
Step 4: Create Pumpkin Sections
A pumpkin looks like a pumpkin because of its rounded ribs. If your wire form already has pumpkin sections, follow those natural lines. Wrap each section neatly, working from one side to the other. If you are using a round wreath form, you can suggest pumpkin ridges by tying three or four pieces of twine vertically around the wreath after wrapping. Pull them slightly inward to create soft indentations.
This little detail makes a big difference. Without ridges, your wreath may look like a cheerful orange donut. Delicious? Yes. Pumpkin? Not quite.
Step 5: Finish and Hide the Yarn End
When the wreath form is fully covered, cut the yarn, leaving a 3- to 4-inch tail. Tuck the tail into the back of the wreath and secure it with hot glue. Press gently until it holds. Turn the wreath over and check the front for gaps. Fluff the yarn with your fingers so it looks soft and even.
Step 6: Add the Pumpkin Stem
Cut a small rectangle of burlap, felt, cork, faux leather, or brown fabric. A piece about 4 to 5 inches tall works well for a medium wreath. Fold or roll it into a stem shape and glue the edges together. Attach it to the top back of the wreath so it peeks above the yarn.
For a rustic look, wrap the stem with twine. For a modern look, use faux leather or dark brown felt. For a kid-friendly craft table, pre-cut the stems before the project begins. This saves time and prevents the classic “where did the brown felt go?” mystery.
Step 7: Attach Leaves and a Bow
Add one or two green leaves near the stem. Felt leaves are simple and cute, while faux maple leaves or eucalyptus sprigs create a fuller fall wreath. Place your leaves first without glue, then step back and check the balance. Once you like the placement, glue them down.
If you want a bow, use plaid, burlap, gingham, velvet, or wired ribbon. A small bow near the stem looks classic. A larger bow on one side creates a more dramatic farmhouse wreath. Wired ribbon is easiest to shape because it holds loops and tails without drooping.
Step 8: Add Final Decorations
This step is optional, but fun. Add a small wooden word sign, a monogram, faux berries, mini pumpkins, wheat, or raffia. Keep decorations lightweight so the yarn does not sag. For front door use, make sure everything is glued securely and protected from direct rain.
The key is restraint. A pumpkin yarn wreath should look cozy, not like it lost a wrestling match with the entire fall aisle.
Step 9: Hang and Enjoy
Add a ribbon loop, floral wire loop, or wreath hanger to the back. Hang your pumpkin yarn wreath on a covered front door, interior wall, mantel, pantry door, or window. If displaying outdoors, a sheltered porch is best because yarn can hold moisture and fade in harsh sunlight.
30-Minute Timeline
- Minutes 1–5: Gather supplies, heat glue gun, plan colors.
- Minutes 6–18: Tie and wrap yarn around the wreath form.
- Minutes 19–22: Secure the yarn end and fluff the wreath.
- Minutes 23–26: Make and attach the stem and leaves.
- Minutes 27–30: Add bow, accents, hanger, and final touch-ups.
Easy Design Variations
Farmhouse Pumpkin Yarn Wreath
Use orange or cream yarn, burlap ribbon, raffia, and a small wooden “welcome” sign. Add a black-and-white buffalo check bow for instant farmhouse charm.
Neutral Modern Pumpkin Wreath
Choose ivory, oatmeal, or soft beige yarn. Use a brown faux leather stem and muted green felt leaves. Skip bright orange and keep the decorations minimal.
Halloween Pumpkin Wreath
Use orange yarn with a black bow, tiny bats, a felt witch hat, or purple ribbon. Add removable decorations so you can switch from Halloween to Thanksgiving without making a whole new wreath.
Thanksgiving Pumpkin Wreath
Add wheat, faux berries, copper ribbon, and a “thankful” sign. Rust, burgundy, mustard, and cream work beautifully for a warm harvest palette.
Troubleshooting Common Problems
The Frame Is Showing Through
Push the yarn rows closer together. If the gaps remain, add a second layer of yarn in those sections or tuck small pieces of matching yarn into the open spaces with hot glue.
The Wreath Looks Lumpy
Fluff the yarn evenly and adjust tight spots. Lumps usually happen when some areas are wrapped tightly and others loosely. Aim for consistent tension as you work.
The Decorations Keep Falling Off
Attach embellishments to the frame whenever possible, not only to the yarn. For heavier accents, use floral wire or pipe cleaners along with hot glue.
The Bow Looks Sad
Use wired ribbon. Shape each loop with your fingers, trim the tails at an angle or into dovetails, and secure the center tightly. A bow should have personality, not stage fright.
Care and Storage Tips
To keep your pumpkin yarn wreath looking fresh, display it in a sheltered area away from heavy rain, strong wind, and long hours of direct sun. Indoors, keep it away from fireplaces, candles, and heating vents. When the season ends, remove delicate bows or loose decorations if possible, then store the wreath upright in a wreath bag or a roomy box. Avoid crushing it under heavier decorations. Yarn has memory, and sometimes that memory is “I was smashed by a ceramic turkey for eleven months.”
If the wreath gets dusty, use a lint roller, soft brush, or cool air from a hair dryer. Do not soak it. Yarn and water are not enemies, but they are also not best friends in wreath form.
Extra Experience Notes: What I Learned Making a 30-Minute Pumpkin Yarn Wreath
The biggest lesson from making an easy pumpkin yarn wreath is that the yarn choice matters more than almost anything else. Thick loop yarn makes the project fast, soft, and forgiving. Thin yarn can still look nice, but it turns the craft into a wrapping marathon. If your goal is a 30-minute wreath, choose the chunkiest yarn that still fits comfortably through the wreath form.
Another helpful experience is to plan the “front” of the wreath before you start gluing. Many wreath forms have one side that naturally looks smoother. Choose that as the front and keep knots, glue dots, and tucked yarn ends on the back. This simple habit makes the final wreath look cleaner.
It also helps to avoid overdecorating. The first instinct is to add a bow, leaves, berries, pumpkins, signs, ribbons, wheat, acorns, and possibly a tiny scarecrow who looks like he has opinions. But the yarn is already the star. A stem, one or two leaves, and a bow are usually enough. If you add more, keep the decorations grouped near the top or lower side instead of scattering them everywhere.
When crafting on a budget, check dollar stores, craft store coupons, clearance bins, and leftover ribbon from previous projects. A pumpkin wreath does not require expensive supplies. In fact, the handmade texture is what makes it charming. A slightly uneven stem or hand-cut felt leaf often looks warmer than something perfectly manufactured.
If you are making this wreath with kids, prepare the hot glue parts ahead of time. Children can wrap yarn, choose ribbon, fluff the pumpkin, and help place decorations. Adults should handle cutting stiff materials and attaching pieces with hot glue. For a classroom or party version, use glue dots, pipe cleaners, or pre-tied bows to make the project safer and faster.
For outdoor use, remember that yarn is more delicate than plastic or grapevine. It can fade, collect dust, or absorb moisture. A covered porch is ideal. If your front door gets direct afternoon sun or rain, hang the wreath inside on a pantry door, entry mirror, or mantel instead. It will still bring fall energy into the house, and it will last longer.
The best part of this DIY pumpkin yarn wreath is that it can be changed from year to year. Swap the bow, add a new sign, remove Halloween accents after October, or tuck in Thanksgiving leaves for November. Once the yarn-covered base is made, the wreath becomes a reusable seasonal canvas. That makes the project not only quick but practical.
Most importantly, do not chase perfection. A pumpkin is supposed to be round, ribbed, and a little quirky. If one side is slightly fuller, call it “organic.” If the bow leans, call it “whimsical.” If someone asks where you bought it, smile mysteriously and say, “Oh, just something I made in half an hour.” That is the true joy of a simple fall craft: it looks impressive, feels personal, and does not require a glue-gun degree.
Conclusion
Making an easy pumpkin yarn wreath in 30 minutes is one of the simplest ways to bring cozy fall style into your home. With a wreath form, chunky yarn, a stem, leaves, and a bow, you can create a soft, charming pumpkin decoration that works for Halloween, Thanksgiving, and the entire autumn season. The process is beginner-friendly, budget-friendly, and flexible enough for nearly any decor style.
Whether you choose classic orange yarn, modern cream, rustic burlap, or a bold plaid bow, your finished wreath will feel warm, handmade, and welcoming. Best of all, it is reusable. Store it carefully, refresh the accents next year, and your pumpkin yarn wreath can become a favorite fall tradition.
Note: Use adult supervision with hot glue, keep the wreath away from open flames and heat sources, and display it in a covered area if using it outdoors.