There is something deeply satisfying about snipping fresh basil from a container you rescued from the recycling bin. It feels like cooking, gardening, and mild environmental heroism all in one. A recycled herb garden DIY project is one of the easiest ways to grow fresh flavor at home without spending much money, needing a giant backyard, or pretending you suddenly became a full-time farmer with muddy boots and a tractor.
The beauty of an easy recycled herb garden is simple: herbs do not ask for much. Give them sunlight, drainage, decent potting mix, and a little attention, and they will reward you with fragrant leaves for soups, salads, pasta, tacos, roasted vegetables, cocktails, and anything else currently looking lonely on your plate. Even better, you can grow them in coffee cans, mason jars, yogurt tubs, old colanders, wooden crates, tin containers, plastic bottles, or almost any safe household container that can hold soil and release extra water.
This guide walks you through how to make an easy recycled herb garden DIY from start to finish. You will learn how to choose containers, prepare them properly, select beginner-friendly herbs, plant them the right way, care for them, and harvest them so they keep growing. Your kitchen windowsill, balcony, patio, porch, or sunny corner is about to become much more delicious.
Why Make a Recycled Herb Garden?
A recycled herb garden is practical, affordable, and surprisingly stylish. Instead of buying brand-new planters, you can reuse items already sitting around your house. An empty tomato can can become a rustic basil pot. A cracked teacup can hold thyme. A wooden produce crate can become a mini herb station. A plastic salad container can start seeds. It is less wasteful, budget-friendly, and much more personal than a row of identical store-bought pots.
There is also a real gardening advantage. Herbs are among the best plants for small-space gardening because many of them grow well in containers. They do not need a sprawling garden bed, and many can be placed near the kitchen, where you are more likely to use them. Fresh herbs are also expensive at grocery stores, especially when you only need a few sprigs and end up watching the rest wilt dramatically in the refrigerator like a tiny green tragedy.
By growing your own herbs, you can harvest only what you need. That means less food waste, better flavor, and fewer emergency grocery trips for “just cilantro” that somehow turn into a $48 cart.
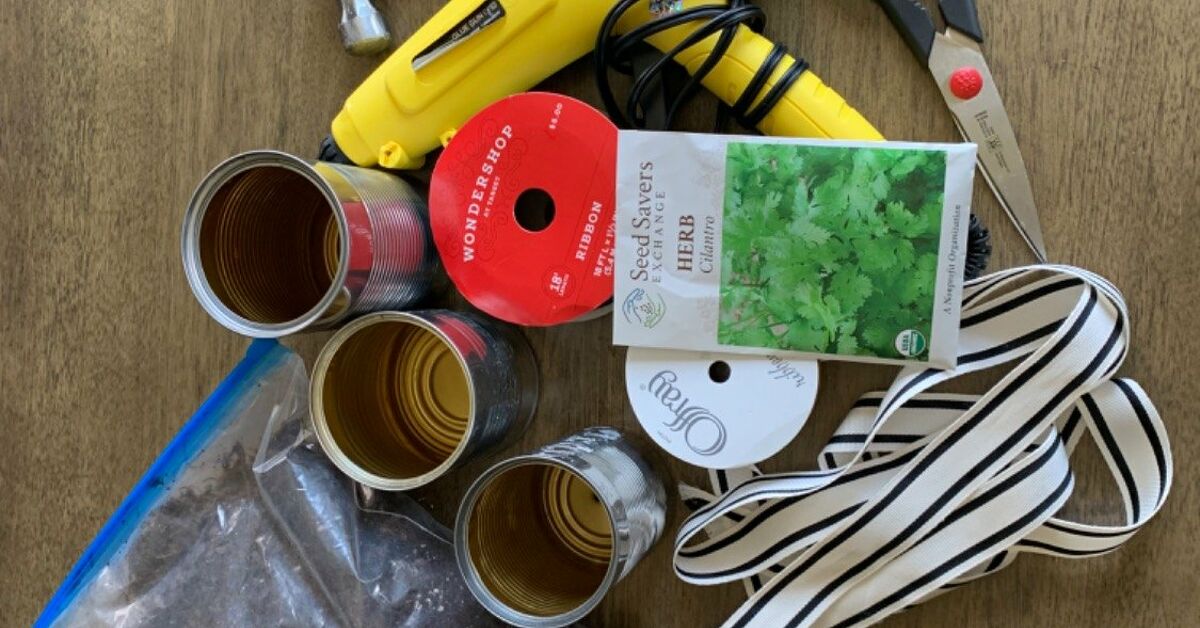
Best Recycled Containers for a DIY Herb Garden
Almost any clean, sturdy container can become a planter if it has enough room for roots and proper drainage. The most important rule is simple: herbs do not like soggy feet. If water collects at the bottom, roots can rot, leaves may yellow, and your cheerful garden can turn into a swamp with parsley.
Good recycled container ideas
Try using metal cans from tomatoes, coffee, beans, or soup. Wash them well, remove sharp edges, and punch or drill drainage holes in the bottom. Old mugs, teacups, and bowls can work for small herbs if you can add drainage or use them as decorative outer covers for nursery pots. Plastic yogurt tubs, takeout containers, food-safe buckets, and milk jugs are lightweight and easy to modify. Wooden boxes, wine crates, drawers, and fruit crates make charming herb gardens when lined properly and given drainage.
Colanders are especially fun because they already have drainage holes. They also bring a quirky farmhouse look, as if your kitchen tools decided to pursue a second career in agriculture. Mason jars are beautiful, but they need extra care because they usually lack drainage. If you use glass jars, add a layer of small stones at the bottom and water lightly, or place a small nursery pot inside the jar so excess water can be removed.
Containers to avoid
Avoid containers that once held harsh chemicals, paint, motor oil, pesticides, or unknown substances. Do not use treated wood scraps unless you know they are safe for food gardening. For herbs you plan to eat, stick with clean food-grade containers whenever possible. Your basil deserves better than a mystery bucket from the garage.
What You Need for This Easy Herb Garden DIY
This project does not require fancy tools. You probably already have most of what you need at home.
- Clean recycled containers
- Drill, hammer and nail, or awl for drainage holes
- Potting mix, not heavy garden soil
- Herb seeds or small starter plants
- Small stones, broken terracotta pieces, or mesh for covering drainage holes
- Labels made from popsicle sticks, cardboard, corks, or scrap wood
- Watering can or spray bottle
- Tray, saucer, baking sheet, or recycled lid to catch water
Use a lightweight potting mix designed for containers. Garden soil may seem like the obvious choice, but in pots it can become compacted, drain poorly, and make roots struggle. A good potting mix holds some moisture while still letting air move around the roots. That balance is the secret behind happy container herbs.
Best Herbs for a Recycled Container Garden
For beginners, choose herbs that are forgiving, useful, and suited to your available light. Most herbs prefer bright sun, especially Mediterranean herbs such as rosemary, thyme, oregano, sage, and lavender. Softer leafy herbs like parsley, cilantro, mint, and chives can handle slightly less intense light, though they still appreciate a bright spot.
Basil
Basil is a classic choice for a DIY herb garden because it grows quickly and tastes like summer decided to become a leaf. It loves warmth, sunlight, and regular harvesting. Pinch off the top leaves to encourage bushier growth, and remove flower buds when they appear if you want the plant to keep producing flavorful leaves.
Mint
Mint is almost too easy to grow. In the ground, it can spread aggressively, which is why containers are perfect for it. Grow mint in its own recycled pot so it does not bully the other herbs. Use it for tea, fruit salads, lemonade, sauces, and desserts.
Parsley
Parsley is fresh, flexible, and more than a garnish that restaurants place on plates for decoration. It works in soups, salads, grain bowls, sauces, and roasted vegetables. It grows well in containers with good drainage and bright light.
Chives
Chives are reliable, compact, and easy to harvest. Their mild onion flavor is perfect for baked potatoes, eggs, dips, and salads. Snip from the outside of the plant and let the center keep growing.
Thyme
Thyme is a great herb for shallow containers because it stays relatively compact. It prefers good drainage and plenty of sun. Use it with roasted vegetables, chicken, soups, beans, and bread.
Oregano
Oregano is flavorful, hardy, and excellent for pizza, pasta sauce, roasted vegetables, and marinades. It likes sun and does not want to sit in wet soil, making drainage especially important.
Cilantro
Cilantro is wonderful but dramatic. It grows quickly, then often bolts in warm weather, meaning it sends up flowers and changes flavor. For a steady supply, plant small batches every few weeks instead of one giant container all at once.
Step-by-Step: How to Make an Easy Recycled Herb Garden DIY
Step 1: Clean and prepare your containers
Wash each container with warm, soapy water and rinse it well. Remove labels if you want a cleaner look, or keep them if they add charm. For metal cans, check the rim for sharp edges. If needed, cover the rim with folded tape, twine, fabric, or a strip of rubber tubing.
If your container does not already have drainage holes, add several to the bottom. Use a drill for plastic, metal, and wood. For thin cans, a hammer and nail can work. Make enough holes so water can escape freely. One tiny hole in the center is not drainage; it is wishful thinking.
Step 2: Add a drainage helper
Place a small piece of mesh, coffee filter, newspaper, or broken terracotta over the holes to keep soil from falling out. You do not need a thick layer of rocks at the bottom of every container. The main goal is to keep drainage holes open while allowing water to move through.
Step 3: Fill with quality potting mix
Add container potting mix until the pot is about two-thirds full. Lightly fluff the mix with your hands. Do not pack it down like you are building a road. Roots need air as much as they need water.
Step 4: Plant seeds or starter herbs
If using starter plants, gently remove each herb from its nursery pot and loosen crowded roots. Place it in the recycled container at the same depth it was growing before. Fill around it with potting mix and press lightly to remove large air pockets.
If planting seeds, follow the depth instructions on the seed packet. Tiny seeds usually need only a light covering of mix. Keep the surface evenly moist until seedlings appear. A spray bottle helps prevent washing seeds into one corner, where they will gather like they are waiting for a bus.
Step 5: Label your herbs
Label each container right away. Young herbs can look surprisingly similar, and guessing “parsley or cilantro?” is not a game you want to play while making salsa. Use popsicle sticks, wine corks on skewers, painted stones, scrap cardboard, or strips cut from old plastic lids.
Step 6: Water gently
Water until moisture begins to drain from the bottom. Then let the top inch of potting mix dry slightly before watering again. Herbs generally dislike being constantly wet. The best watering routine depends on container size, plant type, temperature, sunlight, and airflow, so check the soil with your finger rather than watering on autopilot.
Step 7: Place in the right light
Most herbs grow best with at least several hours of bright light each day. A sunny south- or west-facing window is useful indoors. Outdoors, a patio, balcony, porch rail, or sunny step can work beautifully. If your herbs stretch toward the light and become thin or floppy, they probably need a brighter spot.
Creative Recycled Herb Garden Ideas
Vertical bottle herb garden
Cut openings into clean plastic bottles, add drainage holes, fill with potting mix, and secure them to a wooden frame or fence. This is ideal for small balconies and patios because it uses vertical space instead of precious floor space.
Tin can kitchen herb row
Paint or wrap clean tin cans, drill drainage holes, and place them on a tray near a sunny window. Grow basil, parsley, chives, and thyme for an easy indoor herb garden that looks cute and earns its counter space.
Drawer herb garden
An old wooden drawer can become a rustic herb planter. Drill drainage holes, line the inside with breathable landscape fabric, fill with potting mix, and plant a combination of compact herbs. Make sure the drawer is not made of unsafe treated material if you are growing edible plants.
Hanging colander garden
Line a colander with coconut liner, burlap, or landscape fabric, add potting mix, and plant trailing thyme, oregano, or mint. Hang it where it receives light and where dripping water will not annoy anyone below. Balcony neighbors tend to appreciate not being gently rained on by oregano water.
How to Care for Your Recycled Herb Garden
Container herbs are easy, but they still need regular attention. Check soil moisture often, especially in warm weather. Small recycled containers dry out faster than large pots, while glass or metal containers can heat up quickly in direct sun. If a metal can becomes very hot, move it to a spot with morning sun and afternoon shade.
Fertilize lightly. Herbs usually do not need heavy feeding, and too much fertilizer can create lots of soft growth with less concentrated flavor. If your potting mix already contains fertilizer, wait a few weeks before feeding. After that, use a diluted balanced fertilizer occasionally, especially if you harvest often.
Prune regularly. Harvesting is not just useful for cooking; it also encourages many herbs to grow fuller. Snip leaves or stems just above a set of leaves. Avoid removing more than one-third of the plant at one time, especially from young herbs. Give them a chance to recover before the next big pesto event.
Common Mistakes to Avoid
Using containers without drainage
This is the fastest way to disappoint both yourself and your herbs. Drainage holes are essential. If you fall in love with a container that cannot be drilled, use it as a decorative cover pot and place a smaller draining pot inside.
Overwatering
More water does not mean more love. It often means root trouble. Water when the potting mix begins to dry, not because the plant looked at you funny.
Crowding too many herbs together
Small herbs become larger plants. Give each one room for airflow and root growth. Mint especially should get its own pot because it spreads aggressively and has the social boundaries of a toddler with a marker.
Choosing the wrong light
Herbs grown in dim corners often become weak and leggy. If your home does not have enough natural light, consider a simple grow light for indoor herbs.
Harvesting and Using Your Fresh Herbs
Harvest herbs in the morning when possible, after the leaves are dry but before the day becomes hot. Use clean scissors or garden snips. For leafy herbs like basil, mint, and oregano, cut above a leaf node to encourage branching. For chives, snip leaves near the base. For parsley and cilantro, harvest outer stems first.
Use fresh herbs generously. Stir basil into tomato sauce at the end of cooking. Add mint to iced tea. Sprinkle chives over eggs. Toss parsley into salads. Rub thyme into roasted potatoes. Mix oregano into marinades. Once you start using fresh herbs, dried flakes from the back of the cabinet may start looking a little embarrassed.
Extra Experience: Lessons From Making an Easy Recycled Herb Garden DIY
The first lesson from making a recycled herb garden is that the container matters, but not in the way people think. A fancy pot does not guarantee a healthy plant. A humble bean can with drainage holes can grow better basil than an expensive decorative planter with no way for water to escape. The plant does not care whether the container matches your kitchen backsplash. It cares about roots, air, water, and light.
One of the best experiences with recycled herb gardening is learning to observe plants closely. Basil leaves droop when thirsty, then perk up after watering. Mint grows with almost suspicious enthusiasm. Rosemary prefers life on the drier side and will silently judge you for overwatering. Cilantro may look perfect one week and decide to bolt the next, especially when temperatures rise. These little plant personalities make the garden feel alive, not like a static decoration.
Another useful experience is discovering which containers work best for your routine. Small tin cans look adorable, but they dry out quickly. They are great for people who enjoy checking plants daily. Larger plastic tubs or wooden boxes hold moisture longer and are more forgiving if you forget a watering session. Glass jars are beautiful for photos, but they require careful watering because trapped moisture can cause problems. After trying a few options, most gardeners find a favorite setup that fits their home and habits.
Recycled herb gardens also teach you to think creatively about household waste. A cracked mug becomes a thyme pot. A takeout container becomes a seed-starting tray. A wooden clementine crate becomes a patio herb box. Even old baking sheets can become drip trays. Once you start seeing containers as potential planters, your recycling bin begins to look less like trash and more like a garden supply store with questionable lighting.
The biggest practical lesson is to start small. A beginner does not need twelve herbs, a vertical wall system, and a watering schedule worthy of a NASA launch. Start with three herbs you actually cook with. Basil, chives, and parsley are a friendly trio. Mint, thyme, and oregano are another reliable group. Once you know how light moves through your space and how quickly your containers dry out, expand from there.
Finally, the best part of this project is the daily reward. You do not have to wait months for a harvest. Within a short time, you can snip a few leaves and add them to dinner. That tiny action makes food feel fresher and the home feel greener. It is not just a DIY project; it is a small habit that makes ordinary meals brighter. Also, it gives you the right to say, “I grew this,” which is a very satisfying sentence even when “this” is three chives on a baked potato.
Conclusion
Making an easy recycled herb garden DIY is one of the simplest ways to bring fresh flavor, sustainability, and creativity into your home. You do not need a large yard, expensive supplies, or expert gardening skills. With clean recycled containers, good drainage, quality potting mix, enough light, and a few beginner-friendly herbs, you can build a small garden that looks charming and works hard in the kitchen.
Start with containers you already have, choose herbs you love to eat, and keep the care routine simple. Water thoughtfully, harvest often, and adjust as you learn. Before long, your windowsill, balcony, or patio will smell like basil, mint, thyme, and possibility. Not bad for something that started as an empty coffee can.