

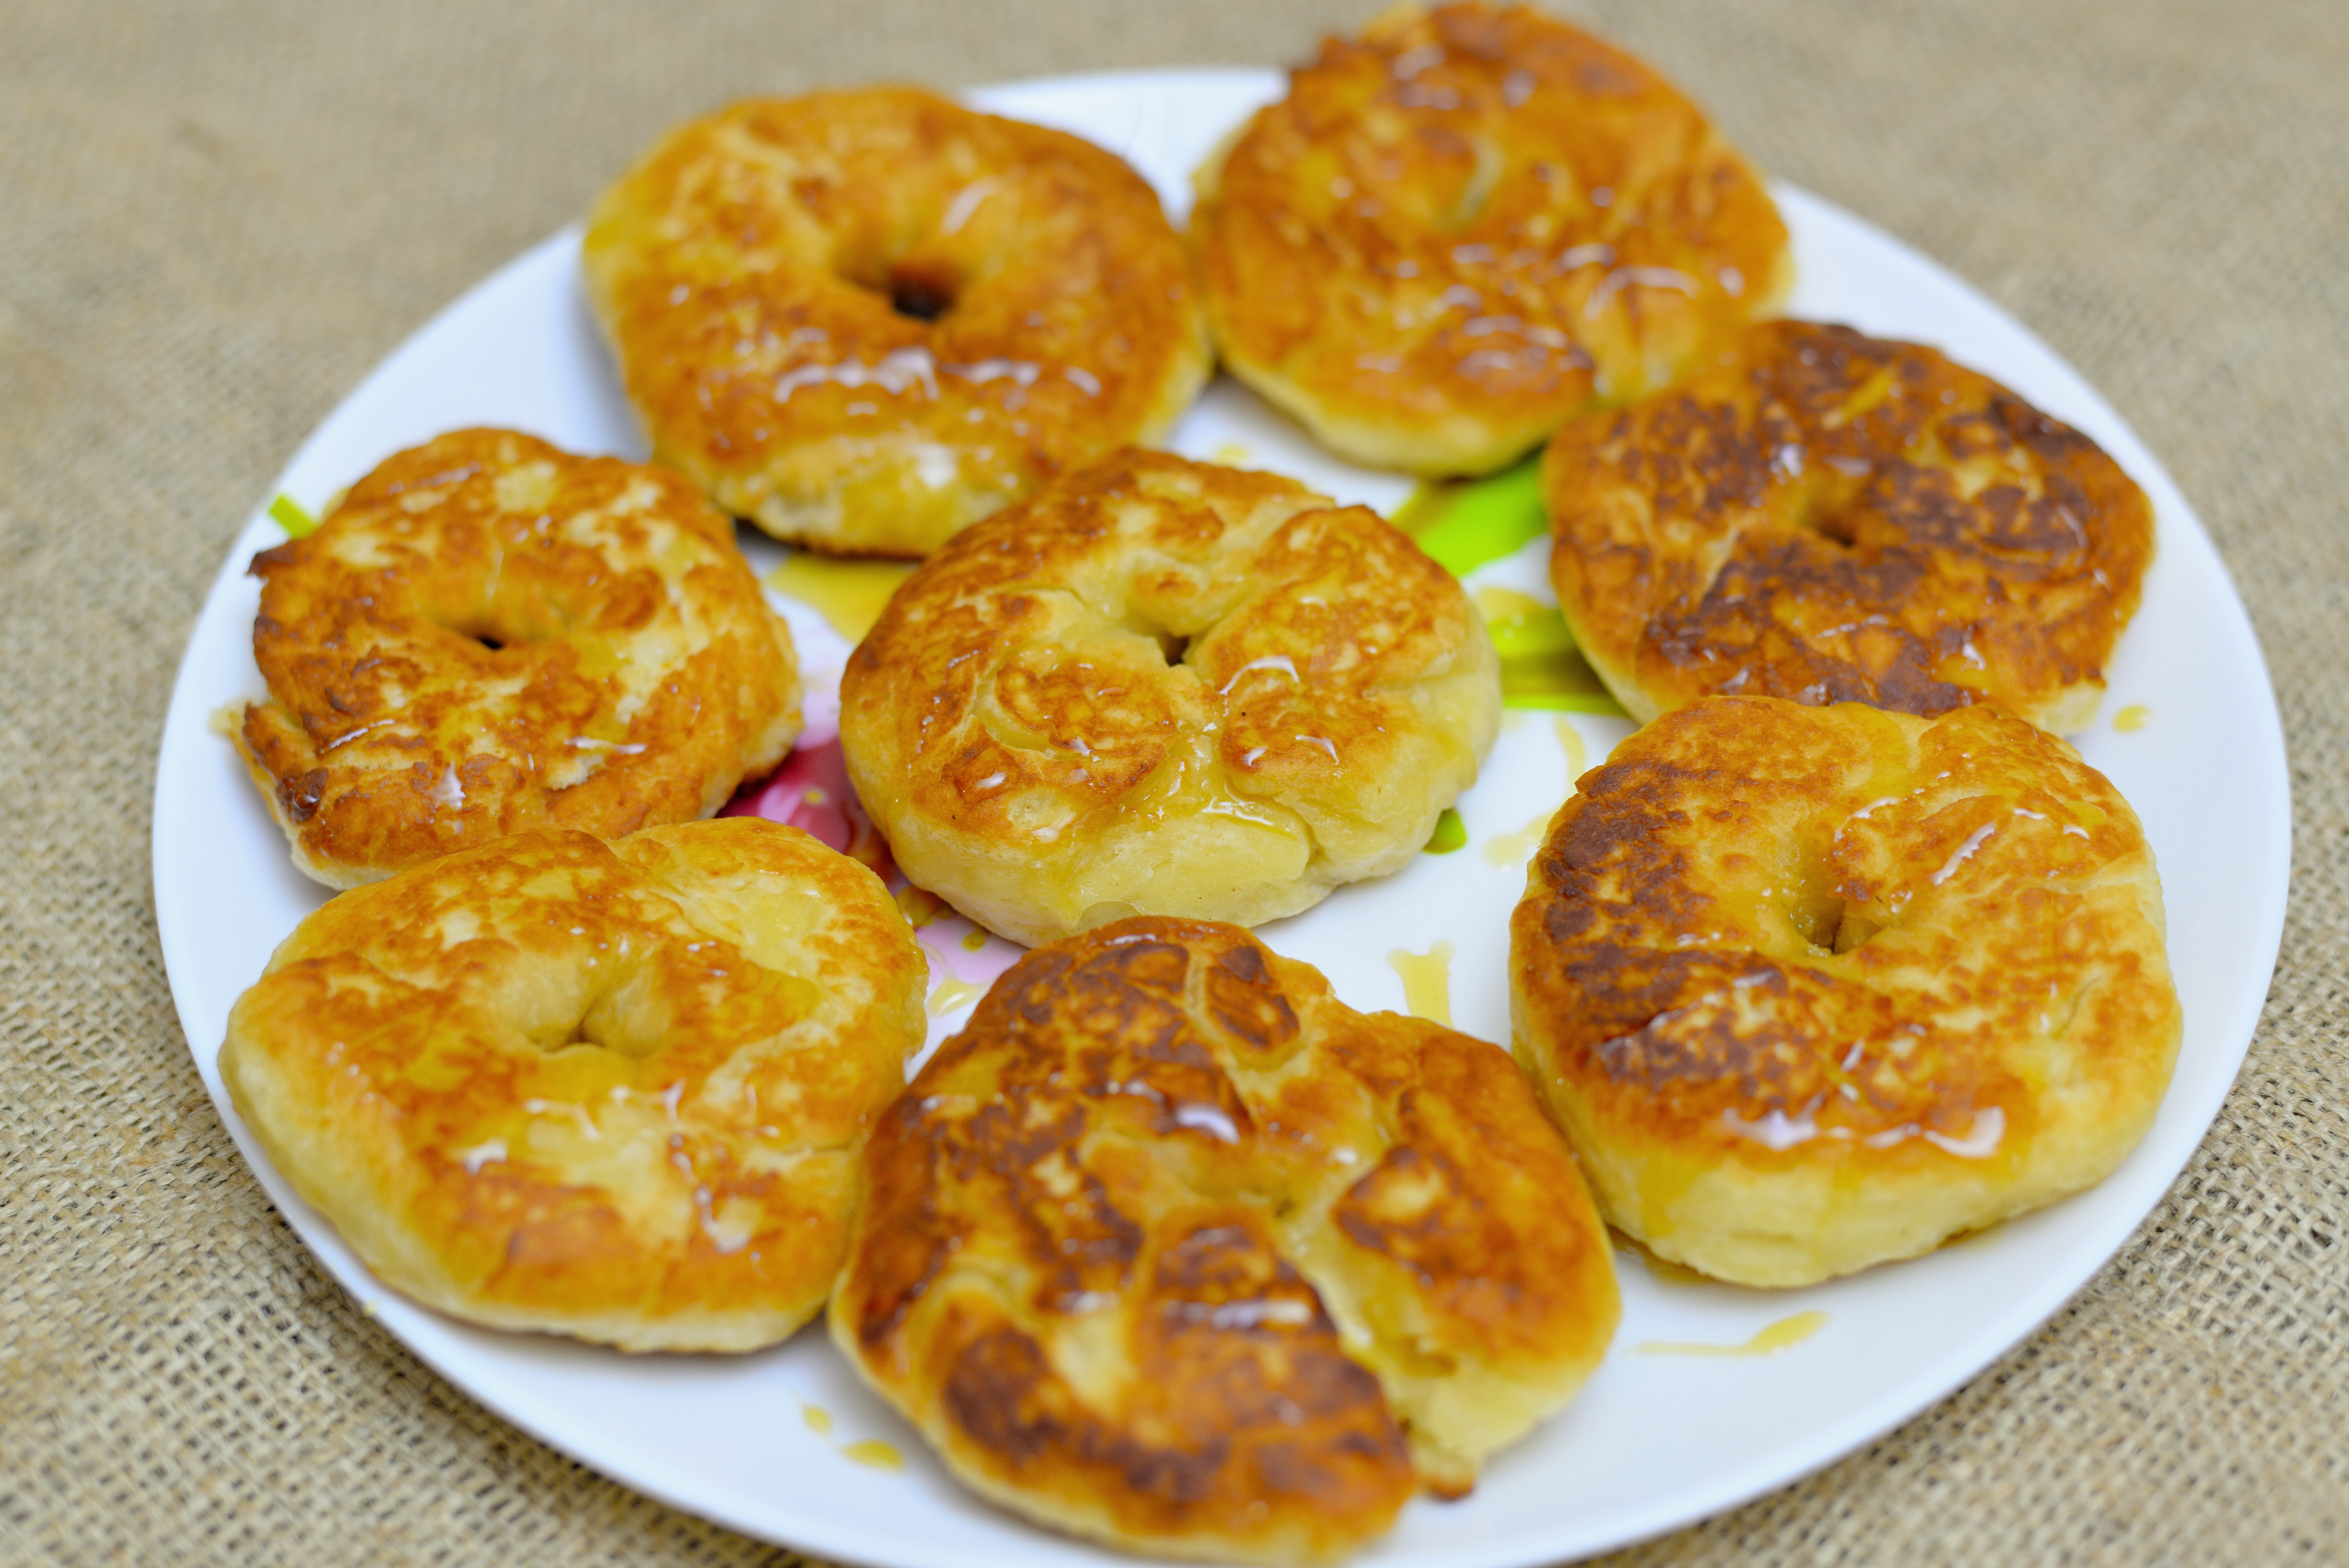
Ojibwe style frybread is the kind of food that makes a kitchen go quiet for about three secondsthe exact amount of time it takes everyone to realize something golden, warm, and slightly dangerous to their self-control has just landed on the plate. Crispy at the edges, tender in the center, and ready for honey, berries, soup, beans, or a full-on Indian taco situation, frybread is simple in ingredients but rich in meaning.
This recipe is inspired by the way frybread is often prepared in Ojibwe and broader Anishinaabe family kitchens: flour, baking powder, salt, warm liquid, and hot oil worked into a soft dough and fried until puffed and golden. The beauty is in the hands-on feel. You do not need a stand mixer, imported flour, or a culinary degree framed on the wall. You need a bowl, a skillet, a little patience, and the courage to not poke the dough every seven seconds while it fries.
Before we cook, it is important to say this clearly: frybread carries a complicated history. It is loved at gatherings, powwows, family tables, and community meals, but it is also connected to forced relocation, disrupted Indigenous foodways, and survival cooking made from government-issued pantry staples. In an Ojibwe context, it should be appreciated with respectnot treated like a trendy fair food that fell from the sky wearing powdered sugar.
What Is Ojibwe Style Frybread?
Ojibwe style frybread is a pan-fried bread made from a soft, slightly sticky dough. It is usually shaped by hand into rounds or ovals, then fried in a shallow layer of oil until the outside becomes crisp and the inside stays fluffy. Some families make it thinner and chewy; others like it thick, airy, and pillow-like. Some add milk, some use water, and some add a tiny pinch of sugar for browning.
There is no single “official” Ojibwe frybread recipe, because family recipes are living things. They travel through kitchens, adapt to what is in the cupboard, and change according to who is cooking. Grandma may measure with a coffee mug. Auntie may refuse to measure at all. Someone else may insist the dough needs to “feel right,” which is both deeply true and wildly unhelpful until you have made it a few times.
For this version, we will use all-purpose flour, baking powder, salt, warm milk or water, and a small amount of oil or melted fat in the dough. The result is a dependable frybread that works for beginners but still tastes like something you would proudly bring to a family table.
Ingredients for Ojibwe Style Frybread
Basic Ingredients
- 3 cups all-purpose flour, plus extra for shaping
- 1 tablespoon baking powder
- 1 teaspoon fine salt
- 1 teaspoon sugar, optional
- 1 1/4 cups warm milk or warm water
- 1 tablespoon neutral oil or melted shortening, optional
- 2 to 3 cups neutral frying oil, such as vegetable or canola oil
Optional Toppings
- Honey or maple syrup
- Cinnamon sugar
- Berry sauce or wojapi-style berry topping
- Cooked beans, seasoned ground meat, lettuce, tomato, and cheese for frybread tacos
- Butter and jam
- Wild rice soup or stew served alongside
Choosing the Right Flour and Liquid
All-purpose flour is the most reliable choice for homemade frybread because it has enough protein to create structure without becoming too tough. Bread flour can make the dough chewier, while cake flour may be too soft and delicate. If you want a heartier version, replace up to 1/2 cup of the all-purpose flour with whole wheat flour, but do not go overboard unless you enjoy frybread with the personality of a hiking boot.
Warm water gives a clean, traditional pantry-style dough. Warm milk creates a slightly richer, softer frybread with better browning. Both are good. If you are making frybread for savory toppings, water works beautifully. If you plan to eat it with honey, berries, or cinnamon sugar, milk gives the bread a gentle richness that plays nicely with sweet toppings.
How to Make Ojibwe Style Frybread Step by Step
Step 1: Mix the Dry Ingredients
In a large mixing bowl, whisk together the flour, baking powder, salt, and optional sugar. Whisking is not just for people who own matching measuring spoons. It distributes the baking powder evenly, which helps the frybread puff instead of forming random dense spots that taste like regret.
Step 2: Add Warm Liquid
Pour in the warm milk or water a little at a time. Add the tablespoon of oil or melted shortening if using. Stir with a wooden spoon or clean hands until a shaggy dough forms. The dough should be soft and slightly tacky, but not soupy. If it feels dry, add warm liquid one tablespoon at a time. If it feels too sticky to handle, sprinkle in a little flour.
Step 3: Knead Gently
Turn the dough onto a lightly floured surface and knead gently for about 1 minute. Do not attack it like pizza dough. Frybread likes a gentle hand. Over-kneading can make the finished bread tough instead of tender. Your goal is simply to bring the dough together until it feels smooth enough to shape.
Step 4: Rest the Dough
Place the dough back in the bowl, cover it with a clean kitchen towel, and let it rest for 20 to 30 minutes. This short rest gives the flour time to hydrate and lets the gluten relax. Translation: the dough becomes easier to stretch, and you become less likely to say rude things to it.
Step 5: Divide and Shape
Divide the dough into 8 equal pieces for medium frybreads or 10 to 12 pieces for smaller ones. Roll each piece into a ball, then flatten it with your hands into a round about 1/4 inch thick. Make a small slit or thumbprint in the center of each round. This helps the bread fry more evenly and keeps it from puffing into a full balloon.
Step 6: Heat the Oil
Pour 1 to 1 1/2 inches of oil into a heavy skillet or Dutch oven. Heat the oil to about 350°F. If you do not have a thermometer, drop in a tiny pinch of dough. It should sizzle immediately and rise to the surface, but it should not turn dark in five seconds. If the oil smokes, it is too hot. If the dough sinks sadly and absorbs oil, it is too cool.
Step 7: Fry Until Golden
Carefully place one piece of dough into the hot oil. Fry for about 1 to 2 minutes per side, turning once, until golden brown and puffed. Do not overcrowd the pan. Frybread needs space, much like people at a buffet pretending they are “just looking.”
Transfer the cooked frybread to a paper towel-lined plate or a wire rack. Repeat with the remaining dough, adjusting the heat as needed to keep the oil steady.
How to Know When Frybread Is Done
Perfect Ojibwe style frybread should be golden brown on both sides, lightly crisp around the edges, and tender inside. When you tear it open, the center should look cooked and fluffy, not wet or doughy. If the outside browns too fast while the inside stays raw, your oil is too hot. Lower the heat and give the next piece a little more time.
If the frybread turns pale and greasy, the oil is too cool. Let it heat back up before adding the next round. Temperature control is the secret handshake of good frybread. Once you learn it, everything improves.
Sweet and Savory Ways to Serve Frybread
Classic Sweet Frybread
For a simple sweet version, drizzle warm frybread with honey or maple syrup. You can also brush it with melted butter and sprinkle it with cinnamon sugar. This is the version that disappears fastest when children, cousins, or snack-motivated adults are nearby.
Frybread with Berry Sauce
A berry topping is a beautiful match for frybread. Simmer blueberries, raspberries, blackberries, or chokecherries with a little water and sugar until saucy. Spoon it over warm frybread and serve immediately. The tart berries cut through the richness of the fried dough, making the whole thing taste balanced instead of heavy.
Ojibwe-Inspired Savory Plate
Serve frybread beside wild rice soup, venison stew, bean stew, or roasted vegetables. While frybread itself came from post-contact survival cooking, pairing it with regional ingredients such as wild rice, maple, berries, fish, or game can create a plate that honors Great Lakes food traditions more thoughtfully.
Frybread Tacos
To make frybread tacos, top each piece with seasoned beans or meat, lettuce, tomato, onion, cheese, and salsa. The bread becomes the base, the plate becomes optional, and your napkin becomes extremely important.
Common Mistakes and How to Fix Them
The Dough Is Too Sticky
Add flour one tablespoon at a time until the dough is soft but manageable. Avoid dumping in a huge amount of flour all at once. Too much flour makes frybread dense and dry.
The Dough Is Too Dry
Add warm water or milk one tablespoon at a time. A slightly tacky dough usually makes softer frybread than a stiff dough.
The Frybread Is Tough
You may have kneaded too much or added too much flour. Next time, mix just until the dough comes together and knead gently for only a minute.
The Frybread Is Greasy
The oil was probably too cool. Let it return to about 350°F between batches. Also avoid stacking hot frybread directly on top of each other, because steam can soften the crust.
The Outside Burns Before the Inside Cooks
The oil is too hot or the dough rounds are too thick. Lower the heat and shape the dough closer to 1/4 inch thick.
Storage and Reheating Tips
Frybread is best eaten fresh, ideally while it is still warm enough to make butter surrender instantly. However, leftovers can be stored in an airtight container at room temperature for about one day or in the refrigerator for up to three days.
To reheat, place frybread in a dry skillet over medium-low heat for a few minutes per side. You can also warm it in a 350°F oven for about 8 minutes. Avoid microwaving if possible, because it can make the bread chewy and limp. Frybread deserves better than a rubbery second act.
Respecting the Cultural Story Behind Frybread
Writing about how to make Ojibwe style frybread means talking about more than flour and oil. Frybread is connected to Indigenous resilience, family gatherings, and creativity under pressure. It is also connected to policies that separated Native people from traditional lands and food systems. That history matters.
For Ojibwe people, traditional foodways include foods such as manoomin, also known as wild rice, along with fish, berries, maple sugar, corn, beans, squash, and game. Frybread entered many Native kitchens later, shaped by ration ingredients and economic hardship. Today, some people celebrate it as a beloved community food, while others critique it as a symbol of colonization and health challenges. Both perspectives deserve respect.
If you are making frybread as someone outside the culture, approach it with humility. Learn the history. Do not flatten Native food into one dish. Do not call it “authentic ancient bread” as if it has existed unchanged for thousands of years. Instead, understand it as a survival food that became a community food, and a recipe that carries memory as well as flavor.
Helpful Tips for Better Homemade Frybread
- Use warm liquid, not boiling liquid. Warm milk or water helps the dough come together smoothly.
- Let the dough rest. Even 20 minutes makes shaping easier.
- Keep the dough soft. A slightly tacky dough usually fries up better than a stiff one.
- Control the oil temperature. Around 350°F is the sweet spot for golden bread that is cooked inside.
- Serve it fresh. Frybread is at its best right after frying.
- Do not overcrowd the skillet. Crowding drops the oil temperature and makes the bread greasy.
Experiences Related to Making Ojibwe Style Frybread
The first time many people make frybread, they expect the recipe to behave like ordinary bread. It does not. There is no long rise, no fancy shaping, no loaf pan, and no dramatic oven spring. Instead, it is a hands-on recipe that asks you to pay attention. The dough tells you what it needs. Too dry? It cracks when you press it. Too wet? It clings to your fingers like it has abandonment issues. Just right? It feels soft, relaxed, and easy to pat into shape.
One of the best experiences with frybread is learning that perfection is not the point. Some pieces puff dramatically. Some stay flatter. Some become nearly round, while others look like a map of a place no one has discovered yet. That is part of the charm. Homemade frybread should look handmade. If every piece is identical, people may suspect a machine was involved, or worse, that you are trying too hard.
Cooking frybread also teaches patience with hot oil. The first piece is often the test piece. Maybe it browns too quickly. Maybe it sits there looking pale and unimpressed. By the second or third piece, you start adjusting the heat like a person who suddenly owns the kitchen. That is when confidence arrives. You begin to hear the correct sizzle, see the right shade of gold, and understand when to flip without overthinking it.
Serving frybread is its own experience. Place a warm batch on the table, and people naturally gather. Someone reaches for honey. Someone wants beans. Someone says they will eat “just one,” which is adorable. Frybread has a way of turning a simple meal into a shared moment. It is not quiet food. It invites stories, toppings, opinions, and the occasional friendly debate over whether the thinner crispy piece or the thick fluffy piece is superior.
Making Ojibwe style frybread can also encourage deeper curiosity about Indigenous foodways. It may lead you to learn about manoomin, maple sugar, seasonal harvesting, berry sauces, fish, corn, and the diversity of Native nations across North America. That matters because frybread should not be the only Native food people recognize. It is one doorway into a much larger food story.
Another memorable part of making frybread is how adaptable it is. On a cold evening, it feels comforting beside soup. At a summer gathering, it becomes a base for tacos. At breakfast, it pairs beautifully with jam or maple syrup. Around the holidays, a dusting of cinnamon sugar makes it disappear faster than anyone planned. The same dough can feel humble, festive, sweet, savory, old-fashioned, or brand new depending on how it is served.
Most of all, frybread reminds cooks that food is never just food. It can be survival, memory, celebration, debate, comfort, and connection all at once. When you make it carefully and respectfully, you are not just frying dough. You are practicing attentionto texture, temperature, history, and the people who will share it with you.
Conclusion
Learning how to make Ojibwe style frybread is simple in technique but meaningful in context. With flour, baking powder, salt, warm liquid, and hot oil, you can create a golden bread that is crisp outside, soft inside, and ready for sweet or savory toppings. The key is to keep the dough tender, let it rest, fry at the right temperature, and serve it fresh.
Just as importantly, frybread should be made with awareness. It is beloved by many families and communities, yet it also reflects a painful history of displacement and adaptation. Enjoy it, share it, and learn from itbut do not separate the recipe from the story it carries.