Some Halloween decorations whisper. Oversized DIY bats absolutely do not. They swoop, they loom, they make your front porch look like a very stylish haunted cave, and they do it without demanding a movie-studio budget. If you want a decoration that feels dramatic, photogenic, and just a little delightfully ridiculous, giant bats are hard to beat.
The best part is that this project looks far fancier than it really is. Many popular oversized bat builds use everyday materials like plastic hangers, black trash bags, zip ties, pipe insulation, and faux fur to create a lightweight prop with big wingspan energy. In other words, you do not need to be a master crafter. You just need a little patience, a flat workspace, and the willingness to embrace your inner Halloween art director.
In this guide, you’ll learn how to make oversized DIY bats for Halloween fun, how to hang them safely, how to style them for maximum spooky impact, and how to avoid the common mistakes that can make a bat look more “sad umbrella” than “night creature of legend.” We’ll also cover a few easier variations in case you want the same flying effect with less effort.
Why Oversized DIY Bats Work So Well for Halloween
Bats are one of those rare Halloween motifs that can go creepy, playful, elegant, or all three at once. A swarm of giant bats on a house creates movement, even when nothing is actually moving. That’s because the eye naturally follows the wing shapes and the direction they seem to fly. It is decoration with built-in drama.
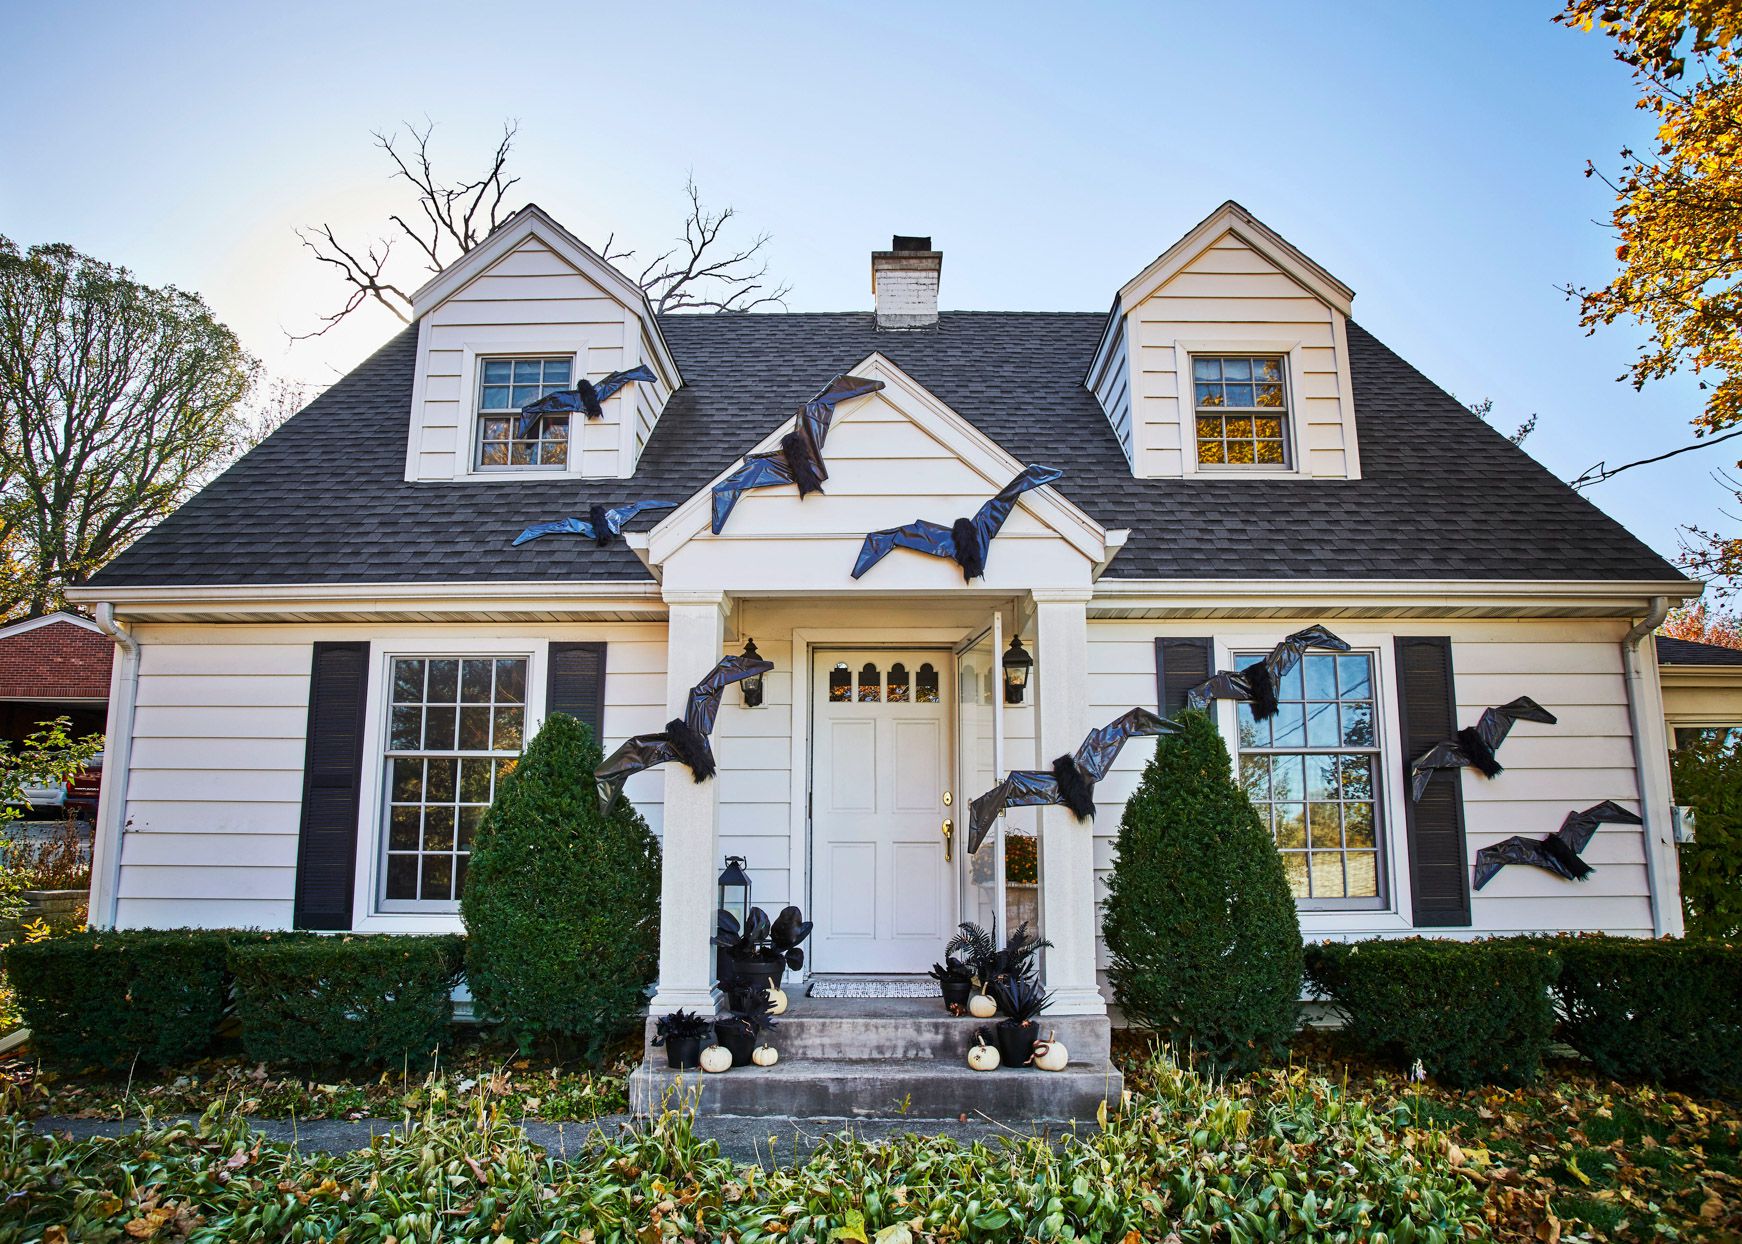
Another reason oversized bats work is contrast. Their dark silhouettes stand out beautifully against white siding, brick, painted doors, porch columns, and windows. Mix large and medium sizes together, and your display instantly feels more dimensional. The effect is especially good near an entryway, where the bats can appear to burst from the door, climb the wall, or circle the porch ceiling like they are late for a vampire staff meeting.
And unlike many bulky Halloween props, bats can be surprisingly lightweight. That makes them easier to hang, easier to store, and easier to reposition when you decide the left side of the porch needs “just one more bat,” which, for the record, is a very common condition in October.
Materials You’ll Need for Oversized DIY Bats
Main materials
- 6 black plastic hangers per bat
- Heavy-duty black trash bags
- Small zip ties
- Larger zip ties
- Black electrical tape
- Pipe foam insulation
- Black faux fur
- Hot glue
Tools
- Wire cutters
- Scissors
- Measuring tape
- Marker or chalk
- Outdoor adhesive hooks or removable hanging hardware
- Rubbing alcohol and a clean cloth for surface prep
If you want to make a whole colony, buy materials in batches before you start. One bat is fun. Five bats turns your home into a full Halloween moment.
Step-by-Step: How to Make Oversized DIY Bats
Step 1: Build the wing frame
Start with six plastic hangers. Use wire cutters to remove the hook tops so you are left with clean triangular hanger shapes. Lay out three hangers to form one wing. You want the curves and angles to overlap slightly so the wing looks broad rather than skinny. Fasten the hanger pieces together with small zip ties.
Repeat with three more hangers for the second wing. Do a quick side-by-side comparison before tightening everything down too much. Symmetry matters here. Your bat can be spooky, but it should not look like it lost an argument with a ceiling fan.
Step 2: Shape the wings
Before wrapping the frame, play with the angles a little. The most convincing oversized bats have wings that feel stretched and lifted, not flat as a pancake. Slight bends and subtle curves help the finished prop look more alive. You do not need perfect anatomy. You just need enough shape to suggest motion.
Step 3: Wrap the wings in black plastic
Lay black trash bags flat on your work surface. If the material seems thin, double it up. Place a wing frame on top and cut around it, leaving several extra inches around the edges. Fold the plastic over the frame and secure it on the back with black electrical tape.
The trick is to keep the front smooth. Think of it like wrapping a present for a very dramatic bat. Pull the plastic taut so the front looks sleek while the taped folds stay mostly hidden on the back. Repeat for the second wing.
Step 4: Make the body
Cut a section of pipe foam insulation to create the bat’s body. A piece around 12 inches long works well for many large builds, but you can adjust depending on how giant you want your creature to be. Place the body between the wings and secure it using a larger zip tie. At this point, the project finally starts looking less like craft supplies and more like a creature plotting porch domination.
Step 5: Add texture with faux fur
Cut faux fur to fit around the pipe insulation body. Wrap it neatly and glue it in place. Faux fur adds volume, hides the structure, and gives the bat that finished look that makes people ask, “Wait, you made that?” which is one of the great joys of holiday crafting.
You can stop here for a clean silhouette, or you can add extra details like small ears, bead eyes, or shaped shoulders. Just avoid over-decorating. Oversized bats are most effective when the silhouette does the heavy lifting.
How to Hang Giant Bats Without Turning Halloween Into a Repair Project
Hanging is where a good bat display becomes a great one. Instead of placing every bat at the same height, arrange them in a rising or swooping formation. Let some appear to fly upward from the door, others angle across the wall, and maybe one or two hover near the porch ceiling. The grouped movement is what creates the “swarm” effect.
Clean the hanging surface first with rubbing alcohol and let it dry completely. Then apply outdoor-rated removable hooks or compatible hanging hardware according to product directions. Press firmly, give the adhesive time to build, and do not rush this step. Halloween magic is wonderful. Adhesive shortcuts are not.
If you are decorating outside, keep an eye on the weather. Lightweight bats can handle a calm autumn day, but heavy rain, snow, or strong wind can shorten their lifespan fast. If bad weather rolls in, bring them inside and let them live to haunt another evening.
Best Places to Display Oversized DIY Bats
Front door and entryway
This is the classic placement for a reason. Giant bats framing the front door make your house feel festive before visitors even ring the bell. Mix sizes and arrange them as if they are climbing the facade or streaming outward from the entrance.
Porch ceiling
If you have a covered porch, suspend a few bats above eye level for a swooping effect. This adds depth and makes the display feel more immersive. It also gives trick-or-treaters that fun little “whoa” moment when they look up.
Garage doors or large exterior walls
A big blank area is perfect for an oversized swarm. The extra space lets the bats breathe visually, which makes them look more intentional and less crowded.
Indoor stairwells, mantels, and windows
If you want a lighter indoor version, use thick black paper, cardstock, felt, or foam core to create medium and small bats. Crease the wings slightly so they pop off the wall. A stairwell full of bats can look incredibly dramatic for very little money.
Easy Variations If You Want the Look With Less Work
Foam core bats
Foam core is a great option if you want a large bat silhouette without building a hanger skeleton. Trace a template, cut the shape, add faux fur to the center if you like, and hang it from fishing line or attach it to a wall. This method is especially useful for sheltered porches or backyard party setups.
Paper or cardstock bats
For indoor decorating, paper bats remain undefeated. Fold black paper, trace half a bat on the fold, cut it out, then crease the wings in opposite directions so they lift away from the wall. Use removable adhesive for quick placement. Make dozens in different sizes and cluster them into a flying pattern.
Felt bats
Felt is soft, easy to cut, and beginner-friendly. It works especially well for front doors, mantels, kid-friendly displays, or homes where you want spooky but not nightmare-inducing.
Styling Tips for a More Professional Halloween Look
Use at least three sizes if possible. Large bats anchor the display, medium bats create flow, and small bats fill in the visual story. This is the difference between “I put up some bats” and “my house appears to be under tasteful nocturnal occupation.”
Pair bats with other decor carefully. Pumpkins, lanterns, dried corn stalks, black wreaths, and a few porch mums work beautifully because they add fall texture without competing for attention. Giant spiders can work too, but use restraint unless your goal is to make the mail carrier file a formal complaint.
Color also matters. Black bats pop hardest against light or warm-toned surfaces, but they also look striking against glass when backlit from inside. If your porch is dark, add soft lighting from flameless candles or warm LEDs so the silhouette stays visible at night.
Common Mistakes to Avoid
Using flimsy materials
Thin plastic or weak tape can make wings sag. If your materials feel too delicate in your hand, they will absolutely feel too delicate in the wind.
Making every bat the same size
Uniform size flattens the effect. Variation creates motion, and motion is the whole point.
Placing bats randomly
A swarm should have direction. Sketch the arrangement first or lay it out on the ground before hanging. Even a loose plan helps.
Ignoring safety
Keep decorations away from open flames, use battery-powered lighting instead of candles when possible, and make sure walkways, steps, and exits stay clear for guests and trick-or-treaters.
How to Store Oversized DIY Bats After Halloween
Good news: these bats do not have to be one-season wonders. If you built them well, they can come back year after year like the world’s most organized spooky tradition.
Remove them carefully from hooks, wipe away dust, and make sure everything is fully dry before storage. Wrap each bat loosely in an old sheet, trash bag, or large plastic storage bag to keep the wings from snagging. Store them flat if you can, or hang them from a garage wall to preserve their shape. Label the bin clearly. Future You in October will be deeply grateful.
Real-Life Decorating Experiences and Lessons Learned
The first time many people make oversized DIY bats, there is usually a moment of doubt somewhere around the hanger-cutting stage. You look at a pile of black plastic, some zip ties, a fuzzy strip of faux fur, and a half-assembled wing frame and think, “I have made a mess, not a bat.” This is normal. In fact, it might be a Halloween rite of passage.
But then the shape begins to emerge. One wing gets wrapped. The second wing suddenly matches. The body goes on, and the whole thing starts looking surprisingly theatrical. Once the first finished bat is hung against a wall or porch post, something magical happens: it looks much larger and more dramatic in place than it did on the floor. That is when most crafters make the same decision: one bat is nowhere near enough.
A common experience is that the project gets easier and faster after the first build. The first bat teaches you how tight to pull the plastic, where to place the tape so it stays hidden, and how much curve the wings need to feel alive. By the second or third bat, you start making smarter choices. You cut materials assembly-line style. You vary the wingspan on purpose. You begin planning a whole formation instead of just a single prop. In other words, you stop crafting and start directing a tiny bat air force.
Another thing people notice is how strongly placement affects the final result. A giant bat hung by itself can look fun, but a grouped formation is what really sells the illusion. One bat near the door, two sweeping upward, one hovering near a porch light, another tucked toward the corner of the siding, and suddenly the whole house feels animated. Even neighbors who normally pretend not to notice seasonal decorating somehow manage to notice this.
There is also a practical lesson nearly everyone learns: weather matters. A calm, crisp fall afternoon makes your bats look fantastic. A wet, windy night can turn them into reluctant acrobats. People who decorate outdoors usually get the best long-term results when they bring the bats in during storms, reinforce stress points with extra tape, and choose sheltered areas whenever possible.
For indoor decorators, the lesson is usually about scale. What feels oversized in the craft room can feel perfectly balanced on a large stairwell or blank wall. Many crafters discover that bigger silhouettes look more polished than a bunch of tiny ones, especially in entryways and double-height spaces. The bats read better from a distance, photograph better for social media, and create a cleaner visual story.
Perhaps the best experience of all is the reaction. Kids point. Guests laugh. Someone always asks where you bought them, and getting to say, “I made them,” is ridiculously satisfying. Oversized DIY bats land in that sweet spot every great Halloween project aims for: they are affordable, memorable, and just over-the-top enough to be fun without becoming a full haunted-house production.
So yes, the materials may look humble. Yes, you may end up covered in bits of faux fur. Yes, you may spend a little too long adjusting wing angles like a perfectionist bat stylist. But when the display is done and your porch suddenly looks like October itself has moved in, the effort feels very worth it.
Final Thoughts
If you want a Halloween project that delivers major impact without requiring elite crafting skills, oversized DIY bats are an excellent choice. They are affordable, lightweight, customizable, and dramatic in all the right ways. You can go full outdoor swarm with hangers and trash bags, or choose paper, felt, or foam core for easier indoor versions.
The secret is simple: focus on silhouette, vary the sizes, give the swarm a clear direction, and hang everything with care. Do that, and your house will look less “I put up decorations” and more “a delightfully spooky creative genius lives here.” Which, honestly, is the dream.