Removing a fireplace surround sounds simple until the first stubborn piece of trim laughs at your pry bar. One wrong move and your “quick weekend update” can become a drywall crater, chipped tile disaster, or an unplanned lesson in colorful vocabulary. The good news? With patience, the right tools, and a careful order of attack, you can remove a fireplace surround without damaging the wallsor at least without creating damage that requires a dramatic phone call to a contractor.
This guide explains how to remove a fireplace surround safely, whether you are dealing with a wood mantel, tile surround, stone veneer, marble slabs, brick facing, or a builder-grade surround attached with mystery fasteners from another era. The key is not strength. It is strategy. Walls do not like surprises, and neither do hidden gas lines, electrical wires, or old adhesive. So before you start swinging tools like you are auditioning for a renovation show, let’s walk through the smart way to do it.
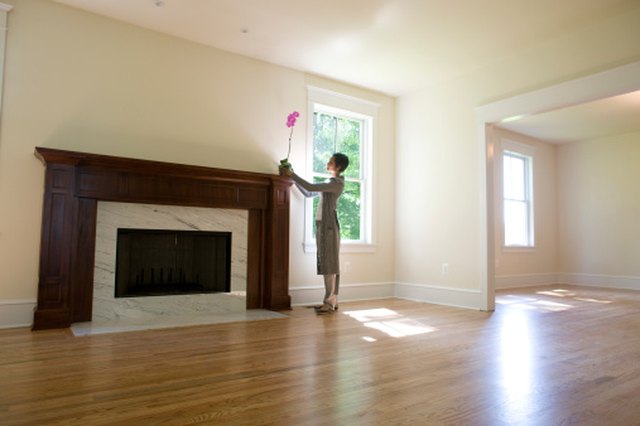
What Is a Fireplace Surround?
A fireplace surround is the decorative and protective frame around the firebox opening. It may include the mantel shelf, side legs, trim, tile, stone, brick, marble, or manufactured panels. Some surrounds are purely decorative, while others help protect nearby wall surfaces from heat when installed with approved noncombustible materials.
Common fireplace surround materials include painted wood, MDF, natural stone, cast stone, ceramic tile, porcelain tile, marble, granite, brick, and metal. Each material comes off differently. A wooden mantel may be screwed into studs or mounted on a cleat. Tile may be bonded with thinset mortar. Stone veneer may be mortared to cement board or directly attached to masonry. That is why the first rule of fireplace surround removal is simple: identify what you are removing before you start removing it.
Before You Begin: Safety Checks That Matter
Fireplace projects deserve more caution than regular trim removal because heat, gas, electricity, masonry dust, and old building materials may all be involved. If your fireplace is gas or electric, shut it off completely before removing any surround components. For a gas fireplace, turn off the gas supply valve and avoid disconnecting gas lines unless you are qualified to do so. If you smell gas at any point, stop immediately, leave the area, and contact the gas company or a licensed professional.
If your home was built before 1978, assume painted surfaces may contain lead until testing proves otherwise. Cutting, sanding, or prying painted trim can create hazardous dust. In older homes, it is smart to use a lead test kit or hire a lead-safe certified contractor, especially if children, pregnant people, or pets are in the home.
Tile, brick, mortar, and stone can also create fine dust when chipped or broken. Wear safety glasses, gloves, a dust mask or respirator, long sleeves, and hearing protection if power tools are used. Keep windows open when possible, use plastic sheeting to isolate the work zone, and run a shop vacuum with a proper filter. Your lungs should not have to participate in the renovation.
Tools and Supplies You Will Need
The exact tools depend on the type of fireplace surround, but a careful DIY removal usually requires a basic set of hand tools rather than a demolition hammer. Gentle tools are your friends because walls are easier to protect when force is spread out slowly.
Recommended Tools
- Utility knife with sharp blades
- Painter’s tape
- Drop cloths, cardboard, or moving blankets
- Stud finder
- Putty knife or 5-in-1 painter’s tool
- Small pry bar or trim puller
- Hammer or rubber mallet
- Screwdriver or drill/driver
- Oscillating multi-tool with scraper or cutting blade
- Cold chisel or masonry chisel for tile and stone
- Shop vacuum
- Safety glasses, gloves, and dust protection
- Joint compound, sanding sponge, primer, and paint for minor wall repairs
One of the best wall-saving tricks is to use a wide putty knife behind your pry bar. The putty knife spreads pressure across a wider area, reducing the chance that the pry bar will punch a hole into drywall. Think of it as giving your wall a tiny shield. A very unglamorous shield, but a heroic one.
Step 1: Clear and Protect the Work Area
Remove everything from the mantel and surrounding area. Take down artwork, nearby shelves, fireplace tools, décor, and anything fragile. Cover the hearth and floor with thick drop cloths, cardboard, or moving blankets. Tape plastic sheeting over nearby built-ins or furniture if you expect dust.
If the surround is heavy stone or tile, protect the hearth especially well. Falling chunks can chip stone, dent wood flooring, or crack tile. Do not rely on a thin sheet of plastic to protect finished surfaces. Plastic catches dust, but it does not cushion impact. Use cardboard or padded blankets underneath.
Step 2: Inspect How the Surround Is Attached
Before prying, inspect the surround from every angle. Look under the mantel shelf, behind decorative trim, along side legs, and near the top edge. Many mantels are attached with screws hidden under plugs, caulk, paint, or small trim pieces. Some are mounted on a French cleat or wood blocking, which means the mantel may lift up and off after fasteners are removed.
Use a stud finder to locate studs around the fireplace. Fasteners are often driven into studs or blocking. If you find screw heads, remove them first. If screws are covered with filler or paint, gently scrape the surface with a putty knife. Removing hidden fasteners is far better than forcing them out with a pry bar and taking a chunk of drywall along for the ride.
Step 3: Score Every Caulked and Painted Seam
This is the step that separates a clean removal from a drywall paper tragedy. Use a sharp utility knife to score every seam where the surround meets the wall, ceiling, hearth, tile, or adjacent trim. Cut through caulk, paint buildup, and adhesive film. Make a light first pass, then a slightly deeper second pass.
Score along the top of the mantel, both side edges, inside corners, decorative molding, corbels, trim returns, and any joint where two materials meet. Paint can act like glue. If you skip scoring, the surround may pull paint and drywall paper off the wall as it moves. That creates fuzzy torn drywall that must be sealed, skim-coated, sanded, primed, and painted. Scoring takes minutes. Repairing torn wall paper takes far longer and is significantly less fun.
Step 4: Remove Decorative Trim First
Start with the smallest and most superficial pieces. Thin trim strips, molding, side caps, or decorative blocks often hide the real fasteners underneath. Slide a putty knife behind the trim, gently tap it with a hammer if needed, and then insert a small pry bar between the putty knife and trim.
Work slowly from one end to the other. Do not pry one spot aggressively. Instead, loosen the piece a little at a time along its length. This reduces stress on the drywall and helps keep the trim intact if you want to reuse it. Label pieces with painter’s tape if you plan to reinstall or repurpose them later.
Step 5: Remove the Mantel Shelf or Wood Surround
Once seams are scored and trim is removed, check again for screws or nails. Remove visible screws with a drill or screwdriver. If the mantel is nailed, gently work the pry bar behind it using the putty knife as a wall protector. Pry near studs whenever possible because the wall is stronger there.
If the mantel does not move, stop and reassess. It may be attached to a cleat, glued to the wall, or locked behind side columns. Try lifting the mantel slightly upward. If it moves vertically but not outward, you may be dealing with a cleat system. If adhesive is holding it, an oscillating tool with a scraper blade can help separate the bond without ripping the drywall apart.
For large wood surrounds with side legs, remove the mantel shelf first if possible, then the side pieces. Have a helper support the surround as fasteners come loose. A large mantel can suddenly release, and gravity is not known for its gentle customer service.
Step 6: Remove Tile Surrounds Carefully
Tile removal requires a different approach because tile is usually bonded with mortar or adhesive. Start at an exposed edge or a grout line. If there is no exposed edge, use a grout removal tool or oscillating tool to open a small starting point. Place a wide putty knife, masonry chisel, or scraper at a shallow angle and tap gently with a hammer.
The goal is to separate the tile from the backing without gouging the wall. If the tile is attached to cement board, the board may come off with the tile. That is not always a bad thing. In many fireplace updates, removing the tile and backer together creates a cleaner surface for replacement. If the tile is bonded directly to drywall, expect some paper damage. Work slowly and keep the chisel angle low to avoid digging into the wall.
Tip for Stubborn Tile
If a tile refuses to release, do not keep hammering harder in the same spot. Move to another edge, remove surrounding grout, or break the tile into smaller sections. Stubborn tiles often come off more cleanly once neighboring pieces are removed. Yes, tile has a personality. Unfortunately, it is often dramatic.
Step 7: Remove Stone, Brick, or Cast Surrounds
Stone, brick, and cast surrounds are heavier and more unpredictable than wood trim. Determine whether the material is real masonry, thin veneer, or a prefabricated surround. Thin stone veneer may be mortared to cement board. Full brick may be structural or tied into the firebox area. Cast stone pieces may be anchored with brackets, screws, mortar, or construction adhesive.
For veneer, start at an edge and use a masonry chisel to separate pieces from the backing. Work in small sections. Do not use a sledgehammer near drywall unless you are emotionally prepared to repair drywall. For large stone slabs or cast surrounds, support each piece before loosening it. Heavy pieces can crack, fall, or tear anchors through the wall.
If you are unsure whether brick or stone is decorative or structural, call a professional. Removing decorative facing is one thing. Removing part of a masonry fireplace assembly is another. When in doubt, choose the option that does not involve accidentally altering the structure of a firebox or chimney.
Step 8: Deal With Adhesive Without Destroying the Wall
Construction adhesive can be the villain of fireplace surround removal. If you encounter glue beads behind trim or panels, use an oscillating scraper, flexible putty knife, or careful slicing motion with a utility knife. Apply steady pressure rather than sudden prying. Pulling adhesive straight off the wall can remove drywall paper.
For leftover adhesive ridges, scrape high spots gently. If the wall surface tears, trim loose paper with a utility knife. Do not sand torn drywall paper aggressively. First seal the damaged area with a suitable primer or sealer, then skim-coat with joint compound. This prevents bubbling when you paint later.
Step 9: Protect the Firebox and Hearth
Do not allow debris to fall into the firebox, gas burner area, vents, or electrical components. Cover the opening with cardboard or plastic while you work, but remove temporary coverings before the fireplace is used again. Vacuum dust from the hearth and surrounding area after removal.
If the fireplace is wood-burning, avoid damaging the firebrick, damper, smoke chamber, or metal lintel. If it is gas, do not disturb burner assemblies, glass fronts, pilot components, or venting. Any fireplace that has been altered should be inspected before use, especially if the surround removal exposed gaps, cracks, or questionable previous workmanship.
Step 10: Repair Minor Wall Damage
Even careful fireplace surround removal can leave nail holes, shallow gouges, torn paint, or uneven adhesive patches. Small holes can be filled with spackle. Larger damaged areas are better repaired with joint compound applied in thin layers. Let each layer dry fully, sand lightly, and repeat until smooth.
For drywall paper tears, cut away loose paper, seal the exposed area, and skim-coat. For larger holes, use mesh patching or a drywall patch backed by wood strips. Once repaired, sand with progressively finer grit, wipe away dust, prime, and paint. Primer is important because patched areas absorb paint differently from surrounding wall surfaces. Skipping primer can leave shiny or dull spots that say, “A renovation happened here, and it had feelings.”
Common Mistakes to Avoid
Prying Before Scoring
Caulk and paint bind the surround to the wall. Always cut those seams first. This single step prevents much of the torn drywall paper that homeowners dread.
Using Too Much Force Too Soon
If the surround does not move, there is probably another fastener, adhesive bead, cleat, or hidden bracket. Stop and investigate instead of prying harder.
Ignoring Fireplace Type
Gas, electric, and wood-burning fireplaces have different safety concerns. Shut off utilities and avoid disturbing mechanical components.
Removing Masonry Without Understanding It
Some brick or stone may be decorative, but some may be part of the fireplace structure. If you cannot tell the difference, get expert advice.
Forgetting About Code Clearances
If you plan to install a new mantel or surround, follow manufacturer instructions and local building codes for combustible materials, noncombustible facing, and clearance from the firebox opening.
When to Call a Professional
A careful DIYer can often remove a basic wood mantel or tile surround. However, professional help is the better choice if the surround is extremely heavy, if the fireplace is gas and components must be disconnected, if you suspect asbestos or lead paint, if brickwork appears structural, or if the wall behind the surround is badly damaged.
You should also call a professional if you plan to change the size of the firebox opening, remove a raised hearth, alter venting, or install a new surround close to combustible materials. Fireplaces are not just decorative features. They are heat-producing systems, and safety must come before style.
What to Do After the Surround Is Removed
After removal, inspect the wall, hearth, and firebox area. Look for moisture stains, cracked masonry, scorched materials, loose drywall, damaged cement board, and old gaps hidden behind the surround. This is the perfect time to fix problems before installing a new design.
If you are installing tile, stone, or another noncombustible finish, make sure the backing surface is sound, flat, clean, and appropriate for the material. Do not install new tile over crumbling drywall or dusty adhesive. If the old surround was hiding uneven framing, you may need to add cement board, patch drywall, or rebuild parts of the face before finishing.
Real-World Experience: Lessons From Fireplace Surround Removal
One of the most useful lessons from removing fireplace surrounds is that the project is rarely difficult in the way people expect. Most homeowners imagine the hard part will be lifting heavy pieces or breaking tile. In reality, the hard part is usually figuring out how the surround was attached. A mantel that looks simple from the front may be held by screws from below, nails through side trim, adhesive behind the legs, and a hidden cleat along the top. It is like a puzzle, except the puzzle is attached to your living room wall.
A practical approach is to treat the first hour as investigation, not demolition. Remove décor, clean the area, shine a flashlight under the mantel, look for filled nail holes, and run a utility knife along every seam. Many wall-damage disasters happen because someone tries to remove the largest piece first. Instead, start with the smallest trim pieces and let the surround reveal how it was built. Once the decorative layers are removed, the fasteners usually become easier to find.
Another experience-based tip is to keep your pry bar almost embarrassingly gentle. If you hear drywall cracking, stop. If the wall flexes, stop. If a piece moves on one side but not the other, stop and check for another fastener. Slow progress is not failure. It is how you avoid turning a fireplace makeover into a drywall repair marathon. Professionals often look fast because they know exactly where to pry. DIYers can get similar results by moving slowly, protecting the wall with a wide putty knife, and prying in tiny increments.
Tile surrounds teach patience quickly. Some tiles pop off cleanly and make you feel like a home improvement genius. The next tile may cling to the wall like it signed a lifetime lease. When that happens, switch tactics. Remove more grout, change your chisel angle, or start from a different edge. If the tile is bonded to drywall, accept that the paper may tear. The goal is not always zero damage; the goal is controlled, repairable damage. A shallow skim coat is normal. A giant hole shaped like your frustration is avoidable.
Stone and cast surrounds require respect. Even a small-looking stone side piece can be surprisingly heavy. Always support pieces before loosening them, and do not work alone if the surround has large slabs. If a stone panel starts to release suddenly, your hands will not negotiate with gravity fast enough. Use wood blocks, shims, and a helper. Also remember that some old surrounds were installed before today’s common DIY-friendly systems. They may include metal anchors, mortar beds, or fasteners hidden deep behind decorative caps.
Finally, plan for the “after” before starting the “during.” Once the surround is gone, the wall may show old paint lines, unfinished drywall, adhesive ridges, soot staining, or gaps around the firebox. Have joint compound, primer, sandpaper, and paint ready. If you are installing a new surround, measure carefully and confirm clearance requirements before buying materials. Removing the old surround is only half the project. The other half is making the wall look like nothing chaotic ever happened there. That, in home improvement terms, is the real magic trick.
Conclusion
Removing a fireplace surround without damaging the walls is absolutely possible when you work slowly, score seams, locate hidden fasteners, protect the drywall, and match your method to the material. Wood mantels need careful screw and cleat detection. Tile requires shallow-angle scraping and patience. Stone, brick, and cast surrounds demand extra support and sometimes professional help. Above all, remember that a fireplace is both a design feature and a safety-sensitive part of the home.
Take your time, use the right tools, and do not force anything that refuses to move. A clean fireplace surround removal is less about muscle and more about listening to the wall before it starts complaining loudly.
Note: Always confirm local building code requirements and manufacturer instructions before installing a new fireplace surround, mantel, or facing material.