Removing the P-trap in a pedestal sink sounds like one of those tiny home repairs that should take five minutes. Then you kneel on the bathroom floor, discover the pedestal is guarding the plumbing like a marble nightclub bouncer, and suddenly you are negotiating with a curved pipe under dim lighting. Good news: with patience, the right tools, and a bucket that does not emotionally betray you, this is a very doable DIY plumbing task.
The P-trap is the curved section of drainpipe under your sink. It holds a small amount of water, which creates a seal that helps block sewer gases from coming back into your bathroom. It also catches hair, toothpaste sludge, dropped jewelry, and the occasional mystery object that no one in the house will admit owning. In a pedestal sink, the job is trickier because the plumbing is partly hidden behind the pedestal base, leaving less room for your hands, pliers, and dignity.
This guide explains how to remove a P-trap in a pedestal sink safely, cleanly, and without turning your bathroom into a low-budget water park. You will learn what tools you need, when to remove the pedestal, how to loosen slip nuts, how to clean the trap, and how to reinstall everything without leaks.
What Is a P-Trap and Why Would You Remove It?
A P-trap is a curved drain assembly shaped somewhat like the letter “P” when connected to the wall drain. It includes the J-bend, the trap arm, slip nuts, and washers. In a bathroom sink, it usually connects the sink tailpiecethe straight pipe coming down from the drainto the drainpipe entering the wall.
You may need to remove the P-trap in a pedestal sink for several common reasons:
- The sink drains slowly or is completely clogged.
- You dropped a ring, earring, contact lens case, or other small item down the drain.
- The trap is leaking at a slip nut or washer.
- The old metal trap is corroded and needs replacement.
- You are replacing the faucet, pop-up drain, sink basin, or pedestal.
- You smell sewer odors and suspect the trap is dry, cracked, loose, or misaligned.
In many cases, removing the P-trap is more effective than pouring chemical drain cleaner into the sink. Hair, soap scum, and toothpaste residue often collect right in the bend. When you physically remove the trap, you can clean the blockage directly instead of hoping a bottle of mystery liquid solves your problems while quietly judging your plumbing decisions.
Why Pedestal Sinks Make P-Trap Removal More Challenging
A vanity sink usually gives you open cabinet space under the basin. A pedestal sink, however, is designed to look elegant by hiding much of the plumbing. That clean look comes with one small catch: the trap is often tucked behind the pedestal column, making it harder to reach.
Some pedestal sinks have enough rear clearance to remove the P-trap without moving the pedestal. Others are so tight that you may need to slide the pedestal forward slightly or remove it completely. Before doing anything dramatic, inspect the setup with a flashlight. If you can reach both slip nuts and move the trap downward and outward, you may not need to disturb the pedestal at all.
Important warning: in many pedestal sink installations, the pedestal helps support the basin along with wall brackets or bolts. Do not yank the pedestal out casually. If the sink bowl is not securely fastened to the wall, moving the pedestal can make the basin shift or drop. That is not a plumbing repair; that is a bathroom plot twist.
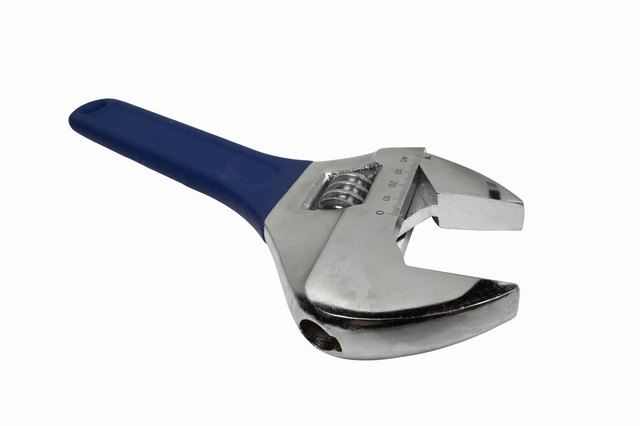
Tools and Supplies You Will Need
Gather everything before you start. Crawling out from under a pedestal sink three times because you forgot towels is a rite of passage, but not a fun one.
Basic Tools
- Bucket or shallow pan
- Old towels or rags
- Flashlight or headlamp
- Tongue-and-groove pliers or slip-joint pliers
- Adjustable wrench, if needed
- Small brush, bottle brush, or old toothbrush
- Rubber gloves
- Plastic bag for debris
Helpful Extras
- Penetrating oil for stuck metal nuts
- Replacement slip-joint washers
- Replacement 1-1/4-inch bathroom sink P-trap kit
- Painter’s tape for labeling parts
- Phone camera for before-and-after photos
- Short drain snake or plastic hair removal tool
Most bathroom sinks use a 1-1/4-inch tubular P-trap, though some setups use adapters or 1-1/2-inch parts. If you plan to replace the trap, take the old pieces to the hardware store or measure carefully before buying new parts.
Safety First: Before You Touch the Trap
You do not usually need to shut off the water supply just to remove a P-trap, because the trap is part of the drain system, not the pressurized water supply. However, turning off the faucet valves is a smart precaution if other people are in the house. Someone turning on the sink while the trap is off can create a very educational waterfall.
Before you begin, clear the area around the pedestal sink. Remove rugs, trash cans, cleaning supplies, and anything that does not enjoy dirty water. Place towels around the base of the pedestal and position a bucket directly under the trap. Even a “dry” sink trap holds water in the bend. That water may contain hair, soap film, and substances best described as “ancient bathroom soup.”
If the trap is metal and visibly corroded, proceed slowly. Old chrome-plated brass traps can become thin and fragile. Plastic traps are easier to remove, but slip nuts can crack if squeezed too hard with pliers.
Step-by-Step: How to Remove P-Trap in a Pedestal Sink
Step 1: Inspect the Pedestal Sink Plumbing
Use a flashlight to locate the tailpiece, J-bend, trap arm, wall drain, slip nuts, and washers. The tailpiece runs vertically from the sink drain. The curved part is the J-bend. The horizontal pipe leading into the wall is the trap arm.
Look at how much space you have around the pedestal. If the slip nuts are visible and reachable, you may be able to remove the P-trap without moving the sink base. If the pedestal blocks access to one or both nuts, you may need to loosen or shift the pedestal carefully.
Step 2: Take a Photo Before Disassembly
Take a clear photo of the trap assembly before loosening anything. This gives you a reference for how the parts fit together. It is especially useful if washers fall out, nuts slide down the pipe, or the trap arm rotates into a position that makes you question your life choices.
Step 3: Place a Bucket Under the Trap
Position a bucket or shallow pan under the J-bend. Because pedestal sinks often have limited floor space, a low plastic container may fit better than a tall bucket. Add a towel under the bucket to catch splashes.
If you are removing the trap to retrieve jewelry, avoid dumping the trap water directly into another drain. Empty it into the bucket and inspect the contents carefully. Small items often hide in hair and soap buildup.
Step 4: Loosen the Slip Nut at the Tailpiece
Start with the slip nut connecting the top of the J-bend to the sink tailpiece. Try turning it counterclockwise by hand. Many plastic slip nuts loosen without tools. If it is tight, wrap the nut with a rag and use tongue-and-groove pliers gently.
Do not crush the nut. Plastic fittings need firm pressure, not a wrestling match. Metal fittings may require more force, especially if they are old or mineral-crusted. If a metal nut refuses to move, apply a small amount of penetrating oil, wait several minutes, and try again.
Step 5: Loosen the Slip Nut at the Wall Trap Arm
Next, loosen the slip nut connecting the J-bend to the trap arm or the trap arm to the wall adapter, depending on your setup. Keep one hand on the trap as you loosen the second nut because water may start to drain immediately.
In tight pedestal installations, you may only be able to turn the nut a fraction of a rotation at a time. Be patient. Plumbing rewards calm hands and punishes hurry with leaks.
Step 6: Lower and Remove the J-Bend
Once both slip nuts are loose, gently lower the J-bend. Tilt it toward the bucket so trapped water drains into the container. If the trap is stuck, wiggle it lightly. Avoid forcing it sideways, especially if the wall drain pipe is old.
Slide the slip nuts and washers back carefully. Note the direction of each washer. Most slip-joint washers are tapered, and the tapered side usually faces the joint it seals. Installing a washer backward is a classic reason for a slow drip after reassembly.
Step 7: Remove the Trap Arm If Needed
If you need deeper access, loosen the nut at the wall adapter and remove the horizontal trap arm. This is useful when clearing a clog beyond the P-trap or replacing the entire trap assembly. Pull the trap arm straight out of the wall adapter, not downward.
Once the pipe is out, stuff a rag loosely into the wall opening to reduce sewer odors while you work. Do not push the rag deep into the drain. You want an odor blocker, not a new plumbing problem.
Step 8: Clean the P-Trap
Empty the trap into the bucket and inspect it. Use a bottle brush, old toothbrush, or small wire brush to remove hair, soap scum, toothpaste buildup, and debris. Rinse the trap in another sink, outdoors, or with clean water poured carefully through it. Avoid rinsing recovered jewelry down another drain. Yes, people do that. No, it is not a proud moment.
If the trap is cracked, badly corroded, dented, or smells terrible even after cleaning, replace it. Plastic P-trap kits are inexpensive and easier to work with in tight pedestal sink spaces. Decorative chrome traps are common for exposed pedestal sinks, but they must be installed carefully to prevent scratches and leaks.
Do You Need to Remove the Pedestal?
Sometimes the trap simply cannot come out because the pedestal blocks the J-bend or slip nuts. If that happens, determine whether the pedestal is caulked to the floor or bolted down. Also check whether the basin is bolted securely to the wall.
If the sink basin is firmly wall-mounted, you may be able to loosen the pedestal and slide it forward slightly. Cut any caulk line carefully with a utility knife, remove pedestal fasteners if present, and move the pedestal just enough to access the trap. Do not put your full weight on the sink basin. Do not lean on it. Do not use it as a handle. Pedestal sinks look sturdy, but they can crack, shift, or detach if abused.
If the basin seems loose or the pedestal appears to be carrying most of the weight, stop and get help. Supporting a pedestal sink while disconnecting plumbing is easier with two people and much cheaper than replacing a shattered sink.
How to Reinstall the P-Trap After Cleaning
Reinstallation is the reverse of removal, but with one important difference: alignment matters more than muscle. A P-trap should fit naturally between the tailpiece and wall drain. If you have to force the pieces together, something is too long, too short, angled incorrectly, or assembled in the wrong order.
Step 1: Reinsert the Trap Arm
If you removed the trap arm, slide it back into the wall adapter. Make sure the slip nut and washer are in place. The pipe should enter the wall adapter straight, not at a sharp angle.
Step 2: Position the J-Bend
Lift the J-bend into place under the tailpiece and connect it to the trap arm. Slide the washers into their sealing positions, then thread the slip nuts by hand. Start all nuts before tightening any one of them fully.
Step 3: Hand-Tighten First
Hand-tighten the slip nuts until snug. For plastic fittings, hand-tight is often enough. If needed, use pliers for a small additional turn, but do not overdo it. Over-tightening can distort washers, crack nuts, and create the very leak you were trying to prevent.
Step 4: Test for Leaks
Remove the rag from the wall drain if you used one. Run water for 30 seconds and watch every joint. Then fill the sink basin partway and release the stopper to send a larger rush of water through the trap. Wipe each joint with a dry tissue or paper towel. If it comes away wet, you have a small leak.
For minor leaks, loosen the nut, realign the washer and pipe, then retighten. If a washer is hard, cracked, flattened, or missing, replace it. A new washer costs little and can save you from chasing drips all afternoon.
Common Problems and How to Fix Them
The Slip Nut Will Not Loosen
Mineral buildup, corrosion, and age can freeze a nut in place. Wrap the nut with a rag and use pliers carefully. For metal nuts, penetrating oil may help. If the nut is badly corroded, replacing the trap may be safer than trying to preserve it.
The Trap Leaks After Reassembly
Leaks usually come from misalignment, backward washers, worn washers, or over-tightening. Take the joint apart and check the washer direction. Make sure the pipe ends meet straight. Hand-tighten first, then test again.
The Drain Still Runs Slowly
If the P-trap is clean but the sink still drains slowly, the clog may be in the trap arm or wall drain. Use a small hand auger carefully through the wall opening. Avoid forcing a snake aggressively, especially in older pipes. If multiple fixtures drain slowly, the problem may be farther down the drain line.
The Sink Smells Bad After Removing the Trap
The P-trap normally holds water to block sewer gases. If the trap is removed, odors can come from the open wall pipe. Stuff a rag loosely in the opening while you work, then remove it before reinstalling the trap. After reassembly, run water to refill the trap seal.
The Pedestal Blocks Everything
Some pedestal sinks are simply unfriendly to DIY access. Use a headlamp, small pliers, and patience. If the pedestal must be moved and the basin is not clearly supported, call a plumber or have a helper support the sink while you work.
When to Replace Instead of Clean the P-Trap
Cleaning is fine when the trap is in good condition. Replacement is better when the trap is cracked, corroded, pitted, cross-threaded, missing washers, or leaking from the pipe wall rather than the joint. Old chrome traps can look shiny on the outside while being thin and weak underneath. If the metal feels fragile or flakes when touched, replace it.
For most bathroom pedestal sinks, a 1-1/4-inch P-trap is common. If the sink is decorative and the plumbing is visible, choose a finish that matches the faucet, such as chrome, brushed nickel, or matte black. If the trap is hidden by the pedestal, a standard plastic tubular trap may be easier to install and maintain.
What Not to Do When Removing a Pedestal Sink P-Trap
- Do not pour chemical drain cleaner into a trap you are about to remove.
- Do not overtighten plastic slip nuts.
- Do not reuse cracked or flattened washers.
- Do not force a misaligned trap into place.
- Do not remove the pedestal unless the sink basin is supported.
- Do not ignore sewer odors after reassembly.
- Do not use the sink before confirming there are no leaks.
The biggest DIY mistake is assuming tighter means better. In slip-joint plumbing, proper alignment and good washers matter more than brute force. Think of it as a handshake, not a bench press.
Practical Experience: Real-World Lessons From Removing a P-Trap in a Pedestal Sink
Experience teaches a few things that instruction labels politely leave out. First, the water inside a P-trap always finds the one spot your bucket does not cover. A shallow tray plus towels often works better than a tall bucket because pedestal sinks leave limited space near the floor. Before loosening the trap, test where the water will fall by gently tilting the pipe in your mind and then assume it will do the opposite. Plumbing has a sense of humor, and it is not always kind.
Second, taking photos is not optional. Many DIYers think, “I’ll remember how this goes.” Ten minutes later, they are holding two washers, one nut, a curved pipe, and a facial expression usually reserved for tax forms. A quick phone photo shows the original angle of the trap arm, how far the pipe entered the wall adapter, and which direction the washers faced. This is especially helpful in pedestal sinks where you cannot easily see the back side of the assembly.
Third, most pedestal sink problems are access problems, not plumbing problems. The trap itself may be simple, but the pedestal base turns a beginner repair into a knuckle-scraping puzzle. A headlamp helps more than a handheld flashlight because it frees both hands. Short-handled pliers are easier to use in tight spaces than large ones. Rubber gloves improve grip on wet plastic nuts. If a nut is only hand-tight, skip the pliers entirely and save the fitting from damage.
Fourth, old metal traps deserve respect. They may look elegant, but corrosion can make them brittle. If the slip nut starts crumbling or the pipe wall looks thin, stop trying to rescue it. Replacing the assembly is often cleaner and safer than reusing parts that are already halfway to retirement. When buying a replacement, bring the old trap or at least clear photos and measurements. Bathroom sinks commonly use 1-1/4-inch tubular parts, but adapters and decorative traps can change the setup.
Fifth, leaks after reassembly are usually small and fixable. Do not panic if you see a drip. Turn off the water, loosen the joint, reseat the washer, straighten the pipe, and tighten it again by hand. A dry paper towel is the best leak detector. Wipe around each connection after running water. If the towel stays dry, you are winning. If it comes away damp, the joint needs attention.
Finally, know when to call a plumber. If the pedestal sink is loose, the wall drain is damaged, the trap is glued instead of slip-jointed, or the pipes disappear into old, fragile plumbing, professional help is not defeat. It is wisdom wearing work boots. Removing a P-trap in a pedestal sink is usually manageable, but the goal is a clean, leak-free bathroom, not a heroic story that ends with a bucket under the sink for three weeks.
Conclusion
Learning how to remove P-trap in a pedestal sink is one of those DIY skills that pays off quickly. It can help you clear clogs, recover lost items, stop leaks, and understand your bathroom plumbing better. The key is to work slowly, protect the floor, support the sink if the pedestal must move, and reinstall the trap with proper alignment.
A pedestal sink may make access awkward, but the basic process is straightforward: inspect the plumbing, place a bucket under the trap, loosen the slip nuts, lower the J-bend, clean or replace the trap, and test carefully for leaks. With a little patience, you can handle the job without drama. Well, maybe a little drama. It is still plumbing.