Sometimes the text in a photo is helpful. A street sign can set the scene. A product label can explain what you are looking at. And a dramatic quote slapped across a sunset can make your aunt’s Facebook post feel very inspirational. But when you are editing an image, text is often just visual clutter. Maybe it is a date stamp in the corner, words on a poster, a caption baked into a meme, or random lettering on a background that steals attention from the real subject.
The good news is that removing text in Adobe Photoshop is usually very doable. The even better news is that you do not need one magic button for every situation. Photoshop gives you several tools, and the trick is choosing the one that matches the background behind the text. A clean blue sky? Easy. A brick wall, patterned fabric, or hairline detail? That takes a little more finesse, but it is still manageable with the right workflow.
In this guide, you will learn how to remove text from a photo in Adobe Photoshop using the Remove Tool, Content-Aware Fill, Clone Stamp, Healing Brush, and Generative Fill. I will also show you when each method works best, how to avoid that smeared “someone definitely edited this” look, and what to do when Photoshop gives you results that are more cursed than clean. Let’s make that text disappear like it never paid rent.
Before You Start: A 30-Second Setup That Saves Headaches
Before you start erasing text from an image, set yourself up for cleaner edits. Open your photo in Photoshop and duplicate the original layer by pressing Ctrl+J on Windows or Command+J on Mac. This gives you a backup in case your first attempt looks like it was edited during an earthquake.
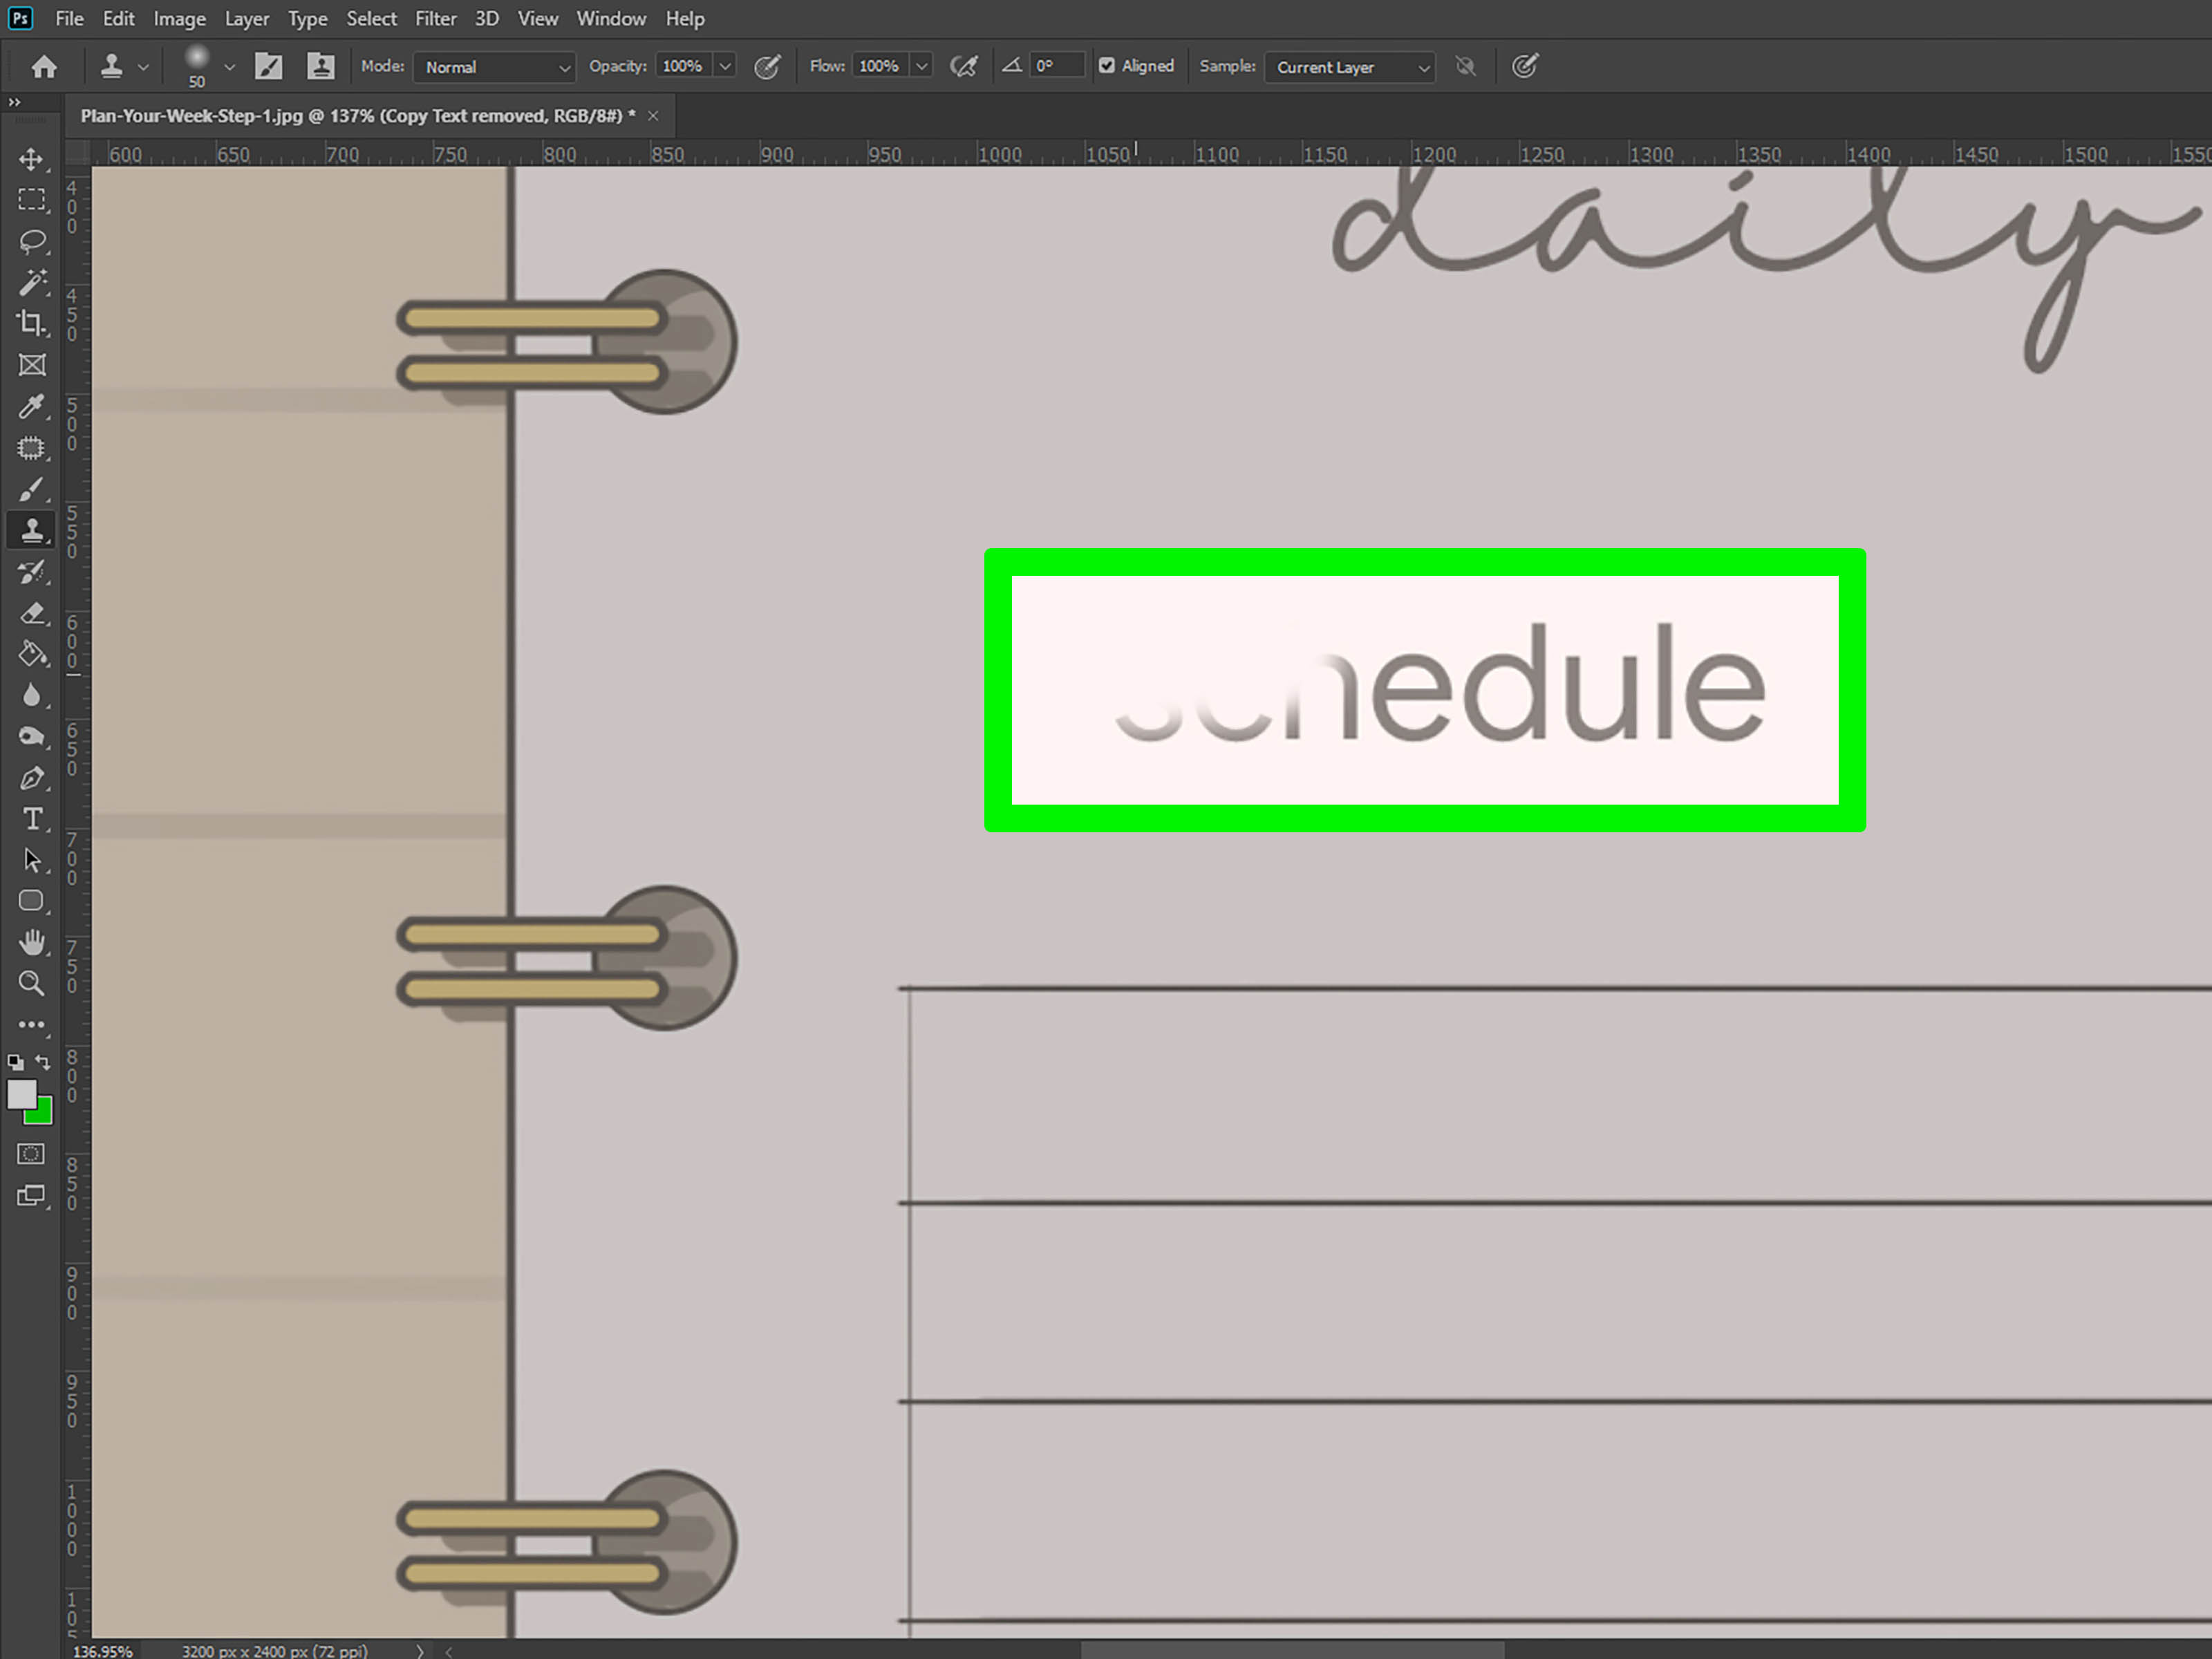
Then zoom in enough to clearly see the edges of the text. A lot of bad retouching happens because people work too far zoomed out and assume things look fine. They do not. They only look fine from across the room, which is not how pixels work.
Quick Prep Checklist
- Duplicate the background layer before editing
- Zoom in to at least 100% for accuracy
- Use a soft brush when blending edges
- Work in small sections instead of trying to erase all text at once
- Save a PSD file so you can revise the edit later
One more smart note: if the text is a copyrighted watermark or logo that you do not have the right to remove, pause there. It is fine to clean up your own photos, old date stamps, labels, or distracting words in licensed images. It is not smart to use Photoshop to remove ownership marks from content you do not own.
Method 1: Use the Remove Tool for the Fastest Results
If you are using a current version of Photoshop, the Remove Tool is usually the best place to begin. It is fast, beginner-friendly, and surprisingly good at removing text from simple or moderately textured backgrounds.
This tool works especially well when the text sits over areas like sky, pavement, grass, walls, sand, or blurred backgrounds. In other words, if the image behind the text has enough nearby pixels for Photoshop to study, the Remove Tool often handles the cleanup in seconds.
How to Use the Remove Tool
- Open your image and duplicate the background layer.
- Select the Remove Tool from the toolbar.
- Adjust the brush so it is slightly larger than the text you want to remove.
- Brush directly over the letters or draw a loose loop around them.
- Release the mouse and let Photoshop analyze the surrounding area.
- Inspect the result and repeat if needed on leftover artifacts.
For example, if you are removing white text from a blue-sky background, this tool can often wipe it out in one pass. If you are removing black text from a concrete wall, it may still work well, but you may need a second pass for the darker edges of the letters.
The biggest mistake here is using a brush that is way too large. If you paint half the image to remove one little word, Photoshop will do exactly what you asked and then ruin more than it fixes. Keep the brush close to the text and work deliberately.
Method 2: Use Content-Aware Fill When You Need More Control
The Content-Aware Fill feature is a strong choice when the Remove Tool gets close but not close enough. It gives you more control over the sampling area, which means you can tell Photoshop where to borrow pixels from. This is incredibly useful when the text sits near edges, patterns, shadows, or anything that confuses automatic cleanup.
Think of Content-Aware Fill as the editor’s version of saying, “No, Photoshop, not that part of the image. Use this part.”
How to Remove Text with Content-Aware Fill
- Select the text using the Lasso Tool, Object Selection Tool, or Quick Selection Tool.
- Leave a tiny bit of space around the letters so Photoshop has room to blend.
- Right-click inside the selection and choose Content-Aware Fill, or go to Edit > Content-Aware Fill.
- In the workspace, review the sampling area that Photoshop wants to use.
- Remove any bad sampling zones and keep only the areas that match the background.
- Apply the fill and review the new layer result.
This method works beautifully for things like text on painted walls, paper textures, wood grain, or backgrounds with soft gradients. If you are trying to remove text from a sunset photo, for example, Content-Aware Fill lets you guide Photoshop toward the right color blend rather than letting it invent a weird cloud blob out of nowhere.
Use this method when the edit needs to look polished, not merely “good enough for a thumbnail.”
Method 3: Use Clone Stamp for Precision and Repeating Patterns
When the background has structure, the Clone Stamp Tool is often the hero. This tool copies pixels from one part of the image and paints them onto another. It does not automatically blend in the same way healing tools do, which is exactly why it is so useful for bricks, tiles, edges, lines, product packaging, and architectural details.
If the text crosses a straight edge like a fence, horizon, tabletop, or window frame, Clone Stamp gives you much more control than a one-click removal tool.
How to Use Clone Stamp to Remove Text
- Create a new blank layer above your image.
- Select the Clone Stamp Tool.
- Set the sample option to Current & Below or All Layers.
- Hold Alt on Windows or Option on Mac and click a clean area near the text.
- Paint over the text using short strokes.
- Resample often so patterns do not repeat in an obvious way.
Let’s say you are removing words printed over a brick wall. If you clone from a brick pattern ten inches away, your edit may technically remove the text, but it can also create duplicated bricks that scream “Photoshop happened here.” The better approach is to sample from areas very close to the text and repaint the wall piece by piece.
Clone Stamp is slower, but it shines when realism matters. It is also great for cleaning up whatever the Remove Tool and Content-Aware Fill leave behind.
Method 4: Use Spot Healing Brush and Healing Brush for Small Leftovers
The Spot Healing Brush is excellent for small text fragments, rough edges, and tiny marks left behind after a larger removal. It works best on minor imperfections and simpler textures. You can click or drag over little problem areas and let Photoshop blend them with nearby detail.
The Healing Brush is similar, but you choose the sample source yourself. That makes it better when you want more control over texture, lighting, and tone. If the Spot Healing Brush is the quick cleanup sponge, the Healing Brush is the careful detail artist.
When to Use Each One
- Spot Healing Brush: Great for tiny leftover edges, dots, specks, and single-letter traces
- Healing Brush: Better for larger touch-ups where you need to sample a matching area manually
A smart workflow is to remove most of the text first with the Remove Tool or Content-Aware Fill, then use one of the healing tools to smooth tiny imperfections. This combination often looks more natural than trying to force one tool to do the entire job.
Method 5: Use Generative Fill for Difficult Backgrounds
If the text sits on a complex background, like foliage, reflections, layered shadows, fabric folds, or messy interior details, Generative Fill can be extremely helpful. It is designed for non-destructive edits and can remove or replace selected content using AI-assisted generation.
This is especially useful when traditional retouching tools start smearing detail instead of rebuilding it. In many cases, you can make a selection around the text, choose Generative Fill, leave the prompt blank for removal, and let Photoshop create new pixels that match the surrounding area.
How to Use Generative Fill to Remove Text
- Select the text area with the Lasso Tool or Object Selection Tool.
- Choose Generative Fill from the contextual task bar.
- Leave the prompt blank if you simply want the text removed.
- Generate the result and compare the variations.
- Pick the most natural version and refine with healing or cloning if needed.
This method can save an image that would otherwise take forever to retouch manually. That said, do not assume it is always perfect. AI can occasionally invent texture that looks slightly too smooth, too symmetrical, or just plain suspicious. Always zoom in and check the details before calling it done.
How to Choose the Best Tool for the Job
If you are wondering which Photoshop text removal method to use, here is the easy version:
- Use Remove Tool for quick edits on simple backgrounds
- Use Content-Aware Fill when you need more control over sampling
- Use Clone Stamp for patterns, edges, and precision work
- Use Healing tools for small flaws and final cleanup
- Use Generative Fill for difficult, detailed, or uneven backgrounds
In real-world editing, the best result often comes from combining two or three tools, not treating one of them like a miracle wand.
Common Problems When Removing Text in Photoshop
1. The Background Looks Blurry
This usually happens when Photoshop borrows from the wrong area or when the brush is too large. Undo the step and work in smaller sections. Use Clone Stamp or Healing Brush for detail recovery.
2. Repeating Patterns Give Away the Edit
This is classic Clone Stamp trouble. Resample often and avoid copying the same texture block over and over. Nature repeats. Photoshop repeats more suspiciously.
3. Straight Lines Become Wobbly
When text crosses a hard edge, like a railing or horizon, remove the letters first, then redraw the line carefully with Clone Stamp or a small brush-based retouch.
4. Shadows and Highlights Stop Matching
If the text sits across a gradient, use Content-Aware Fill or Healing Brush so the tonal transition stays smooth. Removing text is not just about texture. It is also about preserving light.
Best Practices for Clean, Professional Results
If you want your retouching to look natural, keep these principles in mind:
- Always work on a duplicate or separate retouching layer
- Zoom in for accuracy, then zoom out to check the full image
- Remove text in sections, especially over detailed backgrounds
- Use the lightest-touch method that gets the job done
- Combine tools instead of forcing one tool to solve everything
- Check for texture, lighting, edge shape, and pattern continuity
Also, remember this: the goal is not just to delete text. The goal is to make the area look like text was never there in the first place. That is a very different standard, and it is the one that separates rushed editing from great retouching.
Real-World Experience: What Actually Happens When You Remove Text a Lot
One thing I have learned from removing text in Photoshop is that the job is rarely about the text itself. The real challenge is the background hiding underneath it. The letters are just the obvious problem. The texture, lighting, perspective, and pattern continuity are the sneaky problems waiting behind the curtain like tiny pixel goblins.
For example, text over open sky is usually the easiest kind of cleanup. You can often brush it away with the Remove Tool and move on with your life. But text over brick, fabric, leaves, or water reflections is where Photoshop starts asking whether you really meant “easy.” In those cases, I have had the best results by resisting the urge to rush. Small selections, short Clone Stamp strokes, and frequent resampling beat aggressive brushing almost every time.
Another common experience is discovering that the first result looks great until you zoom in. From a distance, the image seems perfect. Then you check at 100% and realize one corner of a letter is still there, or the repaired area has turned into a muddy patch that looks softer than the rest of the photo. That is why I always do a two-step review: zoomed in for detail, zoomed out for realism. If the edit only works at one zoom level, it is not done yet.
I have also noticed that people tend to underestimate how important edge reconstruction is. If text crosses over a windowsill, a jawline, a tree branch, or the seam of a shirt, deleting the letters is only half the work. The other half is rebuilding the shape cleanly. This is where Clone Stamp becomes less of a “tool” and more of a patient friend who quietly fixes your mistakes without judging you too much.
Generative Fill can be a huge time-saver, but experience also teaches caution. Sometimes it creates a result that is technically impressive but slightly off in a way your eye catches immediately. Maybe the texture is too smooth, maybe a repeated pattern looks suspicious, or maybe the new content is almost correct but not quite. So I treat AI-generated cleanup as a strong draft, not always the final answer. Often the best workflow is Generative Fill first, then manual refinement with Healing Brush or Clone Stamp.
The most reliable habit I keep coming back to is simple: work non-destructively and stay flexible. Duplicate layers. Name cleanup layers. Save the PSD. Because the edit that feels brilliant at midnight can look weird the next morning, and future-you will be very grateful not to have flattened the evidence. In the end, removing text from a photo in Adobe Photoshop is less about pressing the perfect button and more about reading the image. Once you understand what the background needs, the right tool becomes much easier to choose.
Final Thoughts
If you want to know how to remove text from a photo in Adobe Photoshop, start simple and choose your tool based on the background. The Remove Tool is great for fast cleanup. Content-Aware Fill gives you more control. Clone Stamp handles structure and precision. Healing tools smooth the leftovers. Generative Fill helps with complicated scenes.
The real secret is not magic. It is judgment. Know when to automate, know when to step in manually, and know when the image needs five careful strokes instead of one giant swipe. Do that, and your edit will look natural, polished, and convincingly text-free.