If your hair clippers have started chewing through hair like a grumpy lawn mower, pulling instead of gliding, or sounding like they are auditioning for a small helicopter role, dull blades are probably the culprit. The good news is that you may be able to sharpen hair clippers at home and get them cutting more cleanly again. The even better news? You do not need a machine shop, a wizard, or barber superpowers.
That said, clipper sharpening is not just about making metal shiny. It is really about cleaning, flattening the cutting surfaces, reassembling the blade set correctly, aligning the teeth safely, and oiling everything so the tool runs smoothly. Miss one of those steps and your “freshly sharpened” clippers can still snag, heat up, or cut unevenly. In other words, sharp blades are great. Sharp blades installed crooked? Absolutely not.
This guide walks you through how to sharpen hair clippers in 11 practical steps. You will also learn when to stop sharpening and replace the blade instead, what mistakes to avoid, and what real-world experience teaches people the first time they try it. Whether you are maintaining home clippers for family trims or keeping your grooming tools in better shape between deeper services, this step-by-step approach will help you do it right.
Before You Start: What You Need
Set up your workspace before you touch a screw. You will want a screwdriver that fits your blade screws, a cleaning brush, a soft cloth, blade cleaner or a blade wash product, clipper oil, and a fine sharpening stone or flat honing surface designed for blade maintenance. A small magnetic tray or bowl for screws is also helpful, because clipper screws have a magical ability to disappear the second they hit the floor.
It also helps to have good lighting and a phone camera. Taking a quick photo of the blade assembly before you take it apart can save you from the classic “Why do I now have two screws, one spring, and zero confidence?” moment.
How to Sharpen Hair Clippers in 11 Steps
-
Step 1: Turn Off and Unplug the Clippers
Start with the obvious but important move: power the clippers off and unplug them. If you are using a cordless model, switch it off and remove it from the charging stand. You want the tool completely inactive before you start cleaning, loosening screws, or handling the blade set. Clippers are helpful. Surprise-moving clippers are not.
This is also the right time to let the blade cool down if you were using it recently. Working on a warm blade is uncomfortable, and if it has been running hot because of friction or lack of oil, that is useful information you will want to remember later.
-
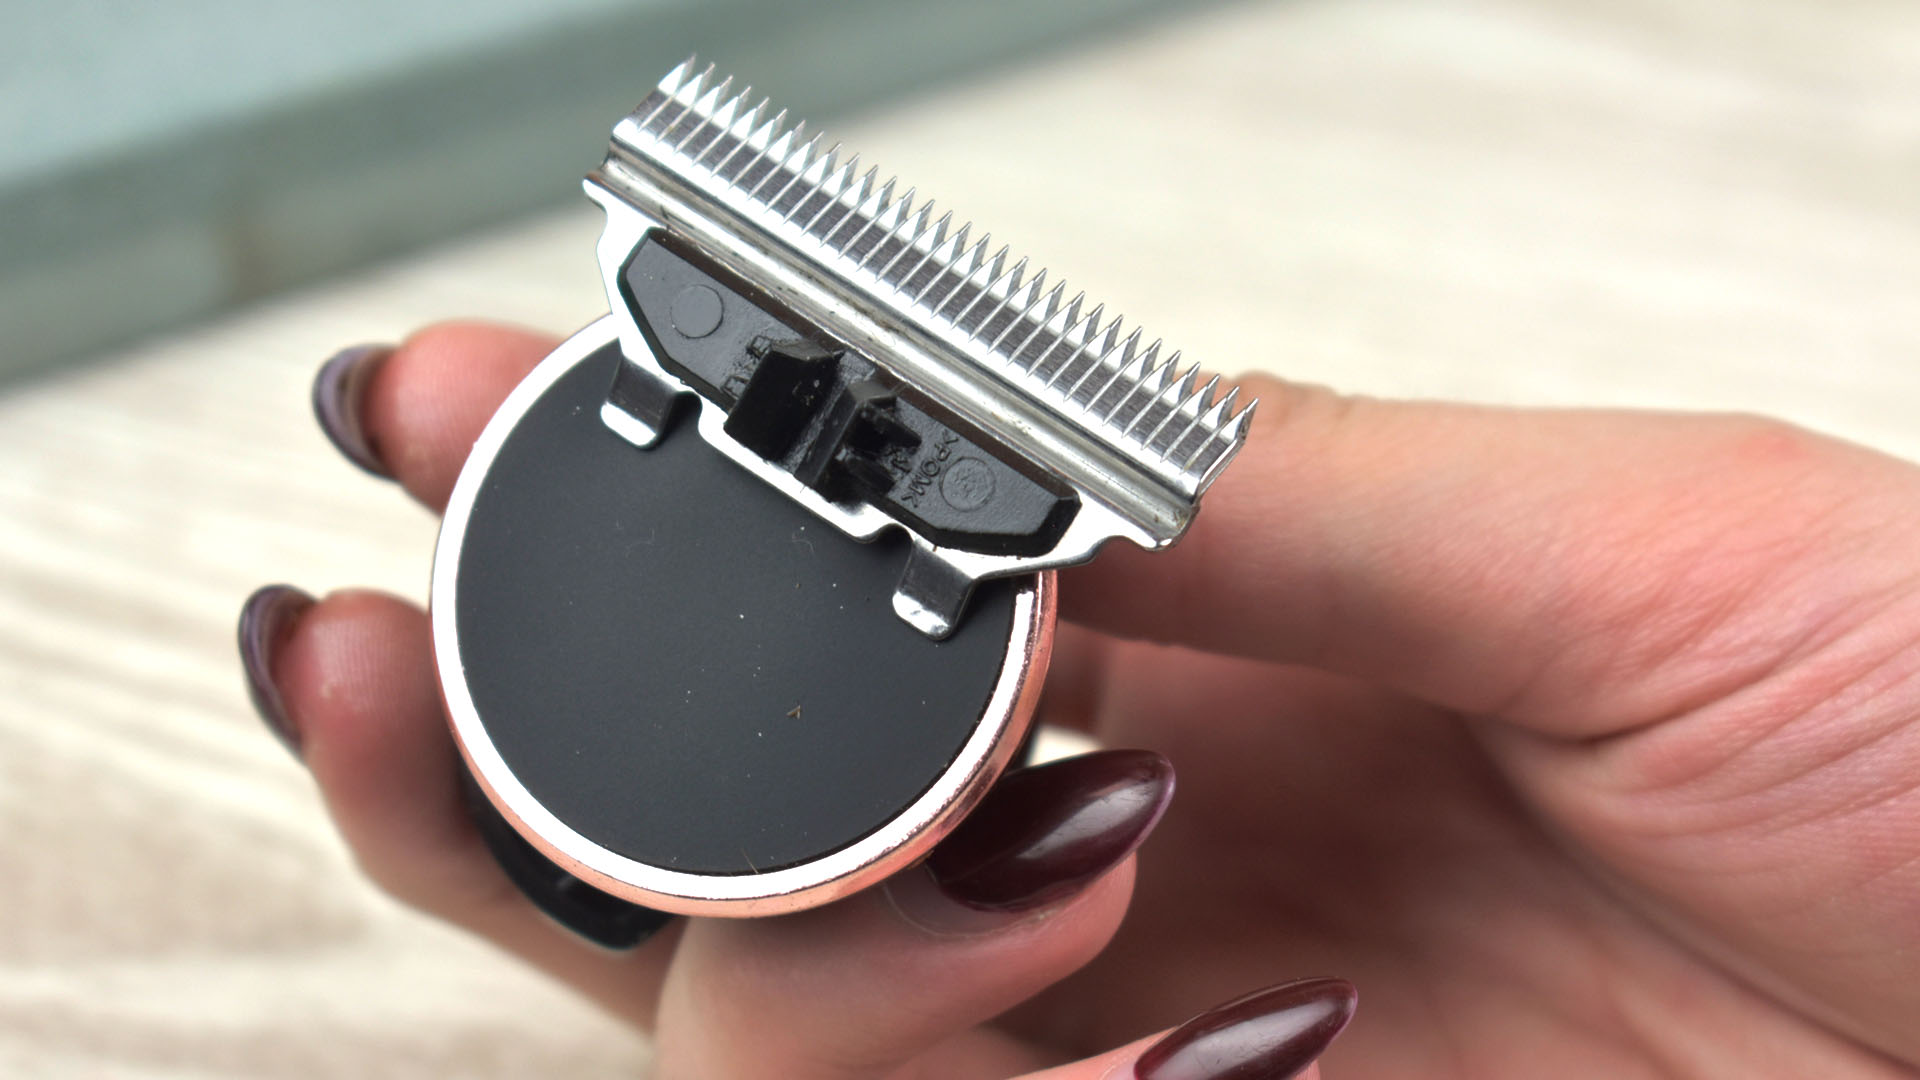
Step 2: Remove the Blade Set Carefully
Use the correct screwdriver to remove the blade screws and lift off the blade set. Keep the parts together and place the screws somewhere safe. If your clipper uses a two-piece blade set, pay attention to which blade is stationary and which one moves. They work as a matched pair, and many manufacturers recommend sharpening or replacing them as a set rather than mixing old and newly serviced parts.
Take a photo before disassembly if this is your first time. Future-you will appreciate the favor.
-
Step 3: Brush Away Hair, Dust, and Debris
Before sharpening anything, get rid of the obvious grime. Use a blade brush to remove trapped hair, skin flakes, lint, and product buildup from the teeth and inner surfaces. A surprising number of clippers feel “dull” when they are really just dirty.
If the blade has been used on dirty hair or has picked up abrasive residue, that buildup can speed up wear and make the cutting edge feel rough. Cleaning first gives you a better look at the actual condition of the metal and helps you avoid grinding dirt straight into the blade surface.
-
Step 4: Deep-Clean the Blade and Dry It Completely
Once the loose debris is gone, deep-clean the blade set with a blade-cleaning product or blade wash. Wipe away old oil, residue, and fine grime from the teeth and contact surfaces. Do not rinse the blade under water unless your specific manufacturer explicitly allows it. For many clipper blades, water invites rust, and rust is not exactly a performance upgrade.
Dry the parts thoroughly with a lint-free cloth. If you sharpen while the blade is damp, metal dust can stick to the surface and make a mess of both the blade and your mood.
-
Step 5: Inspect the Blade for Damage
Now examine both blade pieces closely. Are the teeth chipped, bent, cracked, or deeply rusted? Is there obvious wear on the sliding surfaces? If so, sharpening may not be the best fix. Sharpening can improve a dull edge, but it cannot magically restore missing teeth, correct serious geometry problems, or undo heavy damage.
This step matters because many people waste time sharpening a blade that really needs replacement or professional service. If your clippers were pulling badly even after regular cleaning and oiling, or if the blade has visible damage, be realistic. The smartest repair is sometimes a new blade set.
-
Step 6: Identify the Surfaces You Are Actually Sharpening
With hair clippers, you are usually refining the flat mating surfaces and cutting areas of the blade pieces, not freehand sharpening them like a kitchen knife. That is a key difference. The goal is to restore a clean, even surface so the moving blade and stationary blade work together smoothly.
Place each blade piece flat against your sharpening surface and notice how it sits. You want even contact. If you tilt the blade or lift one edge, you can round the surface and make the blade cut worse, not better. This is the “slow is smooth, smooth is fast” part of the job.
-
Step 7: Sharpen the Stationary Blade
Lay the stationary blade flat on the sharpening stone or honing surface. Using gentle, even pressure, move it across the surface in smooth passes while keeping it flat. Do not press like you are trying to sand a boat. Light, controlled contact is better. You are refining the surface, not removing half the blade in one dramatic gesture.
A small number of consistent passes is usually better than endless grinding. Check the surface periodically. You are looking for an even, refreshed finish, not a mirror-polished trophy. If one side is getting more attention than the other, correct your hand position before continuing.
-
Step 8: Sharpen the Moving Blade the Same Way
Repeat the process with the moving blade. Keep it flat, use the same controlled pressure, and aim for consistency. Try to give both blade pieces a similar amount of attention so they continue to work as a pair. Uneven sharpening can throw off performance even if each piece looks fine by itself.
Do not chase perfection forever. Over-sharpening removes unnecessary metal, shortens blade life, and can leave you wondering why your “maintenance session” turned into a blade funeral.
-
Step 9: Wipe Away Metal Dust and Reassemble the Blade
After sharpening, wipe both blade pieces thoroughly to remove metal dust and residue. Pay special attention to the teeth, inner edges, and sliding contact points. Any leftover grit can increase friction fast.
Reassemble the blade set carefully using the photo you took earlier if needed. Tighten the screws enough to hold the assembly in place, but leave just enough movement for a final alignment check if your clipper model requires adjustment.
-
Step 10: Align the Blade Properly
This is the step many DIY sharpeners rush, and it is also the step that can make a sharpened clipper feel terrible if done wrong. The moving top blade should sit slightly behind the stationary bottom blade, not ahead of it. On many adjustable clippers, the top blade teeth are set back slightly so the moving teeth do not touch the skin.
As a general rule, the moving blade should be parallel to the stationary blade and set back a little, often around 1/32 to 1/16 of an inch depending on the clipper style. Tighten the screws once the alignment looks correct. If the teeth are uneven or the moving blade sits too far forward, stop and reset it. A sharp blade that is misaligned can pull, scratch, or cut too close.
-
Step 11: Oil, Test, and Fine-Tune
Apply a few drops of proper clipper oil to the blade. Use clipper oil, not random hair oil, grease, or anything mixed with solvents. Less is more here. You want lubrication, not an oil slick dramatic enough to qualify as an environmental incident.
Turn the clippers on and let them run briefly so the oil distributes across the blade. Wipe away excess oil with a clean cloth. Then test the clippers on clean hair or another appropriate test surface. Listen for smooth operation and pay attention to how the blades feel. If the clipper still pulls, chatters excessively, or cuts unevenly, check the alignment again. If that does not solve it, the blade may need professional sharpening or full replacement.
Common Mistakes to Avoid
The biggest mistake is trying to sharpen dirty blades. Hair dust, dried product, and old oil can make blades seem dull when they are really just clogged. Clean first, always.
The second major mistake is sharpening too aggressively. You do not need brute force. Clipper blades are precision parts, and heavy pressure can change the blade surface in a way that hurts performance. Think controlled maintenance, not medieval blacksmith energy.
Another common issue is poor alignment during reassembly. A lot of people do the sharpening part decently and then lose the plot when putting the blade back together. If the moving blade sits too far forward, the clipper may bite the skin. If the teeth are crooked or not parallel, the cut can feel rough and uneven.
Too much oil is also a problem. Proper oil reduces friction and helps prevent rust, but over-oiling can attract debris or seep into areas where it should not go. A few drops are usually enough.
When to Replace the Blade Instead of Sharpening It
Sometimes sharpening is the fix. Sometimes it is just delaying the inevitable. If the blade teeth are chipped, bent, heavily corroded, or worn unevenly, replacement is often the better choice. The same goes for blades that still pull after cleaning, sharpening, alignment, and oiling.
If your clipper uses detachable professional blade systems or you rely on the tool every day for clients, professional sharpening may also make more sense than DIY work. A sharpening service can inspect spring tension, wear surfaces, and blade geometry in a way that home users usually cannot. That matters when consistent cutting quality is part of your income.
Also remember that blade performance is not always only about the blade. Excessive vibration, unusual noise, or poor cutting with a sharp blade can point to other worn parts inside the clipper. In that case, replacing the blade alone may not solve the real issue.
Final Thoughts
Learning how to sharpen hair clippers is one of those useful DIY skills that feels small until the day your clippers stop cutting halfway through a trim. Then it suddenly becomes very important, very fast. The trick is to treat sharpening as one part of total blade care: clean the blade, sharpen carefully, align it correctly, oil it properly, and store it in a dry place.
If you do that, your clippers have a much better chance of staying smooth, cool, and comfortable to use. If you skip those basics, even a decent sharpening job may not rescue performance. So yes, sharpen the blade. But also respect the maintenance routine around it. Your clippers will thank you by not sounding angry and not trying to eat hair one strand at a time.
Real-World Experience: What People Learn the Hard Way
One of the most common experiences people have when sharpening hair clippers for the first time is discovering that the blades were not nearly as dull as they thought. Often, the clippers were packed with tiny hairs, sticky residue, and old oil that had turned into a kind of invisible gunk. After a deep clean and a few drops of fresh oil, the clipper suddenly cuts much better. That teaches an important lesson: not every bad haircutting experience means the blade is ruined. Sometimes the tool is just begging for basic maintenance.
Another very real experience is underestimating blade alignment. Plenty of people can handle the cleaning and sharpening stages just fine, then reassemble the blade a little off-center and wonder why the clipper feels worse than before. It may buzz more loudly, cut unevenly, or feel scratchy against the skin. That is why many experienced users say the alignment step is where the real test happens. A well-aligned blade can make a modest sharpening job feel successful. A badly aligned blade can make a good sharpening job feel like a total flop.
There is also the classic overconfidence phase. Someone sharpens the blade, sees a brighter metal surface, and assumes more passes must mean better results. Ten sensible passes become twenty, then thirty, then “I am sure one more round will perfect it.” Suddenly too much metal has been removed, the surface is not as even as it should be, and the blade does not perform the way it used to. The takeaway is simple: sharpening is about control, not enthusiasm. Clippers reward patience, not drama.
People also learn quickly that using the right oil matters. Many beginners are tempted to use whatever is nearby, especially if the bottle says “hair” on it and seems close enough. It is not. Proper clipper oil is light and made for moving metal parts. Heavier oils can create drag, collect grime faster, or leave residue behind. After one bad experiment, most people become fiercely loyal to using the correct oil forever. Nothing builds discipline like having your clippers act possessed during a haircut.
Finally, experienced users usually develop a practical rule: sharpen when the blade is dull, but replace when the blade is damaged. Once teeth are chipped, rust is severe, or the blade still pulls after careful maintenance, fighting with it is rarely worth the trouble. At that point, a replacement blade or a professional sharpening service saves time, frustration, and possibly an awkward explanation to the person sitting in the chair. In real life, the best maintenance habit is not squeezing every last second out of a worn blade. It is knowing when to stop forcing it and make the smarter call.