

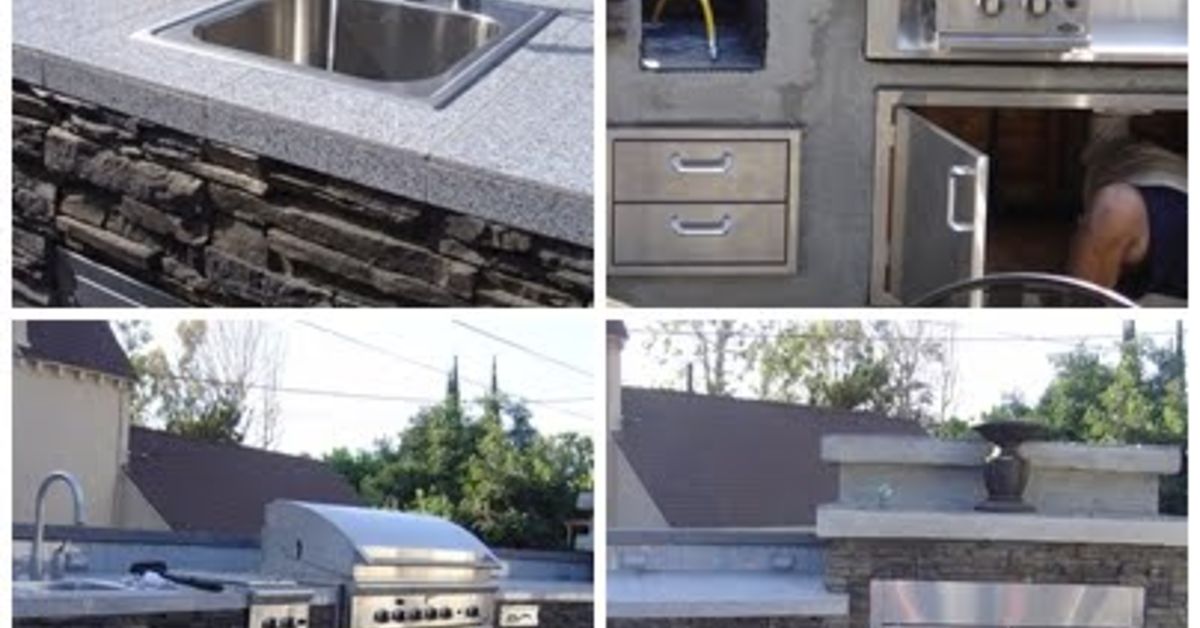
Few backyard upgrades say, “Yes, I do take grilling seriously,” quite like a well-built deck paired with a smart outdoor kitchen. One gives you the stage. The other brings the sizzle. Together, they turn a basic yard into a true outdoor living space where dinner, weekend coffee, birthday parties, and random Tuesday burgers all feel a little more exciting.
But this project is not just about pretty boards and a shiny grill. Installing a deck and outdoor kitchen is a mix of structural planning, utility coordination, safety decisions, weather-proof material choices, and layout strategy. In other words, it is equal parts backyard dream and grown-up logistics. The good news is that when you plan the two together, the final result feels more cohesive, functions better, and usually avoids the classic “why is the sink over there?” problem.
If you want a deck installation and outdoor kitchen setup that looks polished, lasts for years, and does not become a budget-eating mystery halfway through construction, start with the big picture first. Then build the bones. Then add the fun stuff. That order matters more than people think.
Why Plan the Deck and Outdoor Kitchen as One Project?
A lot of homeowners build a deck first and try to squeeze an outdoor kitchen into the remaining space later. That approach can work, but it often creates awkward traffic flow, crowded cooking zones, or structural limitations once heavy appliances and countertops enter the chat.
When you design both together, you can match the deck size, framing, utilities, and traffic paths to how the space will actually be used. Maybe you want the grill station tucked near the back door for easy trips inside. Maybe you want a prep counter that faces guests instead of a wall. Maybe you want dining on one side and cooking on the other so nobody is standing in the “chef runway” while holding a lemonade and asking when the ribs will be done.
Planning both projects together also helps with permits, inspections, and budgeting. One coordinated plan makes it easier to map gas lines, electrical runs, water access, drainage, lighting, and structural support before the decking boards go down.
Start with the Non-Glamorous Stuff: Permits, Codes, and Site Conditions
Not thrilling, but absolutely essential: check local building requirements before you order materials or sketch your “ultimate backyard resort” on a napkin. A deck often needs a permit when it is attached to the house, elevated, or built with stairs, guards, and footings. An outdoor kitchen may trigger additional permits if you add a hard gas line, new electrical circuits, outlets, plumbing, a roofed structure, or foundation work.
Site conditions matter just as much. Pay attention to slope, drainage, frost depth, sun exposure, prevailing wind, and how close the project sits to your house or property line. A dream layout in theory can become a headache in reality if the grill blows smoke into your patio doors or the deck sits over soggy soil that never drains properly.
Attached Deck or Freestanding Deck?
This is one of the earliest and most important choices. An attached deck connects to the house with a ledger board, which means the connection must be flashed and fastened correctly. A freestanding deck avoids that house connection, which can simplify some moisture-management issues and sometimes works better when the best location is not right against the home.
If you plan an attached deck, the ledger is no place to improvise. Proper flashing and weather protection are critical because water intrusion at that connection can lead to rot, structural damage, and expensive repairs. Think of ledger flashing as the unglamorous hero of the whole project. Nobody posts it on social media, but it quietly prevents disaster.
Build the Deck Like It Has a Job to Do
Because it does. A deck supporting an outdoor kitchen is not just a lounging platform for two chairs and a citronella candle. It may need to carry appliances, storage cabinetry, countertops, people, food, and the kind of party crowd that suddenly appears when someone smells steak.
Foundation and Framing Come First
Your deck foundation should be sized for your site, soil, climate, and load. Footings, beams, posts, and joists all work together to create a stable structure. If the outdoor kitchen will sit on the deck itself, the framing plan should reflect that from day one. Heavy zones may need tighter framing, shorter spans, extra blocking, or engineering review depending on the design and product loads.
This is especially important if you are installing stone countertops, masonry cladding, concrete features, or multiple built-in appliances. These materials look fantastic, but they are not exactly featherweight. A gorgeous outdoor kitchen loses some of its charm if the deck beneath it feels bouncy enough to suggest ocean travel.
Joist Spacing Is Not a Guessing Game
For standard deck installation, always follow the decking manufacturer’s span and spacing rules. Many composite deck boards are installed over joists spaced 16 inches on center for standard applications, while diagonal layouts or heavier loads may require tighter spacing. That one detail affects feel, performance, and long-term durability more than many homeowners realize.
And while you are in framing mode, think ahead about stair placement, railings, lighting, drainage, and where utility lines will pass. It is much easier to plan those paths before the surface goes on.
Moisture Protection Is a Long-Term Investment
Decks live outside, where rain, humidity, temperature swings, and debris are always auditioning for a chance to cause trouble. Use pressure-treated framing lumber where appropriate, protect critical connections, and pay attention to flashing details. Joist tape or similar protective membranes can also help preserve framing by limiting moisture intrusion at the tops of joists and beams.
If the deck connects to the house, proper flashing above, behind, and below the ledger matters. Water should always be directed away from the structure, never trapped behind it. Water is patient. If you give it a tiny opportunity, it will behave like it just signed a long-term lease.
Choosing the Right Decking Material
For many homeowners, the biggest material decision is wood versus composite decking. Pressure-treated wood remains a common and budget-friendly option. It is durable and widely available, but it requires more upkeep and often needs time to dry before staining or sealing. Composite decking costs more upfront, but it is popular because it is lower maintenance and resists many of the problems that make wood decks grumpy over time.
If your outdoor kitchen includes grease, sauces, drink spills, and constant foot traffic, a low-maintenance surface can be a smart move. Composite or PVC decking is especially attractive for homeowners who want the outdoor kitchen area to stay looking crisp without a yearly ritual of sanding, staining, and questioning every life choice that led to brush-cleaning in July.
Also consider heat, color, slip resistance, and how the material looks next to your kitchen finishes. A deck and outdoor kitchen should feel coordinated, not like two separate projects that happened to meet on the same weekend.
Design the Outdoor Kitchen Around How You Actually Cook
Once the deck structure is planned, move to the kitchen layout. The best outdoor kitchen design is not the one with the most appliances. It is the one that supports your real habits. If you grill burgers for six people once a week, your needs are very different from someone hosting football parties for twenty with a grill, smoker, refrigerator, sink, and pizza oven.
Think in Zones
A practical outdoor kitchen usually includes these core zones:
- Cooking zone: grill, smoker, side burner, or pizza oven
- Prep zone: landing space, cutting area, tool access, seasoning storage
- Serving zone: room to plate food and hand it off without chaos
- Cleaning zone: sink, trash, towel storage, or at least smart cleanup access
- Cold storage zone: refrigerator or beverage center placed away from high heat
One of the smartest planning moves is leaving enough uninterrupted counter space. More specifically, do not spend all your square footage on appliances and then act surprised when there is nowhere to put a tray of chicken. Good outdoor kitchen design includes space to actually work.
If you are including a sink, a prep counter right beside it makes the kitchen more functional. Even in compact layouts, a continuous prep area pays off every single time you cook.
Location Matters More Than Fancy Features
Outdoor kitchens work best when they feel connected to the house without being cramped against it. Close enough for convenience, but with enough clearance for safety, smoke movement, and traffic flow. A spot near the back door is often ideal because it reduces hauling food, dishes, and supplies across the yard like you are training for a backyard triathlon.
Try to orient the cooking zone so the person at the grill can still talk to guests instead of facing a fence in lonely culinary silence. Also consider sun direction and wind. A grill station in full afternoon sun can feel brutal in midsummer, while a bad wind orientation can turn every cookout into a smoke test.
Outdoor Kitchen Materials That Can Handle Real Weather
Outdoor kitchens need finishes and appliances designed for outdoor use. This is not the place for leftover indoor cabinetry or a retired basement mini fridge hoping for a second act.
Best Material Choices
Stainless steel remains a favorite for appliances and hardware because it is durable and handles weather well. For the island structure and cladding, popular choices include stone, brick, concrete, stucco, and tile, depending on climate and style. Countertops are often made from concrete, stone, or other durable exterior-rated surfaces.
Material selection should balance appearance, maintenance, weight, and climate performance. Stone and concrete are strong and timeless. Stucco is lightweight and versatile. Brick is durable and approachable. Tile can look great, but it must be chosen carefully for outdoor conditions. If you are building on a deck, remember that heavier finishes may affect structural requirements.
Wood accents can be beautiful, but around heat and weather they usually demand more caution and maintenance. When combustible materials are used near a built-in grill, protective details and manufacturer requirements matter. This is not a section to freestyle.
Utilities and Safety: The Part That Separates Good Design from Good Luck
An outdoor kitchen installation often involves gas, electricity, and sometimes water. That means planning utility runs early, not after the countertop is installed and everyone is standing around pretending that cutting a new access hole is “probably fine.”
Gas
Decide whether you are using natural gas or propane at the start. That choice affects appliance selection, venting details, permits, and how the kitchen is built. Gas work should be handled by licensed professionals. For built-in grills, vent placement is critical, and the vent location depends on the fuel type. Natural gas rises; propane sinks. That one difference matters a lot when designing enclosed bases.
Electrical
Any outdoor kitchen with refrigeration, task lighting, convenience outlets, or powered accessories should have a deliberate electrical plan. Exterior outlets and wiring must follow local code and should be designed to reduce the temptation to run extension cords across the deck. Outdoor-rated fixtures and weather-resistant electrical components are a must.
Water and Drainage
A sink is convenient, but it adds complexity. Water supply, drainage, winterization, and plumbing permits all need to be considered. In colder climates, freeze protection is not optional. If you do not need a sink, skipping it can simplify the project significantly.
Ventilation and Heat Clearance
If your outdoor kitchen is near the house or beneath a covered structure, ventilation becomes a major design issue. Cooking appliances need room around them, and covered kitchens may require carefully selected vent hoods or other ventilation solutions depending on the setup. Keep grills and cooking surfaces away from combustible materials, and always follow the appliance manufacturer’s clearance requirements.
A Smart Step-by-Step Installation Sequence
- Create a full plan. Finalize layout, dimensions, appliances, utilities, and materials.
- Verify permits and approvals. Include city, county, and HOA requirements if applicable.
- Prepare the site. Confirm drainage, grade, and utility paths.
- Install footings and framing. Build the deck structure to match the kitchen load and layout.
- Complete ledger flashing and moisture details. Protect the house connection and framing.
- Run rough utilities. Gas, electric, and plumbing should be coordinated before surfaces are finished.
- Install decking. Follow manufacturer spacing and fastening requirements.
- Build the kitchen base and cladding. Confirm appliance cutouts before making final openings.
- Install appliances, counters, storage, and lighting. Finish the kitchen in the correct order.
- Inspect and test everything. Fire up the grill only after all safety checks are complete.
Common Mistakes to Avoid
- Building the deck without accounting for kitchen weight
- Ignoring permits until halfway through the project
- Skipping or botching ledger flashing
- Cramming in appliances but leaving no prep space
- Placing refrigeration right next to hot cooking equipment
- Using indoor-rated appliances or finishes outside
- Forgetting ventilation under covered cooking areas
- Underestimating how much storage you will want
- Choosing looks over climate durability
- Assuming “close enough” is good enough for cutouts and utility rough-ins
What the Experience Is Really Like
Installing a deck and outdoor kitchen is one of those projects that teaches people a lot about how they actually live at home. On paper, it looks like a construction job. In real life, it feels more personal than that. You start out thinking you are building a place to grill. Then somewhere between measuring the framing and arguing about whether you really need the beverage fridge, you realize you are designing how your weekends will feel.
There is usually an early phase where excitement runs high and common sense takes a coffee break. That is the stage where people want the grill, the pizza oven, the sink, the bar seating, the smoker, the fridge, the accent lighting, and maybe a fireplace because apparently the backyard is applying for luxury resort status. Then reality arrives with load calculations, utility routes, and a reminder that every amazing feature needs space, money, and support beneath it. Oddly enough, that is a good thing. The project becomes better once priorities get clear.
Homeowners who love the final result usually say the same thing: the best decisions were not always the flashiest ones. It was the extra prep counter. The wider stairs. The outlet in the right place. The storage drawer for grilling tools. The shade that made late-afternoon cooking comfortable. The lighting that let everyone linger after sunset instead of packing up when the sky went dark. The details that sound boring during planning often become the features people appreciate every single week.
There is also something satisfying about watching the space come together in layers. First it is just stakes and strings in the yard. Then the footings go in and it looks serious. Then framing appears, and suddenly the shape of the future is standing there in lumber. Once the deck boards are installed, the whole area starts to feel usable. Add the kitchen components, and the project shifts from “construction site” to “someone is definitely hosting burgers here soon.” It is a slow reveal, but a rewarding one.
Another common experience is learning that an outdoor kitchen changes the social rhythm of the backyard. Before the build, the cook often disappears indoors to prep, walks outside to grill, then heads back in again to plate and clean. Afterward, more of the process happens in one place. The cook stays in the conversation. Guests naturally gather around the counter. Kids drift in and out for snacks. Even simple meals feel more like events because the layout encourages people to stay outside longer.
Of course, there are always a few lessons learned the hard way. Some homeowners wish they had made the deck larger. Others wish they had added more counter space, more storage, or a little more separation between dining and cooking zones. Some discover that the sun hits the grill harder than expected at 5 p.m. Others realize that a sink sounded more important than it actually was. These are not failures so much as reminders that outdoor living is experiential. You do not fully understand the space until you use it.
In the end, the real value of installing a deck and outdoor kitchen is not just resale appeal or visual wow factor. It is the way the space gets folded into everyday life. Morning coffee tastes better outside. Dinner feels less rushed. Friends stay later. Family gathers more naturally. The backyard stops being something you look at through a window and starts becoming part of the house itself. That is when you know the project worked.
Conclusion
Installing a deck and outdoor kitchen is not a small project, but it is one of the most rewarding ways to upgrade outdoor living. The key is to think beyond finishes and start with structure, safety, and function. Build the deck to support the way you want to cook. Design the kitchen to match the way you actually gather. Choose materials that can handle weather, heat, and wear. And never underestimate the power of good prep space, good lighting, and a deck that feels solid underfoot.
Do it thoughtfully, and you will end up with more than a nice backyard feature. You will create a hardworking, welcoming space that turns ordinary evenings into something a little more memorable.