

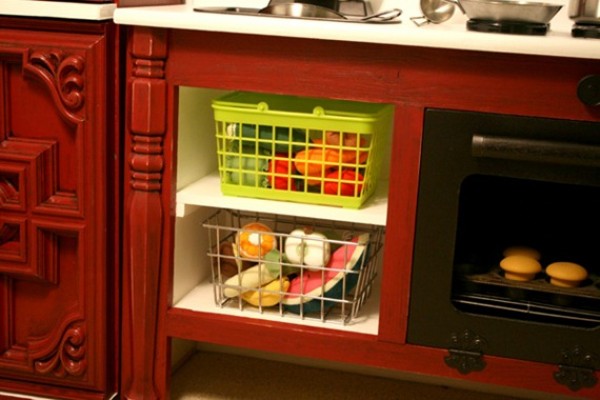
A kid’s cottage play kitchen has a special kind of magic. To an adult, it may look like a small wooden cabinet with a pretend sink and a few painted burners. To a child, it is a bakery, farmhouse café, grocery store, five-star restaurant, and emergency snack headquartersall before lunch.
The cottage style makes this classic pretend-play toy especially charming. Soft colors, tiny windows, vintage-inspired knobs, scalloped trim, and a miniature farmhouse sink can turn an ordinary corner of a playroom into a storybook destination. Better still, a thoughtfully designed play kitchen offers much more than cute décor. It creates opportunities for imaginative play, vocabulary development, social interaction, problem-solving, sorting, counting, and fine motor practice.
Whether you plan to build a DIY cottage play kitchen, customize a store-bought model, or choose a finished wooden set, the best design balances appearance, function, durability, and child safety. Here is how to create a play kitchen that looks delightful, survives enthusiastic chefs, and does not require a reservation.
What Is a Kid’s Cottage Play Kitchen?
A kid’s cottage play kitchen is a child-size pretend kitchen designed with cozy farmhouse or storybook details. Most models include a countertop, sink, faucet, stovetop, oven, and storage cabinets. Cottage-inspired versions may also feature paneled doors, floral wallpaper, arched openings, wooden pegs, gingham fabric, or a roof-shaped top.
The style can range from rustic farmhouse to cheerful English cottage. A natural wood kitchen with sage-green doors feels calm and traditional, while a cream-and-pink version may look like it belongs in a fairy-tale bakery. There is no official cottage rulebook. Thankfully, the miniature kitchen police are busy investigating a missing wooden cupcake.
The kitchen can be freestanding, wall-mounted, built into a playhouse, or made from repurposed furniture. A nightstand, small entertainment cabinet, low bookcase, or unused base cabinet can become a convincing play kitchen with careful modification.
Why Pretend Kitchen Play Is Valuable
It Encourages Imagination and Storytelling
Pretend play gives children a safe space to imitate everyday life and invent new situations. A child may prepare breakfast for a stuffed bear, operate a restaurant with a sibling, or announce that the kitchen serves only purple soup on Tuesdays.
These stories support symbolic thinkingthe ability to let one object represent another. A wooden disk becomes a pancake, a block becomes a carton of milk, and an empty bowl may contain the most delicious invisible oatmeal ever created.
It Builds Language and Communication Skills
A play kitchen naturally invites conversation. Children name foods, describe actions, take orders, negotiate roles, and explain what they are cooking. Words such as stir, pour, measure, bake, slice, menu, recipe, and ingredient become part of active play rather than a vocabulary worksheet.
Adults can support this learning without taking over the game. Questions such as “What are you making?” or “How many apples do we need?” encourage children to explain their ideas. The goal is not to turn pretend lunch into a formal seminar. A little participation goes a long way.
It Supports Social and Emotional Development
When two or more children share a cottage play kitchen, they practice taking turns, cooperating, resolving disagreements, and considering another person’s perspective. One child may be the cook while another becomes the customer. Five minutes later, the customer may stage a management takeover. Such is the restaurant business.
Children also use familiar pretend routines to process real experiences. Reenacting family meals, grocery shopping, birthday parties, or restaurant visits can help them understand how the world works and feel more confident participating in it.
It Strengthens Fine Motor and Early Math Skills
Opening cabinet doors, twisting knobs, placing food on plates, and transferring objects with a spoon all require hand control. Sorting pretend produce by color, dividing cookies among toys, or counting place settings introduces basic math in a playful context.
A kitchen with several kinds of storage also encourages categorization. Children can place pans in one cabinet, dishes on a shelf, and pretend groceries in baskets. The organization may last only twelve seconds, but the learning still counts.
Planning the Perfect Cottage Play Kitchen
Choose the Right Location
Select a spot where children have room to stand, open doors, and move accessories without blocking a busy walkway. Playrooms, bedrooms, family rooms, and enclosed porches can all work well. Keep the kitchen away from working fireplaces, heaters, stairs, cords, and real cooking appliances.
If the unit is tall, narrow, top-heavy, or tempting to climb, secure it to a wall stud with an appropriate anti-tip device. Even compact play furniture should remain stable when a child pulls on an open door or leans against the counter.
Size It for the Child
The countertop should be comfortable for the primary user. For many toddlers and preschoolers, a counter somewhere around 20 to 24 inches high works well, but children vary considerably. Measure the child while standing and aim for a work surface slightly below elbow level.
A width of approximately 30 to 40 inches provides room for a sink, stovetop, and storage without consuming the entire room. A depth of 12 to 16 inches is usually sufficient for pretend cookware. These are flexible starting points rather than mandatory dimensions.
Plan for Growth
A cottage play kitchen can remain interesting for years when the design is open-ended. Avoid making every feature permanently specific. A simple shelf can hold toy dishes now and become a bakery display later. A chalkboard panel can show a restaurant menu, grocery list, café hours, or a stern warning that dragons must pay before eating.
Removable baskets, hooks, fabric curtains, and interchangeable signs make the kitchen easy to refresh. As children grow, introduce play money, recipe cards, menus, measuring cups, and notepads to expand the activity.
Materials for a DIY Cottage Play Kitchen
A scratch-built wooden kitchen is commonly made from cabinet-grade plywood, smooth project panels, or quality lumber. Plywood is strong and holds fasteners well. Medium-density fiberboard creates a smooth painted finish but can be heavy, produces fine dust when cut, and requires properly sealed edges. Solid wood trim is useful for framing doors and creating cottage details.
A basic project may require:
- Plywood or smooth project boards
- Wood strips for trim and door frames
- Wood screws and pocket-hole screws
- Child-appropriate cabinet hinges
- Rounded wooden knobs or securely attached handles
- A stainless-steel or plastic bowl for the sink
- A simple faucet without connected plumbing
- Wooden disks or painted circles for burners
- Wood glue, filler, primer, paint, and protective finish
- Sandpaper in several grits
- An anti-tip anchor suitable for the wall type
Inspect reclaimed furniture carefully before converting it. Very old painted pieces may have deteriorating or unknown coatings. Peeling finishes, rusty hardware, mold, damaged particleboard, sharp metal edges, and unstable joints are signs that the “free” cabinet may be more trouble than it is worth.
How to Build a Kid’s Cottage Play Kitchen
Step 1: Sketch the Layout
Draw the kitchen before cutting anything. Mark the location of the sink, burners, oven, shelves, cabinet doors, and decorative trim. Check that doors will not collide and that the sink bowl will fit beneath the countertop.
A practical layout places the sink on one side and two burners on the other. The lower section can include an oven and a storage cabinet. An upper shelf or cottage-shaped backsplash creates visual height without adding excessive depth.
Step 2: Build a Stable Cabinet Box
Cut the side panels, base, countertop supports, shelves, and back panel according to the plan. Assemble the main box on a flat surface, checking for square as you work. A full or partial back panel adds rigidity and helps prevent the unit from twisting.
Keep the base broad and level. Avoid tall decorative sections that make the kitchen top-heavy. If adding feet, use short, sturdy supports rather than narrow legs that could loosen during play.
Step 3: Create the Sink and Stovetop
Trace the rim of the chosen sink bowl on the countertop. Draw a second line slightly inside the first so the rim has material to rest on. Drill a starter hole and cut the opening with a jigsaw. Sand the cut edge thoroughly before installing the bowl.
For the stovetop, use painted wooden circles, cork trivets, or flat disks secured to the surface. Flat components are easier to clean and less likely to snap off than delicate raised pieces. Add large turning knobs beneath the burners, making sure they cannot detach during ordinary play.
Step 4: Add the Oven and Cabinet Doors
Build lightweight doors with rounded corners and smooth edges. A pretend oven door may include a clear acrylic panel, but the material should be securely framed so no sharp edge is exposed. Avoid ordinary glass.
Choose hinges that control movement and do not create accessible pinch points. Doors should open smoothly without dropping under their own weight. Magnetic closures may be used only when the components are fully enclosed, firmly attached, and appropriate for the child’s age. Small loose magnets are not suitable play-kitchen hardware.
Step 5: Add Cottage-Style Details
This is where the basic cabinet begins developing storybook charm. Add an arched backsplash, scalloped shelf edge, beadboard-style paneling, window-shaped cutout, or tiny café awning. Thin wood strips can create Shaker-style doors without complicated joinery.
Keep decoration low-profile and firmly secured. Oversized wooden pegs are useful for hanging aprons and lightweight utensils, while a small chalkboard can display the day’s menu. Skip fragile ceramic knobs, protruding metal hooks, and decorative pieces that resemble candy.
Step 6: Sand, Prime, and Paint
Round exposed corners and sand every reachable surface. Run a cloth over the project to detect splinters that may be difficult to see. Fill screw holes, seams, and damaged edges before applying primer.
Use a finish intended for interior furniture and follow the manufacturer’s instructions for ventilation, drying, and curing. “Dry to the touch” does not always mean ready for energetic use. Allow the coating to cure fully before placing cookware, food toys, or impatient junior chefs inside.
Step 7: Secure and Inspect the Finished Kitchen
Position the kitchen on a level floor and anchor it when needed. Tighten every knob, screw, hinge, and handle. Confirm that no fastener tip projects through the wood. Open and close each door repeatedly while checking for pinch areas, loose hardware, or instability.
Repeat the inspection regularly. Play kitchens receive a surprising amount of mechanical testing from children, although their quality-control method is mostly known as “pull everything very hard.”
Charming Cottage Design Ideas
Classic Farmhouse Kitchen
Paint the cabinet warm white and use a natural wood countertop. Add black or antique-brass-style hardware, a gingham curtain, and a miniature farmhouse sign. Sage green, dusty blue, and muted clay make attractive accent colors.
Storybook Bakery
Use cream, blush, peach, or pale yellow paint with a scalloped awning. Add wooden pastries, cake stands, paper menus, and a small display shelf. A removable sign can give the bakery a child-created name, even if that name is “Cookies Store No Broccoli.”
Woodland Cottage Kitchen
Combine natural wood with moss green and mushroom-inspired neutrals. Paint simple leaves, berries, or flowers on the backsplash. Felt vegetables and wooden woodland animals can join the kitchen without forcing the design into a single storyline.
Modern Cottage Style
For a cleaner look, pair warm white doors with light oak accents and simple round knobs. Use a restrained color palette and let cottage character come from curved edges, paneled doors, and woven storage baskets.
Accessories That Make the Kitchen More Fun
A play kitchen does not need dozens of accessories. A small, thoughtfully selected collection leaves more room for imagination and makes cleanup manageable. Useful additions include:
- Lightweight pots, pans, bowls, and plates
- Large wooden or fabric pretend foods
- An apron and oven mitt made for play
- Measuring cups and oversized utensils
- Reusable menus and recipe cards
- Play money and a simple order pad
- Baskets for produce and pantry items
- Empty, thoroughly cleaned food containers without sharp edges
Choose accessories for the child’s developmental stage. Small removable pieces are inappropriate for children who still mouth toys. Avoid button batteries, accessible magnets, long cords, breakable dishes, sharp utensils, and heavy cookware.
Keeping a Play Kitchen Organized
Use a small number of clearly defined storage zones. Keep cookware beneath the stovetop, food in one basket, and dishes on an open shelf. Picture labels help younger children identify where items belong even before they can read.
Rotate accessories instead of displaying everything at once. One week the kitchen can become a breakfast café; the next, it can operate as a farmers market. Rotation reduces clutter and makes familiar toys feel new again.
Clean painted surfaces with a lightly damp cloth and mild soap when appropriate for the finish. Fabric food and aprons should be washed according to their care instructions. Inspect wooden food for cracks, splinters, and loose glued parts.
Common Mistakes to Avoid
Prioritizing Appearance Over Stability
A beautiful kitchen is not successful if it rocks, tips, or has doors heavy enough to trap fingers. Build the structure first and decorate second. Stability is not the glamorous part of cottage design, but neither is an emergency room.
Adding Too Many Electronic Features
Lights and sounds may be entertaining, but they are not necessary for meaningful pretend play. Simple controls encourage children to supply their own sounds, dialogue, and ideas. Eliminating electronics also avoids battery compartments and reduces maintenance.
Using Tiny Decorative Hardware
Small knobs, miniature hooks, loose magnets, and bead-like decorations can detach. Use large, securely installed components and inspect them frequently. When possible, paint a detail rather than attaching a tiny three-dimensional version.
Making the Kitchen Too Realistic
A pretend kitchen should resemble a kitchen without functioning like one. Do not connect it to electricity, water, heating elements, or real appliances. Keep actual knives, matches, cleaners, hot cookware, and breakable dishes in the adult kitchen.
Real-World Experiences With a Kid’s Cottage Play Kitchen
Families and DIY builders often discover that the most successful play kitchen is not necessarily the largest or most elaborate one. Children tend to care less about perfect trim work than adults do. They notice whether the knobs turn, whether the cabinet holds their favorite wooden strawberries, and whether a grown-up agrees to order the soup.
One common experience is that children immediately invent uses the builder never planned. The oven becomes a pet bed for a stuffed rabbit. The sink becomes a mailbox. A lower cabinet becomes a secret cave. This is not a design failure; it is evidence that the toy is open-ended. Leaving some shelves and compartments undefined allows children to shape the kitchen around their current interests.
Parents also learn that realistic storage matters more than expected. When every plate, pot, and pretend tomato has a home, children can participate in cleanup. Deep, unorganized cabinets often become toy avalanches. Shallow shelves, divided baskets, and simple picture labels are easier for small hands to manage.
Another frequent lesson involves accessories. It is tempting to fill the finished cottage kitchen with an enormous set of pretend groceries. In practice, too many pieces can overwhelm the space. A dozen versatile food items may inspire more focused play than a hundred tiny packages scattered across the floor. Families often get better results by introducing a small starter set and rotating additional items later.
Builders who customize existing furniture commonly report that preparation takes longer than painting. Old hardware must be removed, holes filled, edges repaired, surfaces cleaned, and glossy finishes scuffed before primer is applied. Skipping those steps can lead to peeling paint and loose fittings. The adorable final color receives all the compliments, but the invisible preparation is what helps it survive years of wiping, banging, and dramatic restaurant closures.
Height is another practical issue. A kitchen built for a two-year-old may feel low by kindergarten. Some families solve this by creating a sturdy recessed base that can be replaced with a slightly taller one later. Others choose a middle-range height and add a stable play mat rather than a step stool. Loose stools near play furniture can encourage climbing, so they should be used cautiously and under supervision.
Many caregivers find that children play longer when an adult helps launch the story and then steps back. A parent might order breakfast, ask whether the café accepts pretend money, or deliver a basket of groceries. Once the child begins directing the scene, the adult can follow rather than control the play. This keeps the experience cooperative without turning it into a lesson disguised with wooden carrots.
Siblings may require duplicate essentials. Two aprons, two stirring spoons, or multiple plates can prevent unnecessary disputes. The kitchen still provides opportunities to practice sharing, but children do not need to negotiate over every single object. Strategic duplication is not surrender; it is excellent restaurant management.
Finally, families often value the play kitchen because it becomes part of daily life rather than a toy used once and forgotten. It can support quiet independent play in the morning, collaborative games during playdates, and conversations about real meals before dinner. Seasonal updates keep it interesting: felt pumpkins in fall, a pretend cocoa bar in winter, flower-shaped cookies in spring, and a lemonade stand in summer.
The most memorable experience is rarely the moment the kitchen is completed. It is the first ridiculous meal served from it, the handwritten menu taped to the wall, or the serious expression of a four-year-old explaining that the restaurant is out of pizza but can offer one invisible blueberry. A well-made kid’s cottage play kitchen becomes a setting for those moments, which is why its value often extends far beyond the wood, paint, and hardware used to build it.
Final Thoughts
A kid’s cottage play kitchen combines practical DIY design with the creativity of pretend play. The best versions are sturdy, appropriately sized, easy to organize, and simple enough for children to reinterpret. Cottage details such as paneled doors, gentle colors, scalloped trim, and wooden accessories give the toy personality without limiting what it can become.
Focus first on stability, smooth construction, secure hardware, age-appropriate accessories, and safe placement. Then enjoy the decorative details. Once the kitchen opens for business, do not be surprised if the chef ignores your carefully planned farmhouse menu and serves dinosaur cereal instead. Imagination, after all, is the main ingredient.