

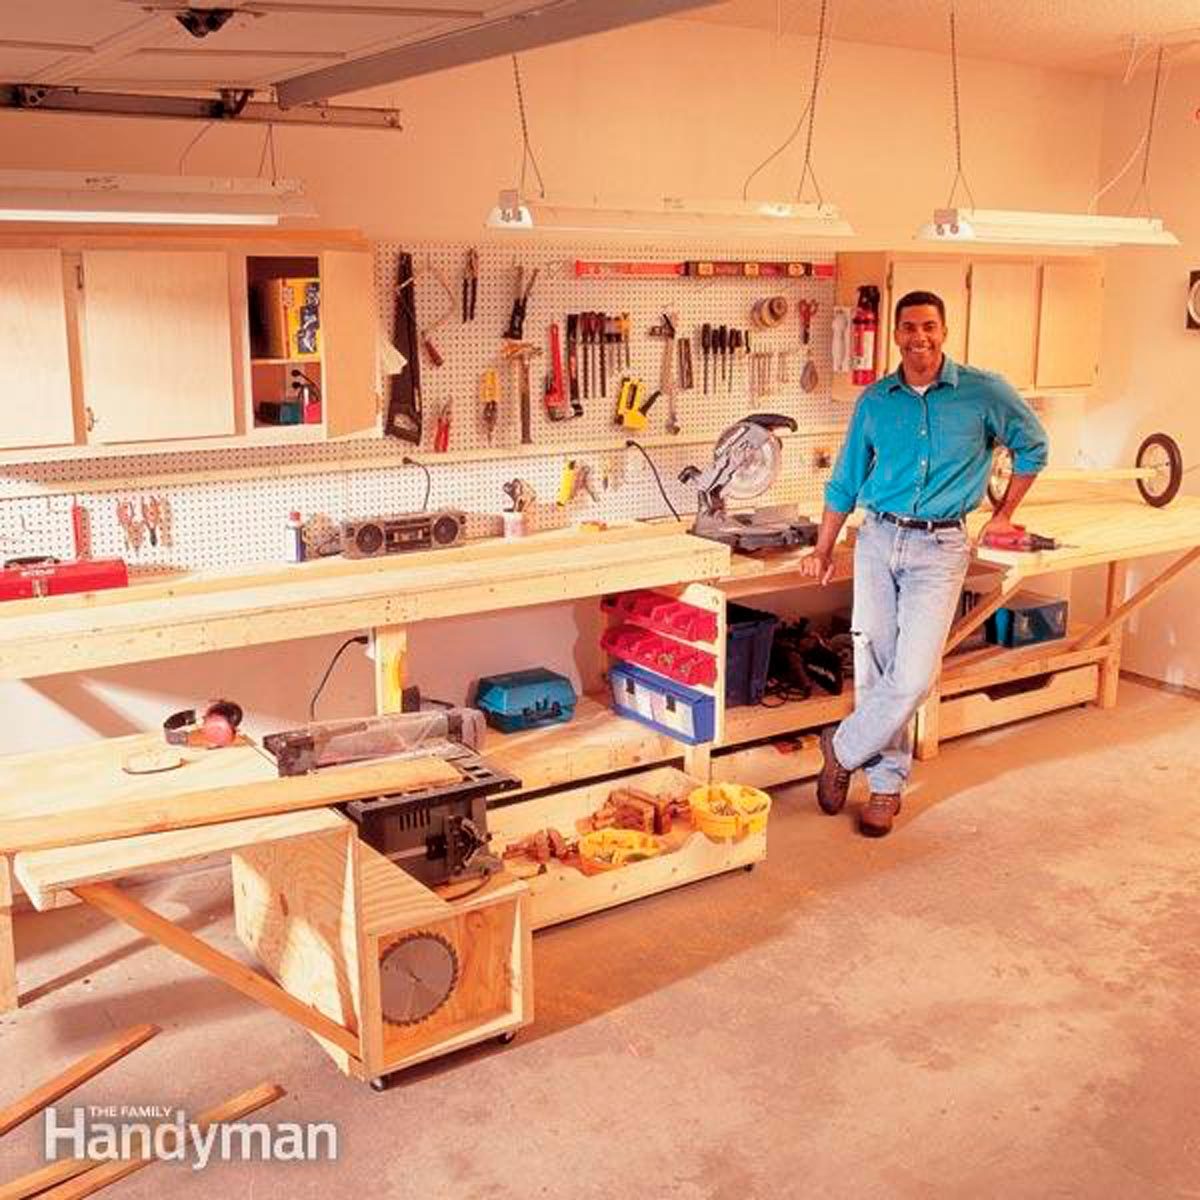
If you’re tired of wrestling long boards on a tiny table, stepping over tools on the floor, or trying to clamp a project to a plastic folding table, it’s time: you need a real workbench. Even better, you need a modular workbench – a flexible, mobile system that can grow and change as your projects do.
Think of a modular workbench as the LEGO set of the workshop. Instead of one giant, immovable beast eating up your garage, you build several sturdy, rolling units that work together: an assembly bench, an outfeed table, a miter saw station, a tool cart, and more. Roll them apart for big projects, nest them together when you need floor space, and rearrange them whenever your workflow changes.
In this guide, you’ll learn how to design and build a modular workbench system with basic tools and materials. We’ll cover ideal dimensions, step-by-step building instructions, smart storage ideas, and real-world tips to avoid the classic “I wish I’d done that differently” mistakes.
What Is a Modular Workbench (and Why It Beats a One-Piece Bench)
A traditional workbench is usually one big, heavy unit. It’s solid, but once it’s in place… that’s where it lives. A modular workbench is built from multiple interlocking or complementary units – often the same height and depth – that can be:
- Rolled together to form a large work surface.
- Separated into different “stations” (sanding, cutting, assembly).
- Reconfigured as your tool collection and projects change.
DIYers love modular workbench plans because they’re practical and future-proof. You can start with one or two core units (like a main bench and an outfeed/assembly table), then add more modules over time instead of trying to build the “ultimate bench” in one weekend.
Planning Your Modular Workbench: Size, Layout, and Height
Before you buy a single 2×4, spend a few minutes planning. Good planning equals fewer “oh no” moments later.
1. Measure Your Space
Grab a tape measure and note:
- Overall garage or shop size (length and width).
- Car parking area if your shop shares space with vehicles.
- Door swing and walkways – leave at least 30–36 inches for comfortable walk paths.
- Tool footprints: table saw, miter saw, jointer, planer, etc.
A common sweet spot for modular workbench units is around 24–30 inches deep and 48–72 inches long. That’s deep enough for most projects but not so deep that you can’t reach the wall, outlets, or pegboard behind the bench.
2. Choose an Overall Layout
Popular layouts include:
- Island layout: Units live in the center of the garage and can be rolled out of the way.
- Wall plus mobile units: One fixed wall bench with one or two modular rolling benches.
- U-shaped layout: Great for larger shops; multiple benches wrap around you for easy reach.
For most home garages, a main modular bench in the middle and a secondary unit that doubles as a table-saw outfeed offers huge flexibility without eating your whole floor.
3. Dial In the Right Workbench Height
Workbench height is one of those details you only notice when you get it wrong. Most general-purpose workbenches land around 34–36 inches tall, which lines up nicely with many table saws and keeps your back reasonably happy for most tasks.
A simple ergonomic rule used by many woodworkers is to stand straight, arms relaxed at your sides, and measure from the floor to your thumb or knuckles. That number (often in the mid-30-inch range for many adults) is a good starting point for bench height. You can adjust an inch or two up or down depending on whether you mostly sand, assemble, or do heavy hand-tool work.
If you want your modular workbench to double as a table saw outfeed table, match the top height exactly to your saw’s table height so boards slide smoothly off the blade instead of catching on a lip.
Materials and Tools for a Modular Workbench
The beauty of a DIY modular workbench is that it uses readily available materials and basic tools. Here’s a solid starting list for a single core unit (roughly 30 in. x 60 in.):
Recommended Materials
- (6–8) 2×4 boards for the frame and stretchers.
- (1) sheet of 3/4″ plywood for the top (and shelf if desired).
- (1) sheet of 1/2″ plywood for optional drawer parts or back panels.
- (4–6) heavy-duty locking casters, 3–4″ diameter.
- 2 1/2″ construction screws or pocket-hole screws.
- Wood glue.
- Sandpaper (80–220 grit) and wood finish (polyurethane or similar).
Basic Tools
- Circular saw or table saw.
- Drill/driver and bits.
- Pocket-hole jig (optional but very handy).
- Miter saw for cutting 2x4s to length (or careful cuts with a circular saw).
- Measuring tape, speed square, and pencil.
- Clamps (you can never have too many).
These modular workbench plans assume you’re comfortable with basic DIY skills: measuring accurately, driving screws, and cutting straight lines. If you can build a simple shelf, you can build this.
Step-by-Step Modular Workbench Plans
This section walks through a core rolling bench module you can repeat and adapt for your space. Adjust the length and depth to fit your shop, but try to keep all your modular units the same height so they work nicely together.
Step 1: Build the Base Frames
- Cut two long 2x4s to your desired bench length (for example, 60 in.).
- Cut two short 2x4s for the bench depth (for example, 28 in.).
- Assemble a rectangle using screws and glue, checking for square by measuring diagonals.
- Repeat to build a second identical frame (one for the top, one for the lower shelf).
These frames form the skeleton of your modular workbench and help prevent sagging over time.
Step 2: Add Legs and Caster Support
- Cut four legs from 2x4s or 4x4s to your planned height, subtracting the caster height and the top thickness.
- Example: You want a 35″ bench. Your casters are 4″ tall and your plywood top is 3/4″ thick. Cut legs at 35 – 4 – 0.75 = 30.25 inches.
- Attach the legs to the inside corners of the top frame using screws through the frame into the legs.
- Slide the lower frame up the legs to the desired shelf height (often 8–10″ off the floor) and secure it.
- Mount locking casters to the bottom of each leg. Consider adding two extra casters in the middle for longer benches to prevent sagging.
Now you’ve got a rolling base that can easily support heavy tools, lumber, and your next “brilliant idea” that turns into three weekends of work.
Step 3: Install the Top and Lower Shelf
- Cut a 3/4″ plywood top to match your frame size. Let it overhang by 1/2–1″ on all sides if you want a lip for clamping.
- Attach the top with screws from above, countersinking slightly so screw heads sit below the surface. Skip glue if you want to replace the top later.
- Cut a second plywood piece for the lower shelf and secure it to the lower frame.
If you want an ultra-flat surface, consider building a torsion-box top (a grid of internal ribs sandwiched between two plywood skins). It’s more work but resists sagging and stays flat for precision work.
Step 4: Add Storage (Drawers, Cubes, and Tool Bays)
Storage is where your modular workbench really shines. You can customize each module for specific tools and tasks:
- Open shelves for bulky tools like planers or compressors.
- Shallow drawers for hand tools, measuring tools, and hardware.
- Vertical dividers for clamps, jigs, and cutting guides.
- Tool-specific compartments for sanders, routers, and nailers.
Use simple plywood boxes or drawer slides from your home center. You don’t need furniture-grade joinery – this is a shop workbench. Straight, strong, and organized beats fancy any day.
Step 5: Create “Companion” Modules
Once you build one modular workbench, it’s easy to design others that play nicely with it. Common companion modules include:
- Miter saw station with the saw set flush to the workbench height and long support wings.
- Outfeed/assembly table sized to match your table saw and used as a second work surface.
- Flip-top cart that lets you rotate between two benchtop tools (e.g., planer and sander) to save space.
- Dedicated clamp and jig cart that rolls right to your project.
Keep all tops the same height and similar depth, and suddenly your shop becomes a modular puzzle you can rearrange at will.
Smart Add-Ons for a Next-Level Modular Workbench
Once the basic structure is done, you can upgrade your modular workbench system with features that make daily use smoother and more fun:
- Dog holes and clamp tracks: Add 3/4″ holes in a grid or aluminum clamp tracks to quickly secure workpieces.
- T-track and jigs: T-tracks in the top let you create adjustable stops, hold-downs, and sleds.
- Integrated power: Mount a power strip or recessed outlets on the side of the bench to avoid cord spaghetti.
- Dust collection ports: If a module holds a sander, miter saw, or planer, plan for a dust port or shop-vac hookup.
- French cleats and pegboard on end panels for extra tool storage.
Start simple and functional, then add bells and whistles as you learn how you really use the bench.
Finishing and Safety Tips
A few final touches make your modular workbench safer and more pleasant to use:
- Ease the edges: Break sharp corners with sandpaper so they don’t chew up your wrists or project edges.
- Seal the top: A few coats of polyurethane, water-based poly, or even a mix of oil and wax will protect against glue and spills.
- Level and lock: Make sure all casters touch the floor evenly and lock firmly so the bench doesn’t skate away mid-cut.
- Weight balance: Store heavy items low to keep the bench stable when rolling it around.
- Respect load limits: Even a beefy DIY bench has limits; don’t park an engine block on a flimsy shelf.
With a thoughtful finish and safe setup, your modular workbench will feel like a professional work station, not just a “DIY special.”
Common Mistakes to Avoid
- Ignoring ergonomics: Too high or low and you’ll feel it in your back and shoulders after a long session.
- Mismatched heights: If your modular units don’t match in height, they won’t work together smoothly.
- Too deep to reach: A 36″ deep bench sounds great until you can’t reach tools at the back against the wall.
- Cheap casters: Undersized or non-locking casters will frustrate you every single time you use the bench.
- No plan for dust: Power tools without any dust strategy will cover your shiny new bench in debris quickly.
Plan ahead, measure twice, build once… and then roll it around the shop a dozen times just because you can.
Real-World Experiences With DIY Modular Workbenches
Once you’ve built a modular workbench, you’ll discover a bunch of small, practical lessons that don’t always show up in the formal plans. Here are some real-world experiences and insights that can help you refine your own system.
Lesson 1: Mobility Is Great… Until It Isn’t
One common experience among DIYers is underestimating how much a heavy bench will move under lateral force. You might think, “I’ve got locking casters, I’m fine.” Then you start planing, chiseling, or wrestling a large sheet of plywood, and the whole bench slowly “walks” across the floor.
In practice, the best modular setups use a combination of locking casters and strategic friction. Some builders install two fixed feet on one side and casters on the other, so the bench is rock solid when parked but still rollable when needed. Others add quick-adjust leveling feet that lift the casters slightly off the floor during heavy hand-tool work.
Lesson 2: Matching Heights Is Non-Negotiable
On paper, it’s easy to say “all my benches will be 35 inches tall.” In reality, slight differences in caster height, plywood thickness, or floor irregularities can leave you with benches that differ by half an inch. That doesn’t sound like much until you try to use one bench as an outfeed table and boards start catching.
Experienced builders often mock up the final height with scrap blocks and casters before committing to leg length. Some even build the bench slightly tall, then trim the legs to final height once everything is assembled and tested with the table saw or other main tool.
Lesson 3: Future You Will Own More Tools
Nearly everyone who builds a modular workbench eventually adds more tools than they originally planned for. The “simple bench plus one cart” turns into carts for sanders, routers, a drill press, and a sharpening station. If you plan ahead for this, your shop will grow more gracefully.
That’s why flexible storage – shelves with adjustable dividers, open bays, and removable bins – tends to age better than ultra-specific cutouts and cubbies. Future you will be very grateful you didn’t build a perfectly fitted slot for a tool you later replace.
Lesson 4: A Replaceable Top Is a Game-Changer
Many DIYers learn the hard way that a workbench top will get abused faster than they thought: saw kerfs, chisel scars, glue blobs, finish spills, and the occasional “oops” with a router bit. A modular bench with a replaceable or reversible top means you can refresh your main surface without rebuilding the entire structure.
One practical trick: double up two layers of 3/4″ plywood, screwed together from below. When the top surface gets too beat up, flip the sandwich over for a “new” top. When both sides are done, replace just the upper layer and keep the lower one as a subtop.
Lesson 5: Use the Ends of the Bench Wisely
The ends of a modular workbench are prime real estate that often goes unused. Builders who’ve lived with their benches for a while tend to mount French cleats, magnetic tool holders, or clamp racks on the ends. This makes it incredibly easy to grab the tools you use most without cluttering the main surface.
Some people even dedicate one end of a bench as a “vertical docking station” for jigs – crosscut sleds, taper jigs, featherboards, and more. When everything has a home at the end of the bench, cleanup becomes much less of a chore.
Lesson 6: One “Ugly” Utility Bench Is Worth It
Real-life modular setups often include one bench that isn’t pretty but is absolutely beloved – the “utility bench.” This is the surface where paint cans, solvents, glue-ups, metal work, and dirty tasks live. Keeping at least one module intentionally rugged and sacrificial protects your nicer main bench from abuse.
DIYers who build a dedicated “messy module” tend to keep the rest of their system cleaner and more organized. It’s much easier to baby a beautiful assembly bench when you have another surface reserved for chaos.
Lesson 7: Your Workflow Will Evolve
Finally, almost everyone who spends serious time in the shop eventually rearranges their modular workbench at least once. Maybe you start doing more cabinetry and need longer support. Maybe you get into metalworking and need one bench for grinders and vises. Maybe you simply get tired of walking around a tool island the long way every time.
This is exactly why a modular workbench system is so powerful. Instead of tearing out a fixed bench and starting from scratch, you can roll units around, swap tops, and reassign storage. As your skills grow and projects become more ambitious, your workbench can evolve with you instead of holding you back.
Build your first module carefully, learn from it, and then treat the rest of your shop as an ongoing experiment. Over time, you’ll create a modular layout that feels custom-made for the way you work.