

A nightstand has one deceptively simple job: stand beside the bed and hold the small collection of objects we apparently cannot sleep without. A lamp, a phone, a book, a glass of water, reading glasses, lip balm, and three mysterious receipts all need somewhere to live. Unfortunately, attractive bedside tables can be expensive, while inexpensive ones sometimes have the personality of a shipping carton.
That is why my wood crate nightstand is such a satisfying DIY furniture project. It starts with an ordinary wooden crate and turns it into a compact bedside table with open storage, rustic character, and dimensions that can be customized for a small bedroom. Home-improvement and design publications frequently recommend repurposing wooden crates as nightstands, end tables, and modular storage because the basic box shape already provides both structure and shelving.
Best of all, this project does not require a workshop that looks like a television carpentry studio. A drill, sandpaper, a few screws, and a willingness to become temporarily covered in sawdust will take you surprisingly far.
Why Build a Wood Crate Nightstand?
A DIY wood crate nightstand offers more than a low project cost. It solves several common bedroom problems at once.
The open compartment keeps books, chargers, baskets, and bedtime essentials within reach. The top provides a landing place for a lamp and water glass. Because crates are available in different sizes, the design can fit beside a platform bed, a tall mattress, a dorm bed, or a narrow guest-room bed. The crate can stand directly on the floor, rest on furniture legs, sit on casters, or be combined with a second crate for extra height.
Wood crates also work with several decorating styles. A dark walnut stain creates a warm, traditional appearance. White paint gives the piece a cottage or coastal feel. Matte black paint makes it more modern, while a clear finish preserves the pale, casual look of unfinished pine. HGTV has demonstrated similarly simple transformations using a wooden crate, furniture legs, and paint to create playful bedside storage.
There is also something pleasantly honest about crate furniture. It does not pretend to be a miniature palace with seven decorative columns. It is a wooden box that learned some manners.
Planning My Crate Nightstand Design
Measure the Bed Before Buying the Crate
The most important measurement is the height from the floor to the top of the mattress. A comfortable nightstand top generally sits near mattress height, although a few inches above or below can still work well. What matters is whether you can reach the lamp without performing a midnight yoga pose.
Measure the available width beside the bed too. Leave enough clearance for curtains, closet doors, baseboard heaters, and walking space. If the crate will be positioned with its open side facing forward, confirm that the interior is deep enough for the books or storage basket you plan to use.
Store-bought crates vary considerably, even when their product photographs make them look identical. Measure the actual crate rather than relying on a general size description. Check the width, depth, height, slat thickness, and squareness before selecting legs or cutting a tabletop.
Choose a One-Crate or Two-Crate Configuration
A single crate works well beside a low bed, especially when fitted with four short legs. Two crates can be stacked vertically for a taller nightstand or arranged side by side for a wider table with two compartments. The crates should be mechanically fastened together rather than merely stacked and encouraged to behave.
Another option is to place one crate on its side and add a solid board across the top. The board creates a smoother surface, hides uneven crate slats, and gives the nightstand a more finished furniture-like appearance. Designs featured by The Spruce use attached crates, a top board, stain, and hairpin legs to turn basic containers into a polished bedside table.
Select the Right Crate
Choose a crate with straight slats, sound corner supports, and no major splits. Place it on a flat floor and press gently on opposite corners. Excessive rocking usually means the box is twisted or uneven.
Inspect every surface for exposed staples, loose nails, splinters, glue residue, and sharp edges. Decorative craft crates are often made from thin softwood, so they should not be treated like heavy-duty cabinets. Avoid using a lightweight crate as a step stool, chair, or platform for an aquarium, no matter how confident the goldfish appears.
Materials and Tools
The exact supply list depends on the final design, but a straightforward crate nightstand typically requires:
- One sturdy wooden crate
- A pine, plywood, or edge-glued board for the top
- Four furniture legs, hairpin legs, or locking casters
- Wood screws sized for the crate and tabletop
- Washers for fastening through thin crate slats
- Wood glue
- Wood filler for small holes and imperfections
- Sandpaper in medium and fine grits
- Pre-stain wood conditioner, when appropriate
- Wood stain, paint, or clear finish
- A drill with drill bits and screwdriver bits
- A tape measure, pencil, square, and clamps
- A vacuum, tack cloth, or lint-free cleaning cloth
- Protective glasses, gloves, and a suitable dust mask
When fastening through thin crate material, washers can help distribute pressure and reduce the chance of a screw head pulling through the wood. HGTV uses this approach in a crate-based furniture project, pairing washers with short screws to secure thin crate panels without tearing them.
How I Built the Wood Crate Nightstand
Step 1: Clean and Inspect the Wood
I began by brushing away dust and checking the crate from every angle. Loose fasteners were reset, rough corners were marked, and a small split near one slat was stabilized with wood glue and a clamp.
Any reclaimed crate should be approached more cautiously. Unknown finishes, chemical contamination, mold, persistent odors, or severe insect damage are good reasons to choose another piece. A new unfinished craft crate is usually the simplest option for bedroom furniture.
Step 2: Sand Every Reachable Surface
Sanding transforms the project more than almost any decorative product. It removes splinters, softens sharp edges, reduces manufacturing marks, and prepares the wood for a more consistent finish.
I started with medium-grit sandpaper on rough areas and moved to a finer grit for the final smoothing. The slat edges and handhold openings received extra attention because those are the places fingers will touch most often. Sanding with the direction of the grain helps prevent visible cross-grain scratches, while progressing through appropriate grits produces a smoother surface. Dust should be removed between sanding stages and before applying any finish.
The crate did not need to feel like polished marble, but it did need to stop attacking innocent pillowcases.
Step 3: Fill Distracting Holes
Small nail holes and shallow dents can be filled with stainable wood filler. I left some knots and minor marks visible because they suited the rustic design, but I repaired anything that looked like damage rather than character.
After the filler dried, I sanded it flush and removed the dust with a vacuum and lint-free cloth. Cleaning thoroughly matters because leftover particles can become sealed into the finish, where they will remain forever as tiny monuments to impatience.
Step 4: Test the Finish
Crates are commonly made from pine or another porous softwood, which may absorb conventional stain unevenly. A pre-stain conditioner can reduce blotching by helping the surface accept color more consistently. Manufacturers such as Minwax and Rust-Oleum specifically recommend wood conditioner for many soft or porous woods.
I tested the conditioner, stain, and clear coat on the underside of the crate before treating the visible surfaces. This step showed how the natural wood color affected the stain and prevented an unpleasant full-project surprise. Stain samples printed on a label are useful, but the actual wood always gets the final vote.
Step 5: Apply Stain or Paint
For a warm rustic look, I applied a medium-brown stain in thin, controlled sections. The stain was worked into the corners with a brush and wiped along the grain with a clean cloth. Excess product was removed instead of being allowed to form sticky patches.
Paint is an equally practical option. Primer helps improve adhesion and can block knots or discoloration from showing through pale paint. Thin coats generally produce a smoother result than one heroic coat thick enough to qualify as frosting. Bare-wood painting guidance from This Old House similarly emphasizes sanding with the grain, removing dust, applying appropriate primer, and building the color with thin coats.
Step 6: Add a Protective Topcoat
A bedside table is likely to encounter water glasses, coffee mugs, lotion, cleaning products, and the occasional phone dropped with dramatic enthusiasm. A compatible clear protective finish makes the wood easier to wipe clean and improves resistance to everyday wear.
I applied thin coats and allowed each coat to dry according to the product label. A wipe-on finish can be especially approachable for beginners because it is applied with a lint-free cloth and avoids obvious brush marks.
Finishes should be used with appropriate ventilation and all label precautions should be followed. The Environmental Protection Agency recommends increasing ventilation when using products that emit volatile organic compounds and, when practical, applying finishes outside before bringing materials indoors after they have dried.
Step 7: Attach the Top
I cut the top board slightly wider and deeper than the crate, creating a modest overhang on the front and sides. The corners were eased with sandpaper so they would not feel sharp beside the bed.
After centering the board, I clamped it in place and drilled pilot holes from inside the crate. Pilot holes reduce splitting and help screws enter accurately. The screw length was chosen carefully so the points could not break through the tabletop.
A bead of wood glue added support, but screws supplied the reliable mechanical connection. Glue alone can be awkward on narrow slats with limited contact area.
Step 8: Install Legs or Casters
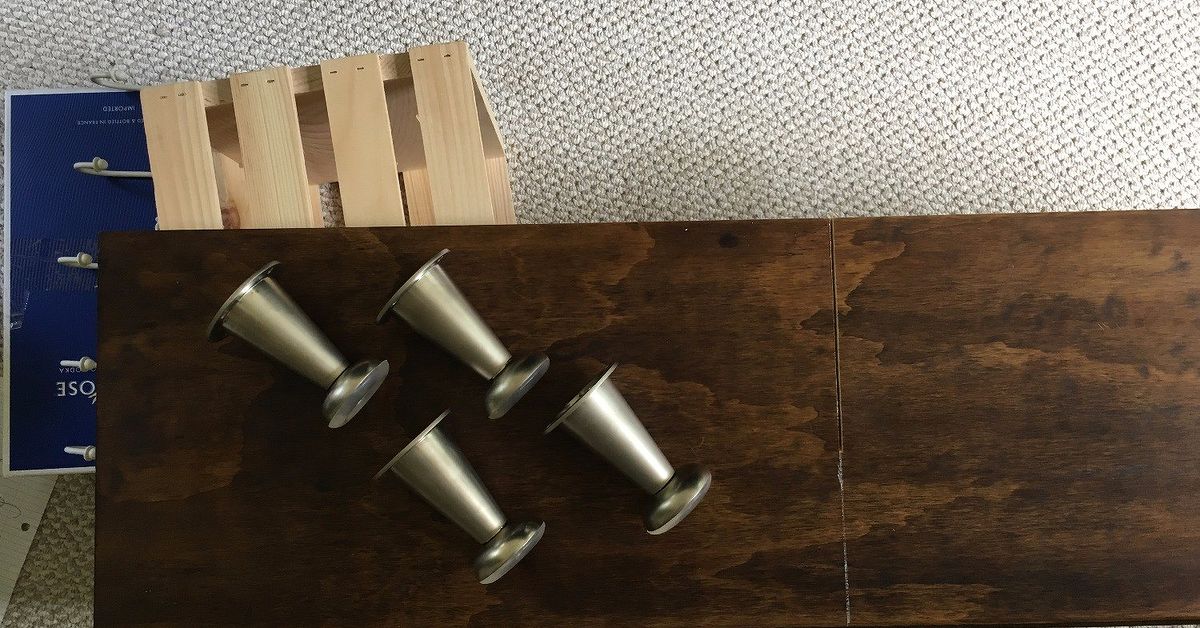
Short wooden legs gave my nightstand a classic furniture appearance, while hairpin legs would have produced a lighter midcentury look. Mounting plates should be positioned over solid wood or an added reinforcement board, not attached only to fragile slats.
For a mobile design, locking casters make cleaning easier. All four wheels should be rated to support more than the anticipated total load, and the locks should face outward where they can be reached.
Step 9: Add Cord Management
A small opening at the back allows a charging cable to reach the interior shelf. I smoothed the opening thoroughly and added a protective grommet so the wood could not scrape the cable.
A compact adhesive cable clip beneath the tabletop keeps the charging cord from falling behind the nightstand every morning. This tiny addition may be the project’s greatest achievement. Humanity has invented satellites, vaccines, and self-driving technology, yet the phone cable still dives behind furniture whenever nobody is watching.
How I Organized and Styled It
The open crate compartment is convenient, but without a plan it can quickly become a museum of unfinished novels. I divided the interior into simple zones.
A small basket holds charging accessories, tissues, and personal items. Two frequently read books stand upright beside it. The top remains intentionally uncluttered, with only a lamp, coaster, and small tray.
Crates can also be grouped into larger modular storage arrangements. Better Homes & Gardens has recommended combining inexpensive wood crates for customized storage, while HGTV has highlighted crate compartments as accessible storage for books, toys, and decorative objects.
For a softer bedroom look, the back panel can be lined with removable wallpaper. A woven basket adds texture, and a felt pad beneath the lamp protects the finish. Labels, decorative handles, metal corner brackets, and contrasting paint are optional, but restraint helps. The nightstand should look customized, not as though it won a craft-store shopping spree.
Common Wood Crate Nightstand Mistakes
Skipping the Sanding
Unfinished crates may look smooth from a distance, but close inspection usually reveals rough slats and sharp edges. Sanding is not decorative busywork; it is what makes the object comfortable to handle and pleasant to use.
Using Screws That Are Too Long
Always compare screw length with the combined thickness of the materials being joined. A screw point emerging through the tabletop is both unattractive and unusually committed to ruining bedtime.
Attaching Legs to Weak Slats
Leg plates concentrate force in small areas. Add a solid bottom panel or internal corner blocks when the crate construction is too thin to hold the hardware securely.
Staining Without a Test
Softwood can absorb stain unpredictably. Test the complete finishing scheduleincluding conditioner, stain, and topcoaton hidden wood first.
Loading the Crate Like a Bookcase
A decorative crate is not automatically rated for heavy storage. Keep dense books and other substantial objects near the bottom, avoid overloading thin slats, and reinforce questionable joints.
Using the Nightstand Before the Finish Cures
A surface can feel dry while remaining soft underneath. Follow the manufacturer’s drying and curing instructions before placing lamps, books, electronics, or water glasses on the top.
Safety and Long-Term Durability
The finished nightstand should sit flat without rocking. All screws should be tight, legs should be aligned, and sharp fasteners should be covered or removed. Felt pads can protect flooring and correct very small height differences.
A tall, stacked, wheeled, or top-heavy crate unit may require additional stabilization. This is especially important in homes with young children. The U.S. Consumer Product Safety Commission’s Anchor It! campaign recommends securing furniture with drawers, doors, or shelves to help prevent tip-over injuries.
Place heavier objects low, avoid storing attractive toys on top, and use appropriate wall restraints when the proportions or household conditions create a tip-over risk. A low single-crate nightstand is generally more stable than a tall stack, but every DIY piece should be assessed in its actual location.
For routine care, dust the nightstand with a soft cloth and wipe spills promptly. Avoid soaking unfinished edges. If the top develops a small scratch, it can often be lightly sanded and touched up with a compatible stain and clear finish.
Is a DIY Crate Nightstand Worth Making?
Yesprovided the crate is sound, the design suits the intended load, and the project is assembled carefully. It is an excellent beginner woodworking project because most of the structure already exists. The builder can focus on preparation, finishing, hardware, and customization instead of complicated joinery.
The project is particularly useful for renters, dorm rooms, guest bedrooms, and small spaces. It creates open storage without the visual weight of a bulky cabinet, and it can be refinished when the room changes. Bob Vila and Family Handyman have both featured wooden crates as adaptable building blocks for affordable storage and furniture.
It may not replace a handcrafted hardwood nightstand with dovetailed drawers, but it does not need to. It holds the lamp, organizes the books, and looks charming while doing it. That is a respectable résumé for a former box.
My Wood Crate Nightstand Experience: What the Project Taught Me
The most surprising part of the wood crate nightstand project was how different the finished piece looked from the original crate. At the beginning, it appeared undeniably like packaging. After sanding, staining, adding a solid top, and lifting it on furniture legs, the same box looked intentional. The transformation did not come from an advanced woodworking trick. It came from taking several ordinary steps seriously.
Sanding required more patience than I expected. The broad outer faces became smooth quickly, but every slat introduced two edges, two corners, and several narrow spaces that seemed designed to hide splinters. I initially thought one quick pass would be enough. Running a clean cloth across the wood proved otherwise because the fabric snagged on several rough spots. That simple test became my favorite quality check. When the cloth moved freely across the edges and openings, the crate finally felt like furniture instead of lumber with ambitions.
Choosing the stain color was another lesson. The dark brown sample looked perfect on the label but much heavier on the pale crate wood. Testing it on the bottom saved the project from becoming darker than the rest of the bedroom. I wiped the stain sooner on the visible surfaces, producing a softer brown that allowed the grain and knots to remain visible.
I also learned that a top board contributes far more than expected. Before it was installed, the gaps between the crate slats made the surface unsuitable for a water glass or small lamp. The solid top created a dependable surface and made the whole piece look wider, calmer, and more substantial. A slight overhang helped visually separate the tabletop from the storage compartment below.
Attaching the legs was the moment when careful planning mattered most. The crate’s bottom slats were too thin to support mounting plates confidently, so I added internal reinforcement blocks. That small change prevented the screws from relying on delicate material. Once the legs were installed, I placed the nightstand on the floor and tested it gently from several directions before adding anything to the top.
The first styling attempt was not a triumph. I loaded the compartment with too many books, added a large basket, placed several decorative objects on top, and somehow made the new nightstand look like a tiny yard sale. Removing half the items improved it immediately. The crate worked best when some of the interior remained visible.
In daily use, the most valuable feature has been the open storage. I can see the book I am reading instead of forgetting it inside a drawer for six months. The basket prevents smaller items from spreading across the tabletop, and the cable clip keeps my phone charger within reach. Those practical details matter more than the decorative brackets I spent far too long comparing.
The project also made me more comfortable with imperfect wood. One knot remained darker than the surrounding surface, and a shallow dent was still visible after sanding. At first, I considered filling and disguising every irregularity. Eventually, I realized that these marks gave the nightstand its character. The goal was not to make inexpensive pine impersonate factory-made plastic. The goal was to make a safe, useful piece that still looked like wood.
Most importantly, the nightstand demonstrated how approachable furniture building can be. The project involved measurement, preparation, finishing, reinforcement, and hardware installation, but none of the individual tasks was overwhelming. Each completed step made the next one easier to understand. By the end, I had more than a bedside table. I had a repeatable process that could be used for crate shelves, an entryway organizer, a plant stand, or a small end table.
That may be the best part of beginner DIY furniture: the finished object is useful, but the confidence gained while building it travels to the next project.
Conclusion
My wood crate nightstand proves that practical bedroom furniture does not need to be complicated or expensive. A sturdy crate, thoughtful sanding, a suitable finish, secure hardware, and a solid top can create an attractive bedside table with useful open storage.
The design can be rustic, modern, coastal, colorful, or minimalist. More importantly, it can be sized around the bed and customized around the objects actually used at night. Build it carefully, keep the proportions stable, follow product safety instructions, and give every finish enough time to cure.
The result is simple furniture with a personal storyand a permanent home for the phone charger that used to live on the floor.
Editorial note: The experience section is a composite first-person project narrative based on common DIY methods, outcomes, and challenges documented in reputable woodworking, home-improvement, finishing, environmental-safety, and consumer-safety resources. It does not claim that an AI physically constructed the furniture.