I did not wake up one morning and think, “Today I shall become a tiny athletic-apparel factory.” Like most DIY projects, this one began with a smaller thought: Why are decent compression sleeves either expensive, boring, too tight in the wrong place, or decorated like they escaped from a neon sports drink commercial?
I wanted lightweight sleeves for workouts, walks, long desk days, and the occasional moment when my arms or calves needed a little extra warmth and support. Store-bought options were plentiful, but the fit never felt quite right. Some rolled at the top. Some squeezed one area while leaving another loose. One pair made me look like I was auditioning for a low-budget superhero movie.
So I made my own.
The result was not a medical-grade garment, a miracle recovery device, or a substitute for professional care. It was a custom, light-support sleeve designed around comfort, movement, and better sewing skills. Along the way, I learned that elastic fabric has opinions, measuring tape is humbling, and “just make it tighter” is rarely the answer to anything involving limbs.
Why I Wanted to Make My Own Compression Sleeves
The first reason was fit. Bodies are not manufactured on a single assembly line, even though many athletic clothing size charts seem deeply committed to pretending otherwise. My arms and calves are not perfectly cylindrical. They taper, bend, flex, and occasionally decide they would rather be under a blanket than inside performance fabric.
The second reason was function. I was not looking for a sleeve that promised to turn me into an Olympic champion by Thursday. I wanted something comfortable enough for warm-ups, brisk walks, light strength training, travel days, and recovery time after activity. A well-made sleeve can provide a close, smooth layer that feels supportive without becoming restrictive.
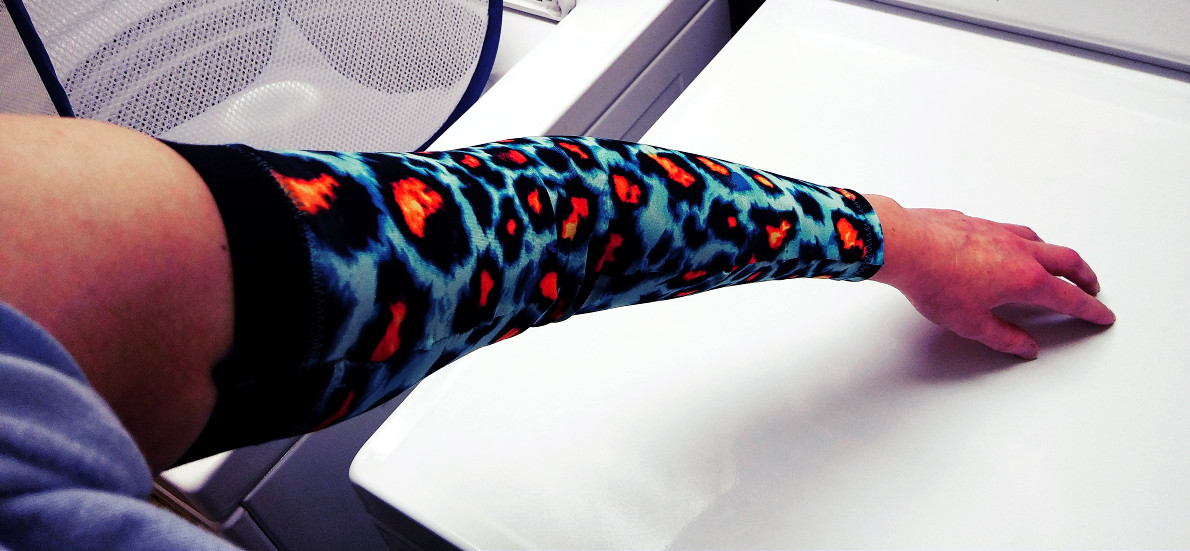
The third reason was style. I wanted a design that looked like clothing, not medical equipment or an ad for an energy gel. Making my own meant I could choose the fabric, length, color, seam placement, and finish. Suddenly, I was not settling for what was on the shelf. I was building something for my actual routine.
There was also a fourth reason: I wanted to stretch my sewing skills. Literally. Stretch fabric is one of those materials that politely waits for you to become overconfident, then skips stitches, curls at the edges, and launches itself toward your sewing machine needle like a very soft protest.
What Compression Sleeves Can and Cannot Do
Compression garments are commonly used in healthcare settings to help support circulation, reduce swelling in certain conditions, and assist with some venous or lymphatic concerns. Graduated compression garments generally apply more pressure farther from the heart and less pressure higher up the limb. That pressure pattern is not random; it is part of the garment’s intended function.
That is why a DIY sleeve needs a clear label: it is not automatically a medical compression sleeve simply because it feels snug. Tight clothing and clinically measured compression are not the same thing. In fact, an uneven, overly tight garment can create uncomfortable pressure points, roll into a narrow band, or feel like a very determined rubber band has taken up residence on your arm or leg.
For healthy people using sleeves during ordinary activity, the goal is comfort and gentle support, not maximum squeeze. Research on sports compression clothing suggests that some people may feel more comfortable or experience modest recovery benefits after exercise, but the evidence does not support treating compression gear as a guaranteed performance upgrade. In other words, sleeves may be helpful, but they are not athletic wizardry.
I approached my project with a simple rule: the sleeve should move with me, not argue with my circulation.
Choosing the Right Fabric for DIY Compression Sleeves
Fabric choice was the most important decision in the entire project. A beautiful sleeve made from the wrong material is just an expensive tube of regret.
Look for four-way stretch fabric
I chose a medium-weight nylon-and-spandex athletic knit with four-way stretch. Four-way stretch means the fabric gives in both directions: around the limb and along its length. This matters because arms and calves do more than sit there looking decorative. They bend, contract, expand slightly during activity, and demand fabric that can keep up.
Nylon-spandex blends are popular for athletic garments because they are smooth, durable, and flexible. Polyester-spandex fabric can also work well, especially when moisture management is a priority. I avoided thin costume fabric, stiff elastic mesh, and anything that felt scratchy during the “rub it against your forearm for thirty seconds” test. That test is not technically scientific, but neither is wearing itchy fabric for three hours and regretting every life decision.
Use fabric with recovery, not just stretch
Stretch is how far a fabric can expand. Recovery is how well it returns to shape after stretching. A sleeve that stretches easily but stays baggy afterward will slowly migrate down the limb like it is trying to escape your workout.
I tested my fabric by stretching a small scrap, releasing it, and checking whether it bounced back smoothly. I also washed a sample before cutting the final pieces. Athletic knits can behave differently after laundering, and it is better to discover that with a scrap than with a finished sleeve that suddenly fits a houseplant.
Tools and Supplies I Used
- Four-way stretch athletic fabric
- Stretch or ballpoint sewing machine needles
- Polyester thread
- Fabric scissors or a rotary cutter
- Measuring tape
- Clips or fine pins suitable for knit fabric
- A sewing machine with zigzag, stretch stitch, or overlock capability
- Washable fabric marker or chalk
- A scrap of paper for creating a pattern template
A serger makes stretch sewing faster, but it is not mandatory. I used a regular sewing machine with a narrow zigzag stitch on my first prototype. It was not glamorous, but it worked. The machine and I reached an uneasy peace agreement after several test seams.
How I Drafted a Simple Sleeve Pattern
My goal was a light-support sleeve with a smooth fit, not a medically calibrated garment. That distinction shaped every measurement decision I made.
Step 1: Measure the limb in more than one place
For an arm sleeve, I measured around my wrist, forearm, lower bicep, and upper arm. For a calf sleeve, the same idea applies: measure around the ankle, lower calf, widest part of the calf, and the area near the top edge.
I also measured the sleeve length I wanted. For an arm sleeve, that meant from just above the wrist to a few inches below the elbow, depending on the design. For a calf sleeve, it meant from just above the ankle to just below the knee.
The key lesson was that one measurement is not enough. A sleeve needs to follow the gradual shape of the limb. If you draft it as a straight tube, it may bunch, twist, slide, or create the visual effect of an overstuffed paper towel roll.
Step 2: Create a tapered paper pattern
I drew a long tapered shape on paper based on my measurements. The narrower end matched the smaller circumference, and the wider end matched the larger circumference. I added seam allowance along the long edge and at the top and bottom.
I did not aggressively reduce the pattern size to force extra tightness. Instead, I made a test sleeve using inexpensive stretch fabric. A snug athletic fit should feel close and secure, but it should not cause pain, tingling, numbness, coldness, skin discoloration, or deep marks that linger after removal.
Step 3: Make a prototype before cutting the good fabric
This step saved me from wasting my favorite fabric. My first sample was too loose near the wrist and too tight near the upper arm. My second sample fit better but rolled at the top. By the third sample, I had learned that the sleeve did not need more tension everywhere; it needed a better shape.
That was the moment the project stopped being “sew two sides together and hope” and became actual garment making.
How I Sewed the Sleeves
Cut carefully and keep the stretch direction consistent
I laid the pattern so the strongest stretch ran around the limb, not vertically from wrist to elbow or ankle to knee. This let the sleeve expand comfortably around the arm or calf while still keeping its length.
I cut two mirrored pieces so I would end up with a right and left sleeve rather than two garments that appeared to be competing for the same arm.
Sew the long seam with a flexible stitch
I folded each sleeve right sides together and stitched the long edge using a narrow zigzag stitch. A straight stitch can snap when stretchy fabric expands, which is a dramatic way for a sleeve to announce that it has had enough.
After sewing, I gently stretched the seam by hand. If the thread popped, I adjusted the stitch width or length and tried again. A seam should move with the fabric rather than behave like it is holding a grudge.
Finish the top and bottom edges
For the edges, I folded the fabric slightly inward and used a stretch stitch. On later versions, I added a narrow band of matching stretch fabric instead of elastic. This gave the sleeve a cleaner finish without creating a harsh, narrow pressure line.
I avoided tight elastic bands at the edges. A sleeve should not roll, but it also should not clamp down on one small area. The best finish was one that stayed in place while still feeling smooth against the skin.
Test the sleeve before making a second pair
I wore the finished sample around the house for short periods. I moved my arm, bent my elbow, carried groceries, typed at my desk, and did a few light stretches. Then I checked for bunching, rolling, pinching, or areas where the sleeve shifted.
This was less glamorous than testing it during an exciting workout montage, but far more useful. A sleeve that feels fine while standing still can become irritating the second you start moving.
How I Checked the Fit
The right fit felt supportive but forgettable. That was my standard. I did not want to spend the day constantly aware of the sleeve. I wanted to put it on and move on with life.
Here are the signs that told me the fit was working:
- The sleeve stayed in place without rolling or sliding.
- I could bend my elbow or knee comfortably.
- The fabric did not bunch in the crease of a joint.
- I did not experience numbness, tingling, pain, coldness, or color changes.
- The top and bottom edges did not leave sharp, deep indentations.
- The sleeve felt equally comfortable during movement and rest.
If a sleeve is too tight, uneven, painful, or difficult to remove, it is not “extra effective.” It is simply too tight. I learned that a comfortable fit is not a compromise; it is the goal.
Why DIY Sleeves Are Great for Athletes and Makers
Making my own sleeves gave me more than a new piece of workout gear. It gave me control over the little details that mass-produced products often ignore.
I could choose a length that worked with my shirts. I could place the seam where it would not rub against my skin. I could make a pair in a neutral color for daily wear and a brighter pair for outdoor workouts. I could even adjust the fit over time as I learned more about stretch fabric and how different materials behave after washing.
There is something satisfying about wearing a garment that you made yourself, especially when it does a real job. It is not just fabric. It is fabric that survived the cutting table, sewing machine, seam-ripping incident, second seam-ripping incident, and your personal campaign against rolling hems.
When a DIY Sleeve Is Not the Right Choice
A handmade athletic sleeve can be useful for comfort, warmth, light support, and style. It is not the right tool for every situation.
Do not rely on a homemade sleeve to manage diagnosed lymphedema, recovery after surgery, a known blood-clot condition, severe swelling, chronic venous disease, or any situation where a healthcare professional has prescribed a specific compression level or garment type. Those situations may require a properly measured medical garment, clinical guidance, and monitoring.
Sudden swelling in one limb, unexplained pain, warmth, redness, shortness of breath, chest pain, or a new change in skin color deserves prompt medical attention. A sewing project is fun. Ignoring concerning symptoms is not.
How I Wash and Maintain My Compression Sleeves
Stretch fabric lasts longer when treated kindly. I hand-wash my sleeves or use a gentle cycle in cool water, then let them air-dry. High heat can weaken elastic fibers over time, which means the sleeve may lose the shape and support that made it useful in the first place.
I also inspect the seams regularly. Stretch garments work hard. If the stitching begins to loosen, I repair it before the sleeve becomes a surprise anatomy lesson at the gym.
Having two or three pairs helps. One can be in the wash, one can be ready to wear, and one can be mysteriously missing despite being located exactly where I left it.
What Making My Own Compression Sleeves Taught Me
The biggest lesson was that “custom” is not just about measurements. It is about attention.
When I made my own sleeves, I paid closer attention to how fabric behaved, how my body moved, and what comfort actually felt like during activity. I learned to notice when a seam rubbed, when a fabric edge rolled, and when a design looked clever on paper but made no sense once my elbow bent.
I also learned that compression gear does not need to be treated like a miracle product. A sleeve can be helpful without being magical. It can offer a comfortable, close-fitting layer without promising faster times, stronger muscles, or a personality upgrade.
Most importantly, I learned that sewing athletic gear is a wonderfully practical way to build confidence. You begin with fabric, measurements, and a few questionable decisions. You end with something wearable, useful, and uniquely yours. Even the mistakes become part of the story.
My Experience: Five Hundred More Words From the Sewing Table
The first sleeve I made looked respectable when it was lying flat on the table. That was its finest moment.
Once I put it on, it immediately revealed several design issues. The wrist opening was loose enough to suggest that it had been designed for a friendly tree branch. The upper edge rolled inward every time I bent my elbow. The seam ran directly across an area that became annoyingly noticeable after ten minutes of typing. It was not a disaster, exactly. It was more like a polite reminder that fabric does not care how confident you felt while cutting it.
Instead of giving up, I treated that first attempt like a prototype. I marked the areas that felt loose, noted where the fabric gathered, and paid attention to what happened when I moved. I discovered that the sleeve needed a gentler taper rather than a tighter overall fit. Making everything smaller would have made the uncomfortable areas worse. Adjusting the shape gave me a sleeve that followed my arm instead of fighting it.
My second version was better, but I made the top band too narrow. It stayed in place beautifully for approximately seven minutes. Then it began rolling into a skinny ridge. By the end of a walk, it looked like the sleeve had decided to become a bracelet.
That failure taught me a useful sewing lesson: stability does not always come from squeezing harder. Sometimes it comes from spreading tension across a wider, smoother area. I replaced the narrow top finish with a wider stretch band made from the same fabric. The new version stayed put without creating a sharp pressure line.
Once I had a pattern that worked, the project became much more enjoyable. I made a simple black pair for everyday use, a charcoal pair with contrast stitching for workouts, and a lighter pair for cooler mornings. The sleeves became part of my routine in a quiet way. I wore them during warm-ups, on walks, while doing light strength exercises, and during long stretches at my desk when I wanted an extra layer between my skin and the air-conditioned office.
I also became more thoughtful about what I expected from the sleeves. I did not expect them to make me faster, stronger, or somehow immune to sore muscles. I expected them to fit comfortably, move well, and feel good when I wore them. That turned out to be enough.
The project changed the way I look at athletic clothing. Before, I saw sleeves, leggings, and performance layers as things people simply bought. Afterward, I saw them as design problems. Where does the fabric stretch? Where does the seam land? Does the garment move with the body? Is it comfortable after thirty minutes, not just thirty seconds?
That is what made the project worthwhile. I did not just make a pair of sleeves. I learned how to observe, test, revise, and improve. I learned that wearable projects are rarely perfect on the first try. And I learned that the seam ripper is not a symbol of failure. It is just another tool, usually sitting nearby, quietly preparing for its next dramatic entrance.
Final Thoughts
Making my own compression sleeves was equal parts sewing project, comfort experiment, and lesson in realistic expectations. The finished sleeves gave me a custom fit, a practical athletic accessory, and a better understanding of how stretch fabric behaves under pressure.
The real win was not creating a “miracle” garment. It was creating a comfortable, well-fitting support sleeve that suited my routine and taught me new skills along the way. For anyone who enjoys sewing, fitness gear, or simply making useful things with their hands, DIY compression-style sleeves can be a satisfying projectprovided you respect the difference between light athletic support and medical compression.