

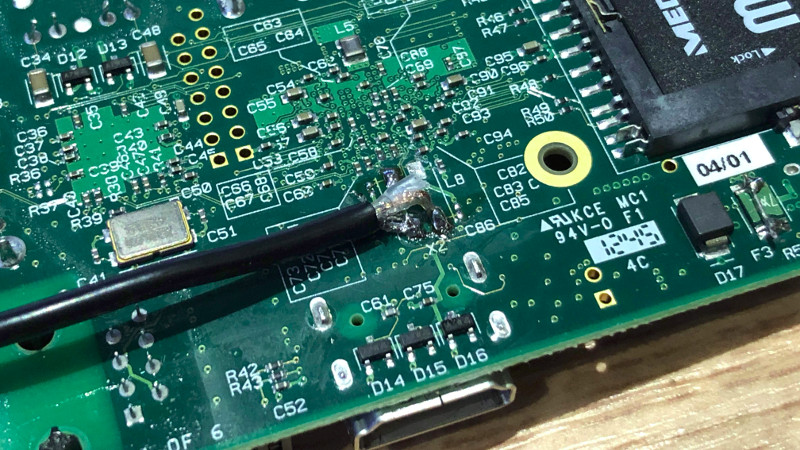
Your Raspberry Pi may be tiny, cheap, and charmingly innocent, but ask it what time it is after a cold boot without internet and it may respond with the confidence of a sleepy raccoon. Unlike a typical desktop computer, many Raspberry Pi models do not include a battery-backed real-time clock by default. That means accurate time on your Pi often depends on network time synchronization, an external RTC module, or, if you are feeling delightfully excessive, a GPS receiver with a pulse-per-second signal.
This guide explores the extreme way to get accurate time on a Raspberry Pi: turning it into a disciplined, high-precision timekeeping machine using GPS, PPS, chrony, and careful configuration. We will cover practical setup concepts, why ordinary NTP is good but not magical, how GPS time helps, why PPS is the secret sauce, and when this level of precision actually matters. Spoiler: if your project is blinking an LED, you probably do not need microsecond timing. If you are logging sensor data, running radio equipment, coordinating cameras, or building a local NTP server, you just might.
Why Accurate Time Matters on a Raspberry Pi
For many projects, time is not just a number in the corner of the screen. It is the backbone of logs, security certificates, databases, file timestamps, scheduled jobs, sensor readings, and network authentication. A Raspberry Pi with the wrong time can create strange problems: HTTPS errors, broken package updates, confusing logs, failed cron jobs, and data that looks like it was collected during the Jurassic period.
Accurate Raspberry Pi time becomes even more important in technical projects where events must be compared across devices. Think weather stations, astrophotography rigs, ADS-B receivers, ham radio systems, security cameras, distributed sensors, robotics, industrial monitoring, and offline field deployments. When two devices disagree about time, troubleshooting becomes a detective novel written by a committee.
The Normal Way: Network Time Protocol
The standard method for setting time on a Raspberry Pi is Network Time Protocol, usually called NTP. In modern Raspberry Pi OS and many Linux distributions, time synchronization may be handled by systemd-timesyncd, chrony, or another time service. The idea is simple: your Pi asks trusted time servers what time it is, measures network delay, and gently adjusts its system clock.
NTP Is Good, But the Network Is Noisy
NTP works remarkably well for everyday computing. For web servers, home automation, and typical Linux tasks, internet-based NTP is usually accurate enough. However, network latency is not perfectly symmetrical. A packet may take one route to the server and a slightly different route back. Wi-Fi adds jitter. Routers buffer traffic. Your ISP may have a moment. The internet is wonderful, but it is not a laboratory-grade timing cable.
For most users, this does not matter. Your Pi does not need nanosecond accuracy to water tomatoes. But if you want extreme Raspberry Pi time accuracy, you need a reference that does not depend entirely on unpredictable internet paths.
The Better Way: Add a Real-Time Clock
A real-time clock, or RTC, is a small clock chip that keeps ticking when the Pi is powered off. Some RTC modules use a coin-cell battery. Raspberry Pi 5 includes an onboard RTC that can be battery-backed through its dedicated connector, while older models often need an add-on RTC module connected over I2C.
An RTC solves a very specific problem: it helps the Pi remember the time across shutdowns. That is useful for remote systems, offline loggers, and devices that may boot before the network is available. However, an RTC is not automatically a precision time source. Low-cost RTC chips drift. Temperature changes affect them. A cheap RTC is better than waking up in 1970, but it is not the same as disciplined time from GPS or a laboratory oscillator.
The Extreme Way: GPS Plus PPS
The extreme way to get accurate time on your Pi is to use a GPS or GNSS receiver that provides two things: serial time data and a PPS signal. GNSS is the broader term that includes GPS, Galileo, GLONASS, BeiDou, and other satellite navigation systems. Many hobby guides still say GPS because it is familiar, but modern receivers may use multiple satellite constellations.
What GPS Provides
A GPS receiver can output time and position data through NMEA sentences over serial or USB. These messages tell the Pi the date, time, latitude, longitude, satellite status, and other information. That sounds perfect, but serial messages arrive with delay and jitter. The receiver may know the correct time, yet the exact arrival moment of the text message is not precise enough for extreme synchronization.
What PPS Provides
PPS stands for pulse per second. It is a sharp electrical pulse emitted once per second by many timing-capable GPS modules. The pulse marks the boundary of each second with much higher precision than a serial text message. In plain English: GPS tells the Pi which second it is; PPS tells the Pi exactly when that second starts.
This pairing is what turns a fun weekend project into a serious local time source. The serial data gives absolute time. The PPS signal gives precise alignment. Together, they allow software like chrony to discipline the Pi’s system clock with impressive accuracy.
What You Need for an Extreme Raspberry Pi Time Setup
A typical high-accuracy Raspberry Pi time server setup includes a Raspberry Pi, a GNSS receiver with PPS output, an active antenna with a clear sky view, jumper wires, Raspberry Pi OS or another Linux distribution, gpsd, pps-tools, and chrony. You may also want an RTC battery or module for graceful bootstrapping when satellite lock is not immediately available.
Recommended Hardware
The most important hardware feature is PPS output. Not every USB GPS dongle exposes PPS, and many inexpensive receivers provide only serial NMEA data. For serious timing, choose a module that clearly documents PPS support. Popular options often use u-blox chipsets or dedicated GPS HATs designed for Raspberry Pi projects.
Antenna placement matters more than people expect. GPS receivers need a decent view of the sky. A module sitting in a basement next to a router, power brick, and a mysterious box of cables will not perform like one connected to an active antenna near a window or outdoors. Timing projects reward boring physical details: short wires, clean power, stable temperature, and good signal quality.
Software Stack: gpsd, PPS, and chrony
The usual software stack has three major parts. First, the Linux kernel must see the PPS signal, often through a GPIO pin using the pps-gpio overlay. Second, gpsd reads the GPS receiver and makes location and time information available to other software. Third, chrony uses the GPS and PPS references to steer the system clock.
Using GPIO for PPS
On many Raspberry Pi setups, the PPS wire from the GPS receiver is connected to a GPIO pin, commonly GPIO 18 in many examples. The exact pin is not sacred; what matters is that your configuration matches your wiring. A typical device tree overlay line may look like this:
After rebooting, a working PPS setup often appears as a device such as /dev/pps0. Tools from the pps-tools package can help verify whether the Pi is receiving pulses. If the pulse is missing, do not immediately blame Linux. Check the receiver documentation, voltage levels, wire placement, antenna lock, and whether the module actually outputs PPS only after satellite fix.
Using gpsd
gpsd is the service that reads GPS data from serial or USB devices. It can parse NMEA messages and provide time and position data to clients. For timing, gpsd can work with chrony through shared memory or sockets, depending on configuration. The goal is not merely to display coordinates; the goal is to provide chrony with a usable reference clock.
Using chrony
chrony is widely used because it handles intermittent connectivity, clock drift, and reference clocks well. It can use ordinary NTP servers, GPS time, and PPS. In a robust configuration, internet NTP sources help sanity-check time, GPS provides an absolute reference, and PPS provides precise second alignment.
A simplified chrony configuration may include internet servers, a GPS reference, and a PPS reference. The exact lines vary by distribution and device path, but the concept looks like this:
The important idea is the lock GPS relationship. PPS tells chrony when the second starts, but it does not say which second it is. GPS serial data provides the date and time. Chrony combines them so the system clock can be both correct and precise.
Stratum 1: What It Means and What It Does Not Mean
When your Raspberry Pi uses a directly attached GPS/PPS source, it can operate as a Stratum 1 NTP server. In NTP language, Stratum 0 refers to primary reference sources such as atomic clocks or satellite systems. A server directly synchronized to one of those sources is Stratum 1.
That sounds glamorous, and it is fun to say at parties if your parties are full of network engineers. But Stratum 1 does not automatically mean perfect. The quality of your Pi time server depends on GPS signal quality, PPS capture latency, operating system jitter, hardware stability, configuration, and network delivery to clients. A badly configured Stratum 1 server can be worse than a well-run public NTP server. Precision is earned, not declared.
NTP vs PTP: How Extreme Do You Want to Be?
NTP is excellent for synchronizing computers over normal networks. With GPS/PPS and chrony, a Raspberry Pi can often reach microsecond-level local clock discipline under good conditions. But if you need sub-microsecond or nanosecond-level synchronization across a local network, Precision Time Protocol, or PTP, may enter the conversation.
PTP is designed for high-precision network timing and can benefit from hardware timestamping support in network interfaces. A Raspberry Pi can participate in PTP experiments, and modern projects have explored Raspberry Pi-based PTP grandmaster clocks. However, ordinary Pi Ethernet hardware and software timestamping have limits. For many hobbyists and small labs, GPS/PPS plus chrony is the sweet spot: extreme enough to be impressive, not so extreme that your wallet starts filing complaints.
Security: Do Not Forget Trusted Time
Time is security-sensitive. TLS certificates, logs, authentication systems, databases, and distributed applications all rely on time being sane. Traditional NTP was not designed with strong authentication for every modern threat scenario. Network Time Security, or NTS, improves this by adding cryptographic protection for NTP client-server communication.
If your Pi relies on internet time, consider using reputable sources and avoid mixing random servers without understanding their behavior. Some providers use leap smearing, which spreads a leap second across a window instead of applying it as a sudden step. That can be useful, but you should avoid mixing smeared and non-smeared time sources in the same configuration unless you know exactly what you are doing. Timekeeping is already spicy; do not add mystery sauce.
Common Problems and Practical Fixes
The Pi Does Not See PPS
If /dev/pps0 does not appear, check the overlay configuration, GPIO number, wiring, and reboot status. Confirm that the GPS module outputs PPS at the voltage level your Pi expects. Some modules output PPS only after satellite lock. Use a known-good ground connection. Timing signals are not magic; they still need electrons to behave.
GPS Has No Fix
Move the antenna. Seriously. Many timing problems are antenna problems wearing a fake mustache. Place the antenna near a window or outdoors with a clear sky view. Use an active antenna if your receiver supports it. Check satellite count and signal strength with GPS monitoring tools.
chrony Ignores the GPS Source
Chrony may reject a source if it looks wrong, unstable, offset too far, or not locked to another reference. Check chronyc sources -v and chronyc tracking. These commands show which sources are selected, which are candidates, and whether the clock is stable. Learn to read them; they are the dashboard of your tiny time machine.
USB GPS Timing Is Not Precise Enough
USB introduces additional latency and jitter. A USB GPS receiver can still provide useful time data, but PPS over GPIO is usually preferred for high-accuracy timing on a Raspberry Pi. The serial data can arrive over USB or UART, but the PPS edge should be captured through a proper PPS-capable path when precision matters.
How to Measure Success
Do not assume your setup is accurate because the configuration file looks handsome. Use measurement tools. chronyc tracking shows system clock performance, including offset, frequency, residual frequency, skew, and root dispersion. chronyc sources -v shows the selected sources and their estimated offsets. ppstest /dev/pps0 can confirm pulse capture.
For a well-built Raspberry Pi GPS PPS NTP server, seeing very small offsets and low jitter is realistic. The exact result depends on the Pi model, kernel behavior, load, GPS module, PPS wiring, and environment. Microsecond-class performance is a reasonable goal for hobbyist GPS/PPS builds. Nanosecond claims, however, deserve careful measurement and perhaps a raised eyebrow.
When This Setup Is Worth It
This extreme approach makes sense when accurate time is part of the project, not just a decorative feature. It is useful for remote sensor networks, air-gapped labs, radio timing, local NTP service, logging systems, camera synchronization, scientific experiments, and learning how time synchronization really works.
It is also a fantastic educational project. You learn about Linux device trees, GPIO, serial devices, GPS, PPS, NTP, chrony, drift, jitter, and the difference between “the clock says the right minute” and “the system clock is disciplined against a stable reference.” That is a lot of knowledge from a board that can hide under a sandwich.
When This Setup Is Overkill
If your Pi is online all the time and only runs a dashboard, media server, or simple automation script, normal NTP is probably enough. If you only need the Pi to remember the time between reboots, an RTC may be enough. If your project does not compare timestamps across systems, microsecond-level accuracy may be more trophy than tool.
There is nothing wrong with overkill as long as you know it is overkill. Half the joy of Raspberry Pi projects is doing something absurdly precise with inexpensive hardware and then pretending it was completely necessary.
Best Practices for Accurate Time on Your Pi
Use chrony instead of relying on manual time setting. Add an RTC if your Pi must boot correctly without the network. Use a GPS or GNSS receiver with PPS output for extreme local accuracy. Give the antenna a clear sky view. Keep PPS wiring short and clean. Use stable power. Monitor chrony regularly. Avoid mixing leap-smearing and non-leap-smearing sources. Document your configuration so future-you does not stare at chrony.conf like it was discovered in an ancient cave.
If you serve time to other devices on your LAN, restrict access appropriately. In chrony, use allow rules only for trusted subnets. A home NTP server is great; an accidentally public, misconfigured time server is less great. Network hygiene still applies, even when the project feels like a science fair with better cables.
Experience Notes: Building Accurate Time on a Pi the Extreme Way
The first lesson from building an accurate Raspberry Pi time server is that “almost working” can look exactly like “working” until you check the details. The Pi may show the correct time. GPS may report a fix. chrony may be running. Everything may look calm. Then you inspect the sources and realize chrony is still trusting internet NTP while your shiny PPS signal is sitting unused like a sports car trapped in a garage.
In practice, the best approach is to build the system in layers. Start with ordinary network time and confirm the Pi can synchronize normally. Then connect the GPS receiver and verify that gpsd can read valid NMEA data. Do not rush. Make sure the date, time, satellite count, and fix status look reasonable. After that, enable PPS and confirm the kernel sees pulses. Only when each layer works should you ask chrony to combine them. This method saves hours of circular troubleshooting and several dramatic sighs.
Antenna placement is often the biggest surprise. A GPS module may technically work indoors, but timing quality improves when the receiver has a clean view of the sky. Near a window is better than under a desk. Outdoors is better still. Active antennas can make a big difference, especially when the Pi lives in a rack, cabinet, attic, or workshop. A poor antenna location can create jitter, dropouts, or long startup times, and no amount of editing configuration files will persuade satellites to move closer to your basement.
Wiring also matters. A PPS signal is simple, but it is still a timing signal. Keep the connection short, share a reliable ground, and double-check the GPIO pin number. Many failed setups come from mismatched assumptions: the guide used GPIO 18, the user connected physical pin 18, and the Pi quietly judged everyone. Remember that Raspberry Pi GPIO numbering and physical header pin numbering are not the same thing.
Another real-world lesson is that logs are your friend. Commands like chronyc sources -v, chronyc tracking, cgps, and ppstest turn vague frustration into visible evidence. Instead of saying “time is broken,” you can see whether GPS has a fix, whether PPS pulses are arriving, whether chrony selected the PPS source, and how much offset remains. Accurate timekeeping is less about one heroic command and more about patient observation.
Thermal stability is a subtle factor. Raspberry Pi boards are not oven-controlled oscillators. CPU load, case temperature, and power quality can influence clock behavior. Chrony can compensate for drift, but stable conditions make its job easier. A decent case, reliable power supply, and moderate CPU load help the Pi behave more predictably. You do not need to build a climate-controlled shrine, but maybe do not zip-tie the Pi to a hot power adapter and expect perfection.
Finally, the extreme setup teaches humility. Time sounds simple until you try to make it precise. Then you meet leap seconds, PPS polarity, serial latency, kernel timestamps, oscillator drift, network jitter, and configuration syntax that looks innocent until one missing path ruins your afternoon. But when the pieces click together, it is deeply satisfying. Your Raspberry Pi becomes more than a small Linux board. It becomes a local clock disciplined by satellites, serving accurate time to your network with quiet confidence. That is wonderfully excessive, undeniably useful, and exactly the kind of project that makes Raspberry Pi culture so much fun.
Conclusion
Getting accurate time on your Pi can be as simple as enabling NTP or as extreme as building a GPS-disciplined Stratum 1 time server with PPS and chrony. The right choice depends on your project. For everyday use, internet time is usually fine. For offline boots, add an RTC. For serious timing, GPS plus PPS is the big leap.
The extreme method is not just about bragging rights. It creates a dependable local time source, improves timestamp quality, and teaches valuable lessons about Linux, networking, satellites, and precision systems. It also gives you the rare pleasure of telling people your Raspberry Pi listens to space to know what time it is. Honestly, that alone is worth a little cable management.