

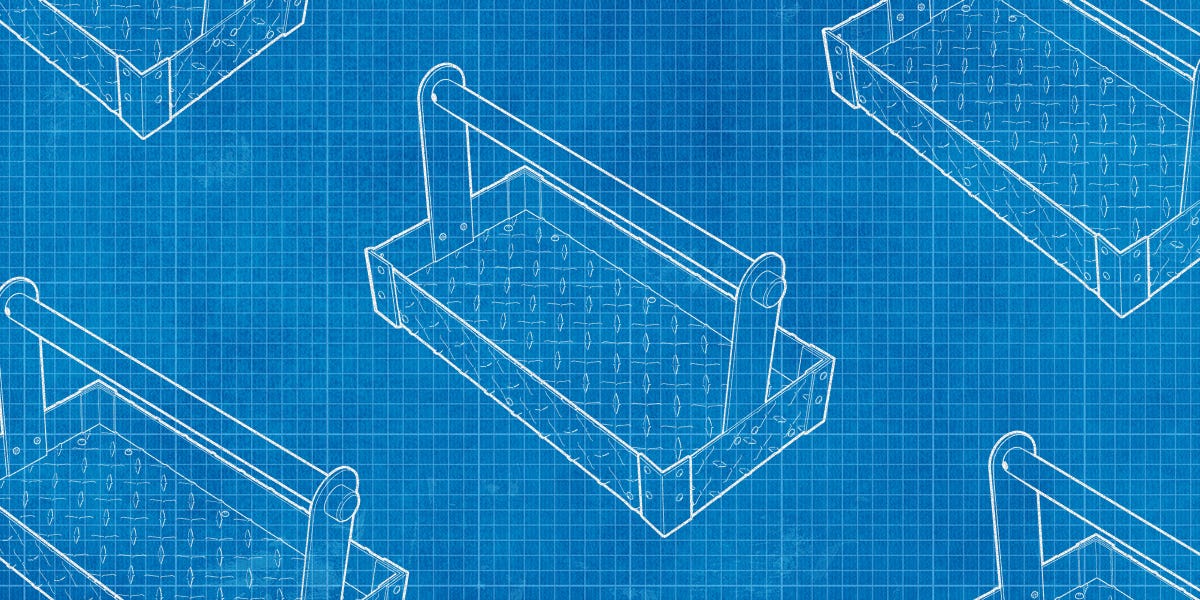
A plastic toolbox is fine until it meets a dropped socket, a hot wrench, a muddy truck bed, or a determined teenager borrowing tools “for just a second.” Then it becomes a lesson in modern materials science. An all-metal toolbox, on the other hand, can take a beating, develop a few honorable scars, and still look ready for work.
This guide shows how to make a compact all-metal toolbox from mild steel sheet, steel rivets, a piano hinge, and a simple steel handle. The result is a durable 20-inch toolbox with a hinged lid, reinforced edges, room for hand tools, and enough personality to make store-bought boxes look suspiciously nervous.
Why Build an All-Metal Toolbox?
A homemade steel toolbox is more than a storage container. It is a useful sheet metal fabrication project that teaches measuring, cutting, bending, drilling, fastening, finishing, and problem-solving. It also gives you a box sized for your actual tools instead of the mysterious assortment imagined by someone in a product-planning meeting.
Steel is a practical choice because it is durable, relatively affordable, easy to drill, and compatible with rivets, bolts, and welding. For a portable toolbox, 18-gauge mild steel is a sweet spot: thick enough to resist dents from normal hand tools, yet still manageable with a brake or a sturdy vise. In practical terms, 18-gauge steel is about 0.048 inch thick, which is substantial enough for a serious shop project without requiring superhero-level forearms.
This design uses steel rivets for the primary assembly, so you do not need to be an expert welder to build it. If you do weld, you can add short stitch welds to selected joints for extra rigidity. The box remains all metal either way.
The Toolbox Design: Compact, Strong, and Easy to Modify
Finished Size
The finished toolbox measures approximately 20 inches long, 8 inches deep, and 9 inches high. The lower body is about 5.5 inches tall, while the lid adds roughly 3.5 inches of height. This size works well for screwdrivers, pliers, measuring tools, a hammer, sockets, drill bits, utility knives, and the collection of mystery fasteners every workshop eventually adopts.
You can scale the design up or down, but resist the urge to make it enormous. A steel toolbox is wonderfully durable, but it can become surprisingly heavy once filled with sockets, pry bars, and enough hardware to rebuild a small bridge.
Materials List
- One sheet of 18-gauge cold-rolled mild steel, at least 24 inches by 36 inches
- One 18-inch steel piano hinge
- Thirty to forty 1/8-inch steel blind rivets
- Small steel washers for rivet backing, if needed
- Two small steel draw latches or one steel hasp and latch
- One 3/4-inch-wide by 1/8-inch-thick steel flat bar for the handle
- Steel machine screws, locknuts, and washers for the handle mounts
- Metal primer and durable enamel or spray paint
- Degreaser or mineral spirits for surface preparation
Tools You Will Need
- Tape measure, steel ruler, square, marker, and center punch
- Sheet metal snips, jigsaw with a metal-cutting blade, bandsaw, or cutoff wheel
- Metal file and deburring tool
- Drill and metal drill bits
- Rivet gun
- Sheet metal brake or a heavy vise with straight clamping bars
- Clamps, locking pliers, and magnets
- Hammer and wood block for minor adjustments
- Optional: MIG or TIG welder for stitch welds
Cut List for the Steel Toolbox
| Part | Quantity | Cut Size | Purpose |
|---|---|---|---|
| Main body blank | 1 | 20 inches × 19 inches | Bottom and two long side walls |
| Body end panels | 2 | 8 inches × 5.5 inches | Closes each end of the lower box |
| Lid blank | 1 | 20.25 inches × 14 inches | Lid top and side skirts |
| Lid end panels | 2 | 8.25 inches × 3 inches | Closes each end of the lid |
| Handle strap | 1 | 11 inches × 3/4 inch × 1/8 inch | Top carrying handle |
Measure every part twice before cutting. Then measure one more time because metal has a delightful way of making small errors permanent. Mark all cut lines with a fine marker or carbide scribe, and use a square to keep every line honest.
Step 1: Choose the Right Steel
Use uncoated cold-rolled mild steel if possible. It has a clean surface, bends predictably, accepts paint well after preparation, and avoids the additional complications of zinc-coated sheet. Galvanized steel may be useful for some projects, but it is not the best choice for a beginner toolbox that may be welded or heavily sanded.
Do not select steel based only on gauge numbers. Different metals can use different gauge charts, so confirm the actual thickness when buying material. For this toolbox, the target is roughly 0.048-inch steel. If you want a lighter-duty box for precision tools or art supplies, 20-gauge steel can work. If you plan to store heavy automotive tools, 16-gauge steel creates a sturdier box, although bending it becomes more demanding.
Step 2: Cut the Main Body and Lid Parts
Cut the main body blank first. This 20-inch by 19-inch rectangle will become the bottom and two long side walls. Next, cut the two body end panels, the lid blank, the lid end panels, and the handle strap.
After cutting, file every edge until it is smooth. This is not glamorous work, but neither is explaining a sheet metal cut to your doctor. A few minutes with a file turns razor-like edges into shop-safe edges and makes the final toolbox feel intentionally built rather than escaped from a medieval armor factory.
Step 3: Add Bend Reliefs and Reinforced Edges
Before bending the body, mark the two long bend lines. Measure 5.5 inches in from each long edge of the 19-inch dimension. The center section between those marks should be 8 inches wide; this becomes the toolbox floor.
At the ends of each bend line, cut small relief slots. These short cuts prevent the steel from puckering, tearing, or bunching as it folds. A narrow relief slot slightly wider than the material thickness is usually enough for a simple project like this.
For extra strength, fold a small hem along the upper edge of each long side wall before forming the final box shape. A hem is simply a narrow fold turned back onto itself. It stiffens the edge, removes a sharp exposed lip, and gives the toolbox a more professional look. Think of it as a tiny steel muscle flexing along the rim.
Step 4: Bend the Main Toolbox Body
Place the main body blank in a sheet metal brake with the first bend line aligned to the bending edge. Bend the first side wall to 90 degrees. Repeat for the second side. You should now have a U-shaped steel channel with an 8-inch-wide bottom and two 5.5-inch-tall sides.
If you are using a vise instead of a brake, clamp the steel between straight, heavy boards or steel bars. Bend gradually along the full length rather than hammering one spot into submission. A wood block and hammer can help refine the bend without leaving dramatic dents that look like the toolbox lost an argument with a golf club.
Check the body with a square. Small inaccuracies are normal, especially on a first build. Correct them now, while the box is still open and cooperative.
Step 5: Attach the End Panels
Position one body end panel against the open end of the U-shaped body. Clamp it firmly so the edges are flush. Mark rivet locations about 3/8 inch from the edge and space them roughly 1.5 inches apart. Drill the holes, deburr them, and install the steel rivets.
Repeat on the opposite end. If the toolbox will hold heavy hand tools, add a small steel washer behind each rivet inside the box. The washers spread the load and help prevent the rivet head from pulling through the steel over time.
At this point, you have the lower toolbox body. It may not look elegant yet, but do not worry. Most good metalwork looks slightly suspicious until the lid, handle, paint, and hardware arrive.
Step 6: Form the Hinged Lid
The lid blank is 20.25 inches long and 14 inches wide. Mark bend lines 3 inches in from each long edge. The center section becomes the 8-inch-wide lid top, while the two outer sections become the side skirts that overlap the lower box.
Bend both lid sides down to 90 degrees. Test-fit the lid over the body. It should slide over the lower section without scraping excessively. If it binds, check whether one side wall is leaning inward or whether the lid skirts need a tiny adjustment.
Rivet the lid end panels in place. Keep the lid square during assembly by clamping it against the toolbox body or a flat work surface. A lid that fits now will save you from years of lifting it at a weird angle while pretending that was part of the design.
Step 7: Install the Piano Hinge and Latch
Place the piano hinge along the rear edge of the toolbox. Mark and drill mounting holes through the hinge and steel. Install steel rivets or small machine screws with locknuts. Rivets provide a clean, permanent appearance; screws make future hinge replacement easier.
Open and close the lid several times before installing the front latches. The lid should move freely, sit flat when closed, and not scrape the body. Once the hinge is behaving, install two small steel draw latches near the front corners. A single center hasp can work, but two latches help the lid pull down evenly.
Step 8: Make and Mount the Steel Handle
Cut an 11-inch length of 3/4-inch steel flat bar. Mark two bend points about 1.5 inches from each end. Bend the ends down to create a U-shaped handle with enough clearance for your fingers.
Mount the handle on top of the lid using two small steel mounting tabs or short steel spacers. Use machine screws, washers, and locknuts. Avoid mounting the handle directly through thin sheet metal without reinforcement; a fully loaded toolbox can turn a weak handle mount into a surprise ventilation opening.
For a stronger handle, place a small steel reinforcement plate under each mounting location inside the lid. This spreads the load and keeps the handle secure when the box is packed with heavy tools.
Step 9: Weld It or Rivet It?
Rivets are enough for a strong, usable toolbox. They are especially helpful for beginners because they create consistent joints without the warping and heat discoloration caused by welding thin sheet metal.
If you want welded seams, use short stitch welds instead of one continuous bead. Weld a small section, move to the opposite side, and let the metal cool naturally between passes. Continuous welding on thin sheet can add too much heat, causing panels to distort or pull out of square.
A good compromise is to rivet the entire toolbox first, then add a few short welds at high-stress corners. This gives the structure extra rigidity while keeping the build controlled. It is also much easier to weld a box that is already clamped, aligned, and mechanically fastened.
Step 10: Prepare and Paint the Steel Toolbox
Clean the entire toolbox thoroughly to remove oil, fingerprints, sanding dust, and metal particles. Degrease the steel, let it dry completely, and lightly scuff smooth areas with fine sandpaper. Paint adheres much better to clean, properly prepared metal than to a surface covered in workshop mystery grease.
Apply a metal primer first, then follow with two or three thin coats of durable enamel. Several thin coats are better than one heavy coat that runs, wrinkles, or becomes a permanent monument to impatience.
For a classic look, use gloss red, deep blue, olive green, charcoal gray, or black. For a shop-ready industrial finish, use satin black with a contrasting handle. For maximum personality, paint it bright yellow so nobody can claim they “couldn’t find the toolbox.”
Optional Upgrade: Add a Removable Metal Tray
A removable steel tray keeps small tools and fasteners from sinking to the bottom of the box like archaeological artifacts. Make a simple tray from 18- or 20-gauge steel with a 6-inch-wide bottom and 1.25-inch-tall sides.
Cut a tray blank approximately 18 inches long by 8.5 inches wide. Bend up the two long sides, then rivet small end panels in place. Add a narrow steel handle across the center. The tray can rest on small steel ledges riveted inside the toolbox body, or it can simply sit on top of larger tools.
Common Mistakes to Avoid When Making a Metal Toolbox
Using Steel That Is Too Thin
Very thin sheet metal is easy to cut and bend, but it can flex, dent, and oil-can under the weight of tools. For a useful portable toolbox, 18-gauge steel offers a practical balance between strength and workability.
Skipping the Deburring Step
Sharp edges make a toolbox unpleasant to use and dangerous to carry. File every cut edge, smooth drilled holes, and cover or hem exposed lips whenever possible.
Drilling Without a Center Punch
Metal drill bits tend to wander on smooth steel. A center punch gives the bit a starting point and helps keep rivet holes aligned. It is a tiny step that prevents surprisingly large amounts of frustration.
Painting Before Test-Fitting the Hardware
Install and test the hinge, handle, and latches before final paint. Otherwise, you may scratch the fresh finish while enlarging holes, repositioning a latch, or discovering that the lid opens in a manner best described as “optimistic but impractical.”
Ignoring Weight Distribution
Store heavier tools low in the box and distribute them evenly. A toolbox packed with heavy sockets on one side can twist the handle, strain the lid, and make carrying it feel like negotiating with a very stubborn bowling ball.
Experiences and Lessons From Building an All-Metal Toolbox
The first lesson most builders learn is that a toolbox looks simple only from a distance. It is basically a rectangular box with a lid, which sounds about as complicated as a sandwich. But once sheet metal enters the chat, every measurement, bend, and hole starts affecting the next step. A side wall that is only slightly off-square can make the lid bind. A hinge mounted a little too high can make the lid sit proud. A rivet drilled one-eighth of an inch off center can suddenly become the boss of the entire project.
The good news is that this is exactly why the project is rewarding. A steel toolbox gives immediate feedback. If your bends are accurate, the panels line up. If your cuts are clean, the rivets sit neatly. If your handle mounts are reinforced, the lid does not flex every time you pick up a box full of sockets. There is no hiding from the material, but there is also no mystery. Steel tells you what it needs, usually through a combination of visible gaps, strange noises, and the occasional stubborn refusal to fit where you planned.
Another common experience is discovering that the most satisfying part is not welding. New metalworkers often imagine sparks flying and heroic weld beads appearing in slow motion. In reality, much of the quality comes from the quiet work: marking accurately, clamping parts square, filing edges, cleaning surfaces, and checking the lid before adding hardware. Welding can strengthen a joint, but careful fit-up is what makes the toolbox look deliberate instead of rescued from a recycling bin.
Builders also learn that rivets deserve more respect than they usually get. Rivets are fast, strong, clean, and less likely to warp thin steel than a long weld bead. A well-riveted toolbox can handle everyday workshop use for years, especially when the rivet spacing is even and high-stress areas receive backing washers or reinforcement plates. The trick is to keep the work clamped tightly while drilling. Loose panels create crooked holes, and crooked holes are the sort of thing that can make a straight line feel personally insulting.
Finishing the toolbox often changes the entire experience. Before paint, it may look like a useful but slightly grumpy steel container. After primer, hardware, and a few clean coats of enamel, it starts looking like an object you would actually want to keep. Paint does more than add color; it protects the steel from moisture, fingerprints, garage humidity, and the occasional beverage placed too close to a workbench. A painted toolbox also makes it easier to spot missing tools, especially when the interior is a lighter color than the outside.
Finally, the most memorable part of building a metal toolbox is using it after it has earned a few dents. A store-bought box arrives perfect and stays precious for a while. A handmade all-metal toolbox begins as a project, then becomes a working object. Every scratch, repair, repaint, extra hook, added divider, and replaced latch turns it into something more useful. It becomes less like a product and more like part of the workshop. That is the real goal: not a flawless box, but a tough one that keeps showing up for work.
Conclusion
Making an all-metal toolbox is a practical way to turn sheet steel into something durable, useful, and genuinely personal. Start with 18-gauge mild steel, keep the design simple, reinforce the edges, use rivets for predictable assembly, and add stitch welds only where they make sense. Take your time with measuring, deburring, hinge alignment, and surface preparation.
The final result will not be a disposable container. It will be a solid steel toolbox built around your tools, your workspace, and your preferred level of organized chaos. And years from now, when the paint is chipped and the corners are scarred, it will still be doing exactly what a toolbox is supposed to do: carrying the tools that fix everything else.