

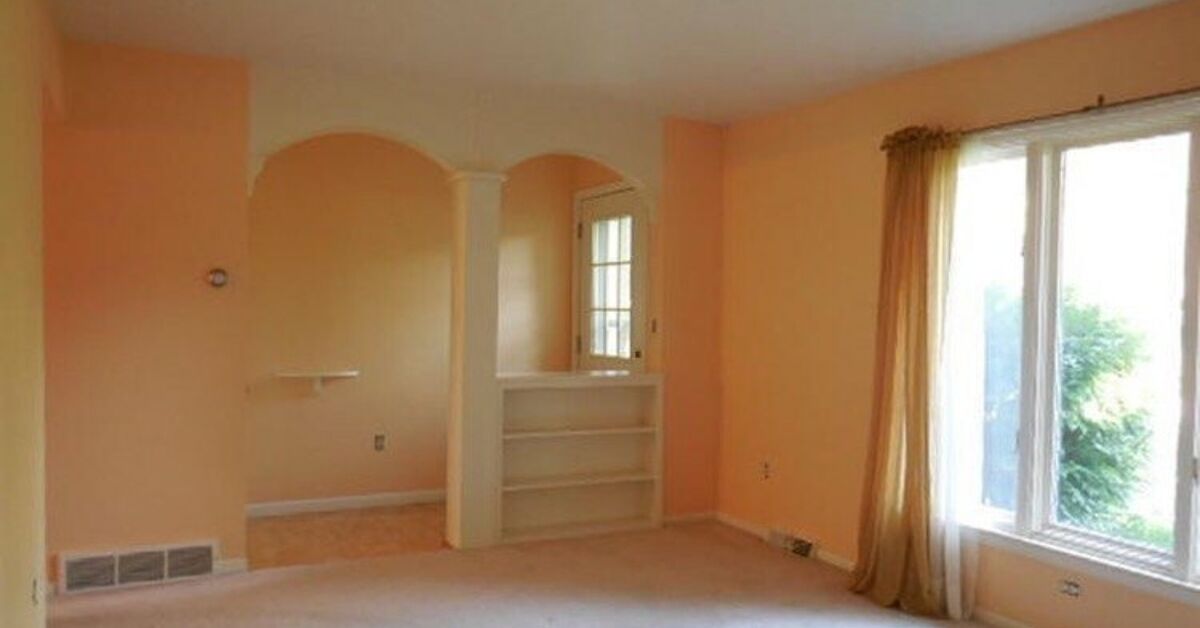
An ordinary entryway can become a memorable architectural feature with little more than paint, a sponge, and a willingness to embrace imperfect rectangles. DIY faux brick arches bring warmth and character to a hallway without the cost, dust, or structural complications of installing real masonry. Better yet, no wheelbarrow is required.
This detailed guide explains how to plan the arch, create convincing brick shapes, layer realistic colors, and finish the design so it looks intentional rather than like a collection of reddish postage stamps. The method works on drywall, plaster, and previously painted interior walls in good condition.
Why Paint Faux Brick Arches in an Entryway?
An entryway sets the tone for the rest of a home, but it is often treated as a pass-through space. A painted brick arch visually defines the opening, emphasizes existing curves, and introduces an old-world architectural detail without taking up floor space.
Unlike brick veneer or faux brick panels, a painted treatment adds almost no thickness. That makes it especially useful around narrow openings, trim, switches, corbels, or doorways where bulky materials could look awkward. Paint is also easier to change later. If your future self suddenly develops a passion for minimalist white walls, the bricks can be primed and covered.
The project is budget-friendly, too. Many homeowners can complete one or two arches using sample-size paint containers left over from other rooms. The largest investment is usually time, especially if every brick is painted by hand.
Choose the Right Faux Brick Style
Before opening a paint can, decide what kind of brick belongs in your home. Matching the finish to the architecture and nearby materials makes the result feel built-in rather than pasted on.
Traditional red brick
Combine brick red, burnt orange, deep brown, and small amounts of charcoal. This palette works well with warm wood floors, vintage furniture, dark metal fixtures, and traditional interiors.
Soft aged brick
Use muted terracotta, clay, beige, and dusty brown over warm gray or cream mortar. Lightly veil the finished bricks with diluted off-white paint for a worn, limewashed appearance.
Modern neutral brick
Choose taupe, greige, putty, mushroom, or soft charcoal. Keeping the contrast low produces texture without turning the arch into the visual equivalent of someone shouting from the foyer.
Painted white brick
Start with medium-gray mortar and build the bricks with layered whites, ivory, and pale gray. The subtle shifts in value are important; one solid white will look more like a stencil than masonry.
Tools and Materials
Gather everything before beginning so you are not wandering through the house with wet paint on one hand and a tape measure in the other.
- Interior wall paint in a mortar color
- Three to five coordinating brick colors
- Primer, if required by the wall condition
- Natural sea sponge or dense household sponges
- Two-inch angled paintbrush and small artist brushes
- Small foam roller and paint tray
- Low-adhesion painter’s tape
- Tape measure, pencil, level, and flexible ruler
- String, a pushpin, or a homemade cardboard compass
- Cardboard for a brick template
- Paint sample cups or disposable plates
- Drop cloths and clean rags
- Spackling compound, putty knife, and fine-grit sandpaper
- Gloves and appropriate eye or respiratory protection
Flat or matte paint usually creates the most convincing masonry finish because real brick does not shine like a freshly waxed car. Eggshell is a practical alternative in a busy entryway because it is easier to wipe clean. Avoid high-gloss paint unless glamorous, light-reflecting bricks are genuinely part of the plan.
How to Paint DIY Faux Brick Arches Step by Step
1. Study the entryway and create a plan
Photograph the opening straight on and sketch the proposed brick border over the image. Decide whether the treatment will cover only the face of the arch, wrap into the opening, continue down both sides, or spread onto the surrounding wall.
A border that is approximately one brick deep creates a subtle frame. Two or three brick courses make a stronger architectural statement. If the arch already has decorative corbels or detailed trim, leave enough breathing room so the features do not compete.
Choose a brick size that suits the opening. A practical painted brick might measure approximately 7 to 8 inches long and 2½ to 3 inches high, with mortar gaps between ⅜ and ½ inch. These are design guidelines, not masonry law. Slight variations often improve realism.
2. Test the palette away from the wall
Paint a small sample on poster board or scrap drywall. Apply the mortar color first, then test the brick colors using the same sponge and pressure intended for the final project.
Examine the sample in morning, afternoon, and artificial light. Entryways can be darker than paint stores, and a cheerful orange sample may become alarmingly pumpkin-like after sunset. Adjust the palette before committing to dozens of bricks.
3. Prepare the wall
Move furniture away from the work area and protect the floor. Remove switch plates if necessary, and tape adjacent trim, baseboards, and fixtures.
Clean the wall with warm water and a mild detergent, particularly around a frequently touched doorway. Rinse away cleaner residue and let the surface dry completely. Fill nail holes, dents, and cracks with spackling compound. Once dry, sand repairs smooth and remove the dust.
Prime patched, porous, stained, or glossy surfaces with a compatible interior primer. Sound paint with a similar sheen may not require a full primer coat, but follow the instructions for the products being used.
4. Apply the mortar-colored base coat
Paint the entire area that will contain the faux bricks with the selected mortar color. Cut in along edges with an angled brush, then use a small roller on broader surfaces. Two thin coats usually look smoother than one heroic, dripping coat.
Allow the base coat to dry for the full time listed on the paint label. If tape will be applied over fresh paint, wait until the coating has cured enough to resist lifting. Use tape designed for delicate or recently painted surfaces.
5. Mark the arch outline
For an existing curved opening, measure an even distance from the edge at several points and connect those marks with a light pencil line. A flexible ruler makes this easier.
If creating the illusion of an arch on a flat wall, mark the desired center point. Attach a pencil to a length of string anchored at that point, pull the string taut, and draw the curved top like an oversized compass. Use a level to extend both sides vertically toward the floor.
Step back frequently and examine the outline from the front door and adjoining room. A mathematically respectable arch can still look visually crooked if the surrounding walls or floor are slightly out of square.
6. Plan the brick pattern
Create a cardboard template for one full brick and another for a half brick. Arrange the pattern in a running bond, meaning each row is offset from the row below. This familiar layout prevents long vertical mortar seams and immediately reads as brickwork.
Along the curved section, imagine wedge-shaped mortar joints radiating from the center of the arch. The bricks may narrow slightly toward the inside curve and widen toward the outside. Perfectly parallel rectangles wrapped around a tight curve rarely look convincing.
Mark bricks lightly in pencil, beginning at the most visible center point and working outward. Adjust the sizes near corners rather than ending with a tiny, awkward fragment.
7. Build a believable brick color mixture
Pour small amounts of the brick colors onto separate plates. Keep them close enough for easy blending but do not stir everything into one uniform shade. Real masonry contains mineral streaks, fired edges, dark spots, and color variation.
Dampen the sponge with water and wring it thoroughly. It should feel flexible, not drippy. Tear or trim the sponge to approximately the size of the brick template, leaving an irregular edge. A perfectly manufactured rectangle produces a suspiciously manufactured wall.
8. Sponge on the first bricks
Load the sponge lightly with the dominant brick color. Blot it on cardboard to remove excess paint, then press it onto the wall without sliding. Lift straight away. Leave the base coat visible around each brick to form the mortar joints.
Vary the pressure and paint coverage. Some bricks can be darker along one edge; others can have pale centers or broken corners. Rotate the sponge occasionally so the same texture does not repeat like a stamp.
Work from the top downward in manageable sections. Keep a damp cloth nearby for quick corrections, but do not obsess over every imperfect edge. Genuine old brick has spent decades collecting chips and personality.
9. Shape bricks around the curve
Use the sponge for the broad center of each curved brick, then refine the tapered sides with a small brush. Keep the mortar gaps reasonably consistent while allowing them to widen slightly toward the outer radius.
On a deep opening, wrap selected bricks around the corner instead of ending every shape at the edge. Continuing the color onto the return makes the painted treatment appear thicker and more dimensional.
10. Add highlights, shadows, and age
Once the first layer is dry, dab a lighter terracotta or beige onto selected bricks. Add dark brown or charcoal sparingly near edges, corners, and random pits. Blend while the accent color remains workable.
For an aged finish, dry-brush a small amount of the mortar color across several brick faces. Another option is a thin off-white glaze blotted unevenly with a clean sponge. Stop before every brick receives identical treatment; controlled inconsistency is the secret ingredient.
Create subtle depth by adding a narrow shadow beneath some bricks and a faint highlight along their upper edges. Keep these details soft. Thick black outlines can send the project directly into Saturday-morning-cartoon territory.
11. Remove tape and correct the details
Remove painter’s tape carefully after the final coat, following the paint and tape manufacturers’ timing recommendations. Pull slowly at approximately a 45-degree angle. If dried paint bridges the edge, lightly score the seam with a sharp utility knife before pulling.
Use a small artist brush and the mortar base color to sharpen fuzzy gaps, separate joined bricks, and correct obvious smears. Do not redraw every edge. The goal is believable masonry, not a spreadsheet with grout.
12. Let the finish cure
Paint may feel dry before it has fully cured. Avoid scrubbing, hanging decorations, or pressing furniture against the new finish until the coating has hardened according to its label.
A clear topcoat is usually unnecessary on an interior decorative wall. If the arch receives frequent contact from bags, coats, pets, or enthusiastic children, consider a compatible water-based matte protective finish. Test it first because sealers can alter the sheen and color.
Common Faux Brick Painting Mistakes
Making every brick identical
Uniform size is useful, but identical texture, color, and damage make the pattern look printed. Rotate the sponge, skip accent colors occasionally, and vary the strength of each impression.
Using too many unrelated colors
Variation creates realism; chaos creates confetti. Begin with one dominant brick tone, one lighter version, one darker version, and a small accent color. Mix neighbors from the same warm or cool family.
Ignoring the arch geometry
Bricks across the curved top should visually follow the arch. Radiating joints and gently tapered shapes make the structure appear plausible, even though its load-bearing responsibilities are exactly zero.
Loading the sponge with too much paint
An overloaded sponge creates blobs, drips, and filled mortar gaps. Use thin layers and blot before touching the wall. Additional color is easy to add; removing a squishy red rectangle from fresh mortar paint is less delightful.
Judging the work from six inches away
The finished arch will normally be viewed from several feet away. Step back after every few bricks. Close inspection helps with edges, but distance reveals balance, rhythm, and whether one dark brick has accidentally become the star of the show.
How to Style the Finished Entryway
Let the painted arch remain the main feature. A narrow console table, simple mirror, woven runner, or small wall sconce can support the architecture without overcrowding it.
Repeat one or two brick colors elsewhere in the entryway through pottery, wood, leather, or textiles. Black hardware provides crisp contrast with red or neutral brick, while aged brass complements warm terracotta.
Good lighting matters. A warm bulb enhances traditional clay colors, while neutral lighting is often better for gray or whitewashed brick. If the painted texture looks flat, place a lamp where gentle side lighting can emphasize the color variation.
Experience-Based Lessons From Painting Faux Brick Arches
The most common surprise with this project is how unimpressive it looks halfway through. The first dozen bricks may resemble random sponge marks floating on a wall. That awkward stage is normal. The pattern begins to make sense only after several courses establish rhythm and the darker and lighter details connect the composition.
Testing on cardboard saves more time than it consumes. It reveals whether the sponge is too wet, the brick color is too saturated, or the mortar gap is too narrow. A test panel also teaches the amount of pressure required. Light pressure creates an aged, porous impression, while heavy pressure produces a more solid modern brick.
Curves are slower than straight sections. On vertical sides, a template can establish a comfortable pace. Across the top of an arch, however, each brick may need a small adjustment. The best experience comes from treating the template as a guide instead of a commandment. A few custom shapes around the crown usually look better than forcing identical rectangles into an unwilling curve.
Color often becomes stronger as the wall fills. A rust shade that seems tasteful on three bricks may dominate once repeated fifty times. Begin with restrained color, especially in a small foyer. Dark accents should be added last and in small quantities. It is remarkably easy to create more drama; convincing a dramatic wall to calm down requires another coat of paint.
Small flaws are useful, but they need to appear random. Repeating the same chipped corner on every brick exposes the sponge pattern. Rotating the applicator and occasionally using a brush prevents obvious duplication. It also helps to work on nonadjacent bricks instead of finishing one perfect row at a time.
Another practical lesson is to protect more floor than seems necessary. Sponging involves tapping, turning, and moving between several paint colors. Tiny droplets travel with the confidence of seasoned explorers. A wide drop cloth and organized paint station prevent the entryway floor from receiving its own unauthorized faux finish.
Breaks improve the result. After an hour of concentrating on mortar gaps, the eye stops noticing imbalance. Leaving the room for ten minutes and returning through the front door provides a fresh view. Photographs are useful, too; asymmetry and overly dark areas often become more obvious on a phone screen.
Touch-ups should be selective. Refining every fuzzy edge can erase the handmade texture that makes painted brick believable. Correct distracting problemsjoined bricks, obvious drips, crooked rows, or one strangely enormous jointand allow minor variations to remain.
Finally, the most satisfying part of the project is its flexibility. A realistic result does not require formal art training or expensive specialty products. It requires patient layering, frequent observation, and the confidence to let a few bricks be wonderfully imperfect. Once the tape comes off and the furniture returns, the entryway gains the warmth of old masonry without losing a single inch to actual construction.
Frequently Asked Questions
Can faux brick be painted over later?
Yes. Clean the surface, lightly sand raised or glossy areas if necessary, apply a suitable primer, and repaint the wall. Deep texture may require additional preparation, but a flat sponge-painted pattern is relatively easy to cover.
Should the mortar be lighter or darker than the bricks?
Traditional mortar is often lighter than red brick, but medium-gray mortar can create attractive contrast with white or neutral bricks. Select the mortar color as part of the complete palette rather than treating it as an afterthought.
How long does the project take?
A small arch can often be completed over a weekend. Surface preparation and the mortar base coat may require the first day, followed by layout, brick painting, and detail work on the second. Product drying and curing times can extend the schedule.
Can this technique work on a rectangular doorway?
Absolutely. Use the same running-bond pattern along the sides and create horizontal or vertical brickwork across the top. The method can also frame mirrors, niches, windows, and decorative wall arches.
Conclusion
Painting DIY faux brick arches is an approachable way to give an entryway architectural warmth without installing heavy masonry or permanent panels. Careful preparation establishes a durable foundation, while thoughtful layout keeps the brick pattern aligned with the curve. From there, realistic results come from layered color, gentle sponge pressure, varied edges, and the discipline to stop before the details become overworked.
Plan the design, test the palette, and accept a little irregularity. Real brick has character because it is not perfect, and your painted version should be allowed the same privilege.