

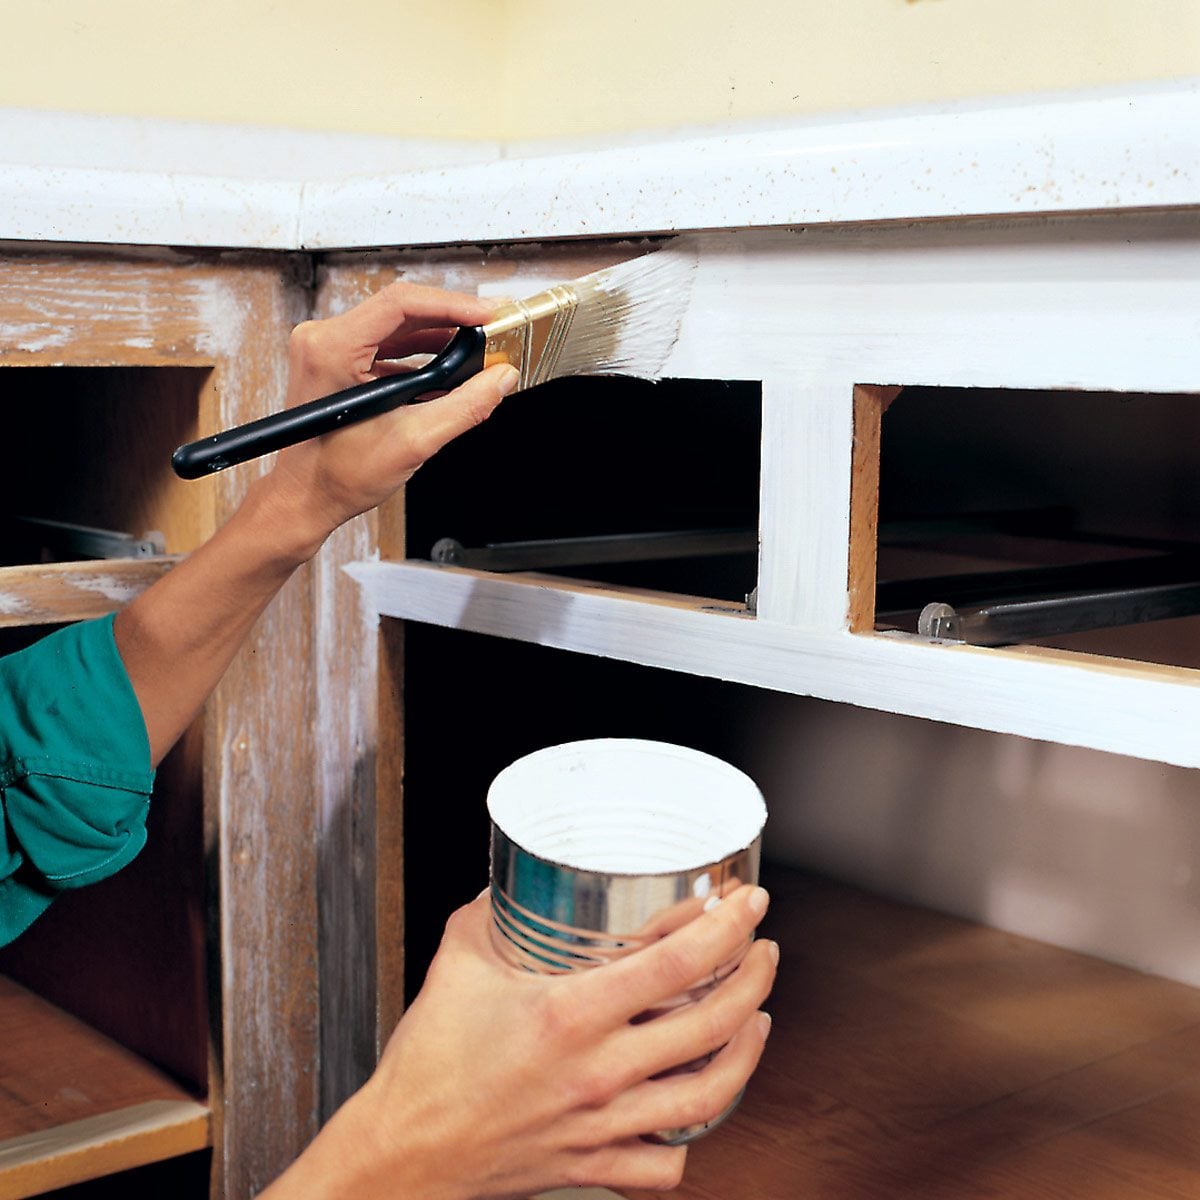
Painting kitchen cabinets can transform a tired kitchen without the demolition dust, contractor parade, or financial heartburn of a full remodel. The catch is that cabinets are not oversized walls. They are hard-working surfaces that endure greasy fingerprints, cooking steam, flying utensils, and the occasional drawer closed with a hip because both hands are holding tacos.
A durable cabinet finish depends far more on preparation than artistic talent. Clean surfaces, compatible primer, cabinet-grade paint, thin coats, and realistic curing time separate a polished makeover from paint that peels around the handles six weeks later. These tips for painting kitchen cabinets explain how to plan, prepare, paint, and protect your cabinetry for professional-looking results.
Decide Whether Your Cabinets Are Good Candidates for Paint
Paint can refresh structurally sound cabinets, but it cannot repair a poor layout, failing boxes, water damage, or doors that are coming apart. Before buying supplies, inspect hinges, shelves, drawer slides, joints, and areas around the sink. Repair loose components and replace swollen or crumbling panels.
Solid wood, wood veneer, medium-density fiberboard, and many laminate cabinets can be painted when prepared correctly. Each material needs a slightly different approach. Wood usually accepts a bonding or stain-blocking primer well. MDF must be protected from excessive moisture, especially along raw edges. Laminate requires thorough cleaning, gentle scuffing, and a high-adhesion bonding primer.
Thermofoil deserves special attention. If its plastic film is tight and undamaged, certain adhesion-promoting systems may work after a test. If the film is lifting, bubbling, or peeling, painting over it is unlikely to produce a reliable finish. Remove the failing film, replace the doors, or consult a refinishing professional rather than asking primer to perform a small miracle.
Choose Cabinet Paint for Durability, Not Just Color
Use a cabinet, door, or trim enamel
Ordinary wall paint may look attractive at first, but cabinet doors repeatedly touch frames, hands, dishes, and cleaning cloths. Choose a coating specifically labeled for cabinets, furniture, doors, or trim. Quality waterborne acrylic-alkyd and urethane-reinforced enamels are popular because they level better than typical wall paint and develop a harder, washable surface.
Traditional oil-based enamel can create a tough, smooth finish, but it generally has stronger odors, slower cleanup, and a greater tendency to yellow over time. Modern water-based cabinet enamels offer easier cleanup and lower odor while still providing impressive durability. Product formulas differ, so use the manufacturer’s recommended primer, application temperature, recoat interval, and curing instructions.
Select a practical sheen
Satin and semi-gloss finishes are common choices for painted kitchen cabinets. Satin offers a softer appearance and disguises small imperfections more effectively. Semi-gloss reflects more light and is usually easier to wipe clean, although it also gives dents, grain, and sanding scratches a little stage lighting.
Flat and matte finishes are less suitable for busy cabinetry because they can be harder to clean. High-gloss paint can look dramatic and luxurious, but it requires nearly flawless surface preparation. For most DIY cabinet painting projects, satin or semi-gloss provides the best balance of appearance, washability, and forgiveness.
Test the Color in the Actual Kitchen
A paint chip viewed beneath store lighting is a suggestion, not a binding contract. Cabinet colors interact with countertops, flooring, backsplashes, appliances, wall paint, and natural light. A white with cool undertones may look clean beside marble but strangely blue next to cream tile. Deep green can feel elegant in daylight and nearly black after sunset.
Apply samples to large movable boards and observe them near upper and lower cabinets throughout the day. Check the color under every permanent light source. If possible, paint the back of one door using the complete primer-and-paint system. This test reveals not only the color but also the sheen, texture, adhesion, and drying behavior.
Keep the long view in mind. Neutral whites, warm grays, taupes, muted blues, and earthy greens tend to coordinate with many finishes. Bold colors can be excellent when chosen intentionally. Your kitchen does not need to dress for an imaginary future buyer every morning, but it should still be a color you will enjoy after the trend cycle moves on.
Gather the Right Cabinet-Painting Supplies
A well-organized work area reduces delays and prevents improvisations such as using a cereal bowl as a paint tray. Depending on the cabinet material and application method, useful supplies include:
- Degreasing cleaner compatible with the cabinet surface
- Sponges, microfiber cloths, and clean rinse water
- Screwdriver or drill with appropriate bits
- Painter’s tape, numbered labels, and resealable hardware bags
- Drop cloths, masking paper, plastic sheeting, and rosin paper
- Wood filler, a putty knife, and paintable caulk where appropriate
- 150- to 220-grit sanding paper or sanding sponges
- A vacuum with a fine-dust or HEPA-rated filter
- Compatible bonding or stain-blocking primer
- Cabinet-grade enamel paint
- A quality angled synthetic brush and smooth-finish mini rollers
- Paint trays, strainers, stir sticks, and door supports
- Gloves, eye protection, and label-specified respiratory protection
Buy high-quality brushes and rollers. A bargain roller that sheds fuzz into wet enamel can make a cabinet door resemble a freshly painted peach. For smooth doors, many painters favor dense foam or short-nap microfiber rollers. Test the roller with the selected coating because some foam products can introduce bubbles.
Prepare the Kitchen Before Opening the Paint
Create a door and hardware map
Remove doors, drawer fronts when possible, knobs, pulls, hinges, and rubber bumpers. Number every door and opening from left to right and top to bottom. Place each door’s hardware in a labeled bag. Even apparently identical doors can fit slightly differently after years of adjustment.
Write the identification number in the hinge recess or another hidden location, then cover it with painter’s tape before coating. A quick cabinet diagram provides additional insurance. Without a labeling system, reassembly becomes a home-improvement version of speed dating: many possible matches, surprisingly little chemistry.
Protect everything that is staying put
Empty the cabinets if dust could enter them. Cover countertops, floors, appliances, sinks, and backsplashes. Mask cabinet interiors if they are not being painted. Establish a separate, clean area where doors can lie flat while primer and enamel level and dry.
Good ventilation is essential. Open appropriate windows, create outward airflow, and follow every warning on cleaners, primers, coatings, and solvents. The U.S. Environmental Protection Agency recommends increased ventilation when using VOC-emitting products. Keep children and pets away from the work and drying areas.
Clean Before You Sand
Kitchen cabinets collect an invisible mixture of grease, smoke residue, dust, polish, and cooking aerosols. Sanding a greasy surface can grind contamination into the old finish and clog the abrasive. Clean first, rinse as directed, and allow every component to dry completely.
Pay particular attention to areas around pulls, above the range, below the sink, and near trash or recycling cabinets. Change cleaning cloths frequently rather than moving dissolved grease from one door to another. Avoid leaving cleaner residue because primer needs contact with the cabinet surface, not a thin layer of scented chemistry.
If the home or painted cabinetry may date from before 1978, do not begin uncontrolled sanding. Renovation can create hazardous lead dust. The EPA recommends lead-safe practices and qualified help for projects involving possible lead-based paint.
Scuff-Sand and Repair the Surfaces
Most sound finishes do not need to be stripped to bare wood. They do need to be dulled so the primer can grip. Lightly scuff-sand doors, drawer fronts, face frames, and exposed cabinet sides. A 150- or 180-grit abrasive is often useful for initial scuffing, while 220 grit works well for smoothing primer or refining repairs. Follow the coating manufacturer’s recommendations.
Sand evenly and avoid rounding sharp profiles or cutting through thin veneer. Use a sanding sponge on molded details and recessed panels. Vacuum thoroughly, then wipe away remaining dust with a clean, slightly damp microfiber cloth or another method approved for the coating system.
Fill dents, unwanted hardware holes, and deep scratches with a compatible filler. Let it dry, sand it flush, and spot-prime as necessary. Caulk narrow stationary gaps where cabinet boxes meet walls or trim, but do not caulk joints that must move or doors that need operating clearance.
Use the Correct Primer
Primer improves adhesion, creates a consistent base, and can prevent stains or wood tannins from discoloring the finish. A high-adhesion bonding primer is important for slick surfaces such as laminate and glossy factory finishes. A stain-blocking primer may be needed for knotty wood, heavily stained cabinets, or woods prone to tannin bleed.
Apply a thin, uniform coat. Use an angled brush in corners and detailed profiles, followed immediately by a smooth-finish roller on broad areas. On wood, finish brush strokes in the direction of the grain. Avoid heavy buildup in panel corners, hinge recesses, and decorative grooves.
After the primer has dried for the specified time, inspect it under angled light. Sand dust nibs, raised grain, ridges, and small drips with fine-grit paper. Vacuum and wipe the surfaces again. Primer is not merely an undercoat; it is your final opportunity to correct the surface before the color coat makes every flaw official.
Apply Thin, Controlled Coats of Cabinet Paint
Brush and roller method
Begin with the backs of cabinet doors so any early learning experiences remain less visible. Paint recessed areas and profiles with an angled brush, then roll flat sections while the brushed paint is still wet. Work from the center toward the edges and inspect corners for pooling.
Do not repeatedly brush paint that has begun to set. Many cabinet enamels are formulated to level as they dry, and excessive touching can leave ridges. Maintain a wet edge, use long finishing strokes, and resist the urge to apply one heroic coat. Two thin coats are usually smoother and stronger than one thick layer with ambitious career goals.
Spray application
A properly adjusted sprayer can produce a factory-like finish, particularly on flat doors. It also demands more masking, ventilation, practice, and control of airborne overspray. Strain the coating, use the equipment and tip recommended for that product, and practice on scrap material before approaching a cabinet door.
Spraying inside an occupied kitchen can spread paint mist far beyond the immediate work area. If adequate containment, ventilation, protective equipment, and technical experience are unavailable, use a quality brush and mini roller or hire a professional finisher.
Respect Drying, Recoat, and Curing Times
“Dry to the touch” does not mean ready for hinges, cleaning, or a wrestling match with a mixing bowl. Paint dries as surface moisture or solvent leaves, but curing is the slower process through which the coating develops hardness and adhesion.
Wait the full labeled recoat time before applying another layer. Temperature, humidity, color, coat thickness, and airflow can extend the schedule. Some cabinet enamels require many hours between coats, while complete curing may take days or weeks. For example, Benjamin Moore advises avoiding heavy abrasion or cleaning during the early hardening period.
When the final coat has dried sufficiently, reinstall doors carefully and add new rubber or felt bumpers. Tighten hardware without crushing the fresh finish. Leave doors and drawers slightly open when practical, and treat the cabinets gently throughout the manufacturer’s stated curing period.
Common Kitchen Cabinet Painting Mistakes
- Skipping degreasing: Paint cannot bond reliably through cooking residue.
- Painting over damage: Loose veneer and swollen MDF need repair or replacement first.
- Forgetting labels: Doors and hinges may not return neatly to random openings.
- Using wall paint: Cabinets need a harder, more washable coating.
- Applying thick coats: Heavy paint sags, pools, stays soft longer, and obscures details.
- Rushing reassembly: Fresh surfaces can stick together or receive permanent hardware marks.
- Ignoring dust: Sawdust, pet hair, and lint become highly visible beneath smooth enamel.
- Skipping a test door: Compatibility problems are cheaper to discover on one hidden surface.
Practical Experiences and Lessons From Cabinet-Painting Projects
Experience 1: Preparation usually takes longer than painting
A common first-time assumption is that most of the weekend will involve happily rolling on color. In practice, the longest stages are labeling, disassembly, cleaning, sanding, masking, repairing, and removing dust. The actual painting can feel almost suspiciously brief.
One practical lesson is to divide the project into phases rather than dismantling the kitchen on Friday evening and expecting brunch-ready cabinets by Sunday. Use the first session for mapping, cleaning, and repairs. Prime during the next suitable work period, then reserve separate days for finish coats and reassembly. A longer schedule is less glamorous, but it greatly reduces fingerprints, dents, and emergency pizza consumption.
Experience 2: A test door can save the entire kitchen
Consider a homeowner painting glossy oak cabinets with a pale neutral enamel. A small test on the back of a door might reveal brown discoloration moving through ordinary primer. That is useful information before thirty cabinet fronts receive the same treatment. Switching to an appropriate stain-blocking primer at the test stage costs little compared with sanding and repainting an entire kitchen.
The test also exposes technique problems. If the roller creates bubbles, try a different roller or adjust the amount of paint. If brush marks remain, confirm the correct brush type and avoid overworking the coating. If paint scratches off after the specified drying period, investigate cleaning, sanding, primer compatibility, and cure time before continuing.
Experience 3: Door orientation changes the quality of the finish
Painting doors horizontally makes it easier for self-leveling enamel to settle smoothly and reduces the risk of runs. Raised supports allow the edges to be coated without gluing the door to the worktable. Painting the backs first also protects the most visible faces from beginner mistakes.
However, horizontal painting requires enough clean drying space. Stacking doors too soon can imprint the finish or make painted surfaces stick together. A simple drying rack, temporary shelves, or carefully spaced supports often improves the workflow more than an expensive new brush.
Experience 4: More paint does not create a smoother coat
When the first coat looks patchy, a beginner may load the roller heavily and attempt to make the door perfect immediately. The result is often a ridge along the edge, a sag below the recessed panel, or a thick corner that remains soft long after the flat areas have dried.
The better response is patience. The first coat establishes coverage; the next coat builds color and uniformity. Thin layers dry more predictably and preserve door details. A light sanding between coats can remove dust nibs and minor texture, but sanding should refine the finish, not become an archaeological dig through every layer.
Experience 5: The final 10 percent requires the most restraint
Freshly painted cabinets look finished before they are ready for normal life. This is the moment when enthusiasm can cause damage. Reinstalling pulls too aggressively may twist them into soft paint. Closing doors can create sticking points. Scrubbing a cooking splash during the curing period can burnish or remove the new coating.
Plan a gentle return to service. Use clean hands, attach bumpers, avoid harsh cleaners, and keep wet towels away from newly painted edges. Once the coating has fully cured, clean it with mild products and a soft cloth unless the paint manufacturer recommends otherwise. That final stretch of patience protects all the unphotogenic preparation that made the transformation possible.
The lasting lesson
The most reliable tip for painting kitchen cabinets is simple: treat the project as refinishing, not casual decorating. A beautiful color gets attention, but adhesion, cleanliness, thin coats, and curing time determine whether the result still looks good after thousands of openings and closings. Prepare carefully, test the full system, follow each product label, and let the finish harden before returning the kitchen to active duty. Your cabinetsand the person who cleans themwill be grateful.