

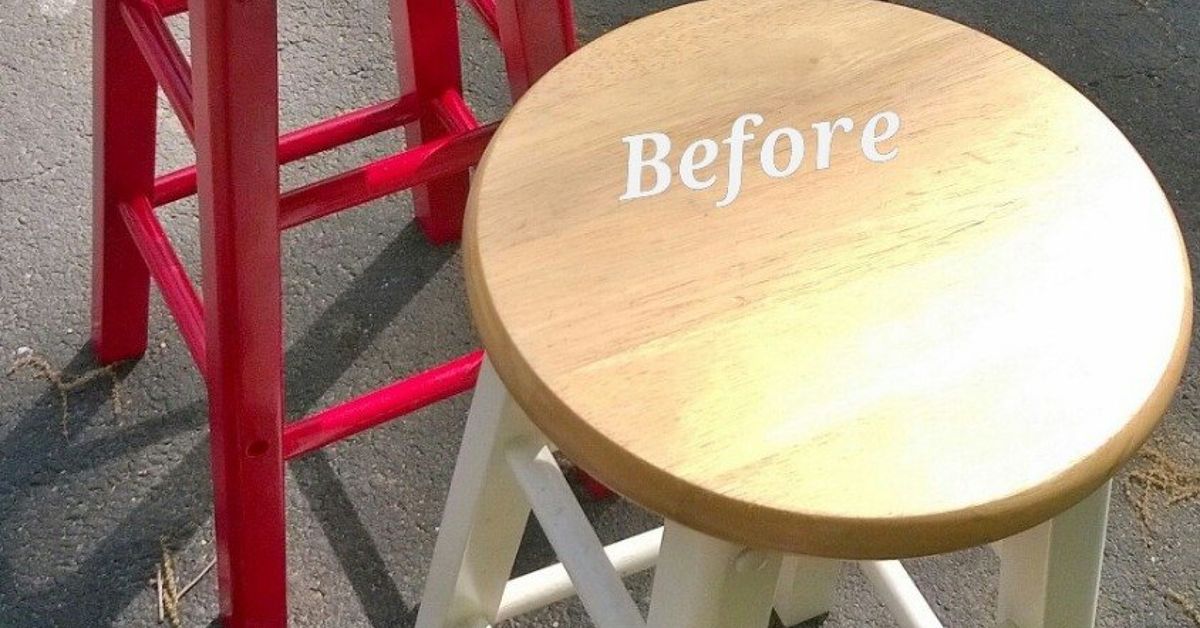
Some furniture pieces enter your home like celebrities. The sofa gets compliments. The dining table gets candles. The bar stool? It usually gets sat on, scuffed up, and ignored until someone notices it looks like it lost a fight with a pizza box in 2019. The good news is that a tired stool does not need a dramatic farewell. With a little prep work, a dash of courage, and a bottle of Unicorn SPiT, that plain perch can become the most interesting seat in the room.
If you love a good DIY bar stool makeover, Unicorn SPiT has become a favorite for a reason. It is not just another stain sitting quietly on the shelf waiting to look sensible. It is colorful, flexible, and surprisingly versatile. On a small furniture project like a bar stool, it lets you experiment with bold color, layered effects, and a finish that can go from rustic to glossy depending on how you seal it. In other words, it turns “meh” into “where did you buy that?”
This guide walks through how to transform a boring bar stool with Unicorn SPiT, what makes the product unique, how to prep the surface correctly, and how to seal the final finish so your beautiful stool can survive real life. Because yes, people will actually sit on it, spill things on it, and drag it across the floor like they are auditioning for a tiny furniture rodeo.
What Is Unicorn SPiT, Exactly?
Unicorn SPiT is best known as a paint, gel stain, and glaze concentrate all in one. That is a big part of its charm. You can use it straight from the bottle for stronger, more opaque color, or dilute it with water for more translucent stain and glaze effects. It is made for a wide range of surfaces, including wood, laminate, glass, metal, fabric, concrete, and more, which makes it especially useful for mixed-material bar stools that have wooden seats and painted or metal legs.
For furniture makeovers, the biggest selling point is the visual range. Traditional wood stain is beautiful, but it usually behaves like a responsible adult. Unicorn SPiT shows up in vivid colors, plays well with layering, and can either sink into raw wood grain or glow over an existing finish. That makes it a standout option for anyone who wants color movement, artistic detail, or a one-of-a-kind surface that does not look factory-made.
It is also popular among crafters because it is easy to manipulate while wet. A mister bottle can help keep the product workable on the surface, which is handy when you want a blended, watercolor-style finish on a stool seat. Once dry, it often develops a chalky look before sealing, which is completely normal. In fact, that dull stage is where a lot of DIYers panic for no reason. The magic comes back when the clear coat goes on.
Why a Bar Stool Is the Perfect Unicorn SPiT Project
A bar stool is small enough to finish over a weekend and large enough to show off color variation, faux wood grain, or a high-gloss statement finish. It is also one of the best upcycled furniture projects for beginners. You do not need to commit to refinishing an entire dining set or a hulking dresser. A stool gives you one seat, a few legs, and plenty of room to experiment without turning your garage into a full-time production studio.
Another reason this project works so well is that bar stools naturally draw the eye. They sit out in the open near kitchen islands, breakfast bars, and entertainment spaces. A colorful or artfully refinished stool adds personality where people gather. It is functional decor, which is the home design equivalent of finding out your favorite snack is also on sale.
Supplies You Will Want Before You Begin
Basic Materials
Gather your bar stool, Unicorn SPiT in one or more colors, sandpaper in a few grits, clean rags, a tack cloth or damp lint-free cloth, gloves, a drop cloth, painter’s tape if needed, applicator brushes or foam pads, and your preferred clear topcoat. If the stool is especially grimy, have a degreasing cleaner on hand before sanding.
Nice-to-Have Extras
A spray bottle of water is especially useful with Unicorn SPiT. It helps you soften edges, blend color, and keep the product from drying too fast while you work. Fine steel wool or very fine sandpaper can also help if you want a gently distressed look between color and sealer. For a more dramatic result, some DIYers keep multiple applicators nearby so they can switch between bold color placement and softer blending without making everything muddy.
Step 1: Decide What You Are Refinishing
Before you pop the cap, inspect the stool. Is the seat raw wood, old stain, paint, laminate, or a glossy sealed surface? Unicorn SPiT can work over different materials, but prep matters. A raw wood stool will behave differently from a slick, factory-finished one. If the top is real wood, the grain may soak up color beautifully. If it is laminate or a sealed surface, you will want to clean and scuff-sand it so the finish can grip.
This is also the moment to decide how artistic you want to get. Do you want a rustic stained seat with a subtle color wash? A bright rainbow blend? A faux galaxy finish? A layered, almost marbled surface? Your answer shapes how much product you use, how much you dilute it, and what type of sealer you choose in the end.
Step 2: Clean Like You Mean It
Furniture refinishing gets better the moment you stop pretending dirt is “character.” Any grease, wax, kitchen residue, or mystery stickiness has to come off first. Clean the stool thoroughly and let it dry. This is especially important for kitchen bar stools, which tend to collect invisible grime from cooking oils and hand traffic.
If your stool has hardware or a seat that can be removed from the base, take it apart first. Working in separate pieces is usually easier and helps you avoid awkward brush gymnastics later. It also keeps you from accidentally coloring parts that were never invited to the makeover.
Step 3: Sand for Better Adhesion and Better Looks
This step is the difference between “I refinished this bar stool” and “Why is the finish peeling when I look at it too hard?” Sanding creates a more receptive surface and smooths out imperfections. On raw or previously stripped wood, start with a medium grit if the surface is rough, then move to finer grit. On a lightly finished stool, a scuff sand may be enough. Always sand in the direction of the grain when you are working with wood.
Be especially careful with veneer or thin wood surfaces. You want to improve adhesion, not sand your way into regret. Once sanding is finished, remove every bit of dust. Use a vacuum if needed, then wipe the piece down with a tack cloth or a slightly damp lint-free cloth and let it dry fully. Tiny leftover particles can wreck an otherwise beautiful finish, and they have a special talent for showing up at the worst possible moment.
Step 4: Apply Unicorn SPiT Based on the Look You Want
For a Rich, Bold Color
Use Unicorn SPiT closer to full strength and apply it with a brush, foam pad, or cloth. This approach gives stronger coverage and works well when you want a vivid painted-stain effect rather than a whisper of color. On a bar stool seat, bold application can turn a plain round top into the visual anchor of your kitchen.
For a Translucent Stain Effect
Dilute the product with water and apply it following the grain. On raw wood, a light mist of water can help open the pores and encourage movement. This is where Unicorn SPiT really earns its reputation. Instead of covering the wood completely, it can let the grain participate in the design, which often looks far more interesting than a flat coat of ordinary paint.
For Blended or Artistic Effects
Work in sections and use a mister to keep the surface workable. Blend one color into another before the edges dry too hard. Popular combinations for a bar stool include weathered blue and gray tones for a coastal look, rich red and brown for a rustic pub vibe, or jewel tones for something more playful and modern. You can also create petal-like blooms, circular movement, or layered bands that feel a little like watercolor and a little like controlled chaos.
The trick is restraint. Too much blending and your masterpiece can become a muddy puddle. Too little and you lose the soft transitions that make Unicorn SPiT look special. Stop while it still looks intentional.
Step 5: Let It Dry All the Way
Dry time depends on how thickly you applied the product, the surface material, and the humidity in the room. Do not rush this step. What looks dry on top may still be soft underneath. Many Unicorn SPiT finishes look chalky before they are sealed, so do not judge the color too early. That dull appearance is part of the process, not a sign that your stool has betrayed you.
If you want a distressed or softly worn finish, you can lightly buff select areas after the color is dry using very fine sandpaper or extra-fine steel wool. This works especially well on stool edges, where natural wear would happen anyway. It is a smart way to make a new finish look collected rather than freshly born in your utility room yesterday.
Step 6: Seal It for Real-Life Durability
If the bar stool is going to be used, sealing is not optional in any meaningful sense. Sure, you could skip it in the way you could skip sunscreen at the beach and claim you enjoy consequences. But a stool seat needs protection from moisture, friction, spills, and constant contact. The clear topcoat is what turns a pretty project into a practical one.
The type of topcoat changes the final look. A satin or matte finish keeps things more subdued and modern. Gloss makes the color look deeper and more dramatic. High-gloss epoxy-style finishes create the biggest three-dimensional effect and are great if you want the seat to look almost glassy. For a kitchen stool, a durable furniture-safe clear finish is a smart choice. Test it first on a hidden spot or scrap, especially if you want to preserve the exact depth and vibrancy of the color.
If your stool is made from a light wood and you do not want the clear coat to warm the color too much, many DIYers prefer a non-yellowing protective finish. Apply thin, even coats, let each coat dry fully, and lightly sand between coats if the product directions call for it. This is boring advice, which is precisely why it works.
Design Ideas That Look Great on Bar Stools
1. Rustic Color Wash
Use browns, muted grays, or weathered blue tones in a diluted mix and follow the grain. Pair it with dark stool legs for a farmhouse or casual industrial look.
2. Ombre Seat
Blend one color from the edge inward or from one side of the seat to the other. This works especially well on round stools and gives the project a polished, designer feel.
3. Faux Stained Wood With Personality
Choose a base wood tone, then add a second color sparingly to highlight knots, edges, or grain movement. It reads as wood stain at first glance, then reveals more character up close.
4. Bold Statement Stool
Go all in with bright tones. A colorful stool can energize a neutral kitchen, breakfast nook, or home bar without forcing you to repaint an entire room.
5. Layered Artistic Finish
Apply color in stages, sealing lightly between layers if needed for more controlled buildup. This can create a deeper, more dimensional look that feels custom and almost gallery-like.
Common Mistakes to Avoid
Skipping prep: No product is magical enough to bond well to grease, dust, and glossy grime.
Over-sanding delicate surfaces: If your stool has veneer, be careful. You are refinishing, not excavating.
Using too much product at once: Thick layers can get muddy or dry unevenly.
Judging the color before sealing: The chalky dry stage is normal. Calm down and keep going.
Rushing the topcoat: Durability comes from patience. Thin coats usually beat one thick, dramatic blob.
Ignoring the room style: The stool should still belong in the space. Wild color is great. Total design anarchy is optional.
Is Unicorn SPiT Worth It for a Furniture Makeover?
For the right project, absolutely. If you want a classic walnut stain on a formal heirloom, there are traditional products that may suit that better. But if you want a furniture refinishing product that offers color flexibility, artistic freedom, and the ability to move between glaze, stain, and paint effects, Unicorn SPiT is genuinely fun to use. A boring bar stool is exactly the kind of project where it shines. You are not trying to make the piece disappear into the background. You are trying to give it a glow-up.
That is the secret appeal of this makeover. It is practical, creative, and just risky enough to feel exciting without being reckless. And when you are done, you get a stool that looks custom, feels personal, and costs far less than buying a trendy designer replacement that would probably arrive with an Allen wrench and emotional baggage.
Final Thoughts
Transforming a plain stool with Unicorn SPiT is one of those DIY furniture projects that delivers more personality than effort. Prep the surface well, work with intention, let the color do its thing, and protect it with the right sealer. That is the formula. Whether you go subtle and woodsy or loud and unapologetically colorful, the result is the same: your old stool stops being background furniture and starts acting like it has a publicist.
So the next time you glance at that scratched, faded, painfully forgettable bar stool, do not write it off. Give it sandpaper, color, and a little drama. Some furniture is destined to stay basic. This one does not have to.
The Experience of Turning a Boring Bar Stool Into Something Beautiful
There is a specific kind of satisfaction that comes from refinishing a bar stool with Unicorn SPiT. It starts before the color ever touches the wood. First, you look at the stool and notice every flaw: the scratched seat, the faded finish, the ring marks, the places where years of use have rubbed the surface dull. It is not glamorous. It is just a humble little piece of furniture that has been doing its job without applause. That is exactly why the transformation feels so rewarding. You are taking something overlooked and deciding it is worth your time.
Then the sanding begins, and that is when the project becomes strangely personal. You are no longer just decorating. You are uncovering. With every pass, the old finish gives way and the stool starts to look less like a problem and more like potential. Once the dust is wiped away, the surface feels ready, almost expectant. It is a small moment, but it is one of the best parts of the whole process.
Applying Unicorn SPiT is where the fun really kicks in. Unlike some stains that behave with strict, almost stern predictability, this product invites play. The color moves. It softens with water. It blends in ways that can surprise you. You might start with a plan and end up with something better. That sense of discovery is a huge part of the experience. It does not feel like factory work. It feels creative. Even if you are not someone who thinks of yourself as “artistic,” the process has a way of making you feel more confident with every brushstroke.
There is also something deeply enjoyable about the sensory side of the project. You watch the grain come alive under the color. You see one shade melt into another. You notice how the stool starts changing from flat and lifeless to layered and expressive. Then it dries and goes chalky, and for a second you wonder whether you ruined everything. That brief panic is practically part of the ritual. And then the sealer goes on, and suddenly the depth comes back. The colors sharpen. The movement returns. The whole piece wakes up.
By the time the project is done, the stool has changed, but so has the way you see it. It is no longer just a place to sit. It is a conversation piece. It is proof that small projects can make a big visual impact. It is also a reminder that home improvement does not always have to be massive, expensive, or exhausting to feel meaningful. Sometimes the best makeover is one stool, one afternoon, and one brave decision to stop settling for boring.