

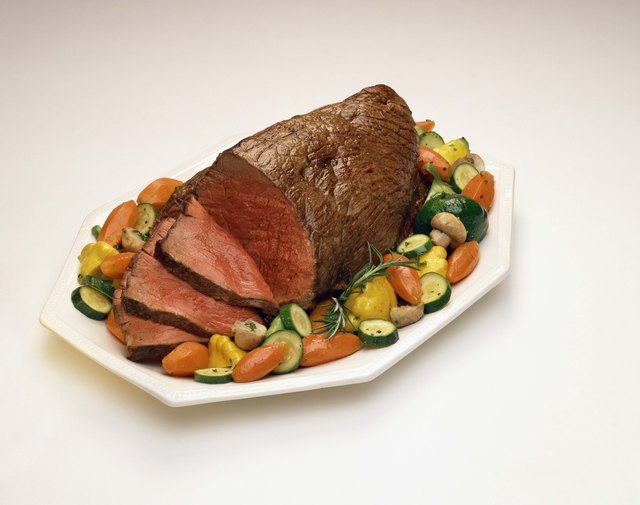
Beef tenderloin is the tuxedo of the meat counter: elegant, expensive, and absolutely capable of causing mild panic when guests are coming over. It is naturally tender, beautifully lean, and forgiving right up until the moment it is overcooked. That is where brining enters the chat.
Learning how to brine a beef tenderloin can make the difference between a roast that tastes like “nice beef” and one that makes people suspicious that you secretly hired a steakhouse chef. A careful brine seasons the meat more evenly, helps it retain a pleasingly juicy texture, and creates a better surface for browning.
But beef tenderloin is not a turkey. It does not need to float in a swimming pool of salt water for two days while absorbing every flavor in your refrigerator. Because tenderloin is already tender and relatively mild, the best approach is usually a light dry brine. A short wet brine can work too, but it requires more restraint than enthusiasm.
This guide explains both methods, shows you how much salt to use, covers food safety, and helps you avoid the most common tenderloin mistakes. The goal is simple: deeply seasoned beef, a gorgeous crust, and no salty regret.
What Does Brining a Beef Tenderloin Actually Do?
Brining is a salt-based seasoning method used before cooking. With a wet brine, beef sits in a salted liquid. With a dry brine, salt is applied directly to the surface and the tenderloin rests in the refrigerator.
Salt does more than make food taste salty. Given enough time, it moves inward and seasons the meat beyond the outer crust. It also changes the way the muscle proteins hold onto moisture during cooking. The result is not a magically indestructible roast, but it does give you more room for error than seasoning at the last second.
For beef tenderloin, brining is mainly about three things:
- More even seasoning: The center tastes seasoned instead of merely being surrounded by salty bark.
- Improved browning: A dry-brined tenderloin develops a drier surface, which helps it brown instead of steam.
- Better moisture retention: Lean cuts can lose moisture quickly, especially when cooked past medium-rare territory.
What brining does not do is turn a cheap tough roast into filet mignon. Tenderloin is already one of the most naturally tender cuts of beef. Brining supports its strengths; it does not give it a new personality.
Dry Brine vs. Wet Brine: Which Is Better for Beef Tenderloin?
Why Dry Brining Is Usually the Best Choice
A dry brine is the preferred method for most beef tenderloin recipes. You season the meat with kosher salt, let it rest uncovered or loosely covered in the refrigerator, then cook it the next day.
This approach is especially helpful when you want a deep beefy flavor and a dark, crisp exterior. Since there is no extra water involved, the tenderloin keeps its concentrated flavor and is easier to sear, grill, roast, or reverse-sear.
Dry brining also saves refrigerator space. You do not need a bucket, a stockpot, or a plastic bag large enough to hide a small household pet. A wire rack and sheet pan will do just fine.
When a Wet Brine Makes Sense
A wet brine can be useful when you are cooking a particularly lean tenderloin, using a smoker, or serving guests who prefer their beef closer to medium or medium-well. Since higher final temperatures can make lean meat seem drier, a short wet brine offers a little extra insurance.
However, wet brining requires discipline. Leave a beef tenderloin in salt water too long, and the texture can become soft or slightly cured. The flavor may also become diluted, which is unfortunate because beef tenderloin is too expensive to taste like politely seasoned water.
For most home cooks, use a dry brine for a holiday roast, dinner party centerpiece, or steakhouse-style meal. Choose a wet brine only when you have a specific reason and can keep the timing short.
Before You Brine: Choose and Prep the Right Tenderloin
Start with a fresh whole beef tenderloin, a center-cut tenderloin roast, or a Chateaubriand-style portion. Check the package before adding salt. Some supermarket beef products are labeled “enhanced,” “seasoned,” or “contains a solution.” These products may already contain salt or other ingredients.
If your tenderloin has added solution, skip the brine or use very little additional salt. Double-brining is a fast route to a roast that tastes like it spent a weekend floating in the Atlantic.
If you are using a whole tenderloin, trim away the silverskin and excess surface fat. Silverskin is the shiny, tough membrane that does not melt during cooking. A sharp boning knife makes this easier, but patience works too. Tie the tenderloin with butcher’s twine every 1 1/2 to 2 inches so it cooks more evenly from end to end.
How to Dry Brine a Beef Tenderloin
A dry brine is simple, reliable, and ideal for a whole tenderloin roast. Plan ahead because the resting time is where the improvement happens.
Ingredients for a Dry-Brined Beef Tenderloin
- 1 whole beef tenderloin or center-cut tenderloin roast
- Kosher salt
- Freshly ground black pepper
- Optional: crushed rosemary, thyme, garlic powder, or a small amount of brown sugar
How Much Salt Should You Use?
The safest way to avoid over-salting is to weigh the salt. Use about 0.75% to 1% salt based on the weight of the meat. For example, a 3-pound beef tenderloin weighs about 1,360 grams, so you would use roughly 10 to 14 grams of kosher salt.
If you do not own a kitchen scale, use a light but even coating of kosher salt over every side. Salt crystals are not all the same size, so measurements can vary dramatically between brands. Fine table salt is much denser than kosher salt and can easily make the roast too salty.
Step-by-Step Dry Brine Method
- Trim and tie the tenderloin. Remove silverskin, tuck the thin tail under if needed, and tie the roast for an even shape.
- Pat the beef dry. Use paper towels to remove surface moisture. A dry surface helps the salt cling evenly.
- Season with kosher salt. Sprinkle the salt evenly over the entire tenderloin, including the sides and ends.
- Add optional aromatics. Black pepper, rosemary, thyme, or garlic powder work well. Avoid piling on wet ingredients at this stage because they can interfere with surface drying.
- Refrigerate on a rack. Place the tenderloin on a wire rack set over a rimmed baking sheet. Refrigerate uncovered for 12 to 24 hours.
- Cook without rinsing. Do not rinse off the dry brine. Simply let the roast sit at room temperature for about 30 to 45 minutes before cooking, then add a little oil or butter if your recipe calls for it.
The uncovered refrigerator rest is not just culinary theater. It helps dry the exterior, which makes it easier to build the kind of browned crust that causes people to hover near the cutting board before dinner is served.
How to Wet Brine a Beef Tenderloin
A wet brine can be useful, but keep it short. The goal is to season the meat lightly and help it stay juicy, not to transform your tenderloin into deli meat.
Simple Wet Brine for Beef Tenderloin
- 4 cups cold water
- 38 grams kosher salt, or approximately 2 1/2 tablespoons Morton kosher salt
- 1 tablespoon brown sugar, optional
- 2 smashed garlic cloves, optional
- 2 sprigs rosemary or thyme, optional
- 1 teaspoon whole black peppercorns, optional
Combine the water, salt, and optional seasonings in a nonreactive container. Stir until the salt dissolves. If you heat any portion of the liquid to dissolve the salt faster, cool the brine completely before it touches the beef.
Step-by-Step Wet Brine Method
- Make the brine. Dissolve salt in cold water. Add herbs, garlic, sugar, or peppercorns if desired.
- Cool it completely. The brine must be refrigerator-cold before adding the tenderloin.
- Submerge the beef. Place the tenderloin in a food-safe plastic bag, glass container, or stainless-steel container. Add enough brine to cover it.
- Refrigerate for 2 to 4 hours. Do not wet-brine a tenderloin overnight unless your recipe has been specifically developed for that timing.
- Remove and dry thoroughly. Take the beef out of the brine, discard the liquid, and pat the tenderloin very dry with paper towels.
- Rest before cooking. Let the tenderloin sit uncovered in the refrigerator for 30 to 60 minutes if possible. This helps dry the surface before searing or roasting.
Never reuse raw-meat brine as a sauce. Once it has touched uncooked beef, it belongs in the trash. Your gravy should taste rich and luxurious, not like a food-safety seminar.
How to Cook a Brined Beef Tenderloin
Brining improves the seasoning, but temperature control determines whether your tenderloin is spectacular. Because the cut is lean and expensive, use an instant-read thermometer or leave-in probe thermometer. Guessing is charming in party games, not in luxury beef.
Oven-Roasted Beef Tenderloin
For a classic roast, preheat the oven to 425°F. Sear the tenderloin in a hot skillet first if you want an extra-crisp crust, or roast it directly on a rack in a shallow pan. Insert the thermometer into the thickest section, avoiding the twine and any larger fat seams.
For food safety, whole beef roasts should reach an internal temperature of at least 145°F and rest for at least 3 minutes before carving. If your household prefers beef cooked more thoroughly, brining can help keep the tenderloin more pleasant at those higher temperatures.
Grilled Beef Tenderloin
Set up a two-zone grill with a hot direct side and a cooler indirect side. Sear the tenderloin over direct heat until browned, then move it to indirect heat to finish cooking. This method gives you smoky flavor and better control than trying to cook the whole roast directly over an inferno.
Reverse-Seared Beef Tenderloin
For an evenly cooked interior, roast or smoke the tenderloin gently over lower heat, then finish it with a fast, high-heat sear. This technique is especially helpful for a thick center-cut roast because it gives you a more uniform interior and reduces the gray band around the edges.
Best Flavor Additions for Brined Beef Tenderloin
Beef tenderloin has a subtle, buttery flavor, so use seasonings that support rather than bury it. The most reliable combinations are simple enough to remember without a spreadsheet.
- Classic steakhouse: kosher salt, black pepper, garlic, rosemary, and butter
- Herb-forward: thyme, rosemary, parsley, lemon zest, and cracked pepper
- Holiday-style: rosemary, shallot, garlic, Dijon mustard, and a splash of red wine in the pan sauce
- Smokehouse-inspired: black pepper, garlic powder, mustard powder, and a small amount of smoked paprika
- Bold but balanced: coffee, black pepper, coriander, and brown sugar in a light dry rub
If you use a salt-heavy seasoning blend after brining, reduce the amount of added salt. The tenderloin already did the homework overnight. Do not make it repeat the class.
Common Beef Tenderloin Brining Mistakes
Brining for Too Long
Longer is not always better. Dry brining for 12 to 24 hours is usually enough for a tenderloin roast. Wet brining should generally stay in the 2- to 4-hour range. Too much time can produce an overly salty taste or an oddly soft texture.
Using Table Salt Without Adjusting
Table salt is much finer than kosher salt. A tablespoon of table salt can contain far more salt crystals than the same volume of flaky kosher salt. Use a scale whenever possible, especially for a premium cut.
Skipping the Drying Step
Whether you dry-brine or wet-brine, surface moisture is the enemy of a great crust. Pat the meat dry before cooking. Moisture must evaporate before browning can begin, so a wet tenderloin tends to steam before it sears.
Cooking by Time Alone
Roast size, starting temperature, oven accuracy, pan material, and the mood of your appliance can all affect timing. Use time as a rough guide, but trust a thermometer more than a recipe clock.
Forgetting Carryover Cooking
The internal temperature continues to rise after the tenderloin leaves the heat. Resting also allows the juices to redistribute through the meat. Carving immediately may save a few minutes, but it can leave your board full of juice and your slices less succulent.
Can You Brine Beef Tenderloin Steaks?
Yes. Filet mignon and other tenderloin steaks benefit from a dry brine, especially when you have at least 45 minutes to spare. For thicker steaks, dry brine them on a rack in the refrigerator for several hours or overnight.
Wet brining tenderloin steaks is less useful because the cuts are smaller and can take on salt quickly. A dry brine gives you better seasoning and a cleaner seared crust without turning dinner into a science experiment involving a zip-top bag and an anxious stopwatch.
Frequently Asked Questions About Brining Beef Tenderloin
Should I brine a beef tenderloin overnight?
Dry brining overnight is ideal for many tenderloin roasts. Wet brining overnight is usually too long unless you are following a recipe specifically designed for that length of time.
Can I use a marinade instead of a brine?
You can, but a marinade and a brine serve different purposes. Marinades mainly flavor the exterior and may include acidic ingredients such as wine, vinegar, or citrus. Brines focus on salt-based seasoning and moisture management. For tenderloin, a dry brine followed by a sauce is often more reliable than a long acidic marinade.
Should I rinse beef after brining?
No. Rinsing raw beef can spread bacteria around the kitchen. After a wet brine, simply remove the meat, discard the brine, and pat the surface dry. After a dry brine, cook the tenderloin without rinsing.
Can I brine a frozen beef tenderloin?
Thaw the tenderloin safely in the refrigerator before brining. Brining a partially frozen roast makes seasoning uneven and complicates timing.
Do I need sugar in a beef tenderloin brine?
No. Sugar is optional. A small amount can balance salty flavors and encourage browning, but tenderloin does not need sweetness to taste luxurious. Salt, pepper, herbs, and butter are more than capable of doing the job.
Kitchen Notes: Real-World Lessons From Brining Beef Tenderloin
Home cooks often approach beef tenderloin with the same emotional energy people bring to parallel parking in front of an audience. The roast costs enough that every decision feels important, from the brand of salt to the angle of the thermometer. The good news is that brining removes some of that pressure when it is done with restraint.
The biggest lesson is that tenderloin does not need to be “fixed.” It is already tender. It does not need aggressive acid, a gallon of soy sauce, or a seasoning blend with thirty-seven ingredients and a suspicious amount of artificial smoke flavor. What it needs is even seasoning, careful heat, and enough confidence to let beef taste like beef.
Dry brining is especially useful for cooks who have made the classic mistake of salting a roast five minutes before it goes into the oven. That approach is not disastrous, but it often leaves the outside salty and the interior bland. An overnight dry brine creates a more balanced result. Every slice tastes seasoned, even the pieces in the middle that never touch the crust.
Another common discovery is that the wire rack matters. Placing the tenderloin directly on a plate traps moisture underneath it, which can make one side damp and pale. Elevating the roast on a rack lets cold refrigerator air circulate around it. The result is a drier exterior and a much better chance of getting that deep brown crust that looks like it belongs under restaurant lighting.
Wet brining can be helpful, but it is rarely the first choice for a tenderloin. Some cooks use a wet brine because they have heard that all lean meat needs one. That is not quite true. A tenderloin has a refined flavor that can become muted when it sits in too much liquid for too long. A short wet brine can help when cooking for guests who prefer more done beef, but it should be treated like a backup singer, not the lead vocalist.
Temperature is the final lesson that keeps appearing in successful tenderloin meals. Even a beautifully brined roast can become dry if it is left in the oven too long. An instant-read thermometer is not a luxury gadget here; it is the calm, practical friend who stops you from checking the roast every four minutes and opening the oven until the kitchen feels like a sauna.
Finally, let the tenderloin rest. It can be tempting to carve the second it leaves the heat because the aroma is dramatic and everyone is suddenly standing too close. Give it time. Resting allows the roast to settle, keeps more juice in each slice, and gives you a few peaceful minutes to finish the sauce, set the table, or accept compliments you have not technically earned yet.
Once you understand how to brine a beef tenderloin, the process becomes pleasantly uncomplicated: salt thoughtfully, keep it cold, dry the surface, cook with a thermometer, and do not rush the rest. That is the entire strategy. It may not sound flashy, but neither does a perfectly cooked tenderloin until someone takes the first bite.
Conclusion
Brining a beef tenderloin is less about adding drama and more about making a premium cut perform at its best. A dry brine is usually the smartest option because it seasons the beef deeply, encourages a better crust, and preserves the tenderloin’s rich, concentrated flavor. A short wet brine can work when you want extra moisture protection, but careful timing is essential.
Keep the process simple: use kosher salt, avoid over-seasoning, dry the surface thoroughly, and monitor the internal temperature with a reliable thermometer. With those steps in place, your beef tenderloin can stay tender, juicy, flavorful, and worthy of the occasionwhether it is a holiday dinner, anniversary meal, or an ordinary Tuesday that deserves a little steakhouse energy.