

Tuning an acoustic guitar is the musical equivalent of brushing your teeth before a date: not glamorous, absolutely necessary, and painfully obvious when skipped. You can know every chord shape, own a gorgeous spruce-top guitar, and practice until your fingers develop tiny superhero calluses, but if the strings are out of tune, your beautiful song may sound like a haunted screen door.
The good news is that learning how to tune an acoustic guitar is easier than most beginners think. You do not need a recording studio, a degree in music theory, or a mysterious old man in a music shop saying, “You must feel the pitch.” You need a clear method, a little patience, and the willingness to listen closely.
In standard guitar tuning, the six strings are tuned from lowest pitch to highest pitch as E-A-D-G-B-E. The thickest string is the low E string, and the thinnest string is the high E string. Many players remember the order with silly phrases like “Eddie Ate Dynamite, Good Bye Eddie,” which is dramatic, memorable, and frankly unfair to Eddie.
This guide covers four practical ways to tune an acoustic guitar: using a clip-on electronic tuner, using a smartphone or online tuner, tuning by reference pitch with the fifth-fret method, and tuning with harmonics. Each method has its place. Beginners usually start with a tuner, while developing players gradually train their ears so they can fix tuning problems quickly anywhere.
Why Acoustic Guitar Tuning Matters
An acoustic guitar creates sound through vibrating strings. When a string is tighter, its pitch rises. When it is looser, its pitch drops. The tuning pegs on the headstock control that tension. Even a small twist can move a note from “sweet and musical” to “why is the campfire suddenly uncomfortable?”
Acoustic guitars drift out of tune for several normal reasons. New strings stretch. Old strings lose life. Temperature and humidity affect wood and metal. Heavy strumming can pull strings sharp or flat. A guitar left in a hot car may return with the emotional stability of a soap opera character. None of this means your guitar is bad. It means your guitar is alive enough to react to the world.
Know the Standard Acoustic Guitar String Notes
Before using any tuning method, memorize the target notes:
- 6th string: E, the thickest and lowest-sounding string
- 5th string: A
- 4th string: D
- 3rd string: G
- 2nd string: B
- 1st string: E, the thinnest and highest-sounding string
When people say “standard tuning,” this is what they mean. Alternate tunings such as Drop D, DADGAD, Open G, and half-step-down tuning are useful later, but standard tuning is the home base for most beginner chords, songs, lessons, and guitar tabs.
1. Tune an Acoustic Guitar With a Clip-On Electronic Tuner
The clip-on tuner is the easiest, fastest, and most beginner-friendly way to tune an acoustic guitar. It clips onto the headstock and reads vibrations through the wood. That means it can work well even when there is background noise, unlike microphone-based tuners that may panic if someone nearby is talking, vacuuming, or passionately blending a smoothie.
How to Use a Clip-On Tuner
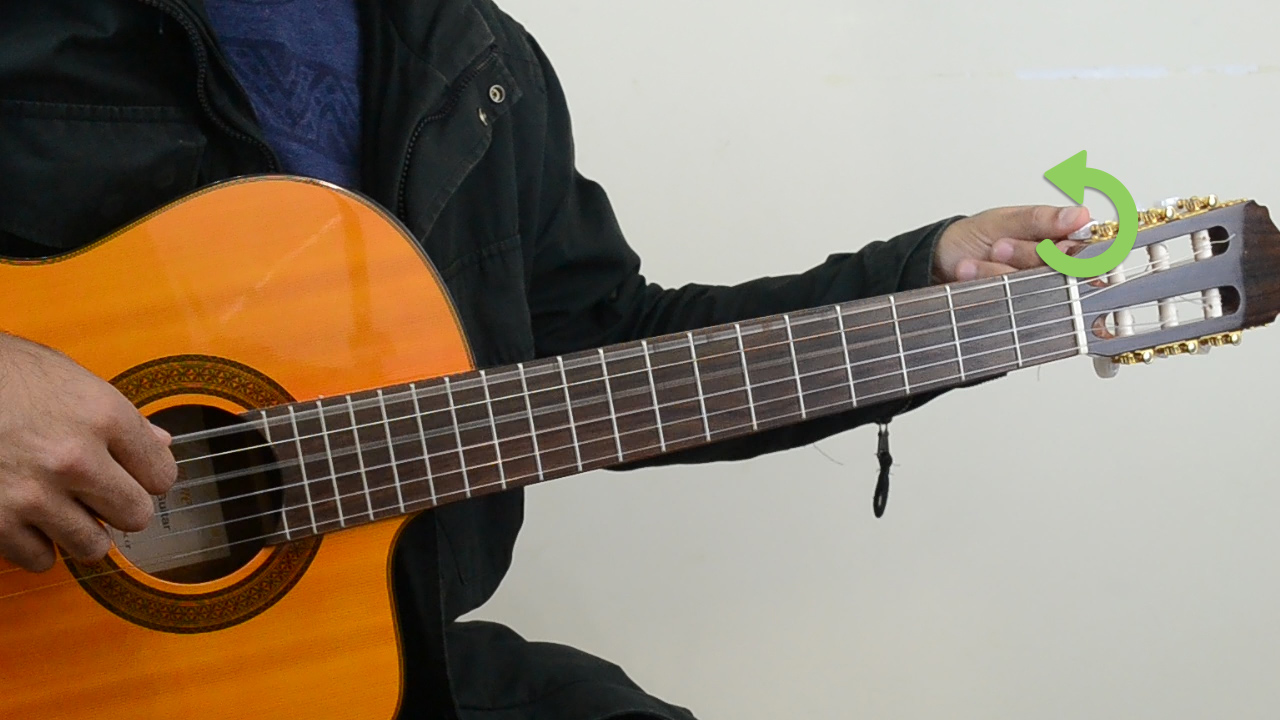
Clip the tuner onto the headstock where you can see the screen. Turn it on and set it to guitar mode or chromatic mode. Pluck one string at a time, starting with the low E string. Let the string ring clearly. The tuner will show the note it hears and whether the pitch is flat, sharp, or in tune.
If the note is flat, the string is too low. Tighten the tuning peg slowly to raise the pitch. If the note is sharp, the string is too high. Loosen the peg until the pitch drops below the note, then tighten back up to the correct pitch. This “tune up to pitch” habit helps the tuning gears settle more securely and can improve tuning stability.
Repeat the process for all six strings: E, A, D, G, B, and E. After you finish, go through the strings again. Acoustic guitars often shift slightly as tension changes across the neck, especially after replacing strings.
Best For
A clip-on tuner is ideal for beginners, lessons, noisy rooms, rehearsals, open mics, church gigs, campfire playing, and anyone who wants accurate tuning without turning the process into a philosophical journey.
Common Mistake to Avoid
Do not twist the tuning peg aggressively. Move slowly. A guitar string can break if tightened too far, and the high E string is especially famous for snapping at the worst possible moment, usually right after you say, “I think I’ve got it.”
2. Tune an Acoustic Guitar With a Smartphone App or Online Tuner
A smartphone tuner app or browser-based online guitar tuner is another convenient way to tune your acoustic guitar. These tools use your device’s microphone to detect pitch. Many apps include visual meters, alternate tunings, chord libraries, metronomes, and other extras that make them useful practice companions.
How to Tune With an App or Online Tuner
Open your tuner app or online tuner and allow microphone access. Choose acoustic guitar or standard tuning if the option appears. Sit in a quiet place, hold the guitar normally, and pluck one string at a time. The tuner will identify the note and show whether it is too low, too high, or centered.
Start with the low E string and work toward the high E string. Keep the guitar close enough to the phone or computer microphone for a clear reading. Avoid strumming multiple strings at once because the tuner needs one pitch at a time. It is a tuner, not a mind reader with tiny headphones.
Pros of App-Based Tuning
The biggest advantage is convenience. Most people already have a phone nearby, so an app tuner can save the day when a clip-on tuner is hiding in a gig bag pocket with old picks, receipts, and one mysterious screw. Apps are also helpful for beginners because they provide a visual guide and often include practice tools.
Limitations of App-Based Tuning
Microphone tuners can struggle in noisy environments. If the room is loud, the app may detect voices, other instruments, or random background sound. For home practice, app tuners are excellent. For a loud stage, a clip-on or pedal tuner is usually more reliable.
3. Tune an Acoustic Guitar by Reference Pitch and the Fifth-Fret Method
The fifth-fret method is a classic way to tune a guitar to itself. It does not require a full electronic tuner for every string, but it does require one accurate reference note. That reference can come from a piano, tuning fork, pitch pipe, another tuned guitar, an online tone, or a tuner used only for the first string.
This method is especially useful when your tuner battery dies, your phone is unavailable, or you want to train your ear. It teaches you to hear when two notes match, which is one of the most valuable skills a guitarist can develop.
Step-by-Step Fifth-Fret Tuning
First, tune the low E string to a reliable reference pitch. Once the low E string is correct, use it to tune the rest of the guitar:
- Play the 5th fret of the 6th string. This gives you A. Tune the open 5th string to match it.
- Play the 5th fret of the 5th string. This gives you D. Tune the open 4th string to match it.
- Play the 5th fret of the 4th string. This gives you G. Tune the open 3rd string to match it.
- Play the 4th fret of the 3rd string. This gives you B. Tune the open 2nd string to match it.
- Play the 5th fret of the 2nd string. This gives you E. Tune the open 1st string to match it.
The only curveball is the 3rd string to 2nd string relationship. You use the fourth fret on the G string, not the fifth. This is where beginners often go wrong, and suddenly every open chord sounds like it is wearing shoes on the wrong feet.
How to Hear Matching Notes
When two notes are almost the same but not quite, you may hear a pulsing or wobbling effect. These are called beats. As the notes get closer, the wobble slows down. When the notes match, the sound becomes smoother. This takes practice, but even a few minutes a day can sharpen your musical ear.
Best For
The fifth-fret method is best for players who already know basic fretting and want a practical backup tuning method. It is also great for ear training because it forces you to listen rather than simply obey a screen.
4. Tune an Acoustic Guitar Using Harmonics
Harmonic tuning is a more advanced ear-based method that uses bell-like tones produced by lightly touching a string above certain frets. Natural harmonics are clear, ringing, and easier to compare than regular fretted notes because they sustain beautifully when played cleanly.
To play a harmonic, lightly touch the string directly above the fret wire, usually at the 5th, 7th, or 12th fret. Do not press the string down to the fretboard. Pluck the string and lift your finger away. If done correctly, the note rings like a tiny glass bell. If done incorrectly, it makes a dull thump, which is the guitar’s polite way of saying, “Try again, buddy.”
Basic Harmonic Tuning Pattern
Start with one accurately tuned reference string, usually the low E or A string. Then compare harmonics between neighboring strings. A common approach is to compare the 5th-fret harmonic on a lower string with the 7th-fret harmonic on the next higher string for several pairs.
For example, the 5th-fret harmonic on the low E string can be compared with the 7th-fret harmonic on the A string. The 5th-fret harmonic on the A string can be compared with the 7th-fret harmonic on the D string. Continue carefully, listening for the same smoothness and absence of beating.
However, guitar tuning is not perfectly symmetrical across all strings because of the major-third interval between G and B. That means harmonic tuning can get tricky around the 3rd and 2nd strings. Many players use harmonics for most strings, then check the final result with open chords such as G, C, D, E, and A.
Best For
Harmonic tuning is excellent for intermediate players who want stronger ears and faster fine-tuning. It is not the first method most beginners should learn, but it becomes very useful once your hands and ears are more comfortable.
Which Acoustic Guitar Tuning Method Should You Use?
For most beginners, the best method is simple: use a clip-on tuner or app tuner every time you practice. Accuracy matters. Your ears learn from what they repeatedly hear, so practicing on an in-tune guitar helps your brain understand how chords should sound.
As you improve, add the fifth-fret method. It builds independence and gives you a reliable backup. Later, experiment with harmonics. Harmonic tuning is not required for strumming your first songs, but it can make you a more sensitive and confident musician.
A Practical Beginner Routine
Before every practice session, tune with a clip-on tuner. After tuning, strum a few open chords. Try G, C, D, E minor, and A minor. If something sounds strange, check the tuning again. Then spend one minute comparing the fifth-fret notes by ear. This routine gives you accuracy from the tuner and ear training from listening.
How to Keep an Acoustic Guitar in Tune Longer
Tuning is not only about turning pegs. Good string habits and guitar care also matter. When you install new strings, stretch them gently after bringing them close to pitch. Pull each string upward slightly along its length, retune, and repeat a few times. New strings settle faster when they are stretched properly.
Make sure the strings are wound neatly around the tuning posts. Too many messy wraps can slip. Too few wraps can also be unstable. If you are unsure, ask a guitar technician or teacher to show you once. It is a small skill that pays off every time you change strings.
Store your acoustic guitar in a stable environment. Extreme heat, cold, and humidity changes can affect tuning and may even damage the instrument over time. A case or gig bag helps protect it. If you live in a dry climate, a guitar humidifier may be worth considering.
Finally, replace old strings when they sound dull, feel grimy, or refuse to stay in tune. Strings are not immortal. They are more like bananas: useful, wonderful, and eventually suspicious.
Common Acoustic Guitar Tuning Problems
The Tuner Shows the Wrong Note
If your tuner shows a completely different note, your string may be far from its target pitch. Tighten or loosen slowly until the correct note appears. Be especially careful with the thinner strings. If you are trying to tune the high E string and the tuner says F or F-sharp, stop tightening and lower the pitch.
The Guitar Sounds Out of Tune Even After Tuning
This can happen because of old strings, poor intonation, pressing too hard on the frets, or tuning one string accurately while another is still off. Check all strings again, then play simple open chords. If fretted notes sound noticeably wrong while open strings are correct, your guitar may need a setup.
One String Keeps Going Flat
A slipping tuning peg, poor string winding, or a string that has not fully stretched can cause this. Retune, stretch the string gently, and check the wraps around the post. If the problem continues, a guitar technician can inspect the tuner, nut slot, and bridge.
Extra Experience: What Tuning an Acoustic Guitar Teaches You Over Time
After you tune an acoustic guitar hundreds of times, you start to realize that tuning is not just maintenance. It is musicianship in miniature. The first few weeks may feel mechanical: pluck, stare at the screen, turn the peg, panic slightly, repeat. But eventually, you begin to hear the difference before the tuner confirms it. That is a small but exciting milestone.
One of the most useful experiences is learning how different strings behave. The low E string often feels sturdy and forgiving. You can turn the peg and hear the pitch change clearly. The high E string, on the other hand, can feel delicate. It responds quickly, and beginners often tighten it too much because they are waiting for a dramatic change. The lesson is patience. Tiny movements matter.
You also learn that tuning is connected to touch. Press a chord too hard and the notes can go slightly sharp. Place your finger too far behind the fret and you may hear buzzing. Strum aggressively and a freshly tuned guitar can sound wild for a moment. The tuner may say everything is correct, but your hands still need to cooperate. In that sense, tuning teaches control.
Another real-world lesson is that guitars react to rooms. A guitar tuned in a cool bedroom may shift after sitting under stage lights. A guitar taken from an air-conditioned car into a humid backyard may need several small adjustments. This is normal. Experienced players do not tune once and declare victory forever. They check tuning often, especially before recording, performing, or practicing songs with open chords.
Recording yourself is one of the fastest ways to understand tuning. When you are playing, your brain is busy thinking about chord changes, rhythm, lyrics, and whether your dog is judging you. On playback, tuning problems become obvious. A slightly sour B string can make a beautiful C chord sound uneasy. A flat low E can make a big G chord lose its power. Listening back may be humbling, but it is also incredibly useful.
There is also a confidence benefit. When your guitar is in tune, practice feels better. Chords ring more clearly. Songs become easier to recognize. Your ear starts trusting the instrument. Beginners sometimes think they are bad at guitar when the real villain is simply poor tuning. Fix the tuning, and suddenly the same three chords sound like music instead of furniture assembly instructions.
Over time, the best approach is to combine tools with listening. Use a tuner for accuracy, but do not become completely dependent on the screen. Before looking, guess whether a string is sharp or flat. Tune with the fifth-fret method occasionally. Check open chords after the tuner says you are done. These small habits turn tuning from a chore into ear training.
The final experience is emotional: tuning gives you a clean starting line. Every practice session begins with a simple act of attention. You listen, adjust, and bring the instrument into balance. That quiet minute can change the whole session. It reminds you that guitar playing is not about forcing the instrument to behave; it is about meeting it halfway, one string at a time.
Conclusion
Learning how to tune an acoustic guitar is one of the first skills every guitarist should master. Whether you use a clip-on tuner, a smartphone app, the fifth-fret method, or harmonics, the goal is the same: make the guitar sound clear, balanced, and ready for music.
For beginners, start with a reliable tuner and memorize standard tuning: E-A-D-G-B-E. Then slowly train your ears with reference pitch methods. As your listening improves, tuning becomes faster and more natural. Eventually, you will know when a string is off before anyone else notices. That is the moment you become the responsible adult in the room, at least musically.
An in-tune acoustic guitar makes practice more enjoyable, recordings cleaner, performances stronger, and songwriting more inspiring. It is a small habit with a big payoff. Tune before you play, listen while you tune, and treat every adjustment as part of becoming a better guitarist.