

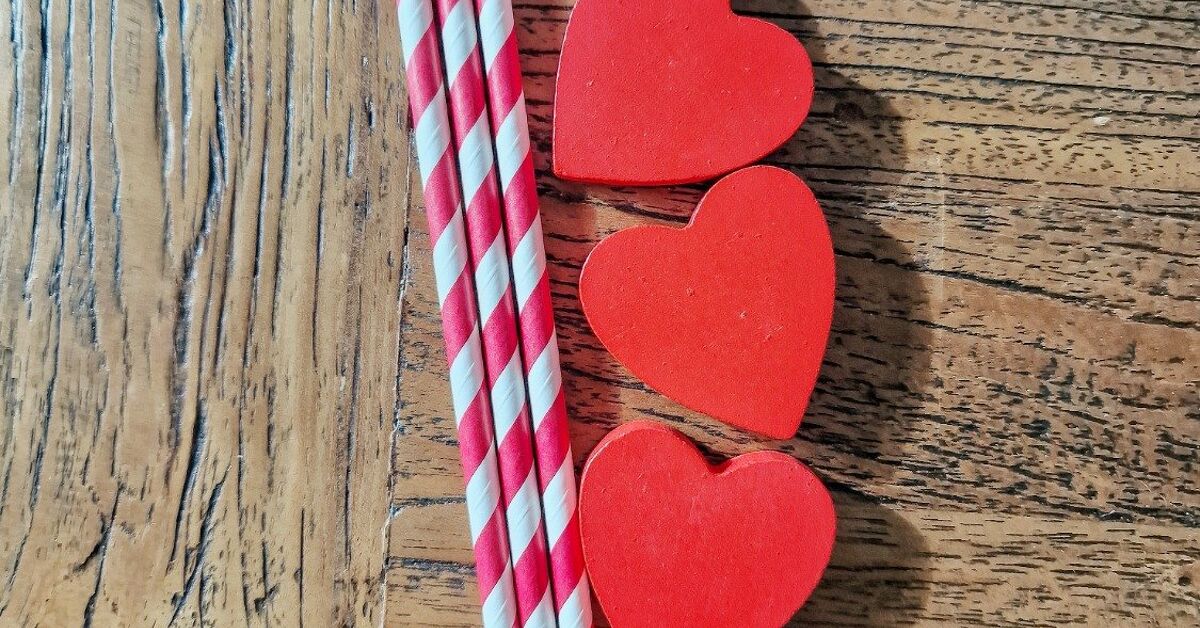
Valentine’s Day decorating does not have to involve an avalanche of glitter, an advanced degree in floral design, or a craft-store receipt long enough to double as a scarf. With a small planter, a handful of colorful paper straws, and a few heart-shaped decorations, you can create cheerful Valentine decor in less than an afternoon.
This quick and easy DIY Valentine straw/planter decor project works as a tabletop centerpiece, teacher gift, office decoration, party accent, or sweet surprise for someone special. It is inexpensive, beginner-friendly, and highly customizable. Better yet, the finished piece can hold a living plant, faux greenery, candy, pencils, or small wrapped treatsbecause even Cupid appreciates a multitasking craft.
What Is Valentine Straw/Planter Decor?
Valentine straw/planter decor combines a decorated flowerpot with lightweight paper-straw picks. The straws act like miniature signposts or flower stems, supporting paper hearts, handwritten messages, pom-poms, bows, photographs, or conversation-heart sayings.
The basic design is simple: decorate a planter, fill it with a plant or another material, and arrange several embellished straws above the rim. The vertical straws add height, while the planter provides visual weight and a stable base. Together, they create a compact display that looks far more elaborate than the effort required.
Why This Project Works So Well
Many Valentine’s Day crafts are either decorative or useful. This one can be both. A real succulent turns it into a lasting gift. A faux plant makes it reusable every February. A candy-filled pot becomes a party favor, and a pencil-filled version makes an adorable teacher appreciation gift.
It is also easy to adapt to different decorating styles. Traditional red, white, and pink feel playful and festive, while blush, cream, gold, and natural terracotta create a more grown-up look. Black, white, and deep burgundy can make the same basic project feel modern instead of sugary.
Materials and Supplies
Most of the supplies are available at craft stores, dollar stores, garden centers, or in the mysterious craft drawer where ribbon goes in but never seems to come out.
Basic Supplies
- One small terracotta, ceramic, metal, or plastic planter
- Five to nine paper straws in Valentine colors or patterns
- Cardstock, construction paper, felt, or craft foam
- Heart-shaped template, cookie cutter, or paper punch
- Scissors
- Low-temperature hot glue or strong craft glue
- Acrylic craft paint and paintbrushes, if painting the planter
- Ribbon, baker’s twine, pom-poms, stickers, or letter decals
- A small plant, faux plant, floral foam, candy, or decorative filler
Optional Embellishments
- Mini clothespins for attaching notes or photographs
- Wooden hearts or unfinished wood shapes
- Small paper doilies
- Self-adhesive gems or pearls
- Metallic paint pens
- Glitter cardstock
- Miniature envelopes
- Artificial moss or shredded paper
Choose embellishments according to where the planter will be displayed. Paper hearts are perfect indoors, while sealed wood, plastic, or craft foam will tolerate occasional moisture more successfully. If young children are participating, use washable paint, blunt scissors, and regular craft glue instead of a hot-glue gun.
How to Make DIY Valentine Straw/Planter Decor
Step 1: Clean and Prepare the Planter
Wipe the planter clean and allow it to dry completely. A new terracotta pot may only need a quick dusting. A reused pot should be emptied, washed, and dried before decorating.
If you are using a living plant, make sure the planter has a drainage hole or keep the plant inside its original nursery pot and place that pot inside the decorative container. This “pot inside a pot” method makes watering easier and protects paper decorations from soggy surprises.
Step 2: Paint or Wrap the Pot
Paint the exterior with one or two coats of acrylic craft paint. White provides a clean background for colorful hearts, while pink, red, or lavender creates instant Valentine energy. Let each coat dry before adding another.
For a crisp design, place heart stickers on the pot before painting. Once the paint is dry, peel away the stickers to reveal heart-shaped negative spaces. You can also paint stripes, dots, scallops, tiny envelopes, or a simple color-blocked band around the rim.
Do not want to paint? Wrap the planter with ribbon, removable vinyl, patterned paper, or a strip of burlap. Keep decorative coverings away from drainage holes and areas likely to remain wet.
Step 3: Make the Straw Toppers
Cut hearts from cardstock, felt, or craft foam. A mix of sizes gives the arrangement more movement. As a general guide, make the largest heart about three inches wide and the smallest about one inch wide.
Decorate the hearts with short sayings such as “Be Mine,” “XOXO,” “Love You,” “Bestie,” “You Grow, Girl,” or “Plant One on Me.” The last two are gloriously corny, which is practically required for Valentine crafts.
Glue one heart to the top of each paper straw. For a more finished appearance, sandwich the straw between two matching hearts so the back is covered. Allow the glue to set before handling the toppers.
Step 4: Add Extra Details
Tie tiny ribbon bows around two or three straws. Attach miniature envelopes, layered hearts, pom-poms, or paper flowers to the remaining straws. Avoid putting the same decoration on every pick. A little variety keeps the display from looking like a highly organized heart-shaped marching band.
For a personalized gift, clip a small photograph or handwritten note to one straw with a miniature clothespin. You can also add individual words to several hearts so the full message appears across the arrangement.
Step 5: Fill the Planter
For a living display, add a small succulent, pothos cutting, peperomia, African violet, or compact herb. Use a potting mix intended for containers rather than heavy garden soil. Match the plant to the available light, and avoid choosing a moisture-loving plant if the decorative pot cannot drain properly.
For a no-maintenance version, place floral foam inside the pot and cover it with artificial moss, shredded paper, fabric scraps, or decorative stones. A faux succulent can be secured in the center before the straw picks are added.
A gift version can be filled with wrapped candy, tea bags, lip balm, seed packets, pencils, or rolled-up notes. Place lightweight filler in the bottom so you do not need enough chocolate to finance a small candy store.
Step 6: Arrange the Valentine Straws
Trim the straws to different lengths. Place the tallest pick near the back or center, then stagger the shorter pieces around it. An odd numbersuch as five, seven, or nineusually creates a relaxed, balanced arrangement.
If the planter contains a real plant, slide the straws gently near the edge to avoid damaging the root ball. Do not push them deeply into thick roots. With floral foam, insert each straw about one inch and adjust until the display looks full from the front.
Step 7: Finish the Rim
Tie ribbon or baker’s twine around the planter rim. Add a small tag with the recipient’s name or a message such as “Love Grows Here.” Check for visible glue strings, crooked hearts, or paint smudges. Perfection is unnecessary, but removing a six-inch hot-glue cobweb is generally considered good manners.
Easy Design Variations
Conversation Heart Planter
Use pastel yellow, mint, lavender, pink, and peach hearts. Write short conversation-candy messages in bold red letters. Paint the pot white so the colors stand out.
Rustic Farmhouse Valentine Planter
Leave a terracotta pot mostly natural and add a whitewashed rim. Use red-and-white striped straws, kraft-paper hearts, jute twine, and a small rosemary plant or faux eucalyptus stem.
Modern Minimalist Version
Paint the planter matte white or black. Add only three straws with simple red, blush, and metallic-gold hearts. Keep the lettering small and use a compact green plant for contrast.
Valentine Candy Bouquet
Fill the pot with individually wrapped candy and add hearts attached to sturdy paper straws. Wrap the finished planter in clear cellophane for gifting, making sure all treats remain sealed and separate from paint or glue.
Classroom-Friendly Planters
Use inexpensive plastic cups or mini pots instead of breakable terracotta. Children can decorate foam hearts with stickers and washable markers. Fill the containers with pencils, erasers, crayons, or wrapped snacks.
Photo Memory Planter
Attach small printed photographs to the straws and alternate them with hearts. This version works especially well for parents, grandparents, close friends, and couples who enjoy sentimental gifts but claim they “do not need anything.”
Plant-Care Tips for a Living Valentine Planter
A pretty container should not become a tiny plant prison. When using a real plant, prioritize drainage, light, and watering needs.
Choose a planter with an open drainage hole whenever possible. If the decorative container has a solid bottom, leave the plant in a smaller nursery pot. Remove the inner pot for watering, let the extra water drain, and return it afterward.
Use fresh container potting mix rather than soil collected from the yard. Container mixes are generally lighter and allow more air around roots. Succulents and cacti need an especially fast-draining mixture and should not remain in standing water.
Place the planter where the chosen plant receives appropriate light. Paper straws and cardstock may fade in intense direct sunlight, so a bright location with indirect light is often a practical compromise. Remove the paper picks temporarily when watering if splashing is likely.
Common Mistakes to Avoid
Using Too Many Decorations
A crowded planter can look messy and may block light from reaching a living plant. Begin with five picks and add more only when the arrangement truly needs them.
Making Every Straw the Same Height
Equal-height toppers create a stiff horizontal line. Trim the straws into at least three different lengths to create depth.
Ignoring Water and Moisture
Cardstock, paper straws, and unsealed labels will not enjoy regular showers. Keep them above the soil line and water carefully at the base of the plant.
Using Heavy Toppers
Large wooden shapes or thick embellishments can bend paper straws. Use lightweight materials or reinforce the straw by sliding a thin wooden skewer inside it.
Rushing the Drying Time
Applying stickers, ribbon, or glue before paint dries can create fingerprints, peeling, and mysterious pink smears on everything nearby. Let the planter dry fully between stages.
Crafting Without Ventilation
Follow all product-label precautions when using paints, sealers, spray adhesives, or strong glues. Work in a well-ventilated area and keep craft products away from food, pets, and small children.
How to Display or Gift Your Finished Planter
Place the finished Valentine planter on an entryway table, desk, kitchen counter, bathroom shelf, or party buffet. A pair of matching planters can frame a dessert display, while three different sizes make an easy centerpiece for a Galentine’s Day brunch.
For gifting, add a care tag when the planter contains a real plant. Include the plant’s name, preferred light, and basic watering instructions. Wrap only the pot in tissue or cellophane, leaving the foliage uncovered so it is not crushed.
This DIY planter also makes a thoughtful gift for teachers, neighbors, coworkers, grandparents, and friends. Valentine’s Day is not exclusively reserved for romantic love, despite what the greeting-card aisle may imply.
Experience Notes: What Making This Valentine Planter Is Really Like
The most useful lesson from this project is that the simplest version often looks the best. It is tempting to buy every heart sticker, pom-pom, glitter ribbon, wooden word, and miniature cupid in the craft aisle. Once all those pieces land on a four-inch planter, however, the result can resemble a Valentine parade experiencing a traffic jam.
In practice, choosing one main pattern and two or three supporting colors creates a cleaner display. A white pot with pink stripes, red hearts, and small gold details usually looks more intentional than six competing patterns. Laying all the materials on a table before gluing anything helps reveal whether the colors work together.
Another common discovery is that paper straws are decorative but not especially strong. A single cardstock heart is usually fine. A layered wooden ornament, oversized bow, and miniature photograph may cause the straw to lean dramatically to one side, as though it has just heard disappointing news. Sliding a bamboo skewer inside the straw solves the problem without changing the appearance.
Spacing also makes a noticeable difference. When the picks are placed too close together, the hearts hide one another. Starting with the tallest straw in the center and turning the planter after each new addition helps create a balanced arrangement. Even when the display is intended to face forward, checking the sides prevents awkward gaps.
The planter material affects the crafting experience as well. Terracotta accepts paint and glue easily, but its porous surface may require a second coat of paint. Smooth glazed ceramic looks polished from the start, although some adhesives grip it less securely. Plastic is lightweight and inexpensive, making it ideal for classrooms or party favors, but lightly cleaning and drying the surface first improves paint adhesion.
Real plants add charm, yet they also introduce water into a project made partly from paper. Keeping the plant in its nursery pot is often the easiest arrangement. It can be lifted out, watered over a sink, drained, and placed back inside the decorated planter. The paper hearts stay crisp, and the plant avoids sitting in excess water.
Faux plants are more forgiving for seasonal displays. They allow the planter to be packed away after February and used again next year. They are also practical for offices, classrooms, guest rooms, or shelves that receive little natural light. A small amount of artificial moss around the base helps disguise floral foam and gives the arrangement a finished appearance.
Making several planters at once is usually faster than completing them individually. Paint all the pots first, cut all the hearts together, and then assemble the straw toppers while the paint dries. This production-line approach works well for teacher gifts, party favors, or a family craft afternoon.
The project is especially enjoyable when each maker adds a personal message. Funny sayings, shared jokes, nicknames, and small photographs turn an inexpensive craft into something memorable. A perfectly painted pot is nice; a slightly crooked heart carrying the exact message someone needed to hear is better.
Finally, expect the finished arrangement to evolve. A heart may need trimming, a bow may look better on another straw, or the tallest pick may belong at the back instead of the center. Nothing is permanently wrong until an unreasonable amount of hot glue becomes involved. Make small adjustments, keep the design lighthearted, and let the handmade character remain visible.
Final Thoughts
Quick and easy DIY Valentine straw/planter decor proves that charming seasonal decorations do not need to be expensive or complicated. A plain pot, several paper straws, and a collection of handmade hearts can become a personalized centerpiece or gift in surprisingly little time.
Use a real plant for a present that continues growing, choose faux greenery for reusable decor, or fill the planter with treats for instant happiness. Whether the final style is rustic, modern, colorful, romantic, or cheerfully over-the-top, the project offers plenty of room for creativity. Most importantly, it turns simple materials into a handmade reminder that affection grows best when it receives a little attentionand occasionally a properly drained pot.