

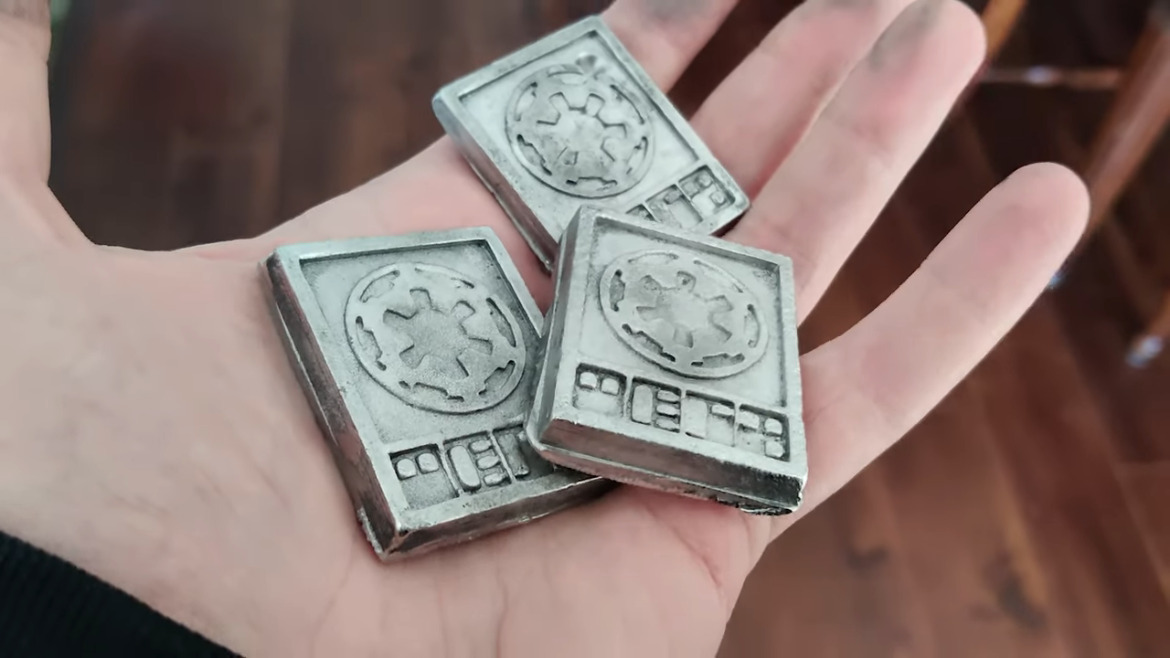
Metal casting usually brings to mind roaring furnaces, leather aprons, and enough heat to make your eyebrows reconsider their career choices. Casting Rose’s metal is different. Because this fusible alloy melts at roughly the temperature of very hot water, makers can experiment with direct metal casting using carefully designed 3D printed molds instead of industrial foundry equipment.
The combination is wonderfully practical: design a part digitally, print a reusable mold, melt the alloy at a relatively low temperature, and pour. Coins, chess pieces, stamping tools, decorative medallions, mechanical prototypes, and small replicas can all move from an STL file to a solid metal object without sending the project to a commercial casting shop.
However, “low temperature” does not mean “harmless.” Rose’s metal commonly contains lead, molten alloy can cause severe burns, and an unsuitable plastic mold can soften, leak, or split. Successful results depend on understanding the alloy, selecting the right printing material, designing proper gates and vents, and treating safety as part of the process rather than an optional accessory.
What Is Rose’s Metal?
Rose’s metal, also called Rose metal or Rose’s alloy, is a low-melting bismuth-based alloy. A commonly sold formulation contains approximately 50% bismuth, 25% lead, and 25% tin. Commercial compositions vary, so the supplier’s technical sheet and Safety Data Sheet should always outrank a random formula copied from a forum post at 2:00 a.m.
Depending on its exact composition, Rose’s metal may begin melting around 203°F to 208°F, while some non-eutectic products remain partly solid until approximately 239°F. In practical terms, it has a melting range rather than always snapping instantly from solid to liquid at one precise temperature.
Why the Alloy Works Well for Printed Molds
The low melting range is the main attraction. Aluminum melts near 1,220°F, while copper and iron require even more dramatic temperatures. Those metals would turn an ordinary FDM mold into a smoky plastic memory. Rose’s metal can be poured close to 212°F, placing it within reach of certain heat-resistant filaments and specialty resins when the mold is thick, dry, supported, and used for a brief casting cycle.
Its high bismuth content also gives the alloy useful dimensional behavior. Many casting metals shrink noticeably as they solidify. Rose’s metal is commonly described as having little or no contraction during cooling, which can help it reproduce lettering, shallow textures, and fine edges. It is not magic dimensional fairy dust, but it can be more cooperative than alloys that pull away from every detail while cooling.
Traditional and Modern Uses
Historically, Rose’s metal has been used as solder, as a heat-transfer medium, and as a temporary filler inside tubes that need to be bent without collapsing. Makers now use it for small castings, prototypes, counterweights, replicas, stamping tools, experimental components, and objects that benefit from a convincing metallic weight without requiring a full foundry setup.
Alloy composition, melting range, cooling behavior, and traditional uses checked against Belmont Metals, RotoMetals, American Elements, and Hackaday.
Can You Really Pour Metal Into a Plastic Mold?
Yes, but the complete answer is, “Yes, under the right conditions, and please do not use a decorative PLA vase as your experimental crucible.” Direct casting works because the alloy’s temperature is low and its contact with the mold is brief. The plastic still absorbs heat, so mold material, wall thickness, geometry, pour temperature, and cooling time matter.
PETG molds have been used successfully for repeated Rose’s metal pours. ABS has also been used for low-melting bismuth-alloy casting because it generally tolerates heat better than standard PLA. High-temperature SLA resins can provide sharper detail and greater thermal resistance, although they cost more and require correct washing and post-curing.
Why PLA Is a Risky Default
PLA is easy to print and wonderfully crisp, but standard PLA begins losing stiffness well below the pouring temperature of Rose’s metal. A mold may look perfect on the workbench yet distort when the hot alloy reaches a thin wall. Annealing can improve the heat resistance of some PLA formulations, but it may also shrink or warp the mold and alter critical dimensions.
PETG and ABS usually offer a better thermal margin, although PETG’s practical heat resistance can still overlap Rose’s metal’s melting range. That means PETG is not automatically invincible. A thick PETG mold can survive because the alloy begins cooling as soon as it enters the cavity, while a thin mold with a large hot-metal volume may sag like a lawn chair left beside a bonfire.
Use a Test Coupon Before the Full Mold
Before printing a complicated six-hour mold, create a small test block using the same filament, wall thickness, layer height, and cavity depth planned for the final tool. Pour a small quantity of alloy into it while the mold sits inside a dry containment tray. Inspect the test for softening, leaks, layer separation, surface damage, and permanent distortion.
This inexpensive trial answers the question that material labels cannot: how your exact filament, printer settings, alloy, and pouring technique behave together.
Polymer heat behavior and direct-casting limitations checked against Prusa Research, UltiMaker, MatterHackers, Make:, Formlabs, and Xometry.
Designing a 3D Printed Mold for Rose’s Metal
A successful mold is more than a negative copy of the desired object. Molten metal must enter the cavity, air must escape, the mold halves must remain aligned, and the finished casting must come out without requiring an archaeological excavation.
Choose the Parting Line Carefully
Most reusable molds are divided into two halves. The line where they meet should follow the widest practical outline of the model and avoid trapping undercuts. A poor parting line can lock the casting inside even when every other step succeeds.
Simple coins, plaques, flat badges, and stamping tools are beginner-friendly because they can often be cast in a shallow one-part mold or a straightforward two-part mold. Figurines, hooks, deep recesses, and intertwined shapes may require multiple mold sections or a sacrificial shell that is broken away after casting.
Add Registration Keys
Registration keys keep both halves aligned. Hemispherical bumps and matching recesses work well, as do tapered pins built into the mold. Use several keys arranged asymmetrically so the mold cannot be assembled backward. This small detail prevents double edges and offset lettering that make a casting look as though it was designed during a minor earthquake.
Include a Pouring Cup and Gate
The pouring cup provides a generous target for the stream of molten alloy. It narrows into a gate that feeds the cavity. A short, smooth, gradually tapered path is generally easier to fill than a tiny horizontal tunnel filled with sharp corners.
Place the gate where the alloy can flow from a thicker area toward thinner details. Avoid feeding directly into the most visible face when possible because the gate leaves a stub that must be trimmed later.
Design Vents and a Riser
Air already occupies the mold cavity, and it needs somewhere to go. Add narrow vents from high points in the cavity to the outside of the mold. Without them, trapped air may create rounded corners, missing lettering, or large voids.
A riser is an additional vertical reservoir connected to the casting. It confirms that metal has reached the far side of the cavity and can continue feeding the part as solidification occurs. Rose’s metal has favorable cooling behavior, but a small riser remains useful for diagnosing incomplete fills.
Add Draft and a Pry Notch
Slightly tapered vertical walls make rigid castings easier to remove. Even one or two degrees of draft can reduce the force needed during demolding. A shallow recess along the outside seam also gives a flat tool a controlled place to separate the mold halves without stabbing the cavity surface.
Recommended 3D Printing Strategy
The mold should be treated as functional tooling, not as a lightweight display print. Thin shells, decorative infill patterns, and aggressive speed settings save filament but create weak points that hot, dense metal is exceptionally good at discovering.
Use Thick Perimeters
Print several solid perimeter walls and provide substantial material between the cavity and the mold exterior. Increase thickness around the pouring cup, gate, alignment keys, and narrow sections. Thick walls act as structural reinforcement and as a thermal buffer.
Favor Strength Over Printing Speed
A moderate layer height produces a smoother cavity and improves detail. Slower exterior walls can reduce gaps and improve dimensional accuracy. High infill or locally solid regions are appropriate near the cavity, although a mold does not necessarily need to be a completely solid brick if its shell and supports are well designed.
Orient Layers to Resist Splitting
FDM parts are weakest between layers. Orient each mold half so clamping and internal pressure are not trying to peel the layers apart. Large flat mold faces are often easiest to print against the build plate, but the best orientation depends on the gate position and cavity geometry.
Inspect Every Surface
Hold the completed mold up to strong light and inspect it for cracks, missing extrusion, open seams, warped corners, and poorly bonded layers. A cosmetic defect in a figurine is disappointing. The same defect in a mold holding molten alloy is a leak with ambitions.
Preparing the Mold
Test-fit the mold halves before melting anything. Confirm that the registration keys seat fully and that the seam closes without rocking. Remove loose strings and blobs that prevent full contact, but avoid aggressive sanding inside detailed cavities because every scratch may appear on the casting.
Make Certain the Mold Is Completely Dry
Moisture and molten metal are an unsafe combination. Water can flash into steam and throw hot alloy from the mold. Store the printed tool in a dry location, and never rinse it immediately before casting. Do not pour into a mold containing condensation, wet release agent, or damp residue.
Apply Release Agent Sparingly
Fine graphite powder is sometimes brushed onto the cavity to improve release and reduce sticking. Use only a thin, even coating. Excess powder can collect in fine details and soften the surface definition. Follow the product’s safety directions and avoid creating airborne dust.
Clamp and Contain the Mold
Secure the mold with bolts, clamps, or a rigid external frame. Apply enough force to close the seam without crushing or bowing the printed halves. Place the entire assembly in a dry steel tray or a container of completely dry sand capable of catching leaks. Never hold the mold in your hand while pouring.
Melting and Pouring Rose’s Metal
Use a dedicated metal container with a controlled heat source. A small thermostatically controlled melting pot or electric hot plate offers more predictable heating than waving a torch at the alloy. Some lower-melting formulations can be melted in a hot-water bath, but not every commercial Rose’s metal composition fully liquefies below water’s boiling point.
Keep the temperature only high enough to make the alloy fully fluid. Excessive heating increases exposure risks, puts more thermal stress on the plastic mold, and buys little in return. Verify temperature with an appropriate dedicated thermometer rather than guessing from the alloy’s mood.
A Controlled Pouring Sequence
- Place the dry, closed mold inside its containment tray.
- Confirm that ventilation is operating and the path around the work area is clear.
- Melt only the amount of alloy needed, plus a small allowance for the gate and riser.
- Remove surface dross carefully without splashing the metal.
- Pour in one steady motion into the pouring cup.
- Continue until alloy appears in the riser or the cup remains full.
- Set the vessel on a heat-resistant surface and leave the mold untouched.
Do not tap, squeeze, move, or open the mold while the metal is liquid. Allow the casting to cool naturally. Quenching a hot plastic mold with water can produce steam, distort the tool, and spread lead-contaminated material.
Essential Safety Precautions
Rose’s metal is easier to melt than conventional casting alloys, but the common formulation contains approximately 25% lead. Lead exposure can occur through contaminated dust, fumes, surfaces, hands, clothing, and finishing debris. The project should therefore be treated as lead work, not as a harmless kitchen craft.
Ventilation and Workspace
Work outdoors or use effective local exhaust ventilation positioned to capture emissions near the melting and pouring area. An open window across the room is not the same as source capture. Keep the casting station separate from kitchens, living areas, children’s play spaces, and locations used for food preparation.
Dedicated Equipment Only
Never reuse the pot, spoon, thermometer, tray, or tools for cooking. Clearly label all casting equipment and store it in a closed workshop container. Do not use a household sink to clean lead-contaminated tools, and do not wash casting residue into a storm drain.
Personal Protection
Wear safety glasses or a face shield, heat-resistant gloves, long pants, closed leather footwear, and natural-fiber clothing. Synthetic clothing can melt against skin. Appropriate respiratory protection requires correct hazard assessment, filter selection, fit testing, and a complete protection program; a casual dust mask should not be treated as a magical force field.
Lead Hygiene
Keep food, drinks, cigarettes, and phones away from the workbench. Wash hands using a lead-removal product before eating or leaving the area. Clean surfaces with methods intended for lead contamination rather than sweeping or blowing dust into the air. Keep contaminated clothing and footwear from carrying residue into the home.
Consider a Lead-Free Alternative
For demonstrations, schools, shared workshops, or projects handled frequently, a lead-free bismuth alloy such as Field’s metal may be a better choice. It is usually more expensive, but it removes the deliberate use of lead. Lead-free pewter may also be suitable when paired with a genuinely heat-resistant mold, although its higher pouring temperature demands different tooling.
Lead hazards and exposure-control guidance checked against OSHA and CDC/NIOSH resources.
Demolding and Finishing the Casting
Wait until the mold and casting are cool enough to handle safely. Remove clamps and separate the halves gradually at the designed pry notch. If the mold resists, do not strike it while the metal remains hot. The casting may still be soft enough to deform.
Trim the gate, riser, vents, and flashing using dedicated tools. Minimize grinding and dry sanding because those operations can produce lead-containing dust. When finishing is necessary, use controlled methods that capture debris, follow appropriate ventilation practices, and collect all chips, slurry, and residue for disposal according to local hazardous-waste requirements.
Inspect the mold after every cycle. Retire it if the cavity has distorted, the seam no longer closes, the layers have separated, or the gate has softened. A reusable mold is economical only until it becomes a reusable leak.
Common Casting Problems and Their Solutions
| Problem | Likely Cause | Practical Correction |
|---|---|---|
| Incomplete casting | Metal too cool, gate too narrow, or poor venting | Verify temperature, enlarge the gate, and add vents at high points |
| Large seam flashing | Mold halves misaligned or insufficiently clamped | Improve registration keys and use evenly distributed clamping |
| Rounded or missing details | Trapped air, excess release powder, or rough print layers | Add micro-vents, brush out excess powder, and improve cavity finish |
| Warped mold | Unsuitable filament, thin walls, or excessive pour temperature | Use a more heat-resistant material, increase thickness, and reduce superheat |
| Metal leaks through layers | Porous print, crack, or weak seam | Increase perimeters, improve extrusion consistency, and test before reuse |
| Casting trapped in mold | Undercuts, insufficient draft, or badly placed parting line | Redesign the split, add draft, or use a sacrificial shell mold |
Good Projects for Rose’s Metal Casting
Begin with broad, shallow objects that fill easily and release cleanly. Coins, medallions, nameplates, game tokens, simple chess pieces, leather-stamping tools, calibration weights, decorative hardware, and flat mechanical prototypes are sensible first projects.
Delay extremely thin fins, enclosed voids, long narrow channels, and complex internal undercuts until the basic workflow is reliable. A mold that resembles a maze designed by an irritated architect will not become easier merely because the alloy melts at a friendly temperature.
For detailed miniatures, high-temperature SLA tooling may capture finer surfaces than ordinary FDM molds. For larger or hotter castings, use the 3D print as a master pattern for silicone, investment, or sand casting rather than pouring directly into thermoplastic.
Applications and mold approaches checked against Hackaday, Formlabs, Make:, and rapid-tooling guidance.
Workshop Experience: What Repeated Pours Teach You
The first practical lesson is that mold design matters more than artistic detail. Makers often begin by obsessing over tiny engraved letters while treating the gate and vents as unpleasant administrative paperwork. The result may be a beautifully modeled cavity that fills only halfway. A plain mold with a generous pouring cup, smooth gate, visible riser, and well-placed vents usually outperforms a gorgeous but poorly fed design.
A second lesson is that thicker molds inspire confidence for a reason. During an early test, a thin tool may survive one pour and appear victorious. On the next cycle, accumulated thermal stress can soften the gate, bow the seam, or weaken layer adhesion. Extra material around the cavity makes the print slower and heavier, but it also gives heat somewhere to go. Saving fifty cents of filament is not much of a bargain when molten alloy escapes across the bench.
Temperature control is another experience that changes the entire process. Beginners frequently heat the alloy far beyond what is necessary because a hotter liquid seems easier to pour. The alloy becomes more fluid, but the mold receives a harsher thermal shock. A controlled temperature just above complete liquefaction is usually more repeatable. The stream remains manageable, details fill properly, and the mold has a better chance of surviving another cycle.
Clamping technique improves with practice as well. One large clamp in the center can bend the mold while leaving the corners slightly open. Several smaller clamps or bolts distributed around the cavity provide more even pressure. Tightening them gradually in sequence helps the halves meet without distortion. The goal is firm closure, not an attempt to compress PETG into a new geological layer.
Surface finish also becomes more predictable after several attempts. Every visible FDM layer inside the mold can transfer to the metal. That texture may look attractive on a science-fiction token but less appealing on a polished medallion. Printing at a finer layer height, orienting the cavity intelligently, and smoothing only accessible surfaces can reduce the staircase effect. Excessive release powder, however, can erase small lettering faster than rough layers do.
Venting problems are easiest to diagnose by studying failed castings. A repeated bubble at the same corner is not bad luck; it is trapped air filing a formal complaint. Adding a narrow vent from that location to the mold exterior often solves the problem. Similarly, a consistently incomplete thin section may need a wider feed path or a different mold orientation rather than a hotter pour.
Demolding teaches patience. Rose’s metal may appear solid on the surface while the center remains warm and relatively soft. Opening the mold early can bend narrow features or tear the gate away from the part. Allowing extra cooling time produces cleaner separation and protects the mold from being twisted while hot.
Finally, good workshop habits matter as much as successful castings. Dedicated tools, labeled storage, proper cleanup, lead-control practices, and a dry containment tray make the activity repeatable rather than reckless. The most satisfying outcome is not merely producing one shiny metal object. It is developing a controlled process that can create the next object without damaging the mold, contaminating the workspace, or turning a pleasant experiment into an avoidable safety incident.
Conclusion
3D printed molds for casting Rose’s metal offer an accessible bridge between digital fabrication and traditional metalworking. The alloy’s low melting range makes direct casting possible with thick PETG, ABS, or specialty high-temperature resin molds, while digital design allows gates, vents, registration keys, and complex surface details to be built directly into the tooling.
The process works best when approached as engineering rather than improvisation. Test the exact material combination, use substantial mold walls, control the alloy temperature, provide a clear path for both metal and escaping air, and inspect the tool after every pour. Most importantly, remember that common Rose’s metal contains lead. Effective ventilation, dedicated equipment, contamination control, protective clothing, and responsible waste handling are essential parts of the project.
With careful preparation, even a desktop 3D printer can become the starting point for coins, tools, replicas, prototypes, and decorative metal parts. It is a satisfying transformation: yesterday’s CAD model becomes today’s hefty metal object, complete with that unmistakable “I made this in my workshop” charm.
Editorial note: This article synthesizes technical and safety information from established manufacturing resources, alloy suppliers, additive-manufacturing specialists, OSHA, CDC/NIOSH, and documented maker casting experiments. Exact alloy compositions and polymer properties vary by manufacturer; users should consult the applicable Safety Data Sheets and technical data sheets before beginning any casting project.