

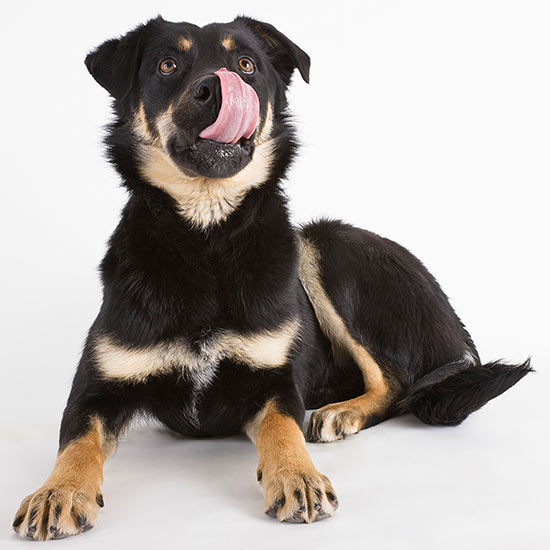
Dogs are wonderfully uncomplicated customers. Give them a comfortable place to nap, something interesting to sniff, and an object they are officially allowed to chew, and they will assume you are a design genius.
That makes DIY projects for dog owners especially rewarding. You can customize each item for your dog’s size, age, habits, mobility, and magnificent talent for covering everything in hair. Homemade dog accessories may also cost less than store-bought versions, particularly when you reuse washable fabric, scrap wood, cardboard, or PVC left over from other projects.
Safety, however, matters more than an impressive social media reveal. A beautiful toy is not a success if its decorative button becomes an afternoon snack. Choose sturdy materials, smooth every edge, avoid exposed staples and toxic finishes, and supervise your dog whenever a new enrichment item is introduced. The best DIY dog project is one your pet can enjoy without creating an unscheduled veterinary adventure.
Before Starting Your DIY Dog Projects
Match every project to the dog in front of you rather than the imaginary perfectly behaved dog in the instructions. Strong chewers need tougher construction than gentle seniors. Puppies may swallow fabric, cardboard, or foam while investigating it. Older dogs often benefit from nonslip surfaces, lower obstacles, and easier access to beds, food, and favorite furniture.
Use pet-safe, water-based finishes and allow them to cure completely before returning the item to your dog. Remove loose strings, cracked plastic, splintered wood, exposed glue, and pieces small enough to swallow. Food-based enrichment should use part of your dog’s normal daily calories, not an additional buffet disguised as a brain game.
Easy DIY Projects for Canine Comfort and Enrichment
1. Make a No-Sew Fleece Tug Toy
Cut three or four long strips from clean fleece fabric, knot them firmly at one end, braid the strips tightly, and finish with another substantial knot. Fleece is softer than many ropes and can be washed after your dog drags it through every known category of yard debris.
Make the finished tug long enough to keep your hands away from excited teeth. Use it for structured games with clear “take it” and “drop it” cues. Inspect the braid regularly and discard it when it begins shedding strips. This is an interactive toy, not something to leave with a dog who enjoys eating textiles.
2. Build a Washable Snuffle Mat
A DIY snuffle mat turns ordinary kibble into a scent-driven treasure hunt. Start with a sturdy rubber sink mat containing multiple holes. Cut dozens of fleece strips and tie them through the openings until the surface becomes dense and shaggy.
Scatter dry food between the folds and let your dog search with their nose. Sniffing and foraging provide mental stimulation without requiring a marathon around the neighborhood. Begin with loosely scattered kibble so the game is easy, then hide pieces more deeply as your dog gains confidence. Wash the mat frequently and supervise its use, especially if your pet believes fleece is an exotic vegetable.
3. Create a Muffin-Tin Puzzle Feeder
Place a few pieces of kibble in the cups of a clean muffin pan, then cover selected cups with balls or other dog-safe objects. Your dog must move the covers to uncover the food. It is inexpensive, adjustable, and significantly more exciting than watching dinner appear in a bowl without explanation.
Choose covers too large for your dog to swallow and avoid cracked tennis balls or damaged rubber. For beginners, leave several cups uncovered. Experienced puzzle solvers can tackle a fully covered pan. Count the food as part of the dog’s regular meal and stop the session if frustration turns into aggressive pan remodeling.
4. Assemble a Low PVC Agility Jump
PVC pipe and removable connectors can become a lightweight backyard agility jump. Build two stable side supports and rest a horizontal bar in shallow holders so it falls away easily when bumped. Keep all pipe ends capped and check that the frame cannot wobble or collapse onto the dog.
Start with the bar almost touching the ground. Encourage your dog to walk over it using praise and small rewards before increasing the height. Repeated jumping is not appropriate for every puppy, senior dog, or pet with joint, back, or heart concerns, so ask your veterinarian before turning the yard into the Canine Olympics.
5. Design an Indoor Scent-Search Course
Save several small cardboard boxes, remove tape and staples, and arrange them around one room. Place a treat in one or two boxes while leaving the others empty. Lead your dog into the room and give a consistent cue such as “find it.”
Once the game becomes easy, change the box locations or hide food beneath lightweight cups and clean towels. Scent games are useful during bad weather and can be adapted for dogs with limited mobility. Keep the course on the floor, avoid slippery pathways, and remove cardboard if your detective abandons scent work in favor of shredding and swallowing the evidence.
6. Sew a Washable Envelope Dog Bed
Create a simple envelope-style cover from durable upholstery fabric, canvas, or washable cotton. Insert an existing dog-bed cushion, folded blankets, or a properly sized orthopedic foam pad. An overlapping fabric panel on the back eliminates the need for a zipper, which is helpful for dogs who regard metal hardware as an appetizer.
Prewash the fabric before cutting so the finished cover does not shrink. Use strong seams and check them regularly. Senior dogs may appreciate a supportive foam insert and a low bed that is easy to enter. Dogs that destroy stuffing should use a tougher commercial bed until their interior-design phase has passed.
7. Construct a Nonslip Dog Ramp
A stable ramp can help a small, short-legged, injured, or older dog reach a couch, bed, porch, or vehicle with less jumping. Cut a wide board to the required length, sand every surface, and attach closely spaced wooden cleats or a securely fastened rubber runner for traction.
Add low side rails and anchor the top so the ramp cannot slide away during use. A longer ramp produces a gentler slope, which is usually easier for dogs with reduced mobility. Introduce it with treats and patience rather than placing the dog at the top and hoping gravity offers a persuasive tutorial. Have a veterinarian evaluate sudden reluctance to jump or climb.
8. Build a Custom Feeding Station
Cut openings in a sealed plywood top to hold removable stainless-steel bowls. Mount the top on a broad, stable base and add rubber feet so enthusiastic eating does not send dinner traveling across the kitchen. Removable bowls make daily washing much easier.
The station can remain near floor level or be built to a veterinarian-recommended height for a dog with specific mobility needs. Elevated feeding is not automatically better for every animal, so customization should be based on comfort and professional advice rather than decorating trends. Finish the wood with a pet-safe coating, allow it to cure fully, and wipe up trapped moisture before it becomes a science project.
9. Install a Wall-Mounted Leash Station
Transform a small wooden board into an organized dog-walking station. Sand it, apply a pet-safe finish, and add strong hooks for leashes, harnesses, waste-bag holders, and a lightweight towel. Include a small shelf or basket for treats and keys.
Mount the station securely into wall studs or suitable anchors near the door. Position it high enough that the dog cannot chew hanging straps or pull the entire arrangement down while performing the pre-walk celebration dance. Add a printed checklist for medications, reflective gear, or water during hot weather. It is practical, attractive, and may finally answer the daily question, “Where did the leash go?”
10. Make an Open-Front Dog Toy Box
Build a shallow wooden bin with a lowered front edge so your dog can select toys independently. Sand corners until they are smooth, use recessed or well-covered fasteners, and apply only a fully cured pet-safe finish. The base should be broad enough to resist tipping.
Sort toys by type and rotate a few every week rather than leaving the entire collection out permanently. Rotation can make familiar toys seem interesting again. Do not store food treats in an accessible toy box unless you enjoy watching your dog conduct a determined and extremely noisy inventory audit at two in the morning.
11. Set Up a Paw-Cleaning Station
Place a nonslip waterproof tray by the main entrance and top it with an absorbent washable mat. Add a basket containing dog towels, a soft paw brush, waste bags, and veterinarian-approved paw-cleaning supplies. A sealed container can hold a backup towel for days when the first one immediately loses the battle.
Teach your dog to step onto the mat, pause, and offer one paw at a time. Use plain water for routine mud whenever possible, and avoid essential oils or strongly scented household cleaners. Check paws for cuts, burrs, salt, or irritation while cleaning. The station will not stop mud from existing, but it can prevent your living room from becoming its final destination.
12. Create an Airtight Treat and Kibble Center
Use food-safe containers with tight lids to organize training treats and small quantities of kibble. Label each container with its contents and opening date, then place it on a shelf inaccessible to pets. Include a measured scoop so portions do not gradually expand through optimism.
Keep original pet-food packaging until the food has been used, since the label contains product, lot, and manufacturing information that may be important if a problem occurs. Wash and dry reusable containers before refilling them instead of repeatedly pouring fresh food over oily crumbs. Your dog may not admire the organization, but will support any project involving treat storage.
13. Build a Shaded Outdoor Water Station
Create an open-sided shade canopy using a sturdy frame and outdoor fabric positioned to preserve airflow. Place a heavy, tip-resistant water bowl beneath it on a level surface. The structure should be securely anchored, with no loose cords or sharp fittings within the dog’s reach.
Refresh the water frequently and move the station as the sun changes position. A closed doghouse can trap heat, so it should not be treated as reliable summer cooling. Outdoor access still requires supervision, especially during hot or humid weather. This project provides a comfortable rest point, not permission for a dog to remain outside through dangerous temperatures.
14. Prepare a Frozen Enrichment Tray
Fill a silicone mold or sturdy food toy with small portions of dog-safe ingredients such as plain pumpkin puree, mashed banana, plain unsweetened yogurt, moistened kibble, or a little unsalted peanut butter. Freeze the portions and serve one as an occasional enrichment activity.
Read every ingredient label carefully. Peanut butter and other human products must not contain xylitol, sometimes identified as birch sugar, because it is highly toxic to dogs. Avoid chocolate, grapes, raisins, macadamia nuts, onions, garlic, alcohol, and heavily sweetened foods. Introduce new ingredients gradually and ask your veterinarian about appropriate choices for dogs with allergies, diabetes, pancreatitis, or prescription diets.
How to Choose the Best DIY Project for Your Dog
Start with the problem you actually need to solve. A young dog who becomes restless indoors may benefit most from a snuffle mat, puzzle feeder, or scent-search course. A senior dog may gain more from a nonslip ramp and supportive bed. Households drowning in leashes and squeaky toys should probably address organization before building an agility arena in the dining room.
Also consider maintenance. Washable fabric, removable bowls, replaceable traction material, and accessible fasteners make homemade dog accessories easier to keep sanitary and repair. Complicated projects are not automatically better. To a dog, a carefully folded towel containing hidden kibble may be more thrilling than a handcrafted mahogany entertainment center.
Practical Experience From Building DIY Projects for Dogs
The most useful lesson shared by experienced dog owners is that the first version rarely remains the final version. A snuffle mat that works beautifully for a calm spaniel may be flipped over and shaken like a tiny rug by an energetic terrier. A toy box designed for a large dog may be too deep for a dachshund. Successful DIY dog projects improve through observation: watch how the dog approaches the item, identify where the design creates difficulty, and adjust it before encouraging repeated use.
Introducing the project matters as much as constructing it. Many dogs hesitate around an unfamiliar ramp, especially when it moves, sounds hollow, or has a slick surface. Owners often get better results by laying the ramp flat for several short training sessions. The dog can sniff it, walk across it, and receive rewards before either end is raised. Increasing the angle gradually builds confidence. Forcing a nervous dog onto a new structure usually creates a memorable experience, unfortunately in the wrong direction.
Durability tests also tend to be humbling. A project that feels strong to human hands may meet a dog with the jaw pressure, persistence, and free afternoon needed to expose its weaknesses. Owners quickly learn to reinforce toy-box corners, shorten dangling fabric, countersink screws, and replace decorative handles with simpler designs. The safest result is often less photogenic than the original plan. Dogs have never complained that a ramp lacks decorative molding, and they remain famously indifferent to coordinated hardware.
Cleaning deserves attention during the design stage. Removable covers, washable mats, stainless-steel bowls, and sealed wood save considerable effort later. A food puzzle with narrow spaces may look clever until soft food hardens inside it. Likewise, outdoor projects need drainage so water cannot collect and encourage mold, insects, or unpleasant odors. Before completing a build, imagine cleaning it while tired, holding a leash, and being watched by a dog who has just discovered mud. That scenario produces better engineering decisions than optimism alone.
Another common experience is that food enrichment must be measured. Puzzle feeders and frozen treats feel like activities, so it is easy to forget that they also contain calories. Many owners solve this by reserving part of breakfast or dinner for the day’s enrichment project. Kibble goes into the snuffle mat, a small portion is frozen in a toy, and the remainder is served conventionally. The dog receives variety without accidentally adding an entire second menu.
Finally, the best projects tend to strengthen communication between dogs and their people. A tug toy creates an opportunity to practice releasing an object. A scent course encourages independent problem-solving. A paw-cleaning station can teach calm handling, while a ramp helps an aging dog continue participating in family routines. The finished object is useful, but the shared process is often more valuable. You learn what motivates your dog, what causes hesitation, and what kind of challenge produces happy concentration instead of frustration. Your dog learns that your strange garage activities occasionally lead to excellent snacks.
Conclusion
These 14 DIY projects for dog owners cover mental enrichment, comfortable rest, safer mobility, better organization, cleaner paws, and carefully portioned treats. Begin with one simple project, use materials suited to your dog’s behavior, and supervise the first several sessions.
Customization is the real advantage of DIY. You can widen a ramp, lower a toy box, reinforce a tug, or simplify a puzzle until it suits your individual dog. Build for safety first, convenience second, and appearance third. After all, your dog is likely to decorate the finished project with drool within minutes.