

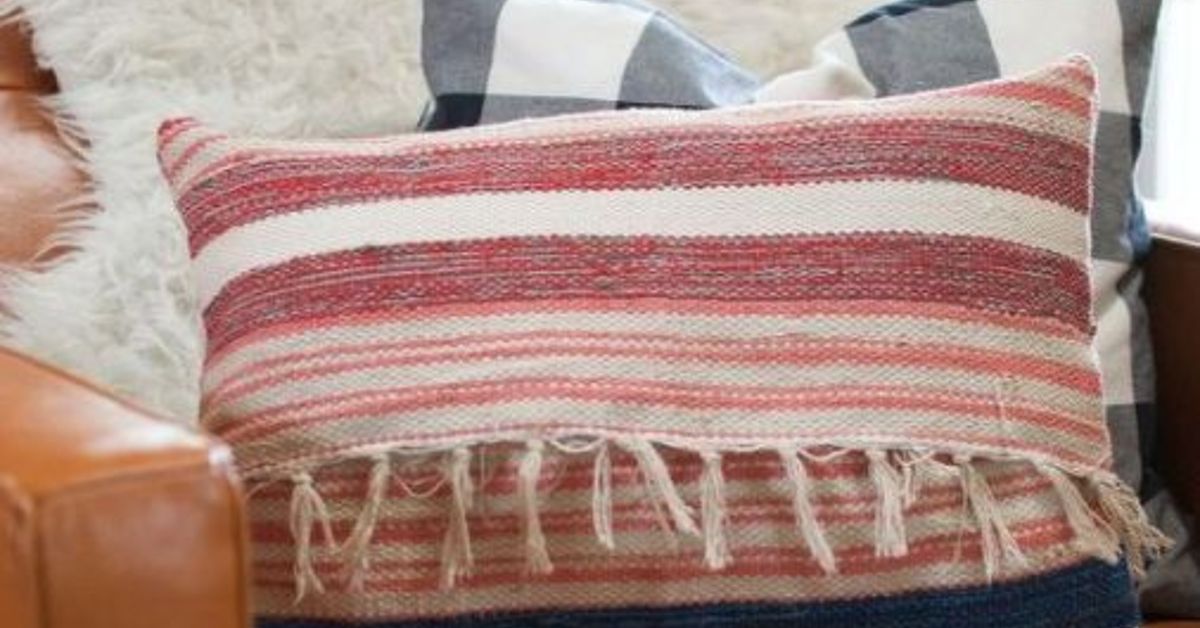
A boho pillow has one very important job: make a room look effortlessly collected, even when you carefully planot need advanced sewing skills, an industrial machine, or a mysterious attic full of imported textiles to create one.
This beginner-friendly tutorial shows you how to sew an easy boho chic pillow cover with a removable envelope back. The construction uses straight seams, simple measurements, and decorative details that can be adjusted to match your space. Choose earthy neutrals for modern boho style, saturated colors for a maximalist look, or rescued fabric for a pillow with genuine history instead of factory-manufactured “vintage vibes.”
The project is designed around an 18-by-18-inch pillow insert, but the same method works for nearly any square cushion. Once you understand the basic formula, your couch may become dangerously overpopulated with handmade pillows.
What Makes a Pillow Look Boho Chic?
Bohemian interior design is less about following a strict rulebook and more about creating a relaxed, personal mixture of color, pattern, texture, and handmade character. Traditional boho rooms may combine earthy shades with jewel tones, global-inspired patterns, plants, natural fibers, vintage furniture, fringe, embroidery, and woven accessories. Modern boho decor often uses a calmer neutral palette while keeping the tactile layers that make the style feel warm rather than sterile. row pillow, texture does most of the visual work. A plain cream fabric can feel richly bohemian when it includes contrasting yarn, chunky stitching, tassels, or a central panel of woven material. Designers frequently use pillows and throws as finishing layers because they introduce softness, dimension, and pattern without requiring a complete room makeover. le Boho Formula
For a balanced design, combine three elements:
- A grounded base: cotton canvas, linen blend, denim, mud-cloth-inspired fabric, or another stable woven material.
- A visible texture: yarn, fringe, woven trim, embroidery, tufting, or appliqué.
- A personal detail: thrifted fabric, a favorite color, handmade tassels, or intentionally irregular stitching.
You do not need to use every boho motif simultaneously. One pillow does not need fringe, pompoms, beads, mirrors, shells, twelve colors, and the spiritual energy of an entire flea market. Choose two or three related details and allow them to stand out.
Supplies for an 18-Inch Boho Pillow Cover
- One 18-by-18-inch pillow insert
- Approximately 3/4 yard of stable woven fabric
- Coordinating all-purpose polyester thread
- Sewing machine
- Universal sewing-machine needle suitable for woven fabric
- Fabric scissors or rotary cutter and cutting mat
- Ruler or measuring tape
- Fabric marker, chalk, or removable marking pen
- Straight pins or sewing clips
- Iron and ironing board
- Yarn, tassels, fringe, cotton cord, or woven trim
- Hand-sewing needle for attaching thicker decorations
- Optional lightweight fusible interfacing
A universal needle is an all-purpose choice for many woven fabrics. Heavier canvas, upholstery remnants, or densely woven material may require a larger needle recommended for the specific fabric. Always test the needle, thread, stitch length, and tension on a scrap before sewing the actual cover. This tiny rehearsal can prevent a dramatic confrontation between your sewing machine and a decorative trim.
Choosing the Best Fabric
Beginner projects behave best when made from a stable woven fabric that does not stretch or slide excessively. Cotton canvas, medium-weight linen blends, duck cloth, denim, and home-decor cotton are dependable options. Standard quilting cotton can also work, especially when supported with lightweight interfacing.
Textured or loosely woven fabric may look wonderfully artisanal, but it can unravel quickly. Finish its raw edges with a zigzag stitch, overcast stitch, or serger. If a beautiful textile is too delicate to serve as the entire pillow front, place a smaller piece over a sturdy base fabric and use it as a decorative panel.
Prewash washable natural-fiber fabric before cutting. Cotton and similar materials may shrink, while some synthetic or plush fabrics shrink very little. Washing the material in the same manner you intend to wash the completed cover reduces the risk of creating a pillow that fits perfectly today and resembles a decorative postage stamp after laundry day. oho Color Combinations
- Desert neutral: sand, rust, cream, charcoal, and muted terracotta
- Modern organic: ivory, camel, olive, warm gray, and natural wood tones
- Jewel-toned boho: emerald, plum, mustard, teal, and deep red
- Soft boho: dusty rose, oatmeal, sage, faded blue, and warm white
- Southwestern-inspired: clay, turquoise, tan, brown, and geometric black accents
Keeping several patterns within a related color family helps an eclectic arrangement feel intentional. A contrasting accent can then provide energy without turning the couch into a visual argument.
Cutting Measurements
For an 18-by-18-inch insert, cut the following pieces:
- Front panel: one 19-by-19-inch square
- Back panels: two rectangles measuring 19 by 13 inches each
These measurements include a 1/2-inch seam allowance around the pillow and enough fabric to create a substantial envelope overlap. The overlap keeps the insert from peeking through the back like an uninvited undershirt.
Some pillow makers cut covers close to the exact dimensions of the insert to produce a plumper appearance. Others add full seam allowances for a slightly more relaxed fit. The ideal choice depends on the insert’s loft and the thickness of the fabric. For this tutorial, the finished cover will measure approximately 18 inches square. ement Formula for Other Sizes
To adapt the tutorial, add 1 inch to the desired finished width and height for the front panel. Each back panel should be the same cut width as the front and approximately two-thirds to three-quarters of its height. After hemming, the two panels should overlap by at least 4 inches.
Step-by-Step Boho Chic Easy Pillow Tutorial
Step 1: Prepare and Press the Fabric
Wash and dry the fabric when appropriate, then press it thoroughly. Accurate cutting is much easier when the material lies flat. Square the grain before measuring so the completed pillow does not lean subtly to one side as though it has opinions about your furniture placement.
Cut one front square and two back rectangles. Mark the wrong side of each piece if the fabric looks similar on both sides.
Step 2: Plan the Decorative Design
Place the front panel right side up and arrange the decorative elements before attaching anything. A simple geometric layout is ideal for beginners. Try one of these designs:
- Three horizontal rows of contrasting yarn
- A large diamond created with cotton cord
- A centered strip of woven or printed fabric
- Minimalist sun rays stitched from the lower center
- A collection of small tassels arranged in a grid
- One line of fringe across the middle or lower third
Use a ruler and removable fabric marker to establish guidelines. Check the placement from several feet away. Decorative proportions often look different at couch distance than they do when your nose is six inches from the fabric.
Step 3: Attach Yarn, Trim, or Appliqué
Pin or clip the decoration securely. For narrow woven trim, stitch close to both long edges. For thick cord or yarn, use a wide zigzag stitch that crosses over the material without piercing it heavily. You may also couch yarn by sewing it down with small hand stitches.
Keep bulky decoration at least 1 inch away from the outer raw edges. Otherwise, it may become trapped in the side seams and create lumpy corners. Backstitch securely at the beginning and end of each seam.
If you are adding fabric appliqué, turn under the edges for a clean finish or use fusible web according to its instructions before stitching around the shape. Geometric diamonds, arches, suns, and abstract leaves work especially well with boho decor.
Step 4: Add Optional Tassels
To make a basic yarn tassel, wrap yarn approximately 25 to 35 times around a piece of cardboard about 4 inches tall. Slide a separate length of yarn under the loops and tie it tightly at the top. Remove the cardboard, tie another strand around the bundle about 1 inch below the top, and cut through the lower loops. Trim the ends until the tassel looks deliberate rather than recently startled.
For corner tassels, position the tassel bodies toward the center of the right side of the front panel, leaving the attachment cords extending beyond the raw corners. Baste each cord in place within the seam allowance. The tassels will point outward after the cover is turned right side out.
Step 5: Hem the Envelope Back
Take one back rectangle and place it wrong side up. Along one 19-inch edge, fold the fabric toward the wrong side by 1/2 inch and press. Fold it another 1/2 inch, press again, and stitch close to the inner folded edge.
Repeat the process on the second back panel. These finished edges will overlap to form the envelope opening. Double-folded hems conceal the raw fabric and help the back withstand repeated insert removal. Envelope-back pillow tutorials commonly use two finished panels that overlap across the center, eliminating the need for buttons or a zipper. : Assemble the Pillow Cover
Place the decorated front panel right side up. Position the first back panel on top with its right side facing down. Align its raw edges with the top and sides of the front panel; the hemmed edge should run across the center.
Add the second back panel right side down, aligning its raw edges with the bottom and sides. Its hemmed edge should overlap the first panel. Pin or clip around all four sides, adding extra clips where the backing pieces cross.
Step 7: Sew Around the Perimeter
Sew around all four sides with a 1/2-inch seam allowance. Use a straight stitch approximately 2.5 millimeters long. Backstitch at the beginning and end, and reinforce the areas where the envelope panels overlap because those points receive extra stress.
Finish the raw perimeter with a zigzag or overcast stitch when the fabric frays easily. Decorative pillows do not receive the same mechanical workout as jeans, but clean interior seams help the cover survive washing and repeated pillow insert wrestling.
Step 8: Trim and Turn the Corners
Trim each corner diagonally without cutting through the stitching. Removing excess fabric reduces bulk and creates cleaner points. Turn the cover right side out through the envelope opening and gently shape the corners with a point turner or the blunt end of a chopstick. Avoid sharp scissors, which are excellent at creating holes exactly when a project is almost finished. : Press and Insert the Pillow Form
Press the completed cover from the back or use a pressing cloth to protect raised decorations. Fold the pillow insert in half, guide it through the envelope opening, and release it inside the cover. Push the insert into all four corners and smooth the edges.
Finally, perform the traditional pillow stylist’s karate chop at the top if you enjoy that tailored indentation. This step is optional and carries no known effect on structural integrity, spiritual balance, or snack quality.
Easy Variations
No-Tassel Modern Boho Pillow
Use oatmeal-colored canvas and add three uneven lines of black yarn. The restrained palette works well in minimalist, Scandinavian-boho, and modern organic rooms. Textured pillows and baskets can bring an eclectic quality to otherwise simple spaces without overwhelming them. ed Textile Pillow
Cut a decorative panel from an undamaged section of a vintage blanket, woven table runner, or heavy scarf. Stitch it onto a sturdy cotton base before constructing the cover. Avoid cutting historically or culturally significant handmade textiles unless they are already irreparably damaged. Whenever possible, purchase artisan-made pieces directly from makers and use them respectfully.
Fringed Lumbar Pillow
Adapt the method for a 12-by-20-inch insert and attach fringe across the lower third. Lumbar pillows add a different silhouette when combined with square cushions, preventing the arrangement from looking like a meeting of identical upholstered marshmallows.
Piped Boho Pillow
For a more polished finish, add premade piping around the front panel before assembling the backing. Align the piping stitching with the pillow’s seamline and use a zipper or cording foot to sew close to the cord. Clip the piping seam allowance at the corners so it can bend smoothly.
Common Problems and Quick Fixes
The Back Opening Gapes
The envelope overlap is probably too shallow, or the insert is overstuffed. Increase the overlap on the next cover. For the current pillow, add a hidden snap, hook-and-loop tab, or small button and fabric loop.
The Corners Look Empty
Work the insert firmly into each corner. If pointed “dog ears” extend too far, taper the seam slightly near each corner on future covers. Trimming seam bulk before turning also improves the shape.
The Fabric Puckers Around the Trim
The trim may have stretched while being sewn, or the machine tension may be too tight. Remove the affected stitches, press the fabric, stabilize the area with interfacing if necessary, and resew without pulling.
The Pillow Looks Too Flat
Try a fuller insert or size the finished cover slightly smaller. Down-alternative and feather-blend inserts often create a softer, fuller appearance than low-density stuffing, although the best insert depends on allergies, maintenance preferences, and budget.
The Design Looks Busy
Remove one element before adding another. Boho style celebrates layering, but successful layering still includes repetition and visual resting places. A neutral background, related color palette, or repeated geometric shape can connect several decorative details.
How to Style Your Finished Pillow
Place the handmade cover beside pillows with different surfaces rather than several nearly identical fabrics. Pair canvas with velvet, linen with faux shearling, or embroidery with a simple woven solid. Mixing tactile qualities adds depth, especially in neutral rooms. fa, begin with two larger pillows at the outer corners, add one or two medium pillows, and finish with a lumbar cushion. Repeat at least one color elsewhere in the room through a rug, artwork, throw, basket, or planter. The repetition creates cohesion while the handmade details keep the arrangement personal.
On a bed, use decorative pillows in front of the sleeping pillows rather than covering every available inch. You should still be able to locate the mattress without conducting an archaeological dig each evening.
Project Experience: What You Learn While Making a Boho Pillow
The most surprising part of this project is how quickly a plain square of fabric begins to look intentional. At the cutting stage, it may resemble nothing more exciting than a placemat with career ambitions. Once the first row of yarn or trim is attached, however, the design starts developing a personality.
Many beginner makers initially spend too much time trying to achieve perfect symmetry. They measure every tassel down to fractions of an inch and repeatedly move the trim because one side appears slightly higher. Careful measuring is valuable, but boho decor does not require machine-produced uniformity. Minor irregularities often make the finished pillow feel handmade in the best possible way. The goal is controlled imperfection, not attaching one tassel to the front and accidentally sewing the other to your sleeve.
Testing the Layout Saves More Time Than It Uses
A common experience is falling in love with a decorative arrangement while viewing it from directly above, only to discover that it looks crowded once the pillow is upright. Taking a phone photo before sewing helps. The photograph flattens the design and makes spacing problems easier to notice. Stepping across the room provides another useful test.
It is also helpful to place the unfinished front panel near the sofa, chair, or bed where the pillow will eventually live. A mustard accent that appears subtle on the craft table may become extremely enthusiastic beside an orange couch. Checking the design in its future surroundings prevents surprises.
The Envelope Back Is Forgiving
For a first home-decor sewing project, the envelope construction creates a satisfying experience because there is no zipper to install and no final opening to close by hand. After four perimeter seams, a little trimming, and one dramatic right-side-out reveal, the cover is essentially finished.
The first insertion can still involve some comedy. Pillow forms are larger and more resistant than they appear. Folding the insert in half and feeding one corner through the opening at a time is easier than trying to push the entire form straight inside. Once the corners are filled, the cover suddenly changes from a flat craft project into a legitimate home accessory. That transformation is one reason pillow covers are excellent confidence-building sewing projects. Beginner sewing resources frequently recommend pillows because their construction introduces measuring, straight stitching, pressing, and simple assembly without complicated fitting. Mistakes Usually Disappear
One seam may wander. A tassel may sit a quarter-inch lower than its neighbor. The inside corners may look less like professional tailoring and more like they were negotiated during a minor emergency. After the cover is turned, pressed, and filled, most of those imperfections become difficult to see.
This is an important practical lesson: evaluate the project from the distance at which it will be used. A pillow is normally viewed from across a room, not inspected under laboratory lighting. Even experienced sewing educators acknowledge that pillow corners can look messy inside while appearing perfectly attractive after turning. llow Often Becomes a Collection
After completing the first cover, makers commonly begin noticing potential pillow fabric everywhere. A leftover curtain becomes a lumbar cushion. A small piece of embroidered cloth becomes an appliqué. A thrifted table runner begins whispering persuasively from the closet.
The basic envelope pattern makes experimentation affordable because the insert can be reused. Seasonal covers take less storage space than complete pillows, and washable covers are more practical in homes with children, pets, coffee, or adults who somehow generate crumbs while watching television.
The best experience is not merely saving money or completing a quick sewing project. It is learning that home decor can evolve through small, personal changes. A handmade boho pillow carries your fabric choice, color preferences, and tiny decisions. It does not need to match a catalog perfectly because it already matches the person who made it.
Conclusion
This boho chic easy pillow tutorial proves that a stylish home update can begin with three rectangles, a few straight seams, and a respectable pile of yarn. The envelope-back construction is approachable for beginners, while tassels, fringe, appliqué, and textured stitching provide nearly unlimited opportunities for customization.
Start with stable fabric, test decorative techniques on scraps, press each stage, and allow a little handmade irregularity to remain. Your finished pillow should feel comfortable, personal, and collectednot as though it spent three hours trying to satisfy an algorithm.
Once the first cover is complete, use the same measurements to create coordinating designs in different textures and scales. Mix solids with patterns, repeat a few colors, and let every pillow contribute something slightly different to the room. That relaxed combination is where boho style feels most at home.