

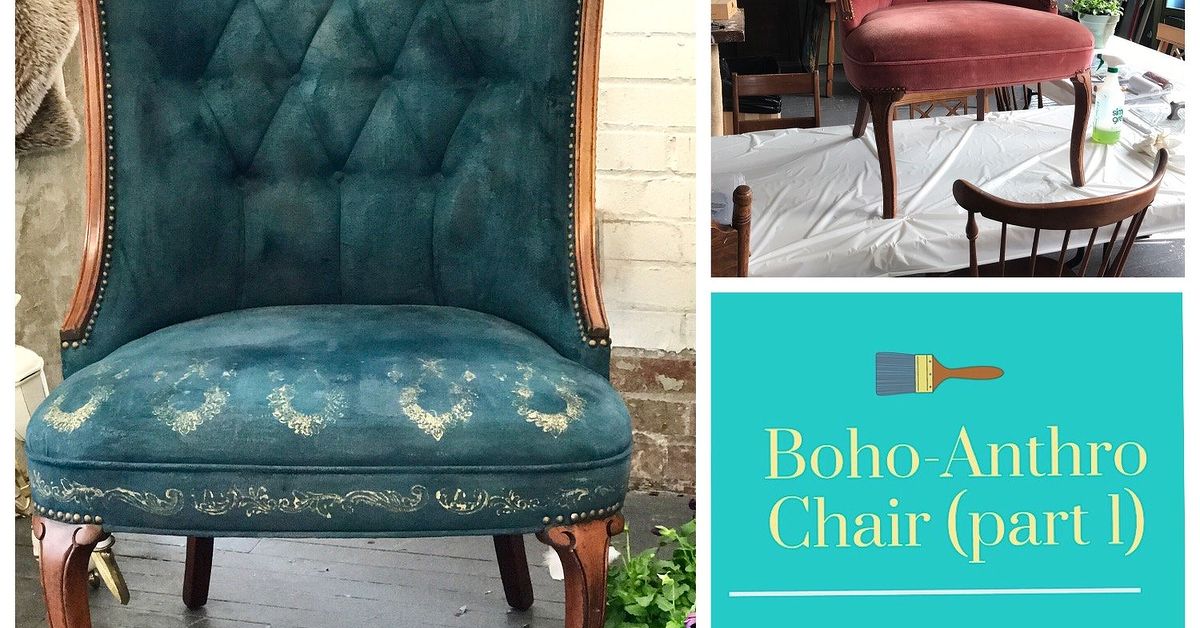
An overlooked thrift-store chair can become the most interesting seat in your home with a little paint, a thoughtful color palette, and just enough artistic mischief. This guide walks you through creating a durable, layered, boho-inspired chair that looks collectednot mass-produced.
From Forgotten Furniture to Boho Showstopper
You know the chair. It sits alone at the thrift store, wearing a scratched brown finish and the defeated expression of furniture that has heard “maybe next time” for fifteen consecutive years. Structurally, however, it may be perfectly soundand hiding beneath that tired exterior is an excellent candidate for a painted furniture upcycle.
A boho or Anthropologie-inspired chair is not about copying one particular product. It is about creating a layered, artistic look through earthy colors, hand-painted patterns, distressed details, natural textures, and small imperfections that make the piece feel personal. Bohemian interiors commonly combine vintage and new furniture, natural materials, global influences, mixed patterns, plants, and objects with individual meaning. In other words, the style practically sends handwritten invitations to DIY projects.
The best part is that you do not need to be a professional furniture refinisher. You need a sturdy chair, basic supplies, patience between coats, and the emotional strength to stop adding patterns before your chair begins demanding its own art-gallery representation.
What Makes a Chair Look Boho or Anthro-Inspired?
Boho furniture feels expressive rather than perfectly coordinated. The finished chair might combine a muted terracotta frame, cream-painted spindles, a small floral motif, and a seat covered in woven fabric. Another version could feature olive green, dusty rose, ocher, and small geometric markings inspired by vintage textiles.
The look usually relies on several design ingredients:
- Earthy or jewel-toned colors: Think clay, mustard, olive, burgundy, turquoise, indigo, coral, and warm cream.
- Layered details: A solid base color becomes more interesting with stripes, leaves, dots, arches, flowers, or distressed edges.
- Natural visual texture: Exposed wood, cane, rattan, linen, cotton, jute, and matte finishes keep the chair feeling relaxed.
- Handmade character: Slightly irregular brush marks or motifs often look more appropriate than machine-perfect decoration.
- A collected-over-time mood: The chair should appear as though it has a storyeven when its previous story was “sat beside a broken treadmill in someone’s basement.”
Modern boho rooms do not have to explode with color. Designers also build the style through layered textures, curved forms, vintage pieces, natural materials, and a controlled neutral palette. That gives you permission to choose either a bold maximalist chair or a quieter cream-and-sage version.
Supplies for a Painted Boho Chair Makeover
Gather everything before opening the paint. Nothing interrupts a creative breakthrough quite like discovering that your only clean brush has hardened into a tiny decorative broom.
Basic Preparation Supplies
- Wooden chair in solid structural condition
- Screwdriver or drill
- Wood glue and clamps, if joints are loose
- Mild detergent or degreasing cleaner
- Clean rags and a damp sponge
- 120-, 180-, and 220-grit sandpaper or sanding sponges
- Vacuum with brush attachment
- Drop cloth
- Gloves, eye protection, and a suitable dust mask or respirator
Painting and Decorating Supplies
- Bonding or stain-blocking primer
- Furniture paint, acrylic enamel, mineral paint, milk paint, or chalk-style paint
- One medium-quality synthetic brush
- One small artist’s brush for details
- Mini foam or fine-finish roller for broad, flat areas
- Painter’s tape
- Pencil, flexible ruler, or stencil
- Clear water-based topcoat or compatible furniture wax
- Optional upholstery fabric, foam, batting, and staple gun
Step 1: Choose a Chair Worth Upcycling
Paint can disguise an ugly finish, but it cannot negotiate peace between four collapsing legs. Before buying or rescuing a chair, place it on a level surface and test it carefully. Check for wobbling joints, major cracks, missing supports, broken caning, deep rot, or evidence of insects.
Small cosmetic flaws are welcome. Scratches, faded stain, water marks, and an unfashionable color are exactly why furniture paint exists. Loose joints may also be repairable with wood glue and clamps. Severe structural damage, however, can turn a budget project into an advanced woodworking course you did not knowingly enroll in.
Chairs with turned legs, curved backs, carved rails, spindle details, or cane panels make especially attractive boho furniture makeovers because paint can emphasize their shapes. Simple chairs also work well, particularly when you plan to add a bold pattern or upholstered seat.
Step 2: Clean Before You Sand
Older furniture often carries layers of dust, furniture polish, skin oils, kitchen grease, and mysterious thrift-store history. Sanding a dirty chair can push those contaminants deeper into the surface and reduce paint adhesion.
Remove the seat cushion and hardware when possible. Wash the frame with a mild detergent or appropriate degreaser, paying close attention to hand-contact areas, carved grooves, and the underside of the seat. Rinse away cleaner residue with a damp cloth and allow the chair to dry completely.
Manufacturers and home-improvement guides consistently recommend removing dirt, grease, wax, failing finish, and sanding dust before applying a new coating. A clean, dry surface gives primer and paint a far better chance of forming a durable bond.
Step 3: Repair and Tighten the Frame
Turn the chair upside down and inspect the joints. Tighten accessible screws, replace missing hardware, and glue loose wooden connections. Clamp repaired areas according to the adhesive instructions and wait until they are fully cured before sanding or painting.
Fill unwanted dents, chipped corners, or old hardware holes with paintable wood filler. Once dry, sand the repair level with the surrounding surface. You do not need to erase every mark. A few visible signs of age can support the vintage boho aesthetic, while random craters large enough to store snacks should probably be filled.
Step 4: Sand for Adhesion, Not Revenge
Most previously finished wooden chairs do not need to be stripped to bare wood. The goal is normally to remove loose material, smooth damaged areas, and dull the glossy finish so primer can grip it.
Begin with 120- or 150-grit paper on rough sections, peeling finish, or filler. Use 180- or 220-grit paper for general scuff sanding and smoothing. Follow the wood grain on broad surfaces and sand curved details by hand. Vacuum thoroughly, then wipe away the final dust with a clean, slightly damp cloth.
Furniture-painting guidance from major paint and finishing companies commonly recommends sanding existing finishes, removing dust, and lightly smoothing primer between coats. Fine sanding is particularly important on slick laminate or glossy sealed surfaces.
A Safety Warning for Older Painted Furniture
Do not aggressively sand an old painted chair when you do not know what the existing coating contains. In the United States, painted surfaces dating from before 1978 may contain lead. Disturbing lead-based paint can create hazardous dust, so questionable pieces should be tested and handled using lead-safe practices rather than casually attacked with a power sander in the kitchen.
Step 5: Apply the Right Primer
Primer is the unglamorous friend who quietly prevents your makeover from becoming a future peeling contest. It improves adhesion, creates a more uniform base, and can help block tannins or stains that might bleed through pale paint.
Use a bonding primer on glossy finishes, laminate, or other difficult surfaces. Consider a stain-blocking primer for mahogany, cherry, knotty wood, or furniture with persistent water marks. Apply a thin, even coat with a brush in detailed areas and a mini roller on flat sections.
After the primer dries for the time stated on its label, lightly smooth rough areas with 220-grit sandpaper. Remove every trace of dust before painting. Bonding primers are especially useful on shiny laminate, while bare wood and patched areas generally benefit from an appropriate primer before the finish coat.
Step 6: Build an Anthro-Inspired Color Palette
Limit your palette before painting. Four thoughtfully related colors usually look richer than twelve colors selected during a craft-store adrenaline event.
Palette Idea 1: Desert Garden
- Warm terracotta base
- Muted sage accents
- Cream botanical details
- Small touches of charcoal
Palette Idea 2: Vintage Jewel Box
- Deep teal frame
- Dusty rose seat
- Ocher geometric markings
- Antique-gold highlights
Palette Idea 3: Soft Organic Boho
- Warm white frame
- Clay-colored lower legs
- Olive green leaves
- Natural wood accents
Repeat at least one chair color elsewhere in the roomperhaps in a pillow, ceramic pot, rug, or artwork. This tiny repetition helps a boldly painted chair look intentional rather than recently escaped from a children’s theater production.
Step 7: Paint the Base Coats
Apply two or three thin coats instead of one heroic, pudding-thick coat. Heavy paint collects around spindles, drips beneath rails, and softens carved details. Thin coats dry more evenly and are easier to smooth.
Begin by turning the chair upside down and painting the underside, lower rails, and inside edges. Return it upright to finish the visible surfaces. Keep a small dry brush nearby to catch drips around joints before they harden.
Allow each coat to dry according to the product instructions. When a dried coat feels rough, lightly sand it with very fine sandpaper and remove the dust before continuing. Multiple thin coats generally produce a smoother finish than one thick application.
Chalk-style paint can create a matte, handmade appearance and is often marketed for simplified preparation. Even so, cleaning the chair and testing adhesion remain sensible precautions, especially on waxed, glossy, or heavily used furniture.
Step 8: Add Boho Patterns Without Overcrowding the Chair
Once the base color is dry, decide where decoration will have the most impact. Good locations include the top rail, center back splat, seat edge, leg tips, or a single wide rung. Leaving some areas plain gives the eye somewhere to rest.
Easy Hand-Painted Motifs
- Alternating dots and short dashes
- Simple leaves connected by a curved stem
- Half-suns or rising arches
- Stacked diamonds and triangles
- Loose wildflowers
- Painted “dipped” legs
- Thin stripes inspired by woven textiles
Sketch complicated motifs lightly in pencil. For stripes, apply painter’s tape and seal its edges with a thin layer of the base color before adding the contrasting shade. This can reduce paint bleeding beneath the tape.
Keep hand-painted flowers and leaves relaxed. A boho chair benefits from visible human character. When every petal is identical, the result can feel more like wallpaper than folk-inspired furniture.
Step 9: Create Tasteful Distressing and Patina
Distressing is optional. A crisp painted chair can look every bit as bohemian as an aged one, especially when the color and pattern already provide personality.
For a naturally worn effect, use a fine or medium sanding sponge on areas that would realistically receive contact: corners, seat edges, lower stretchers, raised carvings, and the front edges of the legs. Begin gently and evaluate the chair from several feet away before removing more paint.
Authentic-looking distressing concentrates on high-contact areas rather than placing identical sanded patches everywhere. Working slowly helps prevent the finish from changing from “beloved vintage find” to “survived an unfortunate encounter with a belt sander.”
You may also add subtle patina with a tinted glaze or a very diluted darker paint. Brush it into carved details and immediately wipe away the excess. Test this technique on the underside first because glaze can dramatically alter pale colors.
Step 10: Protect the Painted Finish
A decorative chair that will rarely be touched may need less protection than a dining chair used three times a day. For functional seating, apply a compatible clear topcoat after the paint has dried for the manufacturer’s recommended period.
A water-based clear finish is useful when you want to preserve pale colors without adding much amber tone. Matte or satin sheen usually supports the relaxed boho appearance, while semi-gloss is easier to wipe clean and can emphasize painted details.
Apply thin coats with a quality synthetic brush or recommended applicator. Follow the grain where visible, avoid excessive brushing, and smooth between coats only when the product instructions allow it. Clear finishes are commonly built in multiple coats, with light sanding and complete dust removal between applications when required.
Dry paint is not necessarily cured paint. Treat the chair gently during the curing period. Avoid stacking items on the seat, dragging it across the floor, or inviting a jeans-wearing relative with a key chain the size of a medieval weapon to test it immediately.
Optional Upgrade: Reupholster the Seat
If the chair has a removable upholstered seat, new fabric can complete the makeover. Choose a medium-weight upholstery fabric with stripes, florals, block prints, abstract shapes, or a woven texture. A patterned seat works best when its colors repeat at least two shades from the painted frame.
Remove the seat and photograph the original construction before taking it apart. Replace compressed foam or stained batting as needed. Center the pattern, pull the fabric evenly, and secure opposite sides before working toward the corners. Trim excess material and reinstall the seat only after the painted frame is sufficiently cured.
When the frame already includes detailed hand painting, consider a quieter fabric. When the frame is mostly one color, the seat can carry a more dramatic print. Good boho design enjoys abundance, but it also knows when the tambourine solo has gone on long enough.
Common Furniture Upcycling Mistakes
Skipping the Cleaning Stage
Paint applied over polish, grease, or wax may separate from the surface. A chair that looks clean can still carry invisible residue, particularly around the backrest and seat edge.
Using the Wrong Primer
A standard wall primer may struggle on slick laminate or heavily sealed furniture. Match the primer to the substrate and the problem you need to solve, such as adhesion, stain blocking, or rust prevention.
Applying Paint Too Thickly
Thick coats hide details, extend drying time, and encourage drips. Build coverage gradually.
Distressing Every Edge Equally
Real wear is irregular. Concentrate on plausible contact points and stop before every surface looks uniformly scraped.
Using an Incompatible Topcoat
Not every clear finish works over every paint or wax. Read both product labels, make a test sample, and respect the recommended drying time.
Putting the Chair Into Service Too Soon
Premature use can leave dents, scratches, and fabric impressions in a finish that feels dry but has not fully hardened.
My Experience Creating a Painted Boho Chair
The most useful lesson I have learned from painted chair projects is that the creative stage should begin before the first paint can opens. On one makeover, I started with an inexpensive wooden dining chair that had a glossy reddish-brown finish, several scratches, and a seat upholstered in beige fabric with approximately the same visual excitement as an office cubicle.
My original plan involved deep green paint, terracotta flowers, mustard stripes, gold accents, a contrasting blue seat, and perhaps a few white dots. On paper, it sounded artistic. On the chair, it would have looked as though five different cafés had argued over the decorating budget.
I reduced the palette to olive green, warm cream, and muted clay. That decision made everything easier. The frame became olive, the lower four inches of each leg received a clay-colored “dip,” and the top rail got a simple cream vine. Repeating only three colors allowed the carved details to remain visible and kept the finished chair from becoming visually exhausting.
Preparation made a larger difference than any decorative technique. The chair had been polished repeatedly, so the first cleaning cloth collected more residue than expected. After washing and drying the frame, I scuff-sanded the shiny finish and applied bonding primer. A small test patch of paint on an unprimed area scratched much more easily, which was a convincing demonstration that “probably fine” is not a professional surface-preparation method.
Painting the chair upside down first was another practical improvement. It exposed the lower rails and hidden edges that are easy to miss. When I painted previous chairs upright from the beginning, I inevitably discovered an unfinished strip while carrying the supposedly completed piece into the room.
The decorative vine created the most anxiety and ultimately the most character. I drew it lightly in pencil, but I did not trace a formal stencil. The leaves varied slightly in size, and one leaned in an unexpected direction. My first instinct was to repaint it. After stepping back, however, the irregularity made the motif look hand-painted rather than manufactured. That small imperfection became one of my favorite details.
I also learned to judge distressing from a distance. Up close, it is tempting to keep sanding because every new exposed edge looks interesting. Across the room, too much distressing can make a chair appear patchy. I focused on the seat edge, corners of the top rail, and a few raised areas on the legs. Then I put the sanding sponge down and physically left the rooma highly effective technique for preventing artistic overconfidence.
The clear finish required patience. I applied thin satin coats and allowed proper drying time instead of trying to complete everything in one afternoon. The final surface looked more even, and the low sheen preserved the soft, chalky character of the colors. After curing, the chair was durable enough for ordinary use without feeling coated in shiny plastic.
Finally, I replaced the beige seat fabric with a small-scale block print containing cream and rust. I considered a much louder floral, but the painted vine already served as the main decorative feature. The quieter textile supported the frame rather than competing with it.
The completed chair did not resemble a factory-fresh product, and that was precisely why it worked. It looked collected, slightly imperfect, colorful, and specific to the room. More importantly, the project proved that successful furniture upcycling is not about applying every technique you know. It is about choosing a few details that belong togetherand recognizing the exact moment when the chair has enough personality to stop accepting your suggestions.
Final Thoughts
A boho chair makeover succeeds when solid preparation and playful design work together. Clean and repair the chair first, create adhesion through appropriate sanding and primer, apply thin coats, and protect the finished surface. Once that practical foundation is secure, you can experiment with earthy colors, botanical patterns, geometric accents, natural fabric, and subtle distressing.
Do not chase perfect symmetry or attempt to reproduce a retail chair stroke for stroke. Use the room, the chair’s shape, and your own favorite colors as the design brief. The finished piece should feel like something you discovered on a marvelous tripeven when the entire journey occurred between your garage and the local paint aisle.