

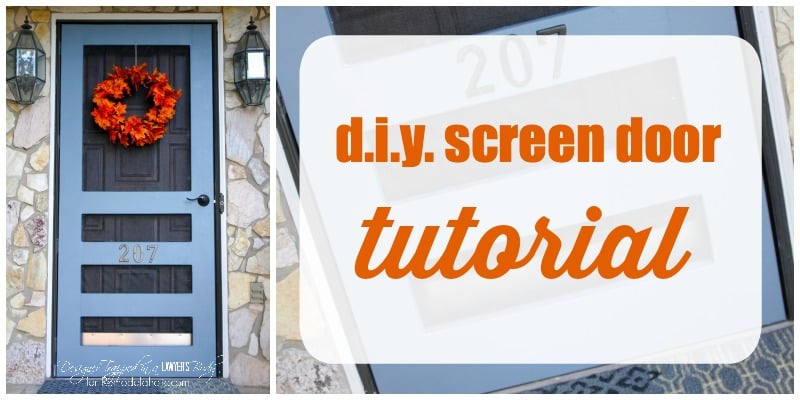
There are few home upgrades as satisfying as a good screen door. It invites in the breeze, blocks the bugs, adds a friendly porch-side charm, and gives your front entry that “yes, someone here knows where the drill is” kind of confidence. Even better, a DIY screen door tutorial is surprisingly beginner-friendly when you break the project into sensible steps: measure carefully, build or prep the frame, install the screen, hang the door, adjust the hardware, and then stand back like a proud homeowner in a tool-belt commercial.
This guide walks you through how to build and install a simple wood screen door, with practical notes for replacing an existing screen door, choosing materials, adding hardware, and avoiding the most common mistakes. Whether you want a rustic farmhouse screen door, a clean modern porch door, or a budget-friendly backyard entry upgrade, the principles are the same: square frame, tight screen, smooth swing, secure latch, and a finish that can handle weather without throwing a tantrum.
Why Build a DIY Screen Door?
A screen door is not just a decorative extra. It improves ventilation, lets natural light into the entry, helps keep insects out, and gives your exterior door a layer of everyday usability. On spring and fall days, when the weather is too nice to trap behind glass, a screen door turns your home into a breezy little paradiseminus the mosquito committee.
Buying a prebuilt screen door is convenient, but building one yourself gives you more control over size, wood species, style, finish, and hardware. That matters if your opening is slightly out of square, your house has older trim, or your design taste is somewhere between “classic cottage” and “I found this on Pinterest at 1 a.m.” A DIY door can also be stronger than a flimsy off-the-shelf model if you use quality lumber and solid joinery.
Tools and Materials You Will Need
Before cutting wood, gather your supplies. The fastest way to turn a weekend project into a three-week saga is discovering you own seven screwdrivers but not the one drill bit you actually need.
Basic Tools
- Tape measure
- Pencil and carpenter’s square
- Miter saw or circular saw
- Drill/driver
- Pocket hole jig or doweling/wood joinery tools
- Clamps
- Staple gun or spline roller, depending on screen installation method
- Utility knife with a sharp blade
- Sanding block or orbital sander
- Level
- Chisel, if mortising hinges
- Safety glasses and hearing protection
Materials
- Exterior-grade wood, such as cedar, fir, pine, or poplar suitable for painting
- Screen mesh: fiberglass, aluminum, pet-resistant, or solar screen
- Screen molding, spline, or removable screen frame system
- Exterior wood glue
- Exterior screws or pocket hole screws
- Hinges
- Handle and latch set
- Door pull, optional
- Door closer or spring hinge, optional
- Primer, paint, stain, or exterior sealer
- Shims
- Weather-resistant caulk, if needed around trim
Step 1: Measure the Door Opening Correctly
Accurate measuring is the difference between a door that swings like a dream and one that scrapes, sticks, and makes you question your life choices. Measure the width of the opening at the top, middle, and bottom. Then measure the height on the left side, center, and right side. Use the narrowest width and shortest height as your working dimensions.
For most DIY screen doors, you want a small reveal around the door so it can swing freely. A common target is about 1/8 inch of clearance on each side, plus enough clearance at the bottom so the door clears the threshold, porch surface, and any doormat. If your porch has a thick rug that likes to bunch up under the door like a tiny home invader, account for that too.
Check for Square
Measure diagonally from the top left corner to the bottom right corner of the opening, then from the top right to the bottom left. If both measurements match, your opening is square. If they are different, your opening is out of square, which is common in older homes. Do not panic. Old houses have personality. Unfortunately, sometimes that personality is geometry.
If the opening is slightly out of square, you can often hide minor differences with careful fitting, shims, and even reveals. If it is badly out of square, fix the trim or frame before building the door. A beautiful screen door installed into a crooked frame will still behave like a shopping cart with one bad wheel.
Step 2: Choose Your Screen Door Style
A simple wood screen door usually has two vertical stiles, a top rail, a middle rail, and a wider bottom rail. The bottom rail adds strength and helps protect the screen from feet, pets, and small children who believe doors are optional. Many designs include a decorative lower panel, crossbuck brace, vertical slats, or a classic farmhouse “X” pattern.
Popular DIY Screen Door Designs
- Classic full-screen door: Best for maximum airflow and visibility.
- Farmhouse screen door: Usually includes a lower crossbuck or paneled section.
- Half-screen door: Has more solid wood at the bottom for durability.
- Decorative cottage door: Uses molding, trim, or shaped rails for character.
- Pet-friendly screen door: Uses pet-resistant mesh and a reinforced lower section.
If this is your first build, keep the design simple. Straight lines, square corners, and clean proportions will look better than an ambitious pattern that slowly turns into abstract art.
Step 3: Select the Right Screen Mesh
Screen mesh comes in several types, and the best choice depends on your home, climate, pets, and patience level.
Fiberglass Screen
Fiberglass screen is one of the most common options for DIY screen replacement and new screen doors. It is flexible, easy to install, affordable, and forgiving if you are learning how to stretch screen material. It does not dent easily, but it can tear if abused.
Aluminum Screen
Aluminum screen is stronger in some ways and has a crisp look, but it can crease if handled roughly. Once it gets a bend, it may remember that bend forever, like a grudge with tiny metal squares.
Pet-Resistant Screen
If you have a dog who greets guests with the enthusiasm of a furry linebacker, pet-resistant screen is worth considering. It is thicker and tougher than standard fiberglass, though it may reduce visibility and airflow slightly.
Solar or Privacy Screen
Solar screen can reduce glare and heat, making it useful for sunny porches. Privacy screen offers a darker, more shielded look, but it may make your entry feel less open.
Step 4: Cut the Wood Pieces
Once you have your final door dimensions, cut the stiles and rails. The two stiles run vertically for the full height of the door. The rails run horizontally between them. A typical DIY screen door might use 1×4 lumber for the stiles and top rail, a 1×6 for the bottom rail, and a 1×4 or 1×3 for the middle rail. Adjust these sizes to suit your design and door opening.
Lay the parts on a flat surface and dry-fit everything before drilling or gluing. Check that the frame is square by measuring diagonally across the door in both directions. If the measurements match, you are in business. If not, adjust the frame before fastening. Wood glue is wonderful, but it is not a time machine.
Step 5: Assemble the Screen Door Frame
There are several ways to join a DIY screen door frame. Pocket holes are popular because they are fast and beginner-friendly. Dowels, biscuits, half-lap joints, mortise-and-tenon joinery, and floating tenons can also work well. For most homeowners, pocket hole screws plus exterior wood glue provide a practical balance of strength and simplicity.
Assembly Tips
- Use clamps to keep the frame aligned while fastening.
- Apply exterior-rated wood glue at each joint.
- Drive screws carefully so you do not split the wood.
- Recheck for square after each major joint is secured.
- Add a middle rail for strength and to divide the screen area.
If you want a decorative lower section, add your cross pieces or slats after the main frame is assembled. Keep the lower section sturdy. It takes more abuse than the top because shoes, paws, packages, and distracted humans tend to meet it regularly.
Step 6: Sand, Prime, and Finish the Door
Do not install the screen mesh before finishing the wood unless your design makes that absolutely necessary. Paint and stain are much easier to apply before the screen is in place. More importantly, all edges of a wood screen door need protection, including the top and bottom edges. Moisture loves unfinished end grain. It finds it the way toddlers find permanent markers.
Sand the door smooth with 120-grit and then 180-grit sandpaper. Round over any sharp edges slightly so paint or sealer can cover them evenly. Apply exterior primer if painting, or use an exterior stain and clear sealer if you want a natural wood look. Let each coat dry fully according to the product instructions.
Paint vs. Stain
Paint gives the best protection and opens the door to fun color choices. A white screen door feels crisp and traditional. Black looks modern and bold. A cheerful blue, green, or yellow can make the entry feel custom and welcoming. Stain highlights the wood grain and works beautifully on cedar or fir, but it requires regular maintenance.
Step 7: Install the Screen Mesh
There are two common ways to install screen on a wood screen door: stapling it to the inside of the frame and covering the staples with trim, or using a groove-and-spline system. A spline system allows easier replacement later, while staples and molding create a classic wood-door look.
Method A: Staple and Trim
Lay the door flat with the inside facing up. Roll the screen over the opening, leaving at least one or two inches of extra material on all sides. Start at the top and staple the screen lightly in place. Move to the bottom and pull the screen snug, not drum-tight. Then staple the sides, working gradually and smoothing wrinkles as you go.
Trim the excess screen with a sharp utility knife. Add screen molding or thin wood trim over the stapled edges for a clean finish. Use small brads or pin nails, and avoid driving fasteners so hard that they crush the trim.
Method B: Spline Installation
If your door uses a spline groove, lay the screen over the opening and press the screen and spline into the channel with a spline roller. Work one side at a time, keeping the mesh straight. Trim excess material along the outside edge of the spline with a sharp blade. The trick is firm, even pressure. Too loose and the screen sags; too tight and the frame may bow.
Step 8: Add Hinges and Hardware
Most screen doors use three hinges: one near the top, one near the bottom, and one near the middle. Mark hinge locations on the door first, then transfer those marks to the jamb. Pre-drill screw holes to reduce splitting. If you want the hinges recessed, use a chisel to cut shallow mortises. Surface-mounted hinges are easier and can look great on casual or rustic doors.
Install the handle at a comfortable height, commonly around 36 inches from the bottom of the door to the center of the handle. Add the latch according to the hardware instructions. Before final tightening, test the handle and latch several times. A screen door should close securely without needing a hip-check.
Should the Door Swing In or Out?
Most exterior screen doors swing outward, away from the main entry door. This keeps the screen door from interfering with the interior door and allows better use of entry space. Confirm that the swing direction will not hit porch railings, lights, planters, or that one decorative lantern you bought because it looked “coastal.”
Step 9: Hang the DIY Screen Door
This is the moment when the project starts looking real. Have a helper hold the door in the opening while you check the reveal on all sides. Use shims to create even spacing. Make sure the door is plumb, level, and centered in the opening. Drive one screw into the top hinge first, then test the swing. If it looks good, secure the remaining hinge screws.
Open and close the door several times. Look for rubbing at the top, sides, and bottom. If the door binds, adjust the hinges, add or remove shims, or lightly plane the edge if needed. Do not force a rubbing door and hope it will “wear in.” It will wear in, technicallybut mostly by removing paint and your good mood.
Step 10: Install a Closer, Sweep, or Stop
A door closer helps the screen door shut gently instead of slamming every time someone walks through with groceries. A spring hinge can also work, but closers give more control. Install the closer according to the manufacturer’s directions, usually between the door and jamb on the hinge side or upper rail area.
A bottom sweep can help reduce gaps under the door. This is especially useful if your threshold is uneven or if bugs seem to hold weekly planning meetings near your porch light. Make sure the sweep touches lightly without dragging hard.
Common DIY Screen Door Mistakes to Avoid
Measuring Only Once
Door openings are rarely perfect. Measure in multiple places and build to the smallest practical dimensions. A screen door that is too small can sometimes be shimmed. A screen door that is too big becomes an unplanned woodworking workout.
Skipping Exterior Finish
Unsealed wood will absorb moisture, swell, crack, and warp. Always prime, paint, stain, or seal every surface before installation, including hidden edges.
Stretching the Screen Too Tight
Screen mesh should be smooth and snug, but not so tight that it bends the frame. If the door starts bowing while you install the screen, loosen your tension.
Using Interior Hardware Outside
Choose exterior-rated screws, hinges, and latches. Outdoor hardware needs to handle moisture, temperature changes, and daily use.
Ignoring the Door Swing
Before drilling hinges, confirm which way the door should open. Also check nearby walls, lights, railings, and furniture. A door that opens into a porch chair is technically functional, but only if your goal is slapstick.
Maintenance Tips for a Long-Lasting Screen Door
A DIY screen door will last longer with simple seasonal maintenance. Clean the screen gently with a vacuum brush attachment or soft cloth. Wash the frame with mild soap and water. Avoid blasting the mesh with high-pressure water, which can stretch or damage it.
Check hinges and screws once or twice a year. Tighten loose hardware and touch up paint chips before water gets into the wood. If the screen tears, replace the mesh sooner rather than later. Small holes become big holes, and bugs do not respect your renovation schedule.
DIY Screen Door Cost Estimate
The cost of a DIY screen door depends on lumber, hardware, mesh type, and finish. A simple painted wood screen door can often be built affordably with basic boards, standard fiberglass screen, hinges, and a latch. Premium cedar, decorative trim, pet-resistant mesh, specialty paint, and high-end hardware will raise the price.
Still, the value is strong. You get a custom fit, a personal design, and the satisfaction of building something useful with your own hands. Plus, every time the door closes with that perfect soft click, you get a tiny victory soundtrack.
Real-World Experience: What You Learn While Building a DIY Screen Door
The first thing you learn from a DIY screen door tutorial is that measuring is not a boring preparation step; it is the entire project wearing a disguise. On paper, a screen door is just a rectangle. In real life, the porch opening may be slightly wider at the top, tighter at the bottom, and mysteriously angled in a way that suggests the house once had a disagreement with gravity. Taking three width measurements and three height measurements feels excessive until the finished door fits without scraping. Then it feels like genius.
The second lesson is that clamps are not optional. They are quiet little superheroes. When assembling the frame, even a tiny shift at one corner can create a door that looks fine on the floor but hangs badly in the opening. Clamping the rails and stiles before driving screws keeps everything aligned and saves you from trying to persuade twisted lumber to behave later. Wood is natural, which is a polite way of saying it occasionally has opinions.
Screen installation teaches patience. If you pull the mesh too loosely, it sags like an old hammock. If you pull it too tightly, the frame can bow or the pattern can look distorted. The best approach is steady tension, moving side to side, checking the mesh as you go. Fiberglass screen is forgiving for beginners, while aluminum screen demands a calmer hand. Pet-resistant mesh feels tougher, but because it is thicker, it may require more care around corners and trim.
Finishing the door before hanging it is another lesson people often learn the hard way. Painting around installed screen mesh is like trying to frost a cake through a window screen. Technically possible? Maybe. Enjoyable? Absolutely not. It is much easier to paint or seal the frame first, especially the top and bottom edges. Those edges are where moisture sneaks in, and moisture is the villain in almost every exterior wood project.
Hanging the door is the part where having a helper makes you feel like a professional. One person can hold the door while the other checks the reveal, places shims, and drives the first screws. Once the top hinge is set, the door begins to support itself, but do not rush. Open it. Close it. Listen. Watch the gap. A little adjustment at this stage can prevent years of rubbing, slamming, or latch problems.
The final reward is more than just a finished door. It is the moment you open the main entry, let fresh air flow through the house, and hear the screen door close neatly behind you. A DIY screen door adds charm, function, and personality. It says your home is cared for, your porch is ready, and mosquitoes may kindly conduct their business elsewhere.
Conclusion
Building a DIY screen door is one of those rare home projects that combines beauty, practicality, and genuine weekend satisfaction. With careful measuring, solid materials, proper finishing, and patient installation, you can create a custom screen door that improves airflow, adds curb appeal, and keeps bugs outside where they can continue their mysterious bug careers.
The key is not rushing the foundation steps. Measure the opening in multiple places, build a square frame, choose screen mesh that fits your household, seal every wood surface, and adjust the door until it swings cleanly. Whether your style is farmhouse, cottage, modern, rustic, or “I just want the dog to stop running through the mesh,” this project is flexible enough to fit your home and skill level.
Note: This article is based on practical home-improvement methods, manufacturer-style installation guidance, and commonly accepted DIY screen door building practices.