The Raspberry Pi 5 arrived with one tiny feature that caused an oversized amount of excitement: a PCIe connector. Not a giant desktop-style slot, of course. That would be too easy, too sensible, and far less entertaining. Instead, the Pi 5 gives you a single-lane PCIe connection through a flat-flex connector, which means fast storage, AI accelerators, networking cards, and other high-speed accessories are finally on the menuprovided you are willing to do a little cable yoga and a little configuration surgery.
If you have spent years treating microSD cards like tiny plastic destiny tokens, the move to PCIe feels like a quality-of-life upgrade your Raspberry Pi projects have been begging for. Boot times improve, application installs feel less sluggish, and workloads that write a lot of data stop behaving like they are trudging uphill in wet shoes. Better still, getting PCIe working on the new Pi 5 is not black magic. It is mostly a matter of choosing the right hardware, enabling the right settings, and resisting the urge to jump straight into unsupported Gen 3 speeds before you know the basics are stable.
This guide walks through the whole process in plain English, with enough depth for hobbyists, makers, home lab tinkerers, and anyone who has already stared at a ribbon cable and whispered, “Please don’t be upside down.”
Why PCIe on the Raspberry Pi 5 Actually Matters
The Raspberry Pi 5 is the first mainstream Pi board to expose a PCIe connection directly for users in a practical way. That matters because PCIe is the highway that many serious peripherals expect. NVMe SSDs, AI accelerators, high-speed NICs, and experimental add-ons all live in PCIe land. On the Pi 5, the exposed connection is a single lane, and the official setup targets PCIe 2.0 speeds by default. In simple terms, that gives you a fast, low-latency route to storage and add-ons that can leave microSD performance looking like it missed the train.
For most people, the star of the show is NVMe. That is not because SSDs are glamorous. They are basically rectangles full of responsible decisions. But once you boot a Pi 5 from NVMe and start installing software, updating packages, opening apps, or running databases, it becomes very hard to go back. The board suddenly feels less like a tiny board that happens to run Linux and more like a genuinely capable mini computer.
What You Need Before You Start
To get PCIe working on the Pi 5, you need the board itself, Raspberry Pi OS, a compatible PCIe adapter or HAT, and whatever device you want to attachmost commonly an NVMe SSD. The easiest official path is the Raspberry Pi M.2 HAT+, which supports M.2 M-key devices in 2230 and 2242 sizes. There is also a compact version for 2230 devices. These are straightforward, supported, and a good choice if your goal is stability over bragging rights.
If you want to use larger 2280 drives or more creative layouts, third-party boards are everywhere. Pimoroni, Pineboards, Geekworm, Waveshare, and others have built options that mount under the Pi, over the Pi, sideways, and in ways that make the Pi look like it is trying on different hats in a dressing room. Many of those boards work well, but they may require slightly more manual configuration than the official HAT+ path.
You should also think about cooling and power before you start. Fast storage is wonderful, but warm storage is how your project begins to mutter about thermal throttling. Cable routing can also interfere with cases and coolers, so it is smart to plan the physical build first instead of discovering afterward that your SSD and your case lid are now bitter enemies.
Choosing the Right PCIe Setup
Option 1: The Official M.2 HAT+
If your main goal is to get NVMe storage working with minimal fuss, the official M.2 HAT+ is the cleanest path. It is designed specifically for the Pi 5, works with Raspberry Pi OS out of the box, and fits neatly into the official ecosystem. The big limitation is drive size: the standard board supports 2230 and 2242 drives, while the compact version focuses on 2230. If you already own a big 2280 NVMe stick, the official board may politely inform you that your ambitions are physically too long.
Option 2: Third-Party NVMe Boards
Third-party boards are where flexibility takes over. Some mount under the Pi, which helps keep the GPIO area more accessible. Others support full-length 2280 SSDs, dual-drive arrangements, or more experimental use cases. This route is popular with makers who already have spare desktop NVMe drives lying around or who want more storage options. The trade-off is that non-HAT+ accessories can require extra bootloader configuration, especially if you want to boot directly from PCIe storage.
Option 3: Beyond Storage
Once PCIe is working, you are not limited to SSDs. The Pi 5 has already been used with Coral AI accelerators, multi-drive RAID boards, networking adapters, and even external GPUs in experimental builds. That does not mean every PCIe device is plug-and-play. It means the Pi 5 has crossed into a more interesting category: a board that can host serious expansion if you are patient enough to make it happen.
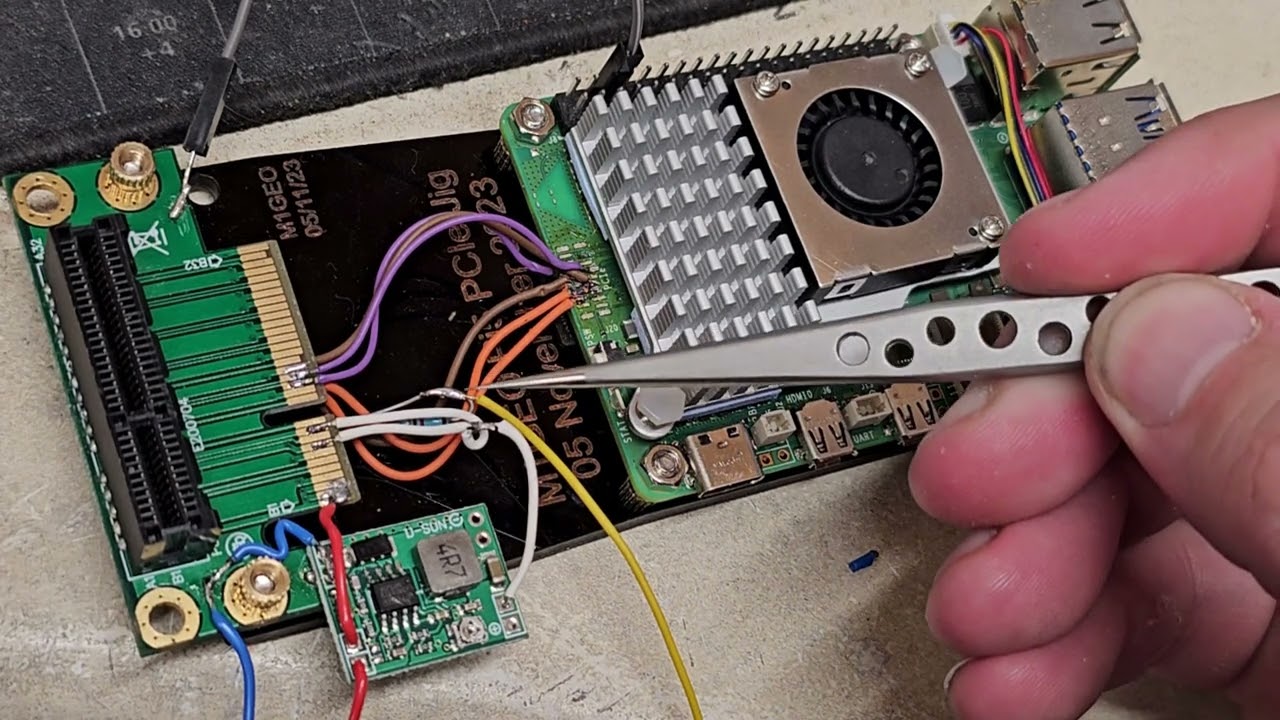
Physical Installation: Slow Down and Respect the Ribbon Cable
Before connecting anything, shut the board down completely and disconnect power. This is not the moment to test fate. The Pi 5’s PCIe connection uses a flat-flex cable, and the connector orientation matters. A cable inserted the wrong way can leave you with a device that simply does not appear, which is one of the most annoying kinds of failure because everything still looks innocent from the outside.
Mount the adapter securely, insert the NVMe drive gently, and avoid over-tightening screws like you are torquing down a race car engine. If you are using a third-party board, double-check which end of the cable belongs to the Pi and which belongs to the adapter. Some cables are keyed in a way that helps; others trust you a little too much.
Once installed, consider airflow. A Pi 5 with an SSD and a cooler can become a game of millimeters. This is normal. Every good Raspberry Pi build eventually includes a moment where you discover that the part you bought to save time has created a brand-new geometry problem.
Software Setup: Enabling PCIe on the Pi 5
Here is where the process splits into two paths.
Using the Official HAT+
If you are using the official M.2 HAT+ or M.2 HAT+ Compact, Raspberry Pi OS is designed to detect it automatically. In many cases, the drive shows up without manual PCIe enabling, and the device can appear as /dev/nvme0n1. That is the friendly route, and it is one reason the official hardware is so appealing.
Using a Non-HAT+ Device
If you are using a third-party PCIe adapter or a non-HAT+ accessory, you usually need to explicitly enable the connector in /boot/firmware/config.txt. Add this line:
Reboot afterward. If your board documentation says it also accepts the alias nvme, that is because Raspberry Pi treats it as an equivalent shortcut. Still, dtparam=pciex1 is clear and easy to remember.
How to Boot from NVMe
Getting a drive recognized is one thing. Booting from it is the real prize.
If you are using the official HAT+ path, Raspberry Pi’s documentation makes this refreshingly simple. Write Raspberry Pi OS to the NVMe drive with Raspberry Pi Imager, boot the Pi with an SD card, open sudo raspi-config, and under Advanced Options set the boot order to NVMe/USB boot. Reboot, and if no SD card is inserted, the Pi 5 can boot directly from the NVMe drive.
For third-party, non-HAT+ hardware, you may need to edit the EEPROM bootloader configuration as well. That looks like this:
BOOT_ORDER=0xf416 tells the bootloader to include PCIe storage in the search order, while PCIE_PROBE=1 helps non-HAT+ devices get discovered during boot. This is the part many first-time users miss, and it is why some builds can see an SSD after Linux loads but still refuse to boot from it. The Pi is not being difficult on purpose. It is just waiting for clearer instructions.
Should You Enable PCIe Gen 3?
This is where every Pi 5 PCIe discussion gets spicy.
By default, Raspberry Pi 5 uses PCIe Gen 2.0 speeds. That is the officially supported mode, and it is already fast enough to make NVMe feel like a major upgrade. Official guidance also warns that the Pi 5 is not certified for Gen 3. In other words, yes, Gen 3 is available, but no, Raspberry Pi is not promising it will behave like a perfect angel in every setup.
If you want to try it anywayand many people doyou can enable it in raspi-config under Advanced Options > PCIe Speed, or add this line to /boot/firmware/config.txt:
Then reboot.
Why bother? Because the speed jump can be dramatic. Real-world testing has shown Gen 2 reads in the low-to-mid 400 MB/s range on some boards, while Gen 3 setups can push toward 900 MB/s with the right SSD and adapter. That is not a tiny quality tweak. That is the kind of upgrade that makes package installs, file transfers, and heavier workloads feel meaningfully quicker.
Still, Gen 3 is the “try it if your hardware is stable” mode, not the “set it and forget it on every build” mode. If your system acts weird, drops the drive, or starts behaving like it drank too much espresso, drop back to Gen 2 and move on with your life.
How to Check That PCIe Is Actually Working
Once the system boots, confirm the drive exists and the bus came up correctly. A few simple checks go a long way:
If the drive appears as nvme0n1, you are in business. If it does not, reseat the cable, check power, verify the adapter orientation, and confirm you added the correct config.txt or EEPROM settings for your hardware.
If you want deeper verification, tools like lspci can help, though some systems may need the pciutils package installed first. For everyday setup, though, the kernel logs and block device list are usually enough.
Common Problems and How to Fix Them
The SSD Is Not Detected
Start with the obvious but important suspects: cable orientation, cable seating, and power. Then check whether your setup is official HAT+ or third-party. If it is third-party, confirm dtparam=pciex1 is set. If you are booting from PCIe, check EEPROM settings too.
The Pi Still Boots from microSD
That usually means the boot order is still prioritizing the SD card. In the official flow, change it in raspi-config. In the manual flow, confirm the EEPROM boot order is correct. Also remember that with an SD card inserted, the Pi may still try that first depending on your configuration.
Gen 3 Is Unstable
That is not unusual. The easiest fix is the least dramatic one: go back to Gen 2. Stable Gen 2 is better than flaky Gen 3, unless your hobby is collecting random kernel messages.
Everything Fits Electrically but Not Physically
Classic Raspberry Pi moment. Try a different board layout, a shorter SSD, a low-profile cooler, or a different case. PCIe on the Pi 5 is powerful, but it still lives in a very compact ecosystem where millimeters have strong opinions.
What PCIe Unlocks for the Raspberry Pi 5
For most users, PCIe turns the Pi 5 into a much better daily-use Linux machine. Boot from NVMe, install software faster, run containers more comfortably, and stop worrying that your storage is the slowest part of the room. For home lab users, the benefits stack up quickly: faster logging, better database behavior, more responsive package management, and more pleasant file-serving workloads.
Beyond that, PCIe on the Pi 5 opens the door to more specialized projects. AI accelerators become more practical, network experiments become more interesting, and edge-computing builds get a serious boost. Even if you never attach anything fancier than an SSD, the very existence of PCIe changes the personality of the Pi 5. It feels less like a board that must work around its limits and more like one that can be shaped to fit the project.
Experience and Lessons Learned From Real Pi 5 PCIe Builds
In practical Raspberry Pi 5 projects, the experience of getting PCIe working usually follows the same emotional arc. First comes excitement. You order an adapter board, maybe an NVMe drive you got on sale, and start imagining a tiny powerhouse that boots like a champ and loads apps before your coffee finishes dripping. Then comes the physical reality: a ribbon cable, a cooler that almost fits, a drive screw so small it seems designed by ants, and a moment where you realize “compact” in Raspberry Pi land means “prepare to negotiate with geometry.”
The first big lesson is that stability beats speed on day one. A lot of people are tempted to enable Gen 3 immediately because the numbers are juicy, and to be fair, they really are. But the smarter move is to get everything working at Gen 2 first. Make sure the drive is recognized, make sure the system boots repeatedly, make sure your file system is happy, and only then push faster settings. That order saves a lot of guesswork. If something breaks after a Gen 3 change, you know exactly what caused it instead of blaming the cable, the SSD, the moon phase, and your own life choices all at once.
The second lesson is that the Pi 5 rewards neat builds. Reseating the cable often fixes “mystery” problems. Careful mounting matters. Good cooling matters. A lot of PCIe weirdness turns out not to be software drama at all, but signal integrity, power, or physical fit. That feels annoying until you realize it is also empowering: many problems are fixable without replacing half your setup.
The third lesson is that NVMe changes the feel of the machine more than benchmark charts can fully explain. People talk about throughput numbers, but what stands out in everyday use is responsiveness. Package updates feel less sleepy. Desktop apps open with less hesitation. Large transfers stop feeling like a snack break. The Pi 5 running from NVMe starts to feel polished, not just fast.
And finally, there is the most Raspberry Pi lesson of all: once PCIe works, one accessory is never enough. Today it is an SSD. Tomorrow it is an AI board. Next week you are reading about network adapters and external GPU experiments at 1:00 a.m., telling yourself this is definitely still a practical project. The Pi 5’s PCIe connector does that to people. It starts as a storage upgrade and ends as an invitation to tinker far beyond the original plan. Honestly, that is part of the fun.
Conclusion
Getting PCIe working on the new Pi 5 is absolutely worth the effort. Start with the right adapter, respect the cable, use the official HAT+ path if you want the smoothest experience, and remember that boot support and PCIe enablement are related but not identical. Once the basics are in place, NVMe boot is the upgrade most users will appreciate immediately, and Gen 3 can be a nice bonus if your particular hardware behaves itself.
The best part is not just that PCIe works. It is that it changes what the Raspberry Pi 5 can realistically be. A better desktop. A better home lab node. A better edge device. A better little machine, full stop. And all because of one small connector that has caused a very large amount of happy tinkering.