The entryway is your home’s handshake. It is the first thing guests see, the last thing you pass on the way out, and somehow the official parking lot for shoes, bags, mystery mail, and that one jacket nobody admits to owning. That is exactly why an entryway bench DIY repurposed idea is such a smart project. It gives you a place to sit, a place to stash clutter, and a very satisfying excuse to turn old furniture into something useful instead of letting it die a slow, dusty death in the garage.
If you have been hunting for a practical DIY entryway bench with storage, here is the good news: you do not need a huge budget, a giant workshop, or a beard that automatically grants woodworking powers. You just need a decent plan, a repurposed base or salvaged materials, and the willingness to measure twice instead of inventing new curse words later. This guide walks you through how to build a functional, good-looking bench using reclaimed or repurposed pieces, while keeping the design clean, durable, and actually useful for everyday life.
Why a Repurposed Entryway Bench Is Worth Building
A good entryway bench solves three problems at once. First, it adds seating where people naturally need it most: the spot where they wrestle with shoes. Second, it creates storage for daily clutter such as baskets, boots, umbrellas, dog leashes, and backpacks. Third, it lets you turn castoff furniture or leftover building materials into something that looks custom, which is both budget-friendly and deeply satisfying.
Repurposing also gives the bench personality. A brand-new store-bought bench can be nice, sure. But a bench made from an old headboard, a retired coffee table, reclaimed boards, stock cabinets, or the carcass of a vintage dresser has a story. It feels collected rather than copied. In a world full of flat-pack furniture and assembly instructions written by chaos itself, that counts for something.
Before You Build: Decide What Kind of Bench You Actually Need
Before you start cutting wood like an enthusiastic raccoon with tools, think about function first. The best repurposed bench idea is the one that fits your space and your habits.
Choose the Right Size
For most entryways, a bench between 42 and 48 inches wide works well for one to two adults, while a depth around 16 to 20 inches feels comfortable without swallowing the walkway. Seat height usually lands around 17 to 19 inches. You do not need to treat those numbers like sacred law, but they are a strong starting point. In a tight hallway, go narrower and cleaner. In a mudroom-style entry, go deeper and add storage underneath.
Pick Your Storage Style
Ask yourself one question: what is always making this space look messy? If the answer is shoes, build an open lower shelf or cubbies. If the answer is random seasonal stuff, add baskets underneath. If the answer is “everything my family touches,” consider a lift-top seat or pair your bench with hooks above it. The goal is not just to build a seat. The goal is to create a landing zone that quietly prevents chaos.
Choose a Repurposed Base
Here are some of the easiest pieces to turn into a DIY bench:
- Old headboard and footboard: Great for a bench with character and built-in back support.
- Vintage coffee table: Easy to shorten or reinforce with a lower shelf.
- Unused dresser frame: Remove upper drawers and adapt the base for baskets or cubbies.
- Stock cabinets: A smart way to build hidden storage with a polished, built-in look.
- Reclaimed lumber: Perfect for a rustic or farmhouse-style bench with a custom seat and shelf.
Tools and Materials
The exact list depends on your design, but most projects use some version of the following:
- Tape measure
- Level
- Circular saw or miter saw
- Drill and driver bits
- Wood screws
- Wood glue
- Sander and sandpaper
- Clamps
- Wood filler
- Primer and paint or stain and topcoat
- Plywood or solid boards for the seat
- Optional baskets, hooks, cushion, or furniture legs
If you are using reclaimed or painted materials, add safety gear to the list. That means eye protection, hearing protection, and proper respiratory protection when sanding or stripping finishes. Old painted wood can be a trap if you treat it casually. Vintage charm is nice. Vintage dust in your lungs is not.
Step-by-Step: How to Build an Entryway Bench DIY Repurposed Idea
Step 1: Measure the Entryway Like a Realist
Measure the wall, the depth of the walkway, nearby door swings, and how much room people need to sit and stand. Your bench should make the space easier to use, not turn the entry into an obstacle course. Mark the footprint on the floor with painter’s tape so you can see the size before building.
Step 2: Inspect and Prep Your Repurposed Materials
If you are using salvaged wood or old furniture, inspect everything first. Check for loose joints, cracked rails, warped boards, protruding nails, rusty fasteners, and old finishes. Clean the piece thoroughly. Tighten what can be saved. Replace what cannot. If there is old paint and you suspect the material is truly old, do not sand blindly. Test it or strip it safely before machining or sanding. This is the least glamorous part of the project, but it is the part that keeps the rest of the build from becoming a reality show.
Step 3: Build or Reinforce the Base
If you are starting with a headboard and footboard, cut the footboard in half and attach the halves as side panels. If you are using stock cabinets, set them side by side, shim until level, and fasten them together securely before adding a top. If you are building from reclaimed lumber, create a simple frame with four legs, front and back aprons, and a stretcher or lower rails for strength.
The base matters more than fancy finishing. A beautiful bench that wobbles is not a bench. It is a trust exercise. Use glue where appropriate, predrill to avoid splitting, and keep checking for square as you assemble. If the bench will live in a busy entryway, add a back rail or corner braces for extra stiffness.
Step 4: Add the Seat
Cut the seat from plywood topped with edge trim, or use solid boards for a more custom look. If you want a rustic style, two or three reclaimed planks can make a great bench top. Dry-fit first, then secure the seat from underneath whenever possible for a cleaner finish. Leave enough overhang to look intentional, but not so much that people catch pockets or knees on it every time they walk by.
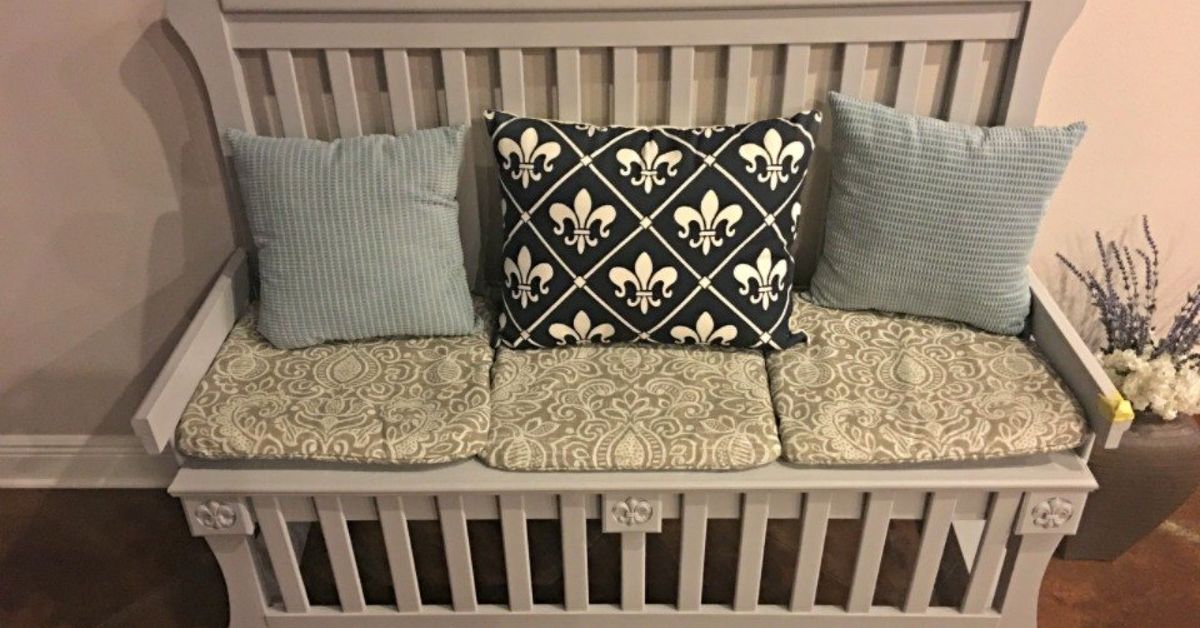
Want extra charm? Upholster a cushion for the top. Want easier cleaning? Keep it wood and toss on a washable pillow. Want maximum practicality? Use a lift-up seat with concealed storage beneath. This is your chance to decide whether your bench is a calm design feature or a tiny productivity machine.
Step 5: Build the Bottom Storage
This is where your entryway storage bench earns its keep. Add one of these:
- Open shelf: Fast and simple, great for everyday shoes.
- Cubbies: Better for families, especially if everyone gets their own slot.
- Baskets underneath: Good for scarves, dog gear, or seasonal clutter.
- Drawers or cabinet doors: Best if you prefer a tidy, hidden-storage look.
Open storage feels lighter and works well in small spaces. Closed storage looks neater but adds more build time. Pick the version that matches your patience level and your tolerance for visible shoes.
Step 6: Sand, Fill, and Finish
Sand rough edges, ease the corners slightly, and fill visible screw holes if you want a cleaner appearance. If you are painting, prime first. If you are staining, do a test area on scrap wood or an inconspicuous spot, because stain has a very special talent for becoming dramatically different from what you expected.
For a repurposed look, you can keep some natural wear and character. Just do it on purpose. There is a difference between “beautiful patina” and “this thing looks like it lost a fight with a lawn mower.” A durable topcoat is smart in an entryway because the bench will deal with dirt, moisture, bags, and daily abuse.
Step 7: Style It So It Works Harder
Once the bench is built, finish the zone around it. Add wall hooks above the bench for coats and bags. Slide baskets below for easy sorting. Place a washable rug nearby. Hang a mirror to bounce light and make the entry feel larger. Suddenly your house looks like it has its life together, even if the junk drawer says otherwise.
Repurposed Entryway Bench Ideas That Actually Look Good
1. Headboard Bench
Use a vintage headboard as the back, half the footboard as the sides, and reclaimed boards for the seat. This style works beautifully in cottage, farmhouse, or coastal interiors.
2. Stock Cabinet Bench
Two low cabinets topped with a wood seat create a polished DIY mudroom bench with hidden storage. It looks custom without requiring advanced joinery.
3. Reclaimed Lumber Bench
Build a basic rectangular frame from construction lumber, then face it with weathered boards. This gives you the look of old wood with the structure of new wood underneath.
4. Dresser-to-Bench Conversion
Take an old dresser, remove the top drawers, reinforce the frame, and create an open lower space for baskets. Add a stained wood seat on top to modernize the whole piece.
5. Minimalist Slat Bench
If your entryway is small, keep the silhouette open. A simple slatted bench with a lower shoe shelf feels airy, practical, and easier to clean around.
Common Mistakes to Avoid
- Making it too deep: A bulky bench can choke a narrow entry.
- Ignoring the floor: If the floor is uneven, shim and level the base before final assembly.
- Skipping reinforcement: Repurposed furniture often needs more support than it looks like it does.
- Overdecorating it: It is an entryway bench, not a stage set. Leave room to sit.
- Using delicate finishes: This piece needs durability more than drama.
- Forgetting safety on old paint: Do not sand first and ask questions later.
How to Make the Bench Look Custom
Want your bench to look less “weekend project” and more “expensive built-in somebody definitely complimented”? Add trim to the front edge of the seat. Paint the base and stain the top. Use matching baskets. Install hooks or board-and-batten above the bench. Add a simple cushion in durable fabric. Small upgrades make a big difference, and they do not require you to sell a kidney at a boutique furniture store.
Color also matters. Soft white, warm greige, olive, navy, charcoal, and natural wood tones all work well in an entry. If your entryway is tiny, lighter colors help keep it open. If you want a dramatic moment, go darker on the bench and keep the wall simple. Either way, make it look intentional. Repurposed does not mean random.
The Real Experience of Building an Entryway Bench
Here is the part glossy tutorials sometimes skip: building a repurposed entryway bench DIY project is rarely one smooth montage where you cut two boards, smile meaningfully, and suddenly own a designer mudroom. Real life is messier. You bring home an old piece of furniture feeling like a genius treasure hunter, only to realize one leg is shorter, one panel is loose, and somebody in 1994 repaired it with a screw the size of a submarine bolt.
Still, that is part of the fun. A repurposed build makes you pay attention in a different way than a brand-new materials list does. You start noticing how things were made. You see old joinery. You learn which boards are solid and which ones are just pretending. You begin to understand why some furniture survives for decades and some pieces start wobbling if you look at them too hard. In that sense, the project teaches more than just construction. It trains your eye.
The first big lesson is patience. Salvaged wood and secondhand furniture almost never behave perfectly. Boards may be slightly cupped. Paint may need extra prep. A seat that looked level on the garage floor may suddenly reveal a dramatic personality once it moves indoors. The answer is usually not panic. It is adjustment. Shim the base. Plane or sand the high spots. Reinforce the weak joints. Build slower than your impulse wants to, and the result gets much better.
The second lesson is that function wins. It is easy to get distracted by style details early on. You start browsing fabric swatches, imagining brass hooks, and debating whether the finish should say “modern farmhouse” or “quietly smug Scandinavian.” Meanwhile, what the bench really needs is enough depth to sit comfortably, enough strength to hold actual people, and enough storage to stop shoes from reproducing all over the floor. The best projects are pretty, yes, but they are useful first. When the bench genuinely makes mornings easier, it becomes one of those humble pieces you wonder how you lived without.
The third lesson is emotional, which sounds dramatic for a furniture project, but stay with me. Building with repurposed materials creates a connection that new materials often do not. Maybe the wood came from an old bed frame from your grandparents’ house. Maybe you rescued a battered table from the curb and gave it a second life. Maybe the bench becomes the place where your kids sit to lace sneakers before school or where guests drop their bags during holidays. Suddenly this is not just a bench. It is part storage solution, part memory collector, part daily proof that useful things can still be beautiful.
And yes, there will probably be one moment when you step back, covered in sawdust, staring at a nearly finished bench, and think, “Why did I decide this was a relaxing weekend activity?” That feeling usually lasts about six minutes. Then you put the bench in place, slide baskets underneath, hang a couple of hooks above it, and watch the whole entryway make sense for the first time. It is weirdly thrilling. You did not just build furniture. You improved the rhythm of the house.
That is why this kind of project sticks with people. It is approachable, practical, and forgiving enough for beginners, but still satisfying for experienced DIYers. You can make it rustic, modern, cottage, industrial, or clean and minimal. You can spend very little if you have good salvaged materials, or upgrade the finish if you want a more polished look. Either way, the payoff is immediate. Every time someone sits down to take off shoes, every time a bag lands in a basket instead of on the floor, every time the entry looks calmer than it did before, the bench keeps earning its spot.
So if you have been waiting for a sign to try a repurposed entryway bench idea, this is it. Start with what you have. Use the good boards. Reinforce the questionable ones. Respect the prep work. Aim for practical beauty instead of perfection. A solid DIY bench does not need to be flawless. It just needs to be sturdy, useful, and good enough to make your entryway feel like a real welcome instead of a shoe explosion with a front door attached.
Conclusion
Building a DIY entryway bench from repurposed materials is one of those rare home projects that hits the sweet spot between affordable, attractive, and genuinely useful. It can be rustic or polished, simple or storage-packed, made from an old bed frame or built from reclaimed boards and stock cabinets. The secret is to start with the way you live, then build around that. Make space for shoes, bags, and daily routines. Keep the structure strong, the size practical, and the finish durable. Do that, and your entryway bench will not just fill a wall. It will quietly make your whole home work better.