

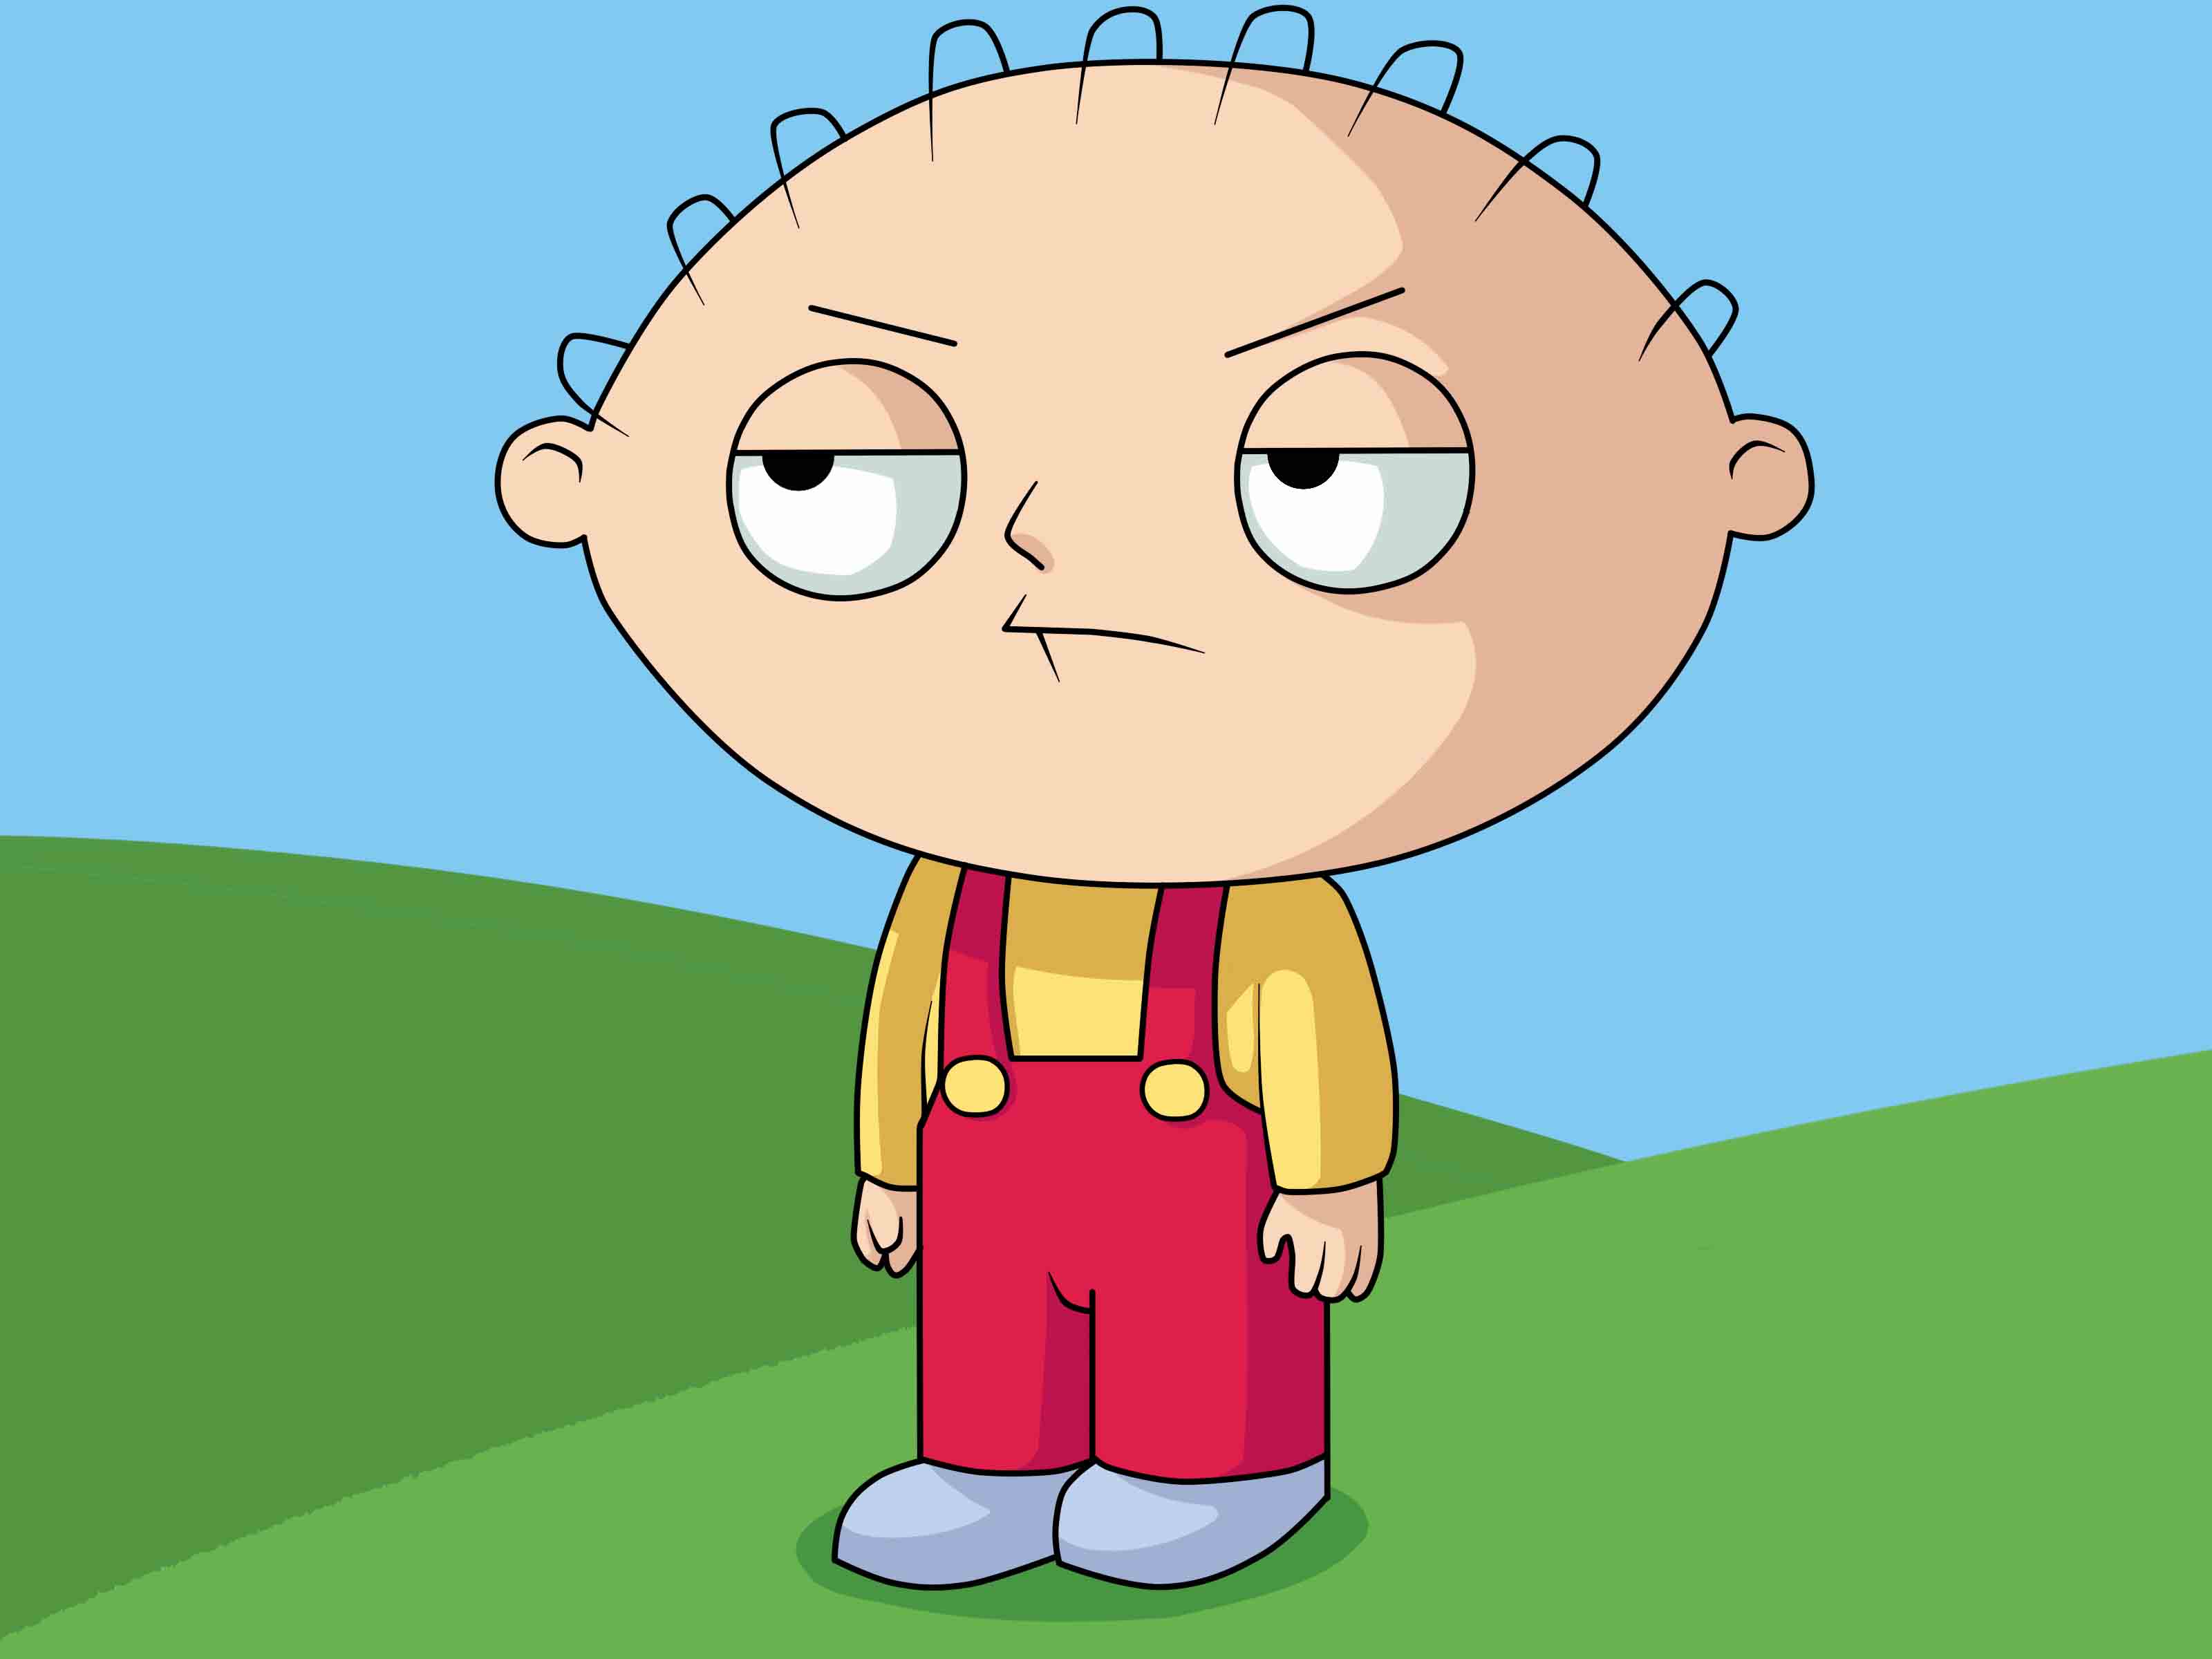
Learning how to draw Stewie from Family Guy is a surprisingly useful lesson in cartoon design. At first glance, he appears simple: an unusually shaped head, two tiny eyes, a compact body, and enough attitude to suggest he has already rejected your artistic choices. However, simple cartoon characters are often less forgiving than detailed ones. Move an eye too far, make the head too round, or stretch the legs too long, and Stewie may suddenly resemble a suspicious football wearing overalls.
The secret is to build the character from large shapes before adding facial details. Stewie’s identity comes primarily from his wide head, small body, short limbs, and carefully placed features. Once those proportions are correct, the clothing, expression, and color become much easier to handle.
This step-by-step Stewie drawing tutorial works for pencil and paper, a drawing tablet, or vector software. Beginners can follow the complete process, while experienced artists can use the proportion and expression tips to create more dynamic poses.
What You Need to Draw Stewie
You do not need an expensive studio or a machine capable of calculating world domination. A small collection of basic art supplies will do the job:
- A pencil, preferably HB or 2H for the construction sketch
- An eraser that does not smear graphite across the page
- Smooth drawing paper or a sketchbook
- A black fineliner, marker, or inking brush
- Colored pencils, markers, or digital coloring tools
- A clear reference image showing Stewie from the front
For digital drawing, create separate layers for the rough sketch, clean outlines, flat colors, and optional shadows. Separating these stages makes corrections far less painful. It also prevents the classic digital-art tragedy of discovering that the beautiful sketch and the bright red overalls are permanently fused onto one layer.
Understand Stewie’s Basic Design
Before drawing individual features, study the overall silhouette. Stewie Griffin is the youngest member of the Griffin family and one of the most recognizable characters in Family Guy. His design is dominated by a horizontally stretched head that looks somewhat like an American football viewed from the side.
His head is much wider than his torso. His body is short and rounded, while his arms and legs are small and simplified. His outfit normally includes a yellow shirt, red overalls, and light-colored shoes.
Think of the design as a combination of simple geometric forms:
- A wide oval or football shape for the head
- A small rounded rectangle for the torso
- Short cylinders for the arms and legs
- Small oval forms for the hands and shoes
- Thin curves and simple circles for the facial features
This shape-based approach is more reliable than trying to copy the finished contour immediately. You are building the character, not tracing the coastline of Rhode Island during an earthquake.
How to Draw Stewie Step by Step
Step 1: Sketch the Center Line and Head Shape
Begin with a light horizontal guideline showing where the center of Stewie’s head will sit. Draw a second vertical guideline through the middle. These lines help you place the eyes, ears, and nose symmetrically.
Now sketch a wide oval around the guidelines. Flatten the top and bottom slightly, and narrow both ends. The result should resemble a soft football rather than a perfect ellipse.
Do not press hard with the pencil. The first shape is only a construction guide, and you will probably adjust it several times. A light sketch allows you to correct the width without leaving behind dark graphite scars from previous artistic negotiations.
The head should occupy roughly the upper half of the completed character. This large head-to-body ratio is essential. If the head is too small, the drawing may look like an ordinary child instead of Stewie.
Step 2: Place the Ears
Draw a small curved ear at each end of the head. The ears should sit near the horizontal center line, not at the top or bottom of the skull.
Use simple backward C shapes. Add a short inner curve inside each ear, but keep the detail minimal. Stewie’s visual style depends on clean, economical lines. Elaborate anatomical ears would look strangely realistic, as though he had borrowed them from a medical textbook.
Step 3: Draw the Eyes
Place two small oval eyes on the horizontal guideline. Leave a noticeable space between them. Stewie’s eyes are much smaller than his head, which creates his dry, calculating expression.
Add one tiny black pupil inside each eye. The direction of the pupils changes his personality instantly:
- Centered pupils create a neutral expression.
- Pupils shifted sideways make him look suspicious or judgmental.
- Slightly raised pupils suggest surprise or concern.
- Uneven pupils can create comic confusion.
Avoid making the eyes too large. Oversized eyes can turn Stewie into a cheerful preschool mascot, which is not exactly the energy we are attempting to capture.
Step 4: Add the Eyebrows, Nose, and Mouth
Draw two short eyebrow lines above the eyes. For Stewie’s familiar skeptical look, angle the eyebrows slightly downward toward the center. A stronger angle makes him appear angry, while flatter eyebrows create a calmer expression.
His nose can be represented by a tiny curved line or a small hook between and below the eyes. Keep it understated.
Draw the mouth as a short horizontal curve. Turn the corners upward for a smug grin, downward for irritation, or leave the line nearly straight for his classic unimpressed expression. You can also add a second curved line to create an open mouth, but do not make it too large unless Stewie is shouting, singing, or delivering a speech no baby should be qualified to give.
Step 5: Construct the Torso
Below the head, draw a small rounded rectangular shape for the torso. It should be centered but considerably narrower than the head.
Leave a small gap between the lower edge of the head and the shoulders. Stewie’s neck is generally hidden or extremely short, so avoid drawing a long visible neck.
The torso should taper only slightly. Keep it compact and childlike. At this stage, concentrate on the outer shape rather than the clothing details.
Step 6: Draw the Arms and Hands
Attach two short arms to the sides of the torso. Use narrow, gently curved cylinders. Stewie’s hands are simplified, so you can draw them as small mitten shapes with a thumb and two or three finger divisions.
For a standard standing pose, allow the arms to hang beside the body. To give the drawing more character, try one of these alternatives:
- Place one hand on his hip for impatient confidence.
- Raise one finger as though he is explaining a complicated invention.
- Fold the arms to create a disapproving pose.
- Extend both arms outward for theatrical frustration.
Even when drawing a simple cartoon character, pose matters. The position of the arms can communicate Stewie’s personality before the viewer notices his face.
Step 7: Add the Legs and Shoes
Draw two short legs beneath the torso. Keep them relatively straight and close together. Each leg can be constructed as a narrow rounded rectangle or cylinder.
Add small oval shoes at the bottom. The shoes should point slightly outward, helping the character feel balanced. Make them wider than the lower legs but much smaller than the head.
Check the total proportions before continuing. Stewie’s body should look short and compact. If the legs become too long, he may appear to have experienced a sudden and deeply suspicious growth spurt.
Step 8: Draw the Shirt and Overalls
Sketch the neckline of the shirt just beneath the head. Add short sleeve lines around the upper arms.
For the overalls, draw a rectangular bib across the upper torso. Extend two straps from the bib toward the shoulders. Add small circular fasteners where the straps connect to the bib.
Continue the overalls downward across the lower torso and legs. A few simple seam lines are enough to explain the clothing. Avoid adding realistic fabric folds because the original visual language is flat and uncluttered.
Step 9: Refine the Outer Contour
Now examine the entire sketch rather than focusing on individual details. Check the width of the head, the spacing of the eyes, the size of the torso, and the length of the limbs.
Make adjustments while the drawing is still light. Look at the character’s silhouette from a distance or temporarily fill the sketch with a dark digital color. A recognizable silhouette indicates that the major proportions are working.
Once satisfied, trace the final contour with a darker pencil, pen, or digital brush. Use smooth, confident strokes. Rotate the paper or canvas when necessary instead of forcing your wrist into an awkward angle.
Step 10: Erase the Construction Lines
Allow physical ink to dry completely before erasing. Then remove the center lines, rough ovals, and overlapping shapes.
Work gently around the final outlines. Aggressive erasing can damage the paper or fade the ink. Digital artists can simply hide or reduce the opacity of the rough-sketch layer, a process that feels considerably more sophisticated than rubbing tiny graphite crumbs off a desk.
Step 11: Color Stewie
Apply flat, even colors before adding any shading. A recognizable Stewie color palette usually includes:
- A light peach skin tone
- A bright yellow shirt
- Red overalls
- Light gray or pale blue shoes
- Black outlines, pupils, and small clothing details
Markers produce bright, clean areas of color, but test them on scrap paper first because some markers bleed. Colored pencils provide more control and are forgiving for beginners. When using pencils, apply several light layers instead of pressing heavily during the first pass.
For a television-style flat drawing, shading is optional. To add depth, place a subtle shadow beneath the head, under the arms, and along one side of the overalls. Keep the shadows simple so they support the character without changing the clean cartoon appearance.
How to Capture Stewie’s Personality
A technically accurate outline can still feel lifeless. Stewie becomes recognizable not only through proportion but also through attitude. His expressions are usually controlled rather than wildly exaggerated. Small changes to the eyes, brows, and mouth can therefore have a large effect.
The Classic Skeptical Look
Angle one eyebrow slightly lower than the other, shift the pupils to one side, and draw a nearly straight mouth. This combination suggests that Stewie has noticed something ridiculous and is deciding whether it deserves a sarcastic response.
The Evil-Genius Expression
Lower both eyebrows toward the center, narrow the visible eye area, and add a small smile. Raising one hand or finger strengthens the impression that he is presenting a plan that will almost certainly violate several household rules.
The Surprised Expression
Raise the eyebrows, open the mouth into a small oval, and center the pupils. Do not enlarge every feature at once. Stewie’s face remains relatively restrained even when the emotion changes.
The Smug Smile
Draw one corner of the mouth higher than the other and glance the pupils sideways. This expression works especially well with folded arms or one hand placed on the hip.
Common Mistakes When Drawing Stewie
Making the Head Too Round
A regular circular head removes Stewie’s strongest identifying feature. Begin with a very wide oval and then narrow the sides. Compare the width with the torso throughout the sketch.
Placing the Eyes Too High
The eyes sit near the horizontal middle of the head. When they drift upward, the lower face becomes too large and the character loses his familiar expression.
Drawing the Body Too Large
The torso should remain secondary to the head. Reduce the body before adding clothing if the proportions look too adult.
Adding Too Much Detail
Extra eyelashes, realistic fingers, complex folds, and detailed shading can clash with the flat animated style. Use only the lines needed to communicate each feature.
Using Scratchy Final Lines
Repeated short strokes may make the outline appear furry or uncertain. Practice drawing long curves before inking the head. You can also complete the contour in several deliberate sections rather than attempting one heroic, uninterrupted oval.
Skipping the Rough Sketch
Starting with dark final lines may seem faster, but it makes proportion errors difficult to repair. Construction shapes are not wasted work. They are the quiet engineering department keeping the cartoon from collapsing.
How to Draw Stewie Digitally
The same construction process works in Procreate, Photoshop, Clip Studio Paint, Adobe Fresco, Illustrator, and similar programs.
Start with a low-opacity sketch on one layer. Add a new layer for clean line art and use a stabilized brush if your software offers one. Stabilization smooths long curves and is particularly helpful when drawing the head.
Place each flat color on a separate layer beneath the line art. Use clipping masks or alpha lock for shadows and highlights. If you prefer a precise vector look, build the head and torso from editable oval and rounded-rectangle shapes, then adjust their anchor points.
Zoom out frequently. A drawing that looks flawless at 800% magnification may appear strangely proportioned at normal viewing size. Viewers see the full character first, not the heroic struggle behind one perfectly polished ear.
Practice Variations After the Basic Drawing
Once you can draw Stewie from the front, repeat the character using different poses and expressions. Repetition is more valuable than endlessly correcting one drawing.
Try these practice prompts:
- Stewie standing with folded arms
- Stewie pointing toward an imaginary invention
- Stewie looking surprised by Brian
- Stewie running with exaggerated determination
- Stewie wearing a formal suit or costume
- Stewie shown in a three-quarter view
- Stewie redesigned in your own cartoon style
When changing the pose, preserve the defining proportions. His head should remain broad, the torso compact, and the limbs short. Those visual landmarks allow viewers to recognize him even when the clothing or expression changes.
Experiences and Lessons from Practicing a Stewie Drawing
The first attempt at drawing Stewie often feels deceptively easy. You sketch a wide head, add two eyes, attach a tiny body, and expect instant success. Then you step back and discover that the character looks familiar but not quite correct. This is a common experience when drawing highly simplified animated characters.
The problem is usually not a missing detail. It is a proportion that drifted slightly during construction. Perhaps the head is ten percent too tall, the eyes are too close together, or the torso begins too far below the chin. Each error seems minor on its own, but simple designs leave nowhere for those errors to hide.
A useful practice experience is drawing only Stewie’s head five or six times on one page. Do not ink or color the sketches. Concentrate on the width, end points, ear placement, and eye spacing. By the fourth or fifth version, the shape usually becomes more natural because your hand begins to remember the required motion.
Another helpful exercise is to set a short timer. Give yourself two minutes for the first sketch, five minutes for the second, and ten minutes for the third. The two-minute version forces you to identify the essential shapes. The longer versions allow refinement without encouraging endless polishing. Many artists discover that the five-minute drawing has more personality than the carefully labored version because its lines feel relaxed.
Inking creates a different challenge. The rough sketch may look energetic, but the clean outline can become stiff. This happens when an artist concentrates so intensely on accuracy that every stroke loses its natural rhythm. Practicing the head curve on a spare sheet helps. Draw from the shoulder or elbow rather than relying entirely on small wrist movements.
Coloring also teaches restraint. Because Stewie’s design uses large flat areas, uneven marker strokes are immediately visible. Working from one edge of a shape toward the other while the ink remains wet can reduce streaks. With colored pencils, several light passes usually look cleaner than one heavy layer.
One of the most satisfying moments occurs when a rough collection of ovals suddenly becomes recognizable. This usually happens as soon as the eyes and small mouth are correctly positioned. The experience demonstrates an important lesson in character drawing: recognition depends on relationships between features, not the amount of detail.
It is equally useful to keep unsuccessful versions. Place the first and fifth attempts beside each other and identify exactly what improved. Maybe the later head is flatter, the body is shorter, or the eyebrows communicate more attitude. Seeing those differences provides clearer feedback than simply deciding that one version looks “better.”
Finally, allow some imperfection. A hand-drawn Stewie does not need to match a production model sheet with mathematical precision. Slight variations can give the picture energy and reveal your personal drawing style. The goal is a recognizable, expressive resultnot a character so exact that Fox’s animation department begins asking uncomfortable questions.
Conclusion
Learning how to draw Stewie from Family Guy becomes much easier when you treat him as a collection of simple shapes. Start with the wide football-shaped head, establish the facial guidelines, construct the compact body, and refine the design only after the proportions feel correct.
Use light construction lines, check the silhouette before inking, and keep the final details simple. Stewie’s personality comes from subtle eyebrow angles, pupil placement, mouth shape, and body language rather than complicated rendering.
Your first drawing may not look perfect, and that is completely normal. Repeat the head shape, test several expressions, and compare each attempt with a clear reference. With practice, those awkward ovals will become a recognizable evil geniuscomplete with red overalls and the unmistakable expression of someone who is already planning his next scene.