Hanging a picture frame sounds like one of those tiny home tasks that should take five minutes. Then suddenly you are standing on a chair, holding a hammer, squinting at a crooked landscape print, and wondering whether your wall is judging you. Good news: learning how to hang a picture frame is not complicated. The trick is to slow down for a few smart minutes before making the first hole.
Whether you are hanging a single family photo, a framed art print, a heavy mirror, or a dramatic gallery wall that says, “Yes, I have taste and also a tape measure,” the same basic rules apply. You need the right height, the right hardware, the right wall support, and a reliable way to level everything before you call the job done.
This guide walks you through the entire process so you can hang a picture right the first timewithout turning your wall into Swiss cheese.
Why Picture Hanging Goes Wrong
Most picture-hanging mistakes happen before the hammer ever touches the wall. People guess the height, ignore the frame weight, use whatever nail is hiding in the junk drawer, and hope gravity is feeling generous. Unfortunately, gravity is not a decorator. It is a very strict building inspector.
A frame can look “off” for several reasons. It may be too high, too low, too small for the wall, poorly centered over furniture, or hung with hardware that does not match the wall type. A lightweight 8-by-10 photo may be fine on a small picture hook, but a large framed print with glass needs stronger support. Drywall, plaster, brick, tile, and wood paneling all require different approaches.
The best way to hang a picture frame is to treat the project like a mini installation, not a random act of bravery. Measure, mark, choose hardware, test the layout, then hang.
Tools and Supplies You May Need
You do not need a professional workshop to hang a picture, but a few basic tools make the job cleaner and calmer. Before you begin, gather what applies to your frame and wall.
- Tape measure
- Pencil
- Painter’s tape
- Level or smartphone level app
- Hammer
- Screwdriver or drill
- Stud finder
- Picture hooks, nails, screws, wall anchors, or adhesive strips
- Bathroom scale for weighing heavier frames
- Felt or rubber bumpers for the back corners of the frame
Painter’s tape is especially useful because it lets you mark the wall without leaving a permanent scar. A level is non-negotiable unless you enjoy the “slightly seasick gallery” look.
Step 1: Choose the Right Wall and Placement
Start by deciding where the picture belongs visually. A frame should relate to the room around it. If you hang art on a blank wall, it should feel centered and intentional. If you hang it over a sofa, bed, console table, fireplace mantel, or desk, the frame should visually connect with that furniture instead of floating too high above it like it is trying to escape.
For a single frame over furniture, a helpful rule is to keep the bottom of the frame about 6 to 10 inches above the furniture. For larger pieces, the art often looks best when it is roughly two-thirds the width of the furniture beneath it. A tiny frame over a large sofa can look lonely, like it showed up to a party in the wrong outfit.
For a hallway or empty wall, think in terms of eye level. You want the picture to meet the viewer naturally, not force them to look up like they are reading airport signage.
Step 2: Use the 57-Inch Rule for Height
One of the most reliable picture hanging height rules is the 57-inch rule. It means the center of the artwork should sit about 57 inches from the floor. This is commonly used because it places art near average eye level and helps multiple frames feel consistent throughout a room.
Here is the simple version: measure 57 inches up from the floor and mark that spot lightly with a pencil. That point represents the center of the frame, not the top.
For example, if your frame is 24 inches tall, half of that height is 12 inches. If the hanging wire or hardware catches 4 inches below the top of the frame, subtract that 4 inches from 12 inches. The result is 8 inches. Add 8 inches to 57 inches, and your nail or hook should go at 65 inches from the floor.
The Easy Formula
Use this formula when hanging a frame with wire, D-rings, or a sawtooth hanger:
57 inches + half the frame height – distance from top of frame to hanging point = wall mark for hook or nail
This one formula prevents most height mistakes. It also makes you look extremely competent, which is a nice bonus.
Step 3: Weigh the Picture Frame
Before choosing hardware, know how heavy the frame is. For light frames, you can often use a picture hook, small nail, or adhesive strip. For medium frames, use a stronger hook or drywall anchor. For heavy frames, mirrors, or anything with glass and a thick frame, use studs whenever possible or choose heavy-duty wall anchors rated for the weight.
If you do not know the weight, use a bathroom scale. Weigh yourself first, then hold the frame and weigh yourself again. Subtract the first number from the second number. That difference is the frame weight. Yes, it feels silly. Yes, it works.
Always choose hardware rated for more than the frame weighs. A little extra strength is cheap insurance against a midnight crash that makes everyone in the house sit straight up in bed.
Step 4: Match the Hardware to the Frame
Look at the back of the frame. The hanging hardware determines how you measure and what support you need.
Wire Hangers
Frames with hanging wire are common and forgiving. Pull the wire up gently in the center as if it is hanging on a hook. Measure from the top of the frame down to the highest point of the pulled wire. Use that measurement in the hanging formula. For wider frames, two hooks can help distribute weight and reduce tilting.
D-Rings
D-rings are metal loops attached to the back of the frame. Some frames use two D-rings without wire, which means you need two wall marks. Measure the distance between the rings, transfer that spacing to painter’s tape, and use a level before installing both hooks or screws. D-rings are excellent for heavier or wider frames because they keep the frame more stable.
Sawtooth Hangers
Sawtooth hangers are often used on smaller frames. Measure from the top of the frame to the notch where the nail will sit. Because sawtooth frames can shift slightly, add small bumpers to the lower back corners to reduce movement and protect the wall.
Adhesive Picture Strips
Adhesive strips are popular for renters and lightweight frames. They work best on smooth, clean surfaces. Clean the wall with rubbing alcohol, press the strips firmly, follow the package directions, and wait the recommended bonding time before hanging the frame. Do not use adhesive strips on wallpaper, delicate paint, textured walls, or frames that exceed the product’s weight limit.
Step 5: Know Your Wall Type
The wall matters as much as the frame. A nail that works beautifully in drywall may be a terrible idea in plaster. A screw that feels secure in wood may do nothing useful in tile. Before you start, identify your wall surface.
Drywall
Drywall is common in modern homes and is usually easy to work with. Small frames can hang from picture hooks or nails. Medium and heavy frames should use drywall anchors if you cannot hit a stud. For the strongest hold, use a stud finder and secure the hardware into a wall stud.
Plaster
Plaster is harder and more brittle than drywall. It can crack if you hammer directly into it. Pre-drill a small pilot hole and use appropriate anchors or screws. For older homes with plaster walls, take your time. Plaster rewards patience and punishes enthusiasm.
Brick or Masonry
For brick walls, use masonry anchors or brick clips designed for the job. If drilling, many homeowners prefer drilling into mortar rather than directly into brick because mortar is easier to repair later. Use a masonry bit and the correct anchor for the frame’s weight.
Tile
Tile requires extra care because cracking a tile is not the kind of DIY souvenir anyone wants. For lightweight art, adhesive hooks may work if the surface is smooth and clean. For heavier items, use hardware made for tile installation and drill slowly with the correct bit.
Step 6: Mark the Wall Without Guessing
Once you know the height and hardware, mark the wall carefully. Use a pencil, not a pen. For a single hook, mark the spot where the nail, screw, or anchor will go. For two hooks, place painter’s tape across the back of the frame, mark the hardware positions on the tape, then move the tape to the wall. Use a level to make sure the tape is straight.
A paper template is also helpful, especially for gallery walls. Trace each frame on kraft paper, cut out the shapes, and tape them to the wall. Move the templates around until the layout feels balanced. This prevents the classic mistake of hanging six frames, stepping back, and realizing the entire arrangement is drifting downhill like a sled.
Step 7: Install the Hardware
For a picture hook, hold the hook at the mark and tap the nail in at the angle recommended by the package. For a screw and anchor, drill the pilot hole, insert the anchor, and drive the screw in until it is snug. Do not overtighten; overtightening can weaken the anchor or damage the wall.
If you are using a stud, drive the screw into the stud and leave enough of the screw head exposed for the frame hardware to catch securely. For heavy items, use two supports whenever possible. Two points of contact reduce stress and help keep the frame level over time.
Step 8: Hang, Level, and Stabilize
Hang the frame on the hardware and place a level on top. Adjust until the bubble is centered. If the frame uses wire, slide it slightly left or right on the hook until level. If it uses two D-rings, your marks should already be level, but small adjustments may still be needed.
Add small felt or rubber bumpers to the lower back corners of the frame. These protect the wall, help air circulate behind the frame, and reduce shifting when someone closes a nearby door with the force of a movie villain.
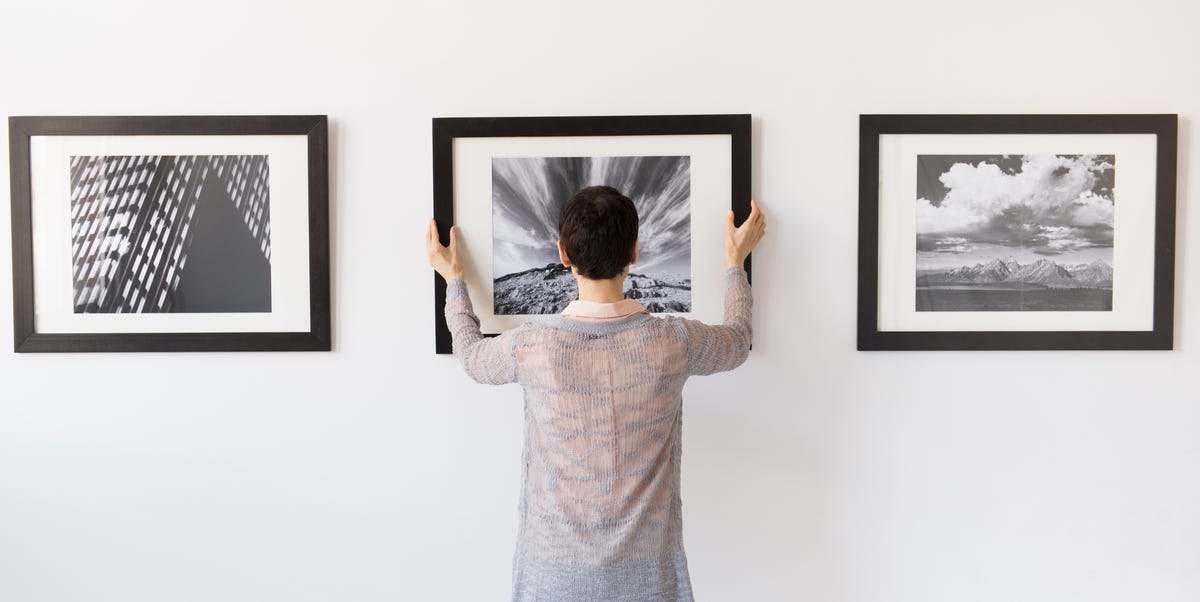
How to Hang a Gallery Wall
A gallery wall is just a group of frames treated as one larger artwork. The key is planning. Start with the largest or most important piece and build around it. Keep spacing consistent, usually about 2 to 3 inches between frames for a polished look. If the frames are very large, you can use slightly wider spacing.
Lay the arrangement on the floor first. Take a photo with your phone so you can remember the layout. Then use paper templates on the wall. For an open wall, center the entire arrangement around the 57-inch eye-level rule. Over furniture, keep the bottom row close enough to the furniture to feel connected.
A grid wall needs precision. Use identical frames, equal spacing, and a level for every row. A salon-style gallery wall can be more relaxed, but it still needs visual balance. Mix sizes, but repeat colors, frame finishes, or subject matter so the wall feels curated rather than chaotic.
Common Picture Hanging Mistakes to Avoid
Hanging Art Too High
This is the most common mistake. Art should relate to human eye level and nearby furniture. When in doubt, lower it slightly. Most people hang art too high, not too low.
Using Weak Hardware
A small nail in drywall may hold a featherweight frame, but it is not enough for a large framed print. Match the hardware to the actual weight and wall type.
Ignoring the Frame Back
Wire, D-rings, sawtooth hangers, and adhesive strips all require different measurements. Always inspect the back before marking the wall.
Skipping the Level
Your eyes can lie, especially near ceilings, trim, or sloped floors. Use a level. It takes seconds and saves your sanity.
Forgetting About Scale
A tiny frame on a huge wall can feel unfinished. A massive piece squeezed into a narrow corner can feel overwhelming. Choose art that fits the wall, the furniture, and the room’s proportions.
Damage-Free Options for Renters
If you rent, check your lease before making holes. Many landlords allow small nail holes because they are easy to patch, but rules vary. Adhesive picture strips can be a good option for lightweight frames on smooth painted walls. Picture ledges are another smart solution because they require fewer holes and let you swap art easily.
You can also lean framed art on shelves, mantels, dressers, or consoles. This creates a relaxed designer look and avoids wall damage. For larger frames, make sure the piece is stable and cannot slide forward.
Personal Experience: What Actually Helps When Hanging Picture Frames
After hanging more frames than I care to count, I have learned that the difference between a smooth project and a tiny domestic comedy is preparation. The fastest picture-hanging job is not the one where you start hammering immediately. It is the one where you spend five minutes measuring and avoid twenty minutes of patching holes.
One of the best habits is to place the frame on the floor near the wall before hanging it. This gives you a quick sense of scale. Sometimes a frame that looked perfect online feels too small once it is in the room. Other times, a large piece that seemed dramatic in the store suddenly looks like it is trying to swallow the hallway. Seeing it in the actual space helps you decide before the wall gets involved.
Another lesson: painter’s tape is your best friend. I like to put a strip of tape on the wall at the proposed top edge of the frame. Then I step back. If the tape looks too high, the art will look too high. If it feels centered and comfortable, the frame probably will too. This simple preview is especially useful over sofas and beds, where people often leave too much space between furniture and art.
For frames with two D-rings, I never try to “eyeball” both nail locations. That road leads to frustration, fresh holes, and a frame that refuses to sit straight out of pure spite. Instead, I put painter’s tape across the back of the frame, mark the D-ring spots, then transfer the tape to the wall and level it. It is simple, accurate, and oddly satisfying.
Heavy frames deserve extra respect. If a piece has glass, a thick wood frame, or sentimental value, I look for studs first. If the studs are not where I need them, I use high-quality wall anchors rated above the frame’s weight. I also prefer two hanging points for wide frames because they stay straighter and feel more secure.
Adhesive strips can be wonderful, but only when used correctly. The wall must be clean, the frame must be within the weight limit, and the adhesive needs time to bond. Skipping the wait time is like taking cookies out of the oven after two minutes and blaming the recipe. Follow the instructions and adhesive strips can save renters a lot of stress.
Finally, I always add bumpers to the back corners of frames. They cost very little, but they stop scuffs, reduce sliding, and make the frame sit better against the wall. It is one of those tiny finishing touches that makes the job feel professional.
The real secret to hanging a picture right the first time is not owning fancy tools. It is respecting the small details: height, weight, hardware, spacing, and level. When those details work together, the frame looks like it was always meant to be there. And you get to walk past it later with the quiet pride of someone who defeated both gravity and guesswork before lunch.
Conclusion
Hanging a picture frame is one of the easiest ways to make a room feel finished, personal, and thoughtfully designed. The process becomes much less intimidating when you follow a clear system: choose the right location, measure the correct height, match the hardware to the frame and wall, install securely, and level before celebrating.
For most single frames, start with the 57-inch rule. For art above furniture, keep the frame visually connected to the piece below it. For heavy frames, use studs or strong anchors. For gallery walls, plan the layout before making holes. And for every frame, no matter how small, take one final step back before calling the job complete.
Do it right, and your walls will look polished instead of patched. Your art will stay straight. Your frames will stay secure. And your hammer can return to the drawer with dignity.