Learning how to hang drywall is one of those home-improvement skills that looks simple from across the room and suddenly becomes very serious when a 4-by-8 sheet is wobbling over your head like a giant cracker with attitude. The good news? Drywall installation is absolutely doable for a careful DIYer. The secret is not brute strength. It is planning, layout, clean cuts, proper fastening, and knowing when to ask a helperor a drywall liftto save your shoulders from writing a complaint letter.
Drywall, also called gypsum board, wallboard, plasterboard, or Sheetrock in casual conversation, creates the smooth interior walls and ceilings found in most American homes. Hanging it well matters because every shortcut becomes visible later. A crooked seam, a screw driven too deep, or a panel forced into place can turn into cracks, popped fasteners, lumpy joints, and the kind of wall that looks fine only if the lights are off. This step-by-step guide explains how to hang drywall correctly, from choosing panels to fastening sheets and preparing for tape, mud, primer, and paint.
Before You Start: What Good Drywall Installation Really Means
A good drywall job starts before the first sheet touches the wall. The goal is to create a flat, stable surface with as few seams as practical. Fewer seams mean less taping, less sanding, and fewer opportunities for joints to show through paint. That is why professionals often use the longest panels they can safely handle. A 12-foot sheet may be awkward, but if it eliminates a butt joint in the middle of a wall, your future self will applaud while holding a much cleaner sanding sponge.
Good drywall installation also means the panel edges land on framing, screws are set just below the paper without tearing it, and seams are staggered instead of stacked. Drywall is strong when it is supported properly, but it is not magic. Every panel edge needs backing, and every cut should be planned so the sheet can sit flat without being forced into place.
Tools and Materials You Will Need
You do not need a museum of tools, but the right basics make hanging drywall faster, safer, and much neater.
- Drywall panels in the correct thickness
- Drywall screws, usually coarse-thread for wood studs and fine-thread for metal studs
- Drywall screw gun or drill with a drywall bit
- Tape measure and pencil
- Drywall T-square or straightedge
- Utility knife with sharp blades
- Drywall saw or jab saw
- Drywall rasp
- Chalk line
- Drywall lift or T-braces for ceilings
- Construction adhesive, where appropriate
- Metal corner bead for outside corners
- Joint compound, drywall tape, sanding tools, primer, and paint for finishing
- Safety glasses, work gloves, and a dust mask or respirator
Choose the Right Drywall Thickness
For many interior walls, 1/2-inch drywall is the standard choice because it balances strength, weight, and ease of handling. For ceilings, garages, fire-rated assemblies, or areas where extra stiffness is needed, 5/8-inch drywall is often used. Thinner panels, such as 1/4-inch drywall, are usually reserved for curved surfaces or covering an existing wall, not for a single unsupported layer.
Moisture-resistant drywall may be appropriate in bathrooms, laundry rooms, and other damp areas, but it is not the same as waterproofing. Shower surrounds and wet zones require materials and assemblies designed for direct moisture exposure. Always check local code requirements, especially for garages, shared walls, ceilings, and fire-rated areas.
Step-by-Step Guide: How To Hang Drywall
1. Prepare the Room and Inspect the Framing
Start with a clean, safe workspace. Remove old fasteners, loose debris, protruding nails, and anything that prevents the drywall from sitting flat. Inspect studs and joists for bows, twists, or uneven spots. Minor irregularities can often be corrected with drywall shims, while serious framing problems should be fixed before the panels go up.
Look for electrical cables and plumbing lines that run through studs. Where wires or pipes are close to the face of the framing, install protective nail plates. This small step helps prevent a screw from piercing a cable or pipe. Nobody wants to discover a hidden electrical problem after the wall is finished, painted, and decorated with confidence.
2. Mark the Studs and Joists
Before lifting panels, mark the center of each stud on the floor and ceiling. For ceilings, mark joist locations on the top plates or nearby walls. These marks guide screw placement after the sheet covers the framing. Drywall has a special talent for hiding the exact place you need to fasten it, so clear layout marks are your best friend.
Most wall studs in modern homes are spaced 16 inches on center, though some walls and ceilings may be framed 24 inches on center. Never assume. Measure and confirm. If a panel edge does not land on framing, add blocking before hanging the sheet.
3. Plan the Drywall Layout
Drywall layout determines how much finishing work you will face later. Use full sheets wherever possible. Avoid placing seams directly above or below the corners of doors and windows because movement around openings can lead to cracks. Stagger butt joints so they do not line up from one row to the next.
On walls, hanging drywall horizontally is common because it can reduce the total length of seams and place the main seam at a comfortable working height. On ceilings, panels are typically installed perpendicular to the joists when practical. The basic principle is simple: support the sheet well, reduce unnecessary seams, and avoid creating weak joint patterns.
4. Hang the Ceiling Drywall First
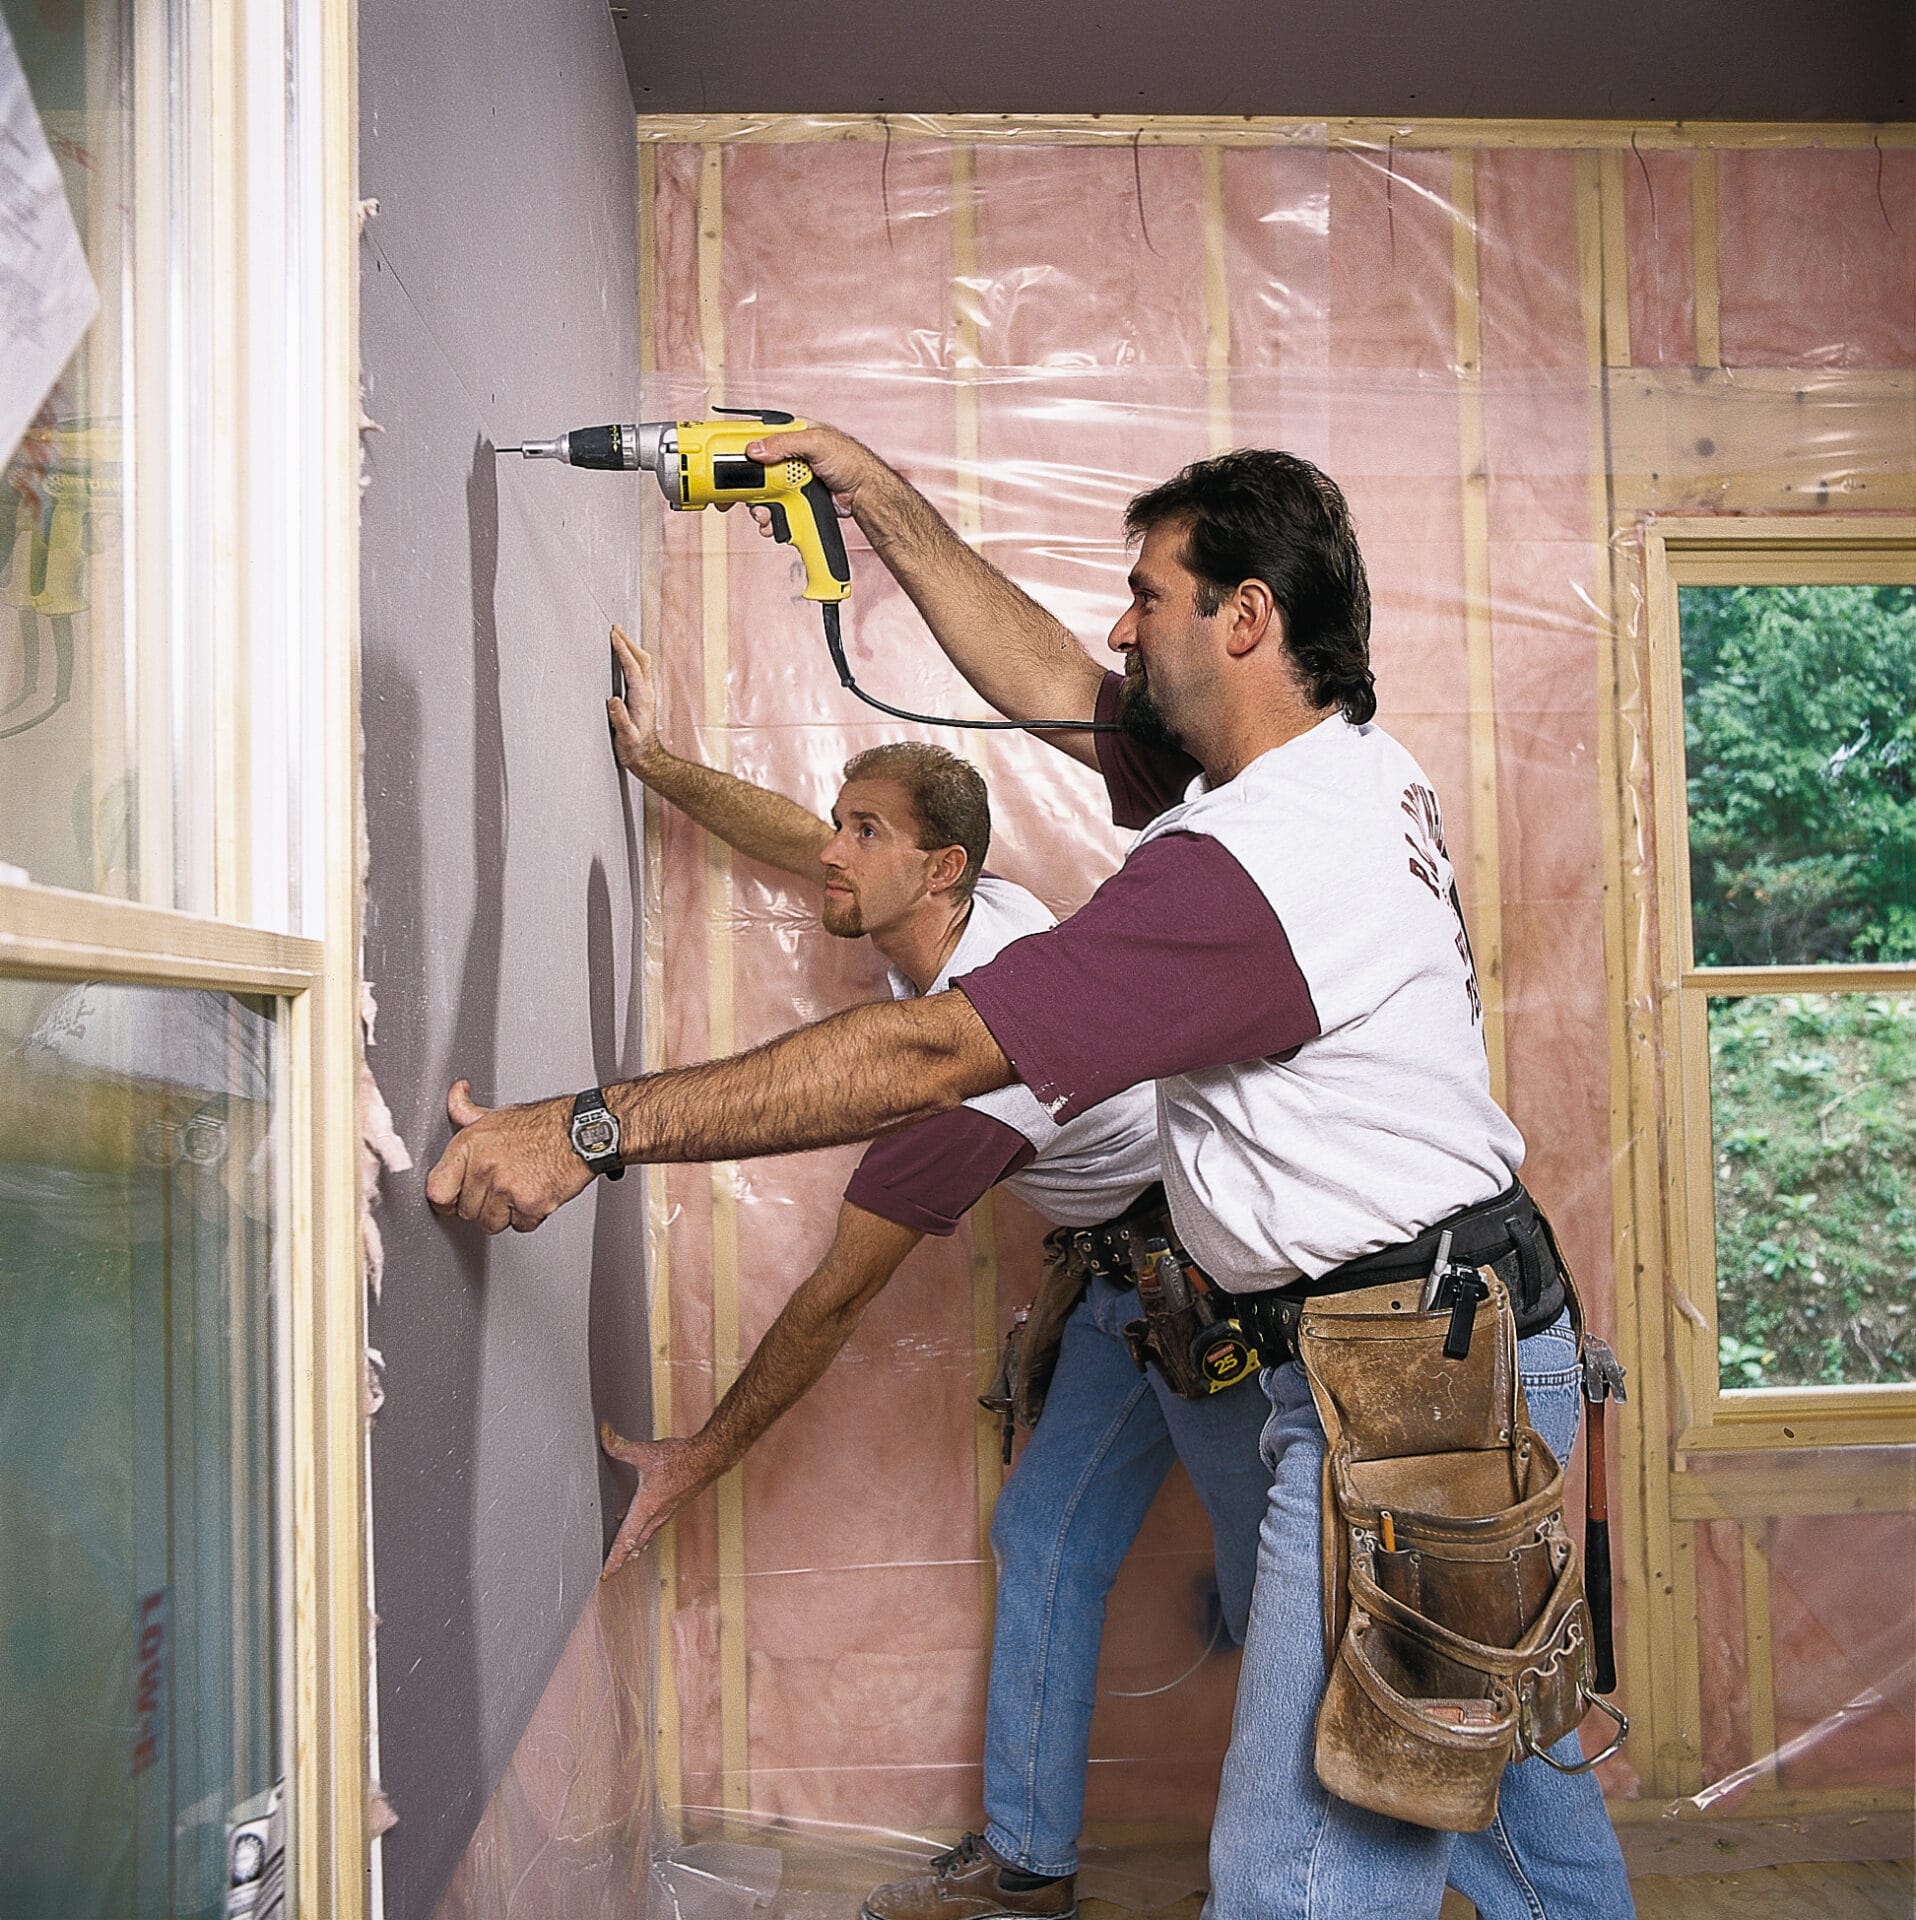
If the room includes ceiling drywall, hang the ceiling before the walls. The wall panels will later help support the edges of the ceiling panels, creating a tighter finished corner. Ceiling sheets are heavy and awkward, so use a drywall lift or T-braces. A helper is not just helpful here; a helper may be the difference between a smooth installation and a dramatic reenactment of a falling garage door.
Raise the sheet into position and snug it against the framing without forcing it. Tack it with a few screws, then fasten from the center outward. This helps the panel settle flat and reduces bubbles or uneven pressure. Keep screws slightly recessed below the surface, but do not tear the paper. If the screw breaks the face paper, it loses holding strength and should be backed up with another screw nearby.
5. Hang the Top Row of Wall Panels
After the ceiling is covered, begin the walls with the top row. Push the wall panel up snugly against the ceiling drywall. This keeps the upper corner tight and leaves any necessary gap at the floor, where baseboard will usually hide it. A small gap at the floor also helps prevent moisture from wicking into the drywall if the floor gets wet.
Position each sheet so the ends land on studs. Drive a few screws to hold the panel in place, check alignment, then continue fastening. Work from the center toward the edges. Do not overdrive screws, and do not leave them proud of the surface. The perfect screw dimple looks like a tiny shallow bowl, not a crater.
6. Measure, Score, Snap, and Trim Panels
For straight cuts, measure carefully and mark the drywall face with a pencil. Use a drywall square as a guide and score the front paper with a sharp utility knife. You do not need to cut all the way through the gypsum core. Snap the sheet along the score line, fold it back, and cut the rear paper. Smooth rough edges with a rasp.
Cut panels slightly short rather than forcing a tight fit. A small gap is much easier to finish than a cracked sheet or bowed panel. Forcing drywall into place can damage the edges and make the board sit unevenly, which becomes painfully obvious once light rakes across the painted wall.
7. Cut Openings for Outlets, Switches, Doors, and Windows
Openings require patience. For electrical boxes, measure from nearby fixed points, transfer the measurements to the drywall, and cut with a jab saw, oscillating tool, or drywall router. Test the fit before fully fastening the sheet. If the opening is slightly tight, trim it carefully. If it is slightly oversized, an outlet cover may hide a minor mistake, but do not rely on cover plates to solve sloppy layout.
For doors and windows, avoid seams that align with the corners of the opening. Those corners are stress points. Instead, cut panels so seams fall away from the opening corners when possible. Around outside corners, allow the drywall to meet cleanly and protect the edge later with corner bead.
8. Fasten Drywall Correctly
Fastening is where many DIY drywall jobs go from promising to problematic. Use drywall screws of the proper length for the panel thickness and framing. For 1/2-inch drywall over wood framing, 1-1/4-inch screws are common. For thicker 5/8-inch panels, longer screws are usually required.
Screw spacing depends on the application, panel type, framing, adhesive use, and local code, but many wall installations use screws spaced about 16 inches apart in the field and closer along edges. Ceilings often require tighter spacing because gravity is not known for being generous. Follow the panel manufacturer’s instructions and local building requirements.
Keep screws roughly 3/8 inch from panel edges to avoid crumbling the gypsum. Drive them straight, not at wild angles. If a screw misses the stud, remove it and drive another into solid framing. Random abandoned screws are like tiny metal confessions; they will haunt the finishing stage.
9. Stagger Seams and Manage Butt Joints
Tapered drywall edges are designed to receive tape and joint compound. Butt joints, where two cut ends meet, are harder to hide because there is no recessed taper. You cannot always avoid butt joints, but you can make them less troublesome by staggering them, keeping them away from the center of prominent walls, and ensuring both panel ends are firmly supported.
When possible, use longer sheets to reduce butt joints. If a butt joint is unavoidable, cut cleanly and keep the panel ends aligned. A small V-groove cut along non-tapered ends can help joint compound settle into the seam during finishing.
10. Install Corner Bead on Outside Corners
Outside corners take abuse from furniture, vacuum cleaners, kids, pets, tool belts, and the occasional human hip that misjudges a hallway. Protect them with metal, vinyl, or paper-faced corner bead. Cut the bead slightly short so it does not buckle, align it straight, and fasten it according to the manufacturer’s directions. A crooked corner bead is difficult to hide, so slow down and check it from both sides before locking it in place.
Common Drywall Hanging Mistakes to Avoid
The most common mistake is rushing the layout. A few extra minutes with a tape measure can save hours of taping and sanding. Avoid seams over door and window corners, unsupported edges, and stacked butt joints. Do not use damaged panels unless the flawed area can be cut away. Store drywall flat and dry before installation, because warped or damp sheets are frustrating from the first screw to the final coat of paint.
Another frequent mistake is driving screws too deep. The paper face is part of the panel’s strength. Once it tears, the screw no longer holds properly. Set the screw just below the surface. If you accidentally overdrive one, add another screw nearby into solid framing.
Finally, do not make panels too tight. Drywall needs to fit neatly, but it should not be wedged into place like the last suitcase in an overpacked trunk. Slight gaps are normal and can be handled during finishing.
Finishing Basics After the Drywall Is Hung
Hanging drywall is only the first half of the project. Finishing turns separate panels into a smooth wall. The usual process includes bedding tape in joint compound, covering fasteners, applying additional coats, feathering each coat wider than the last, sanding smooth, wiping dust, priming, and painting.
Paper tape is strong when embedded properly in all-purpose joint compound. Mesh tape can be useful in some situations, especially with setting-type compound, but always follow the compound and tape manufacturer’s instructions. Most walls need three coats of compound: a tape coat, a fill coat, and a finish coat. The less compound you leave ridged and lumpy, the less sanding you will do later. Sanding drywall is not difficult, but it is dusty enough to make you question your life choices.
Safety Tips for Hanging Drywall
Drywall sheets are heavy. Lift with care, use a helper for large panels, and rent a drywall lift for ceilings if needed. Wear safety glasses when cutting overhead and a dust mask or respirator when cutting or sanding. Keep the work area clear so you are not stepping over tools while carrying a sheet. Check for hidden utilities before cutting into existing walls, and use nail plates where wiring or plumbing is close to the framing face.
If the job involves high ceilings, fire-rated assemblies, major water damage, structural repairs, or complicated code requirements, consider hiring a professional. A skilled drywall crew can hang and finish a room quickly, and their seams may disappear so cleanly that you start believing in construction sorcery.
Conclusion: Flat Walls Are Won Before the Paint Can Opens
Knowing how to hang drywall is really knowing how to plan. The best results come from clean framing, smart sheet layout, careful cutting, correct fastener spacing, and patience around seams and openings. Hang the ceiling first, keep wall panels tight to the top, leave a practical gap at the floor, avoid unsupported edges, and drive screws just deep enough to dimple the paper without tearing it.
Once the drywall is hung, finishing becomes much easier. Smooth walls are not created by joint compound alone; they begin with panels that are straight, stable, and properly fastened. Take your time now, and your finished room will reward you every time sunlight crosses the wall without revealing a parade of bumps, ridges, and mystery waves.
Real-World Experience: What Hanging Drywall Teaches You
The first thing you learn when hanging drywall is that the sheet is bigger than it looked at the store. In the aisle, a 4-by-8 panel seems manageable. In a hallway, it suddenly develops corners with personal ambitions. That is why experienced installers plan the path before they move the first sheet. Clear the route, protect finished floors, remove obstacles, and decide where each panel will go before you lift it. Drywall rewards preparation and punishes improvisation.
Another lesson is that tiny measuring errors have loud consequences. Being off by 1/8 inch may not sound dramatic until a panel refuses to fit around a window or an outlet cutout lands just far enough off to require creative language. The practical solution is to measure from two reference points, mark clearly, and cut a little conservatively. You can trim drywall with a rasp or knife. You cannot un-cut a hole that wandered too far to the left.
Ceilings teach humility faster than walls. Even strong DIYers discover that holding a sheet overhead while trying to find a joist mark is not a personality-building exercise; it is a reason drywall lifts exist. Renting a lift for ceiling work can turn a stressful job into a controlled one-person operation. If you use T-braces, build them carefully and make sure they hold the sheet securely without crushing it against the framing.
Fastening also improves with feel. At first, beginners often leave screws too high or drive them too deep. After a few panels, you learn the sweet spot: a slight dimple that catches compound but does not break the paper. A drywall bit or screw gun makes this much easier. When a screw misses framing, do not pretend it did not happen. Remove it or drive it flush, then place a proper screw into solid backing.
The biggest experience-based tip is to think like the person who will finish the wall. Maybe that person is you, in which case be kind to future you. Keep seams neat, avoid ragged edges, stagger joints, and do not create unnecessary butt joints in obvious places. Every clean decision during hanging saves sanding later. And sanding later is when many DIYers realize that “good enough” during installation was not, in fact, good enough.
Finally, hanging drywall teaches patience. The room changes quickly once panels go up, which feels exciting, but speed should not outrun accuracy. Drywall is forgiving in small ways and brutally honest in large ones. Work steadily, check each sheet before fastening it fully, and remember that the goal is not just to cover studs. The goal is to create a wall that disappears after paint, leaving the roomnot the drywall mistakesto get all the attention.